Defiant DF-5716-BK-A User manual

THANK YOU
We appreciate the trust and condence you have placed in Deant through the purchase of this motion sensor. We
strive to continually create quality products designed to enhance your home. Visit us online to see our full line of
products available for your home improvement needs. Thank you for choosing Deant!
USE AND CARE GUIDE
REPLACEMENT MOTION SENSOR
Questions, problems, missing parts? Before returning to the store,
call Deant Customer Service
8 a.m. - 6 p.m., EST, Monday - Friday
1-866-308-3976
HOMEDEPOT.COM
Item #101240
745407
Model #DF-5716-BK-A
DF-5716-WH-C

2
Table of Contents
Table of Contents......................................2
Safety Information....................................2
Precautions............................................2
Warranty ...................................................2
2-Year Warranty .....................................2
Specifications...........................................3
Pre-Installation.........................................3
Planning Installation ..............................3
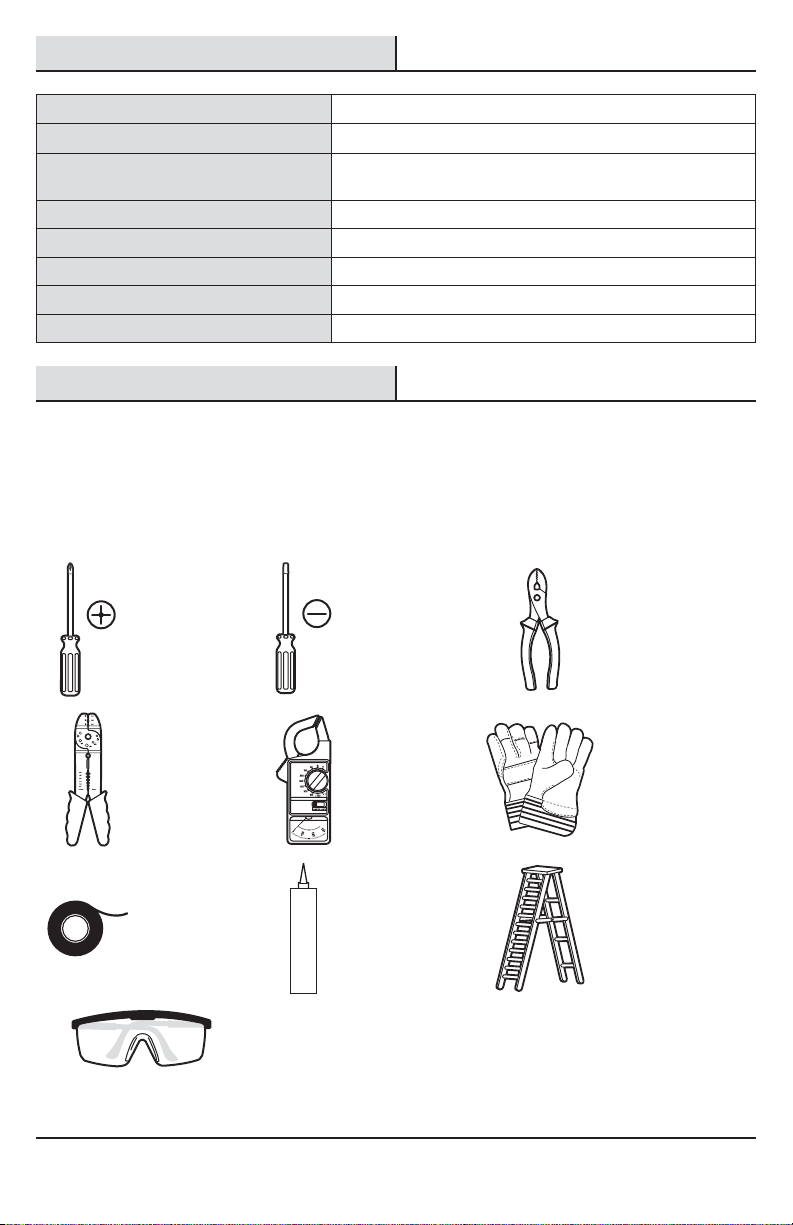
Tools Required .......................................3
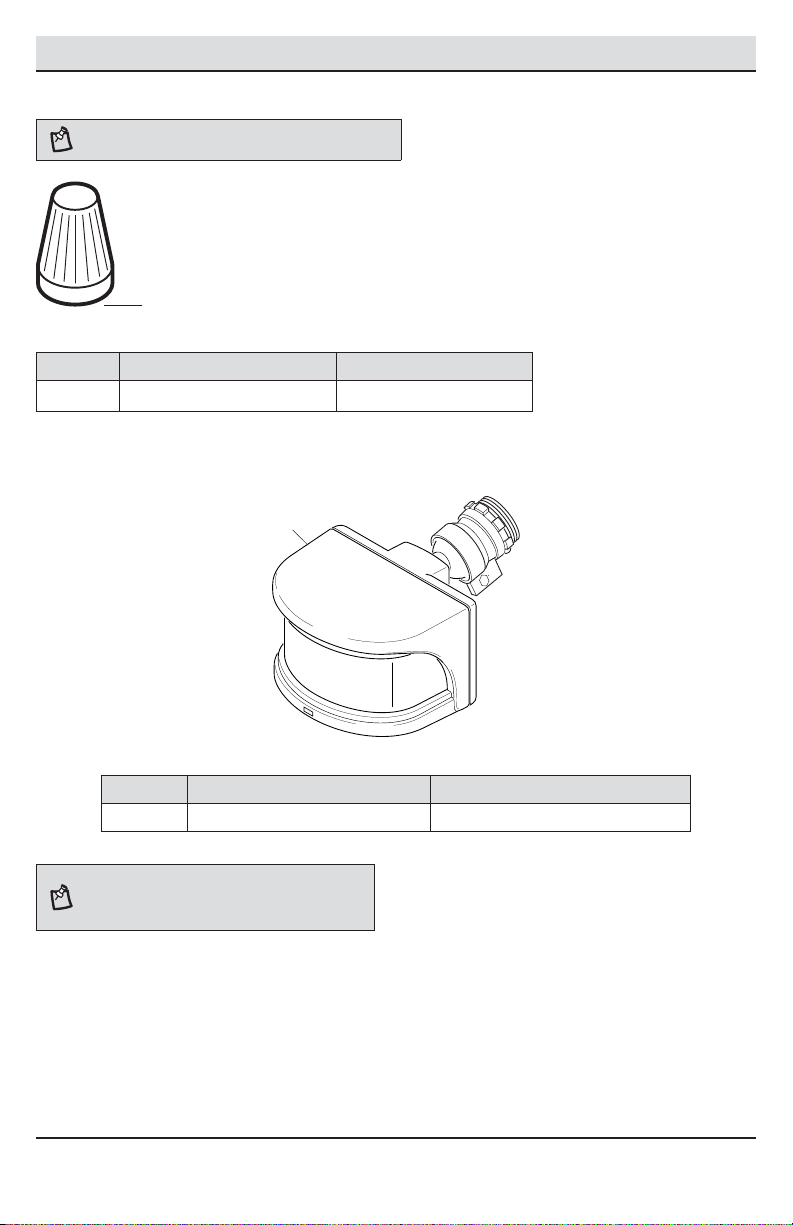
Hardware Included.................................4
Package Contents..................................4
Installation................................................5
Operation...................................................6
Care and Cleaning ....................................8
Troubleshooting........................................9
Safety Information
PRECAUTIONS
Please read and understand this entire manual before
attempting to assemble, install, or operate this motion
sensor.
This motion sensor requires 120-volts AC.
Some codes require installation by a qualied electrician.
This motion sensor must be properly grounded.
For proper operation, this motion sensor should be:
ƑInstalled outdoors to a wall or eaves
ƑInstalled 8 ft. (2.4 m) above the ground (If
the motion sensor is mounted higher than
recommended, aiming the sensor down will reduce
the coverage area.)
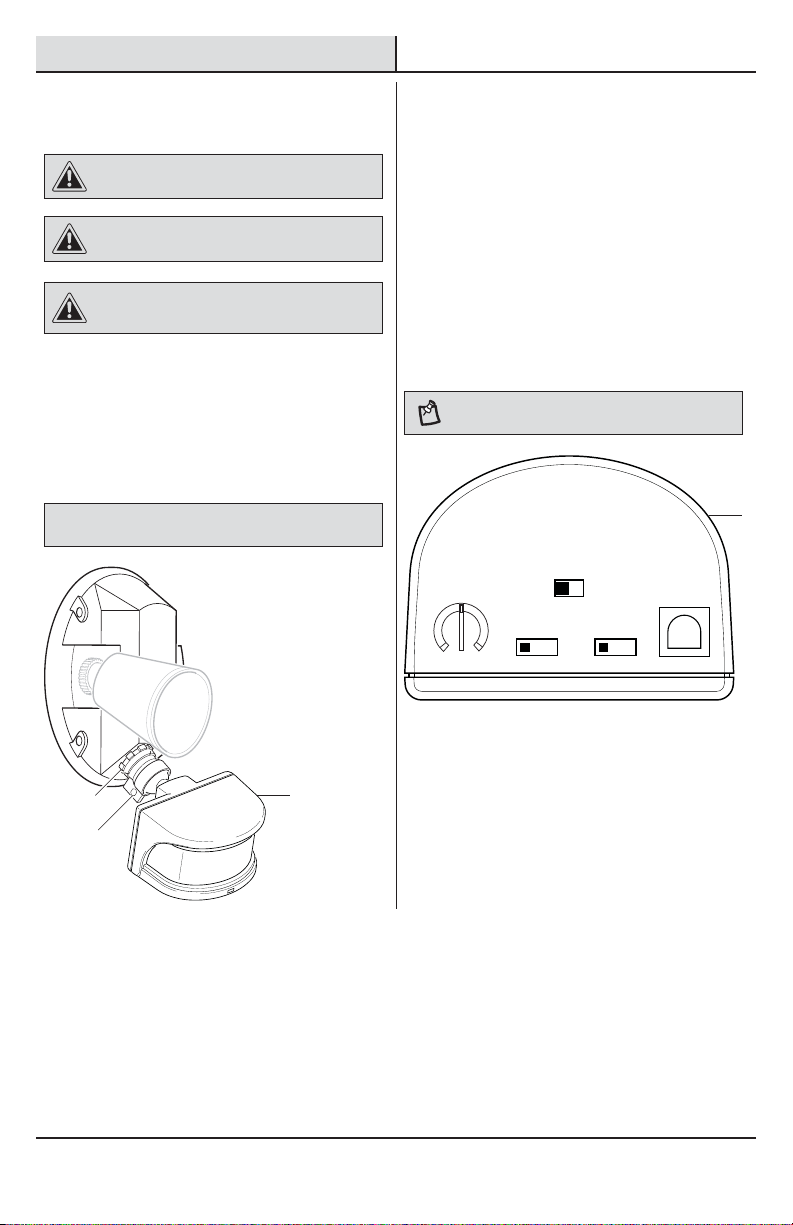
ƑDo not leave the “ON-TIME” switch in the “TEST”
position. The frequent ON/OFF cycling of the light
xture will reduce the life of the bulb
WARNING: Turn the power off at the circuit breaker or
fuse. Place tape over the circuit breaker switch and verify
power is off at the light xture.
CAUTION: Keep the motion sensor at least 1 in. (25 mm)
away from standard PAR38 bulbs.
CAUTION: Keep the motion sensor at least 2 in. (50 mm)
away from halogen bulbs.
CAUTION: To avoid water damage and the risk of
electrical shock, the motion sensor controls must be facing
the ground when the installation is complete.
CAUTION: Burn hazard. Allow the light xture and the
bulb to cool before touching.
NOTICE: Do not connect this motion sensor to a dimmer switch
or timer.
Warranty
2-YEAR WARRANTY
Contact the Customer Service Team at 1-866-308-3976 or visit www.homedepot.com.

3 HOMEDEPOT.com
Please contact 1-866-308-3976 for further assistance.
Specications
Range Up to 100 ft. (30 m) - Varies with surrounding temperature
Sensing angle Up to 270°
Electrical load - incandescent Up to 300 watt maximum (Up to 150 watt maximum per bulb
holder)
Power requirements 120 VAC, 60 Hz
Operating modes Test, Auto, Manual
Bulb modes Security, BulbSaver, AlertFlash
Time delay 1, 5, 20 minutes
DualBrite timer Off, 3 hours, 6 hours, dusk-to-dawn
Pre-Installation
PLANNING INSTALLATION
Before installing the motion sensor, ensure that all parts are present (see Hardware Included on page 4). If any part
is missing or damaged, do not attempt to assemble, install, or operate this motion sensor.
Estimated installation time: 30 minutes
TOOLS REQUIRED
Phillips
screwdriver
Flathead
screwdriver Pliers
Wire strippers/
cutters Circuit tester Work gloves
Electrical tape Silicone sealant Ladder
Safety goggles

4
Pre-Installation (continued)
HARDWARE INCLUDED
NOTE: Hardware shown to actual size.
AA
Part Description Quantity
AA Wire connector 4
PACKAGE CONTENTS
Part Description Quantity
A Motion sensor 1
NOTE: If the motion sensor (A) pops out of the ball joint,
loosen the clamp screw, push the motion sensor (A) back
into the ball joint, and tighten the clamp screw. Do not
overtighten.
A

5 HOMEDEPOT.com
Please contact 1-866-308-3976 for further assistance.
Installation
1 Installing the Motion Sensor
WARNING: Turn the power off at the circuit breaker or
fuse. Place tape over the circuit breaker switch and verify
power is off at the light xture.
The WHITE motion sensor wire is neutral. The BLACK
motion sensor wire is hot. The RED motion sensor wire
is switched “hot”.
ƑRemove the existing light xture.
ƑRoute the motion sensor wires through the
canopy (1) of the existing light xture.
ƑScrew the motion sensor (A) into the canopy
(1) of the existing light xture.
2 Wiring the Motion Sensor
ƑConnect the motion sensor wires to the light
xture wires and the junction box wires with
wire connectors (AA):
ƑWhite to white
ƑBlack motion sensor wire to black junction
box wire
ƑRed motion sensor wire to black bulb
holder (2) wires
ƑBare or green ground wire to house ground
and any light xture ground wire or ground
screw, if present
ƑFollow the instructions that came with the
existing light xture to mount and adjust the
light xture.
OR
FRONT
AAA
AA
AA
A
A
2
2
2
2
1
AA

6
Operation
1 Adjusting the Motion Sensor
CAUTION: Keep the motion sensor at least 1 in. (25 mm)
away from standard PAR38 bulbs.
CAUTION: Keep the motion sensor at least 2 in. (50 mm)
away from halogen bulbs.
CAUTION: To avoid water damage and risk of electrical
shock, the motion sensor controls must be facing the
ground when installation is complete.
ƑTurn the power on at the circuit breaker or fuse
and turn on the wall switch.
ƑLoosen the lock nut (3) and screw (4) to adjust
the motion sensor (A) for the desired coverage.
ƑRotate the motion sensor (A) so the controls
face toward the ground.
ƑTighten the lock nut (3) and screw (4).
NOTICE: All clearances must be maintained. See Safety Information
on page 2.
2 Setting the Sensor for Testing
When the “ON-TIME” switch is set to the “TEST”
position, the light xture will operate during the day
or night. The light will stay on for 5 seconds after all
motion is stopped.
ƑSet the “ON-TIME” switch to the “TEST”
position.
ƑSet the “DUALBRITE” switch to the “OFF”
position.
ƑTurn the “RANGE” dial to the “MIN” position.
ƑAim the motion sensor (A) in the general
direction of the area to be covered.
NOTE: The motion sensor will need to completely warm
up (90 seconds) before beginning the setup process.
LAMP MODE
NORMAL SOFT FLASH
ON-TIME DUAL BRITE™
TEST 1 5 20
MINUTES
OFF 3 6 DUSK TO
HOUR DAWN
MAXMIN
RANGE
A
A
3
4

7 HOMEDEPOT.com
Please contact 1-866-308-3976 for further assistance.
Operation (continued)
3 Adjusting the Motion Sensor
Detection Zone
ƑTurn on the circuit breaker or fuse and the light
switch.
ƑPerform a “walk test”. Walk in an arc across
the front of the motion sensor (A).
ƑWatch the light. The light will come on and the
red LED will ash indicating motion has been
detected.
ƑStop, wait for the light to turn off, and then
begin walking again.
ƑContinue this process until the detection zone
has been established.
ƑAdjust the sensor up, down, or side to side to
change the motion sensor (A) detection zone.
4 Adjusting the RANGE Dial
ƑTo increase the detection zone, turn the
“RANGE” dial toward the “MAX” position.
ƑTo decrease the detection zone, turn the
“RANGE” dial toward the “MIN” position.
NOTE: The motion sensor (A) is more sensitive to motion
moving across the front of the sensor. The motion sensor
(A) is less sensitive to motion moving directly toward the
front of the sensor.
NOTE: The higher the “RANGE” setting (sensitivity), the
greater the possibility of false triggering. To reduce false
triggering, rotate the “RANGE” control toward the “MIN”
setting.
MAXMIN
RANGE
5 Adjusting the ON-TIME Switch
The “ON-TIME” switch determines the amount of time
the light will stay on full bright after all motion has
stopped.
ƑSet the “ON-TIME” switch to the 1, 5, or 20
minute position.
LAMP
M
NORMAL S
O
ON-TIME
TEST 1 5 20
MINUTES
MAXMIN
RANGE
6 Adjusting the DUALBRITE
Switch
The “DUALBRITE” switch determines the amount of
time the lights stay on at a reduced light level after
sundown. Switching this setting to “OFF” will not
effect the “ON-TIME” setting.
ƑSet the “DUALBRITE” switch to OFF, 3 hours, 6
hours, or dusk-to-dawn (sunset to sunrise).
M
ODE
O
FT FLASH
DUAL BRITE™
OFF 3 6 DUSK TO
HOUR DAWN
A
A
A
A

8
Operation (continued)
7 Adjusting the LAMP MODE
Switch
The “LAMP MODE” switch determines the way the
lights will turn on when motion is detected.
ƑSecurity (“NORMAL”) - Light comes on instantly.
ƑBulbSaver (“SOFT”) - Light comes on dim and
gradually increases to full brightness. When the
light turns off it will gradually dim to half-bright,
pause, and then will continue dimming until the
light turns off.
ƑAlertFlash (“FLASH”) - Light ashes on then off
twice before turning on full brightness.
ƑSet the “LAMP MODE” to “NORMAL”, “SOFT”,
or “FLASH” position.
LAMP MODE
NORMAL SOFT FLASH
8 Using Manual Mode
Manual mode overrides the motion sensor (A) and
“ON-TIME” control so the light will operate full bright.
This feature only works at night and only for one night
at a time. The motion sensor (A) will reset to motion
sensing mode at sunrise. Manual mode can be toggled
on and off using a wall switch.
ƑTo turn manual mode on, switch the light off
at the wall switch for 3 to 4 seconds and then
back on.
ƑTo turn manual mode off, switch the light off
at the wall switch for 3 to 4 seconds and then
back on.
NOTE: If the power to the light xture is off for more than
5 seconds, allow the motion sensor to warm up prior to
switching to manual mode.
Turn the switch
OFF for 3 to 4
seconds
Turn the
switch
back ON
Care and Cleaning
ƑTo prolong the original appearance, clean with clear water and a soft, damp cloth only.
ƑDo not use paints, solvents, or other chemicals on this motion sensor. They could cause a premature
deterioration of the nish. This is not a defect in the nish and will not be covered by the warranty.
ƑDo not spray with a hose or power washer.
A

9 HOMEDEPOT.com
Please contact 1-866-308-3976 for further assistance.
Troubleshooting
Problem Possible Cause Solution
The light will not come on. ƑThe light switch is turned off. ƑTurn the light switch on.
ƑThe bulb is loose or burned out. ƑCheck the bulb and replace
if burned out.
ƑThe fuse is blown or the circuit breaker
is turned off.
ƑReplace the fuse or turn the
circuit breaker on.
ƑDaylight turn-off (photocell) is in effect. ƑRecheck after dark.
ƑThe circuit wiring is incorrect, if this is
a new installation.
ƑVerify the wiring is correct.
ƑThe motion sensor is aimed in the
wrong direction.
ƑRe-aim the motion sensor
to cover the desired area.
ƑThe outside air temperature is close to
the same as a person’s body heat.
ƑIncrease the “RANGE”
setting.
The light comes on during the
day.
ƑThe motion sensor may be installed in a
relatively dark location.
ƑThe motion sensor is oper-
ating normally under these
circumstances.
ƑThe “ON-TIME” switch is in the “TEST”
position.
ƑSet the “ON-TIME” switch
to the 1, 5, or 20 minute
setting.
The light comes on for no
apparent reason.
ƑThe motion sensor may be sensing
small animals or automobile trafc.
ƑRe-aim the motion sensor.
ƑThe “RANGE” dial is set too high. ƑDecrease the “RANGE”
setting.
ƑThe “DUALBRITE” switch is in the 3
hour, 6 hour, or dusk-to-dawn setting.
ƑThe motion sensor is oper-
ating normally under these
circumstances.
ƑThe outside temperature is much
warmer or cooler than a person’s body
heat (summer or winter).
ƑDecrease the “RANGE”
setting.
ƑThe motion sensor is wired through a
dimmer or timer.
ƑDo not use a dimmer or
timer to control the motion
sensor. Replace the dimmer
or timer with a standard on/
off wall switch.
The lights turn off too late in
Dusk-to-Dawn setting.
The motion sensor may be installed in a
relatively dark location.
Relocate the motion sensor or
use the 3 hour or 6 hour setting.

10
Troubleshooting (continued)
Problem Possible Cause Solution
The lights stay on continuously. ƑA bulb is positioned too close to the
motion sensor or pointed at nearby
objects that cause heat to trigger the
motion sensor.
ƑReposition the bulb away
from the motion sensor or
nearby objects.
ƑThe motion sensor may be picking up
a heat source like an air vent, dryer
vent, or brightly painted, heat-reective
surface.
ƑDecrease the “RANGE”
setting or reposition the
motion sensor.
ƑThe motion sensor is in manual mode. ƑSwitch the motion sensor
to auto. See Using Manual
Mode on page 8.
ƑThe motion sensor is wired through a
dimmer or timer.
ƑDo not use a dimmer or
timer to control the motion
sensor. Replace the dimmer
or timer with a standard on/
off wall switch.
ƑThe motion sensor is on the same
circuit as a motor, transformer, or
uorescent bulb.
ƑInstall the motion sensor
on a circuit without motors,
transformers, or uorescent
bulbs.
The lights ash on and off. ƑHeat or light from the bulbs may be
turning the motion sensor on and off.
ƑReposition the bulbs away
from the motion sensor.
ƑHeat is being reected from other
objects and may be turning the motion
sensor on and off.
ƑReposition the motion
sensor.
ƑThe motion sensor is in “TEST” mode
and warming up.
ƑFlashing is normal under
these conditions.
ƑLight may be leaking through the bulb
reectors.
ƑReplace the bulbs with new
high quality PAR 38 bulbs.
ƑThe motion sensor is in AlertFlash
(“FLASH”) mode.
ƑFlashing is normal in this
mode. Select Security
(“NORMAL”) or BulbSaver
(“SOFT”) mode to turn
ashing off.
The lights ash once then stay
off in manual mode.
The motion sensor is detecting light from
the bulbs.
Reposition the bulbs to keep the
area below the motion sensor
relatively dark.

11 HOMEDEPOT.com
Please contact 1-866-308-3976 for further assistance.

Questions, problems, missing parts? Before returning to the store,
call Deant Customer Service
8 a.m.-6 p.m., EST, Monday-Friday
1-866-308-3976
HOMEDEPOT.COM
Retain this manual for future use.
205217-05A

GRACIAS
Agradecemos la fe y la conanza que usted ha depositado en Deant al comprar esta detector de movimiento.
Procuramos crear continuamente productos de calidad diseñados para mejorar su hogar. Visítenos en internet para
ver nuestra línea completa de productos disponibles que necesita para el mejoramiento de su hogar. ¡Gracias por
escoger Deant!
GUÍA PARA EL USO Y CUIDADO
SENSOR DE MOVIMIENTO DE REPUESTO
¿Tiene preguntas, problemas o piezas perdidas? Antes de la devolución al
almacén llame a Servicio al Cliente de Deant
8 a.m.- 6 p.m., Hora del Este, de lunes a viernes
1-866-308-3976
HOMEDEPOT.COM
Articulo #101240
745407
Modelo #DF-5716-BK-A
DF-5716-WH-C

14
Contenido
Contenido................................................14
Información de seguridad......................14
Precauciones .......................................14
Garantía...................................................14
2 Años de Garantía...............................14
Especificaciones.....................................15
Antes de la instalación...........................15
Planicación de la Instalación .............15
Herramientas Requeridas ....................15
Ferretería Incluida................................16
Contenido del Paquete.........................16
Instalación ..............................................17
Operación................................................18
Cuidado y limpieza .................................20
Análisis de averías .................................21
Información de seguridad
PRECAUCIONES
Por favor lea y entienda todo este manual antes de
tratar de ensamblar, instalar u operar este detector de
movimiento.
Este detector de movimiento requiere 120 voltios CA.
Algunos códigos exigen que la instalación la realice un
electricista calicado.
Este detector de movimiento debe conectarse
correctamente a tierra.
Para que opere correctamente, este detector de
movimiento debería:
ƑInstalado en el exterior en una pared o en aleros.
ƑInstalarse a 8 pies (2,4m) por encima del suelo (si
el detector de movimiento es montado más arriba
de lo recomendado, enfoque el detector hacia abajo
para reducir el área de cobertura).
ƑNo deje el interruptor de “DURACIÓN” (“ON-TIME)
en la posición “PRUEBA” (“TEST”). La alternancia
frecuente entre ENCENDIDO/APAGADO (ON/OFF)
reducirá la vida de la bombilla.
ADVERTENCIA: Desconecte la energía eléctrica en el
disyuntor o en el fusible. Coloque cinta aislante sobre el
interruptor disyuntor y compruebe que no haya energía
eléctrica en el aparato de luz.
PRECAUCIÓN: Mantenga el detector de movimiento
alejado al menos a 1 pulgada (2,5 cm) de las bombillas
PAR38 estándar.
PRECAUCIÓN: Mantenga el detector de movimiento
alejado al menos a 2 pulgadas (5,0 cm) de las bombillas
halógenas.
PRECAUCIÓN: Para evitar daños por el agua y el
riesgo de una descarga eléctrica, los controles del detector
de movimiento deben estar de cara al suelo cuando la
instalación esté terminada.
PRECAUCIÓN: Peligro de quemaduras. Deje que el
aparato de luz y la bombilla se enfríen antes de tocarlos.
AVISO: No conecte este detector de movimiento a un interruptor
reductor de luz o a un temporizador.
Garantía
2 AÑOS DE GARANTÍA
Póngase en contacto con el personal de servicio al cliente al 1-866-308-3976 o visite el sitio www.homedepot.com.

15 HOMEDEPOT.com
Por favor, póngase en contacto al 1-866-308-3976 para obtener más ayuda.
Especicaciones
Alcance Hasta 100 pies (30 m) – Varía con la temperatura circundante
Ángulo de detección Hasta 270°
Carga eléctrica-Incandescente Hasta 300 vatios máximo (Hasta 150 vatios máximo por cada
porta-bombillas)
Requisitos de la energía eléctrica 120 VCA, 60 Hz
Fases de operación Prueba, automática, manual
Fases de la bombilla Seguridad, ahorrador de bombilla, destello de alerta
Retardo de tiempo 1, 5, 20 minutos
Temporizador DualBrite Apagado, 3 horas, 6 horas, del crepúsculo al amanecer
Antes de la instalación
PLANIFICACIÓN DE LA INSTALACIÓN
Antes de instalar el detector de movimiento, asegúrese de que tiene todas las piezas (vea Ferretería incluida
en la página 16). Si cualquier pieza falta o está dañada, no intente ensamblar, instalar ni operar el detector de
movimiento.
Tiempo estimado para la instalación: 30 minutos
HERRAMIENTAS REQUERIDAS
Destornillador
phillips
Destornillador
plano Alicates
Peladores/
cortadores de
cables
Probador de
circuitos
Guantes de
trabajo
Cinta aislante Sellador de
silicona Escalera
Gafas de
seguridad

16
Antes de la instalación (continuación)
FERRETERÍA INCLUIDA
NOTA: La ferretería se muestra en su tamaño real
AA
Pieza Descripción Cantidad
AA Capuchón para cable 4
CONTENIDO DEL PAQUETE
Pieza Descripción Cantidad
A Detector de movimiento 1
NOTA: Si el detector de movimiento (A) se sale de la
unión esférica, aoje el tornillo sujetador, empuje de nuevo
el detector de movimiento (A) hacia la unión esférica y
apriete el tornillo sujetador. No apriete en exceso.
A

17 HOMEDEPOT.com
Por favor, póngase en contacto al 1-866-308-3976 para obtener más ayuda.
Instalación
1 Instalación del detector de
movimiento
ADVERTENCIA: Desconecte la energía eléctrica en el
disyuntor o en el fusible. Coloque cinta aislante sobre el
interruptor disyuntor y compruebe que no haya energía
eléctrica en el aparato de luz.
El conductor BLANCO del detector de movimiento
es el neutro. El conductor NEGRO del detector de
movimiento es la fase, El conductor ROJO del detector
de movimiento es la “fase” a través del interruptor.
ƑRetire el aparato de luz existente.
ƑGuíe los conductores del detector de
movimiento a través del escudete (1) del
aparato de luz existente.
ƑAtornille el detector de movimiento (A) en el
escudete (1) del aparato de luz existente.
2 Cableado del detector de
movimiento
ƑConecte los conductores del detector de
movimiento a los conductores del aparato de
luz y a los conductores de la caja de conexiones
mediante los conectores de cable (AA):
ƑBlanco con blanco
ƑEl conductor negro del detector de
movimiento al conductor negro de la caja
de conexiones
ƑEl conductor rojo del detector de
movimiento a los conductores negros del
porta bombillas (2)
ƑEl conductor desnudo o verde de conexión
tierra a la conexión tierra de la casa y a
cualquier conductor o tornillo de conexión
a tierra del aparato de luz si existe
ƑSiga las instrucciones que vienen con el
aparato de luz existente para montar y ajustar
este aparato de luz.
O
FRONT
AAA
AA
A
2
2
1
AA
A
2
2
AA

18
Operación
1 Ajuste del detector de
movimiento
PRECAUCIÓN: Mantenga el detector de movimiento
alejado al menos a 1 pulgada (2,5 cm) de las bombillas
PAR38 estándar.
PRECAUCIÓN: Mantenga el detector de movimiento
alejado al menos a 2 pulgadas (5,0 cm) de bombillas
halógenas.
PRECAUCIÓN: Para evitar daños por el agua y el
riesgo de una descarga eléctrica, los controles del detector
de movimiento deben estar de cara al suelo cuando la
instalación esté terminada.
ƑConecte la energía eléctrica en el disyuntor o en
el fusible y encienda el interruptor de la pared.
ƑAoje la contratuerca (3) y el tornillo (4) para
regular el detector de movimiento (A) para la
cobertura deseada.
ƑGire el detector de movimiento (A) de modo
que los controles estén orientados hacia el
suelo.
ƑApriete la contratuerca (3) y el tornillo (4).
AVISO: Todos los espacios libres deben ser mantenidos. Vea
Información sobre seguridad en la página 14.
2 Calibración del detector para
prueba
Cuando el interruptor de “DURACIÓN” (“ON-TIME”) se
ja en la posición “PRUEBA” (“TEST”) el aparato de luz
operará durante el día o la noche. La luz permanecerá
encendida 5 segundos después que todo movimiento
se ha detenido.
ƑFije el interruptor de “DURACIÓN” en la
posición “PRUEBA (“TEST”).
ƑFije el interruptor “DUALBRITE” en la posición
“APAGADO” (“OFF”).
ƑGire el cuadrante “ALCANCE” a la posición “MIN”.
ƑEnfoque el detector de movimiento (A) en la
dirección general del área a ser cubierta.
NOTA: El detector de movimiento necesitará calentarse
completamente (90 segundos) antes de empezar el
proceso de puesta a punto.
LAMP MODE
NORMAL SOFT FLASH
ON-TIME DUAL BRITE™
TEST 1 5 20
MINUTES
OFF 3 6 DUSK TO
HOUR DAWN
MAXMIN
RANGE
A
3
4
A

19 HOMEDEPOT.com
Por favor, póngase en contacto al 1-866-308-3976 para obtener más ayuda.
Operación (continuación)
3 Regulación de la zona de
detección del detector de
movimiento
ƑConecte el disyuntor o el fusible y el
interruptor de la lámpara.
ƑHaga una “prueba caminando”. Camine
transversalmente a la parte frontal del detector de
movimiento (A) siguiendo la trayectoria de un arco.
ƑObserve la luz. La luz se encenderá y el LED
rojo destellará indicando que se ha detectado
movimiento.
ƑDeténgase, espere que la luz se apague, y
luego empiece a caminar de nuevo.
ƑContinúe este proceso hasta que la zona de
detección haya sido establecida.
ƑAjuste el detector hacia arriba, abajo, o a los
lados para cambiar la zona de detección del
detector de movimiento (A).
4 Regulación del cuadrante
ALCANCE
ƑPara aumentar la zona de detección, gire el
cuadrante “ALCANCE” hacia la posición “MÁX”.
ƑPara disminuir la zona de detección, gire el
cuadrante “ALCANCE” hacia la posición “MÍN”.
NOTA: El detector de movimiento (A) es más sensible al
movimiento transversal a la parte frontal del detector. El
detector de movimiento (A) es menos sensible al movimiento
que se dirige directamente hacia la parte frontal del detector.
NOTA: Mientras mayor sea la calibración del “ALCANCE”
(sensibilidad), mayor será la posibilidad de falsas alarmas.
Para reducir las falsas alarmas, gire el control del
“ALCANCE” hacia la calibración “MÍN”.
MAXMIN
RANGE
5 Regulación del interruptor de
DURACIÓN
El interruptor de DURACIÓN determina el lapso de
tiempo que la luz permanece encendida con todo su
brillo luego que ha cesado el movimiento.
ƑColoque el interruptor de DURACIÓN en la
posición 1, 5 o 20 minutos.
LAMP
M
NORMAL S
O
ON-TIME
TEST 1 5 20
MINUTES
MAXMIN
RANGE
6 Regulación del interruptor
DUALBRITE
El interruptor DUALBRITE determina el lapso de tiempo
que la luz permanece encendida con un nivel de luz
reducido luego de la puesta del sol. Cambiando esta
calibración a “OFF” (“DESCONECTADO”) no quedará
afectada la calibración de la DURACIÓN.
ƑColoque el interruptor “DUALBRITE” en APAGADO
(OFF), 3 horas, 6 horas o del crepúsculo al
amanecer (de la puesta a la salida del sol).
M
ODE
O
FT FLASH
DUAL BRITE™
OFF 3 6 DUSK TO
HOUR DAWN
A
A
A
A

20
Operación (continuación)
7 Regulación del interruptor
FASE LÁMPARA
El interruptor FASE LÁMPARA determina la manera
en que las luces se encenderán cuando se detecta
movimiento.
ƑSeguridad (“NORMAL”)- La luz se enciende
instantáneamente.
ƑAhorrador de bombilla (BulbSaver) (“SOFT”) La
luz se enciende tenue y aumenta gradualmente
hasta su brillo total. Cuando la luz se apaga su
brillo primero bajará gradualmente a la mitad,
luego pausará y luego continuará bajando hasta
que se apaga.
ƑDestello de alerta (AlertFlash) (“FLASH”) – La luz
destella y luego se apaga, esto dos veces antes
de encenderse con todo su brillo.
ƑColoque la FASE LÁMPARA en las posiciones
“NORMAL”, “SOFT” o “FLASH”
LAMP MODE
NORMAL SOFT FLASH
8 Uso del la fase manual
La fase manual anula el detector de movimiento (A) y
el control de duración (“ON-TIME”), de esta forma la
lámpara operará con todo su brillo. Esta característica
funciona solamente en la noche y solamente una
noche a la vez. El detector de movimiento (A) vuelve
a ponerse en la fase detección del movimiento al salir
el sol. La fase manual puede también alternar entre
encendido y apagado mediante el interruptor de pared.
ƑPara encender la fase manual, apague la
luz con el interruptor de pared entre 3 a 4
segundos y luego vuelva a encenderla.
ƑPara apagar la fase manual, apague la luz con
el interruptor de pared entre 3 a 4 segundos y
luego vuelva a encenderla.
NOTA: Si la energía eléctrica al aparato de luz es
apagada por más de 5 segundos, deje que el detector de
movimiento se caliente antes del cambio a la fase manual.
Apague el
interruptor
entre 3 a 4
segundos
Vuelva a
encender el
interruptor
Cuidado y limpieza
ƑPara mantener la apariencia original, limpie solamente con agua limpia y un paño húmedo y suave.
ƑNo use pinturas, disolventes ni ningún otro químico en este detector de movimiento. Podrían ser la causa
de una prematura deterioración del acabado. Esto no es un defecto del acabado y no será cubierto por la
garantía.
ƑNo rocíe con manguera ni con una lavadora eléctrica.
A
This manual suits for next models
3
Table of contents
Languages:
Other Defiant Accessories manuals
Popular Accessories manuals by other brands

ORION TELESCOPES & BINOCULARS
ORION TELESCOPES & BINOCULARS 8743 manual

LEGRAND
LEGRAND Dooxie 6 003 52 quick start guide

Sandberg Active
Sandberg Active 10400 quick guide

V-TAC
V-TAC VT-5134 Installation instruction

Hanna Instruments
Hanna Instruments ELECTRODE instruction manual

Omnicomm
Omnicomm LLS 20160 installation manual

TEQSAS
TEQSAS LAP-TEQ operating manual

Sigfox
Sigfox WSSFC-ULC Series user guide

SICK
SICK MultiPulse WTB4-3P2100S14 operating instructions

Bunker Hill Security
Bunker Hill Security 97004 owner's manual

iseeBell
iseeBell Video Doorbell installation guide

PCB Piezotronics
PCB Piezotronics 261A01 Installation and operating manual