1
TRANSPORT / FLOAT.....................Transport Cylinder
LEFT HAND WHEEL ..................LH Endwheel Cylinder
RIGHT HAND WHEEL ................RH Endwheel Cylinder
3
2
1
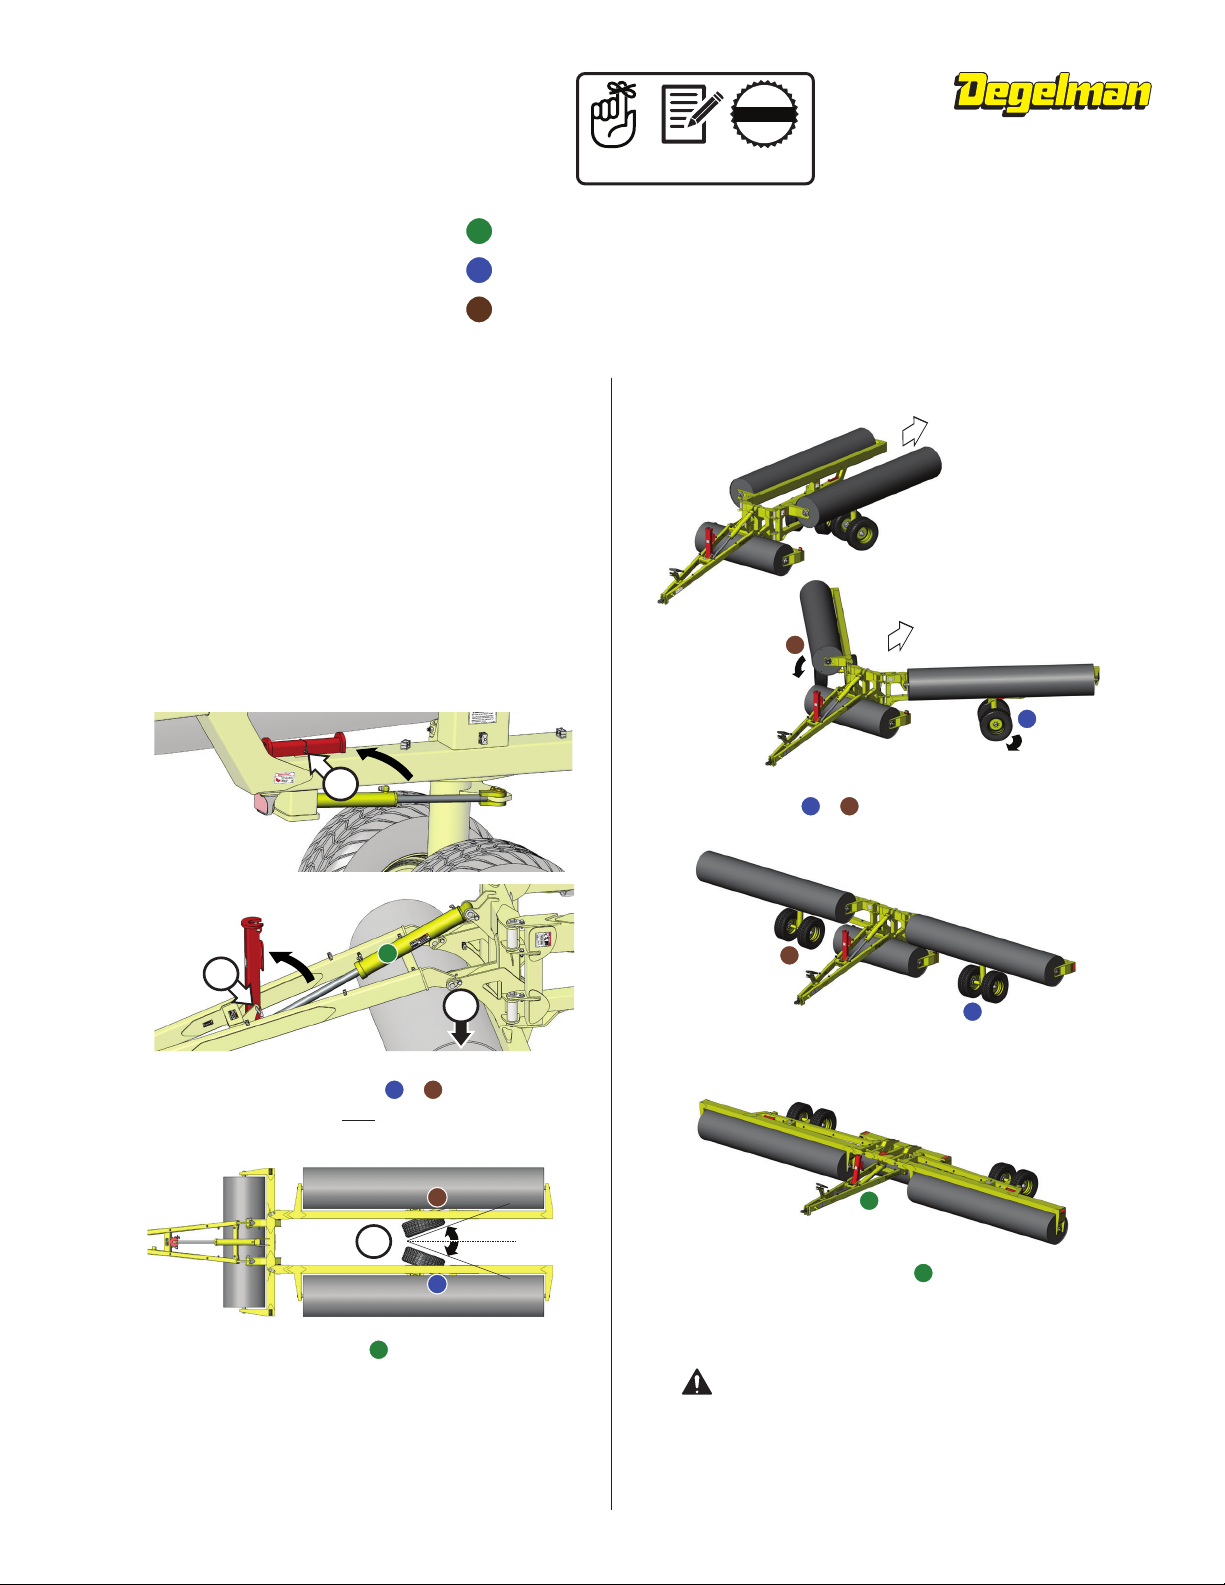
1) Drive landroller onto level ground, straight behind the
tractor.
• Ensure there is plenty of room behind and to the sides
of the landroller for backing into field position.
2) Remove all 3red transport bars. (1 on front transport
cylinder and 2 located on rear endwheel cylinders).
• Place the transport bars into the storage positions
shown and secure with lock-pins.
Note: You may need to activate (slightly extend) the hydraulic
cylinders to allow removal of the cylinder transport bars.
A
B
Connect Hydraulics
Backing Into Field Position
142785 v1.0
QUICK-START GUIDE*
for HY-ROLLER
* Refer to operators manual for complete safety and operation info.
T
O
B
E
E
L
I
G
I
B
L
E
F
O
R
Y
O
U
M
U
S
T
R
E
G
I
S
T
E
R
WARRANTY
REMEMBER! You must complete Product
Registration to be eligible for Warranty.
4) Retract the transport cylinder to lower the center drum
until the weight of the drum is on the ground.
1
3
2
6) Turn the wheels & while backing up. Avoid
pushing on the sidewalls of the tires.
32
7) Backup until the wings are straight in line with the
center frame. Ensure wheels are straight before Step 8.
8) Activate the transport cylinder to retract the cylinder.
Retract until all the roller drums are on the ground. Once
all drums are on ground, set transport circuit to “float”
position.
1
IMPORTANT: Set the tractor hydraulic remote that
activates the transport cylinder into “float” position. This
will allow the hitch pole to contour more effectively and
prevent strain or possible damage to the machine.
3) Activate the End Wheel Circuits & to turn each
Endwheel to around 20°max. Try to match the angles
on each wheel.
32
3
2
320° MAX
20° MAX
(LH & RH)
2
2
4
1
5) Slowly back-up the landroller until wings are slightly
spread.
3
2


