10 Quick Start
www.dell.com | support.dell.com
Recording a Program You are Watching
Recording a Program Using the Guide
NOTE: Depending on the time of day, some networks share the same channel. The Guide may display the programming
for one network, which can cause recording options to be unavailable. You may need to manually update the Guide
before scheduling a recording.
NOTE: During scheduled recordings, you can only watch the program being recorded. If you change channels while
recording, the recording stops.
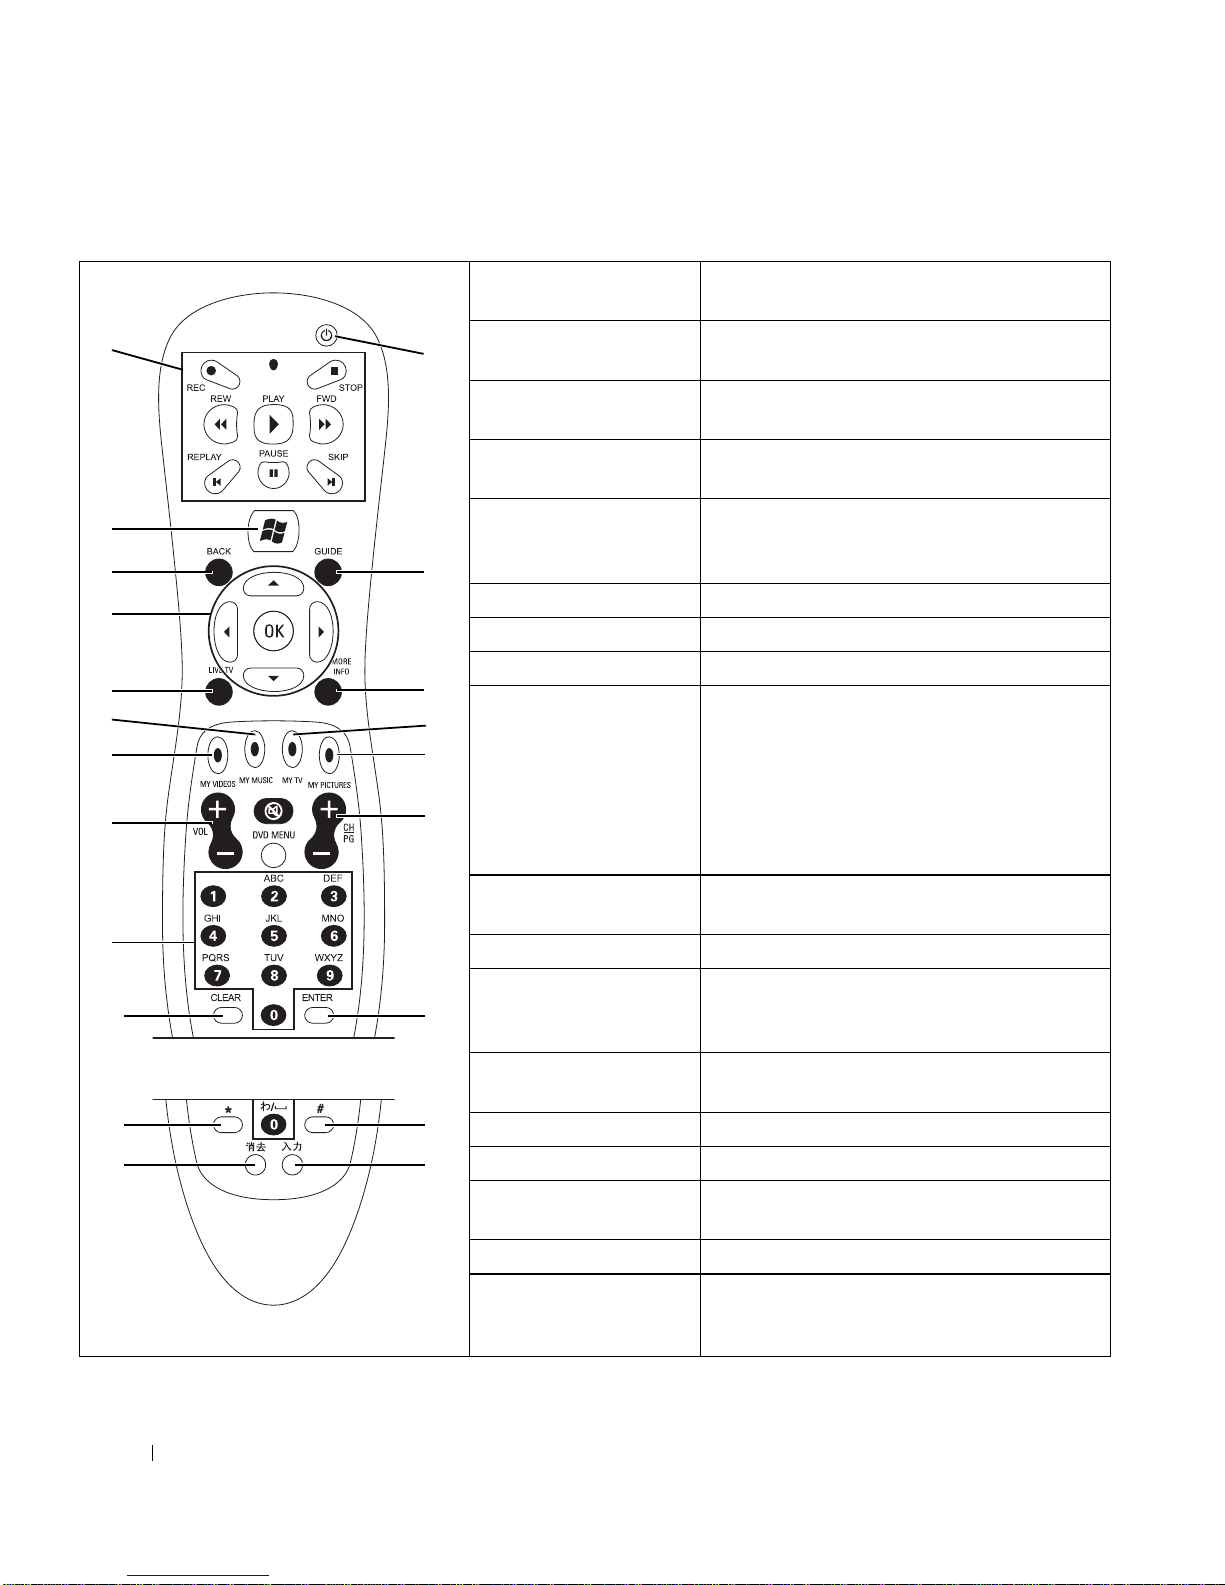
Using the Mouse and Keyboard Using the Remote Control
1
Click on the bottom
Media Center
toolbar.
The
Record
icon appears in the Guide next to
the program.
1
Press the
REC
button.
The
Record
icon appears in the Guide next
to the program.
Using the Mouse and Keyboard Using the Remote Control
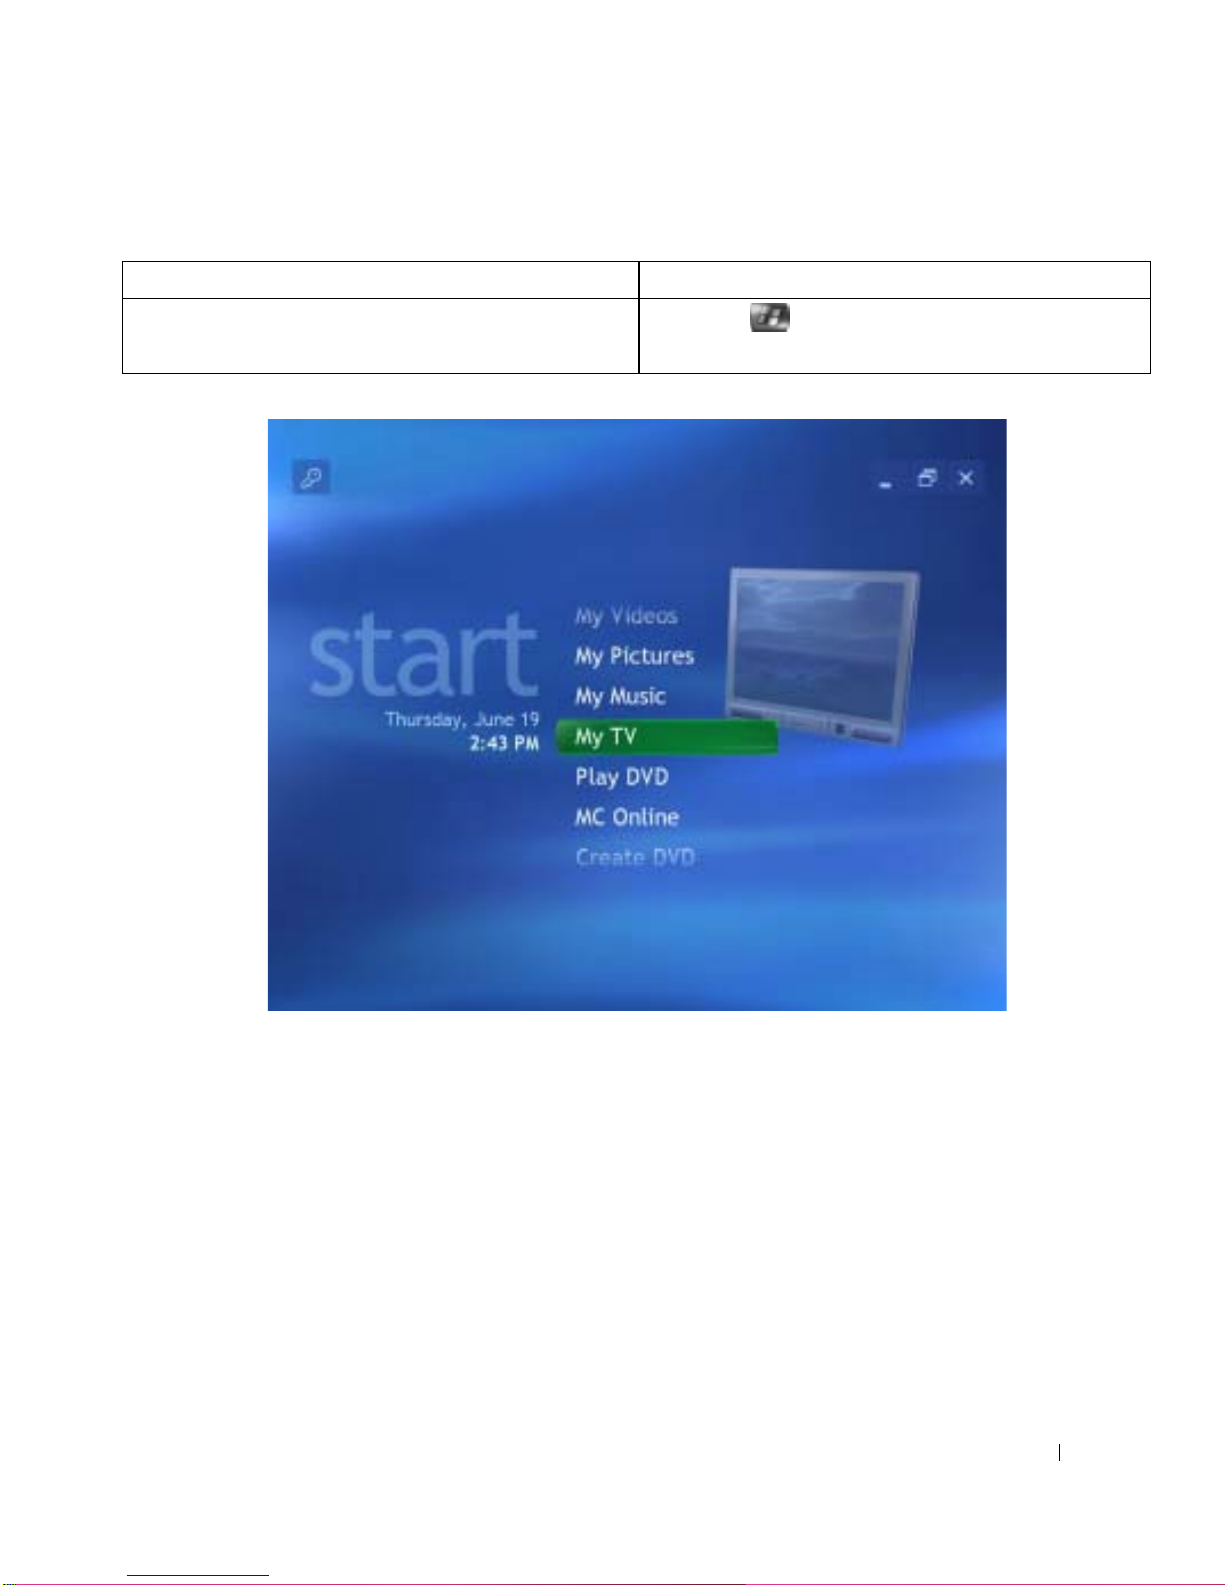
1
In the
Media Center Start Menu
window, click
My TV
.
2
Click
Guide
.
3
To navigate to the program you want to record,
click in the window or press on your
keyboard. If the program is scheduled at a future
time and does not appear, click in the window
or press on your keyboard to scroll through
future programs.
4
Click the program.
5
Click
Record
to record the program or click
Record series
to record the program series.
The
Record
or
Record
series icon
appears in the Guide next to the program.
•
Advanced record
— Displays the recording start
and stop times and other recording settings.
1
Press the
MY TV
button.
2
Highlight
Guide
and press
OK
.
3
To navigate to the program you want to record,
press . If the program is scheduled at a
future time and does not appear, press to
scroll through future programs.
4
Highlight the program and press
OK
.
5
Highlight
Record
and press
OK
to record the
programorhighlight
Record series
and press
OK
to record the program series.
The
Record
or
Record
series icon
appears in the Guide next to the program.
NOTE: When you schedule a recording in the Guide, you
canpressthe REC button once to recordaprogram,twiceto
record a series, or three times to cancel the scheduled
recording you just selected.
•
Advanced record
— Displays the recording start
and stop times and other recording settings.