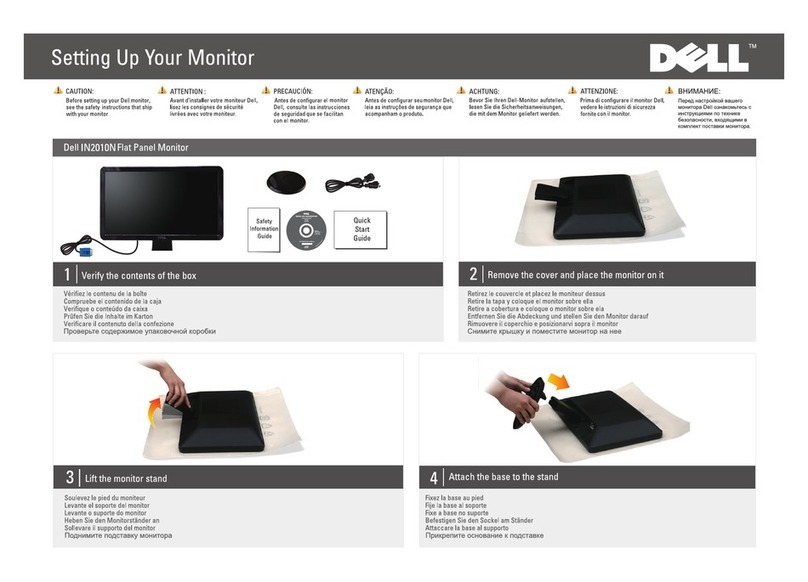
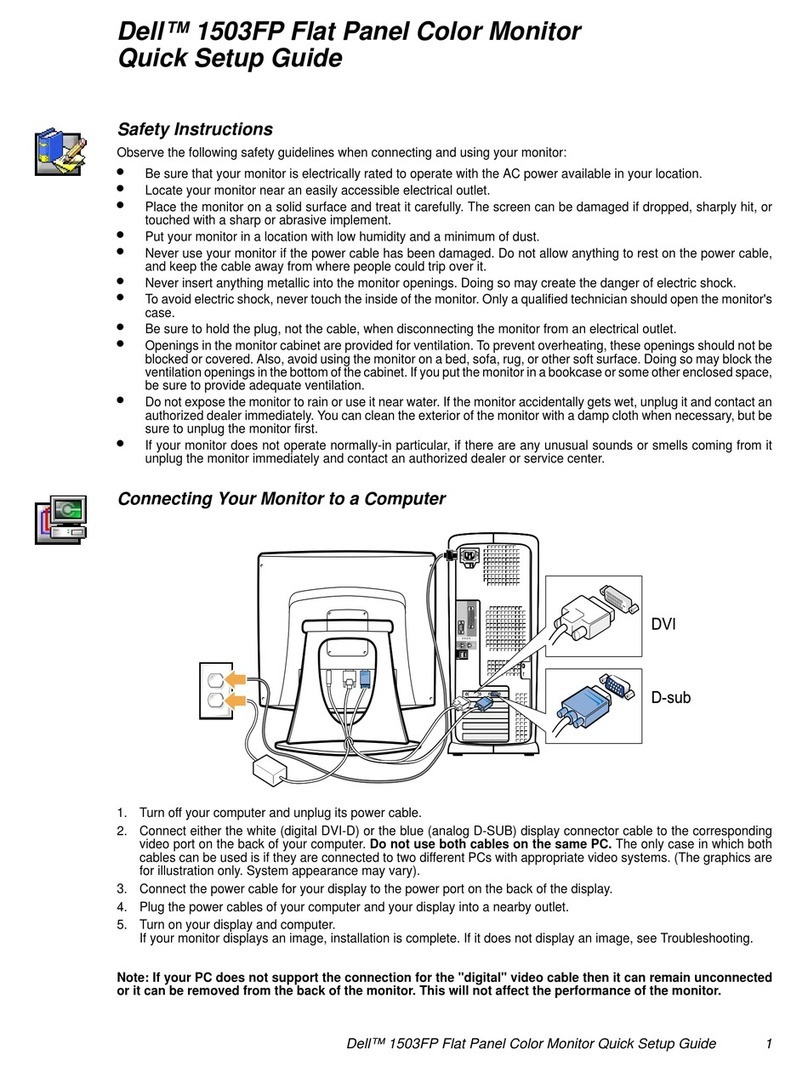
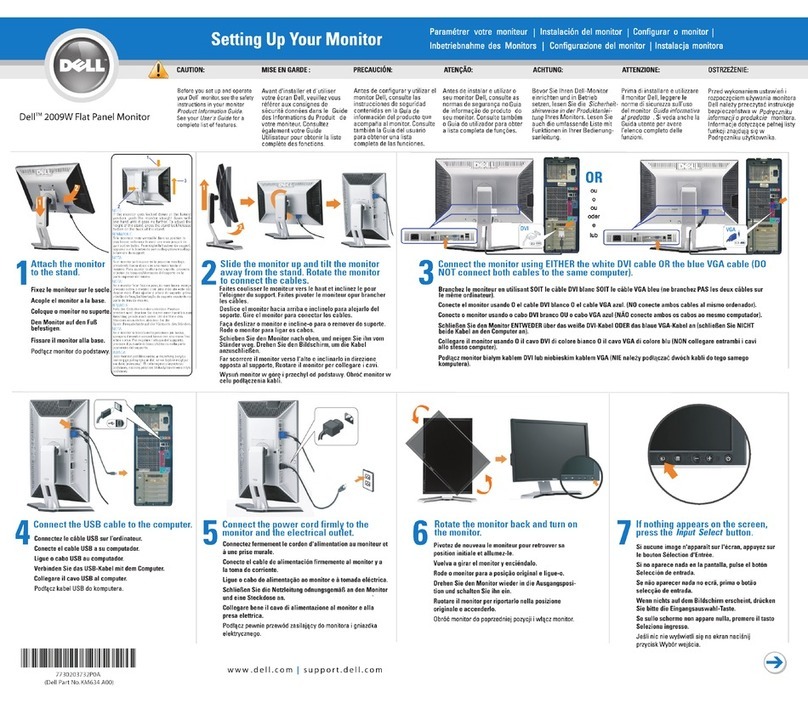
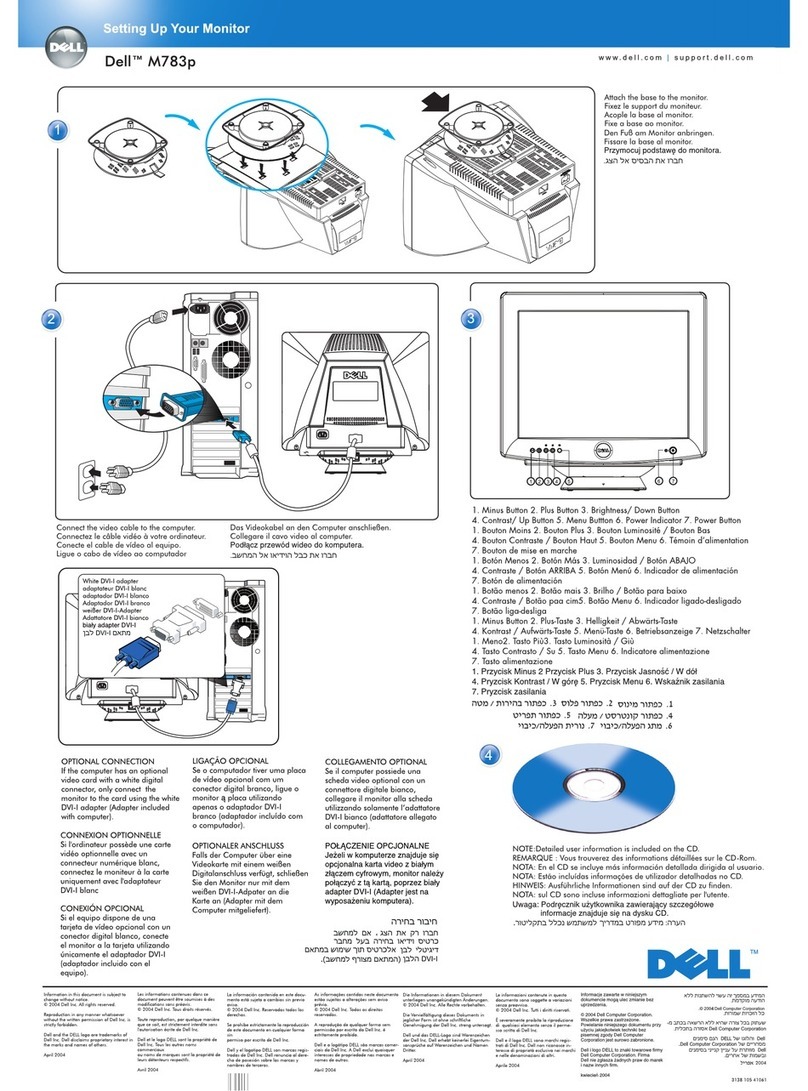
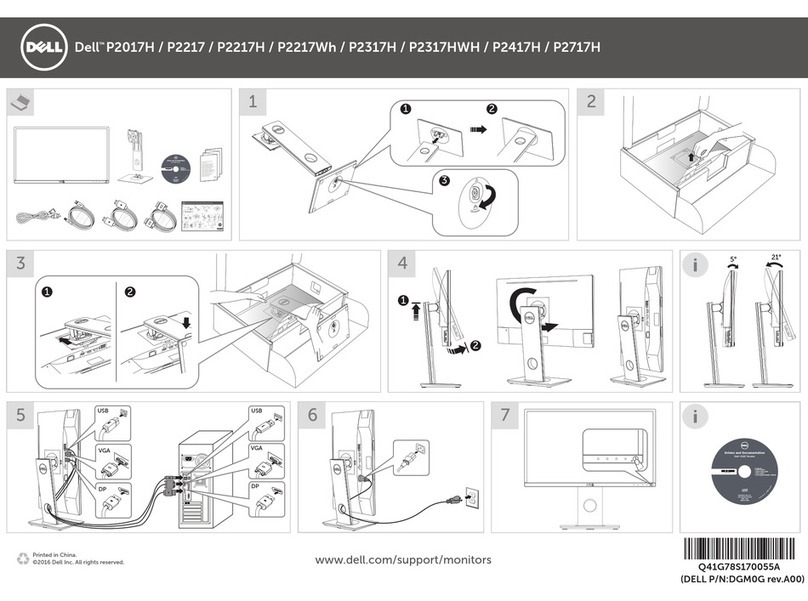
Dell E173FP User manual

Great user manuals database on UserManuals.info
DELL E173FP Service Manual
1
17” LCD Monitor
DELL E173FP
THESE DOCUMENTS ARE FOR REPAIR SERVICE INFORMATION ONLY. EVERY
REASONABLE EFFORT HAS BEEN MADE TO ENSURE THE ACCURACY OF THIS MANUAL;
WE CANNOT GUARANTEE THE ACCURACY OF THIS INFORMATION AFTER THE DATE OF
PUBLICATION AND DISCLAIMS RE LIABILITY FOR CHANGES, ERRORS OR OMISSIONS.
Prepared By: WuHaiyan
Checked By: Sushi
Manufacture Date: May-29-04
SERVICE MANUAL

Great user manuals database on UserManuals.info
DELL E173FP Service Manual
2
Table of Contents
Table of Contents -----------------------------------------------------------------------------------------------2
1. MONITOR SPECIFICATIONS -----------------------------------------------------------------------------4
2. LCD MONITOR DESCRIPTION -----------------------------------------------------------------------------5
3. OPERATING INSTRUCTIONS --------------------------------------------------------------------------6
3.1 GENERAL INSTRUCTIONS ----------------------------------------------------------------------------6
3.2 CONTROL BUTTONS ----------------------------------------------------------------------------------------6
3.3 ADJUSTING THE PICTURE ----------------------------------------------------------------------------7
4. Input/Output Specification--------------------------------------------------------------------------------------10
4.1 Input Signal Connector ----------------------------------------------------------------------------------------10
4.1.1 Analog D-SUB Connector ----------------------------------------------------------------------------------10
4.2 Factory Preset Display Modes ----------------------------------------------------------------------------10
4.3 Power Supply Requirements ----------------------------------------------------------------------------11
4.3.1 Input Requirements --------------------------------------------------------------------------------------11
4.3.2 Output Requirements----------------------------------------------------------------------------------------11
4.4 PANEL SPECIFICATION -------------------------------------------------------------------------------------11
4.4.1 Panel Feature ----------------------------------------------------------------------------------------------11
4.4.2 Display Characteristics ----------------------------------------------------------------------------------11
4.4.3 Optical Characteristics --------------------------------------------------------------------------------12
4.4.4 Parameter guide line for CCFL Inverter --------------------------------------------------------------12
5. Block Diagram ----------------------------------------------------------------------------------------------------13
5.1 Monitor Exploded View ----------------------------------------------------------------------------------------13
5.2 Software Flow Chart ----------------------------------------------------------------------------------------14
5.3 Electrical Block Diagram --------------------------------------------------------------------------------16
5.3.1 Main Board ----------------------------------------------------------------------------------------------------16
5.3.2 Inverter/Power Board----------------------------------------------------------------------------------------17
6. Schematic ----------------------------------------------------------------------------------------------------------18
6.1 Main Board --------------------------------------------------------------------------------------------------18
6.2 Inverter/Power Board --------------------------------------------------------------------------------------23

Great user manuals database on UserManuals.info
DELL E173FP Service Manual
3
7. PCB Layout ----------------------------------------------------------------------------------------------------25
7.1 Main Board --------------------------------------------------------------------------------------------------25
7.2 Inverter/Power Board --------------------------------------------------------------------------------------26
7.3 Keypad Board----------------------------------------------------------------------------------------------------28
8. Maintainability -----------------------------------------------------------------------------------------------------29
8.1 Equipments and Tools Requirements ---------------------------------------------------------------------29
8.2 Trouble Shooting -----------------------------------------------------------------------------------------------30
8.2.1 Main Board ----------------------------------------------------------------------------------------------------30
8.2.2 Power/Inverter Board ---------------------------------------------------------------------------------------33
8.2.3 Key Pad Board ------------------------------------------------------------------------------------------------35
9. White-Balance, Luminance adjustment ---------------------------------------------------------------------36
10. EDIT Content ----------------------------------------------------------------------------------------------38
11. ISP User Manual-------------------------------------------------------------------------------------------------39
11.1. Connect ISP Writer preparation action-------------------------------------------------------------------39
11.2. To Use ISP WRITER-----------------------------------------------------------------------------------------39
11.3. Executing ISP--------------------------------------------------------------------------------------------------43
12. BOM List ----------------------------------------------------------------------------------------------------------44

Great user manuals database on UserManuals.info
DELL E173FP Service Manual
4
1. MONITOR SPECIFICATIONS
Driving system TFT Color LCD
LCD Panel Size 43cm(17.0")
Pixel pitch 0.264mm(H) x 0.264mm(V)
Viewable angle 140˚(H) 120˚(V)
Response time (typ.) 16 ms
Video Analog Only
Input Sync. Type H/V TTL Separate and Composite Sync.
H-Frequency 30kHz – 80kHz
V-Frequency 56-75Hz
Display Colors Over 16.2 million Colors
Dot Clock 135MHz
Max. Resolution 1280 x 1024
Plug & Play VESA DDC2BTM
Power Consumption ON Mode
<35W
Power Saving
<2W
Maximum Screen Size Horizontal : 337.92mm
Vertical: 270.336mm
Power Source 90~264VAC,47~63Hz
Environmental
Considerations
Operating Temp: 0°C to 50°C
Storage Temp.: -20°C to 60°C
Operating Humidity: 10% to 90%
Weight (N. W.) Packaged 5.8Kgs Unit
Unpackaged 4.6Kgs Unit

Great user manuals database on UserManuals.info
DELL E173FP Service Manual
5
2. LCD MONITOR DESCRIPTION
The LCD MONITOR will contain a main board, an internal inverter/power board, keypad board,
which house the flat panel control logic, brightness control logic and DDC.
The internal Inverter/power board will drive the backlight of panel and the DC-DC conversion.
and provides the 12V DC-power to main board.
Inverter/Power Board
Flat Panel and
CCFL backlight
Main Board
Keyboard
RS232 Connector
For white balance
adjustment in
factory mode
HOST Computer
CCFT Driver.
Video signal, DDC
Monitor Block Diagram
AC Power IN

Great user manuals database on UserManuals.info
DELL E173FP Service Manual
6
3. OPERATING INSTRUCTIONS
3.1 GENERAL INSTRUCTIONS
Press the power button to turn the monitor on or off. The other control buttons are located at front panel of
the monitor. By changing these settings, the picture can be adjusted to your personal preferences.
-The power cord should be connected.
-Connect the video cable from the monitor to the video card.
-Press the power button to turn on the monitor, the power indicator will light up.
3.2 CONTROL BUTTONS
-Power Button:
When pressed, the monitor enters the off mode, and the LED turns blank. Press again to restore normal
status.
-Brightness Button:
The Brightness Button is used to select the Brightness/Contrast adjust functions. Press to switch functions
or adjust settings.
-Auto Adjust Key:
The Auto Adjust Key is used to automatically set the H Position, V Position, Clock and Phase.
-Power Indicator:
Green — Power On mode.
Orange — Power Saving mode.
Blank —Power Off Mode.
A. Buttons for the OSD menu
(On-Screen-display)
B. Brightness Button
C. Auto Adjust Button
D. Power On/Off Button and indicator
Control Buttons

Great user manuals database on UserManuals.info
DELL E173FP Service Manual
7
3.3 ADJUSTING THE PICTURE
To set the OSD menu, perform the following steps:
Briefly press the SELCT / MENU button to activate the OSD menu.
The main menu appears on the screen with icons for the setting functions.
The first symbol (Exit) is highlighted.
Necessary, press the - or + button to mark another icon (e.g. Positioning).
Press the SELECT/MENU button to select the highlighted icon.
The corresponding setting window (here: Positioning) is displayed.
The first symbol (Exit) is highlighted.
If necessary, press the – or + button to mark the desired icon.
Press the SELECT/MENU button to select the highlighted function.
Press the – or + button to adjust the value for the selected function.
Press the SELECT/MENU button to exit the function.
Press the SELECT/MENU button to exit the sub-menu when “Exit” function is highlighted;
All changes are stored automatically.
Adjusting the brightness and contrast
Calling the Brightness / Contrast setting window using Brightness button.
Brightness
Setting the brightness of the display
With this function you change the brightness of the background lighting.
Contrast
Setting the contrast of the display
With this function you modify the contrast of bright colour tones.

Great user manuals database on UserManuals.info
DELL E173FP Service Manual
8
Adjusting size and position
Calling the Positioning setting window
H-Position Adjusting the horizontal position
With this function you move the picture to the left or to the right.
V-Position Adjusting the vertical position
With this function you move the picture up or down.
Setting Image
Calling the Image setting window
Auto
Adjust
Auto adjust will produce best image automatically, The information of “ Auto
Adjust In Progress” will show;
Pixel clock Adjusting the pixel clock
Phase Adjusting the phase
Setting colour temperature and colours
Calling the Color setting window
Selecting the colour temperature
The colour temperature is measured in K (= Kelvin). You can select from Normal
Preset, Blue Preset, Red Preset to User Preset;
Normal preset
Blue preset
Red preset
User preset
= Original colour of the LCD display, it’s 6500K;
=5700Kcolour of the LCD display, it’s 9300K;
=9300K colour of the LCD display, it’s 5700K;
= Setting user-defined colours
In the user preset setting you can change the colour ratios of the basic colours (red,
green, blue) as required.
Setting display of the OSD menu
Calling the OSD Set up setting window
Horizontal
Position
Setting the horizontal position of the OSD menu
With this function you move the OSD menu to the left or to the right.
Vertical
Position
Setting the vertical position of the OSD menu
With this function you move the OSD menu up or down.

Great user manuals database on UserManuals.info
DELL E173FP Service Manual
9
OSD
Hold
Time
Setting the display duration of the OSD menu
With this function you select a value from 0 to 60 seconds.
If the set time expires without a setting being made, the OSD menu is automatically
faded out.
OSD
Lock
Setting the display of the OSD menu lock or unlock.
With this function you select Yes to lock OSD, NO to unlock it.
Setting Language
Calling the Language setting window
With this function you choose between English (default setting), French, German,
Spanish and Japanese as the language for the OSD menu.
Factory Reset
Activating the factory settings
With this function all settings except Language of OSD are reset to the factory settings
without prompting for confirmation.

Great user manuals database on UserManuals.info
DELL E173FP Service Manual
10
4. Input/Output Specification
4.1 Input Signal Connector
4.1.1 Analog D-SUB Connector
1
6
2
7
3
8
4
9
5
11
12
13
14
15
10
1
7 1
6
Pin Meaning Pin Meaning
1 Video input red 9 +5 V (DDC)
2 Video input green 10 VGA-PG
3 Video input blue 11 Ground
4 Ground 12 DDC-Data
5 Ground 13 H. Sync
6 Red video ground 14 V. Sync
7 Green video ground 15 DDC Clock
8 Blue video ground
4.2 Factory Preset Display Modes
The following are the most frequently used of the preset operating modes:
Horizontal frequency Refresh rate Screen resolution
31.5 kHz
31.5 kHz
37.5 kHz
37.9 kHz
46.9 kHz
48.4 kHz
60.0 kHz
67.5KHz
64.0KHz
79.9KHz
70 Hz
60 Hz
75 Hz
60 Hz
75 Hz
60 Hz
75 Hz
75Hz
60Hz
75Hz
720 x 400
640 x 480
640 x 480
800 x 600
800 x 600
1024 x 768
1024 x 768
1152 x 864
1280 x 1024
1280 x 1024
For ergonomic reasons, a screen resolution of 1280 x 1024 pixels is recommended. Because of the
technology used (active matrix) an LCD monitor provides a totally flicker-free picture even with a refresh rate of
60 Hz.

Great user manuals database on UserManuals.info
DELL E173FP Service Manual
11
4.3 Power Supply Requirements
4.3.1 Input Requirements
AC INPUT VOLTAGE: 90V ~ 264V
AC INPUT FREQUENCY: 47 ~ 63 HZ
AC INPUT CURRENT: 1.5A max.
INRUSH CURRENT: 60A MAX AT 264VAC COLD START
LEAKAGE CURRENT: 3.5 mA MAX and less then 0.25 mA at 100Vac
4.3.2 Output Requirements
ITEM MIN. TYP. MAX. UNIT REMARK
Output voltage (12V) 11.4 12 12.6 V
Output current (12V) 0 2.0 3.0 A
Output voltage ( 5V) 4.75 5.0 5.25 V
Output current (5V) 0 1.5 2.0 A
Ripple & Noise (12V) 200 mV
Ripple & Noise (5V) 100 mV
4.4 PANEL SPECIFICATION
4.4.1 Panel Feature
-High contrast ratio, high aperture structure
-Wide viewing angle
-High-speed response
-SXGA (1280 x 1024 pixels) resolution
-Low power consumption
4.4.2 Display Characteristics
Items Specification Unit
Display Area 337.92x270.336 mm
Driver element a-Si TFT active matrix
Display color 16.2M Colors
Number of pixels 1280 x 1024 pixel
Pixel Arrangement RGB vertical stripe
Pixel pitch 0.264(H) x 0.264(W) mm
Display Mode Normally Black

Great user manuals database on UserManuals.info
DELL E173FP Service Manual
15
1) MCU Initializes.
2) Is the EEprom blank?
3) Program the EEprom by default values.
4) Get the PWM value of brightness from EEprom.
5) Is the power key pressed?
6) Clear all global flags.
7) Are the AUTO and SELECT keys pressed?
8) Enter factory mode.
9) Save the power key status into EEprom.
Turn on the LED and set it to green color.
Scalar initializes.
10) In standby mode?
11) Update the lifetime of back light.
12) Check the analog port, are there any signals coming?
13) Does the scalar send out an interrupt request?
14) Wake up the scalar.
15) Are there any signals coming from analog port?
16) Display "No connection Check Signal Cable" message. And go into standby mode afte
r
the message disappears.
17) Program the scalar to be able to show the coming mode.
18) Process the OSD display.
19) Read the keyboard. Is the power key pressed?

Great user manuals database on UserManuals.info
DELL E173FP Service Manual
16
5.3 Electrical Block Diagram
5.3.1 Main Board
H-sync,
V-sync
RGB
OSD
Control
Interface
(CN101)
Scalar GmZan3-SL
(Include ADC, Scalar, OSD)
(U102)
MCU
Win Bond W78E65
(SyncMos SM5964)
(U101)
EEPROM
M24C16
(U104)
D-Sub
Connector
(CN100)
EEPROM
24C02
(U103)
RXD
TXD
DB12_SDA,
DB15_SCL
NVRAM_SDA
NVRAM_SCL
LCD Interface
(CN103)
LCD Panel

Great user manuals database on UserManuals.info
DELL E173FP Service Manual
17
5.3.2Power Block Diagram
R8
CCFL
Vrms
M5
METER V
Note 1: M3 / M4/M5/M6 need to use two channel multimeter , such as
FLUKE 45 , or use the oscilloscope check frequency.
CN901
NL
GND
Vrms
M6
METER V
R12
CCFL
ON/OFF
1. M3 / M4/M5/M6 = 6.5 +- 5 mV @
DIM= 5V
2. Check M3 / M4/M5/M6operating frequency. (
note 1 )
CON207
1
2
GND
CN102
1
2
3
4
5
6
7
8
10
9
11
12
PWPC1742LGD1
GND
R11
10
12V
M3 / M4 /M5/M6= 3.0 +- 5 mV @
DIM= 0V
Vrms
M4
METER V
M1 = 12V +- 0.5V , M2 = 5V +- 0.25V
R6
CCFL
R10
CCFL
CON206
1
2
2. M3 / M4/M5/M6= 55KHz
+- 5 KHz
DIM
R7
10
V
M2
METER V
R2
5
R13
10
VR1
10K
R5
100
Specification :
AC IN
CON208
1
2
R4
560
Function test step :
Vrms
M3
METER V
5V
Step1 :
R1
100
PCB
NO.715L1283-1
Model name :
PWPC1742LGD1
Function test
V
M1
METER V
R9
10
CON205
1
2
1. Adjust VR1 ( Set Vdim voltage from 0V to 5V) , then check M3 /
M4/M5/M6 Vrms .

Great user manuals database on UserManuals.info
DELL E173FP Service Manual
18
6. Schematic
6.1 Main Board
R114 47 1/16W
C109
NC
CLK_DDC
GND
GND
HSYNC 2
GND
gndG
D102
MLL5232B 5.6V
C114 0.047uF
HSI
GND
R120 100 1/16W
FB102 22 1/16W
+5V
GIN
R105 100 OHM
R116
2.2K 1/16W
VGA_CAB 2
D103
MLL5232B 5.6V
R111
100 1/16W
RXD 2
R102 100 1/16W
GND
R107
75 1/16W
D107
MLL5232B 5.6V
R118 47K 1/16W
R115
2.2K 1/16W
C104 0.047uF
GND
GND
BLUE+ 2
R110
100 1/16W
GND
BIN
R109
100 1/16W
GREEN- 2
D110
BAT54C-GS08
3
1
2
C117
NC
DAT_DDC
RED- 2
C119 0.1uF/16V
GND
R103 NC
R129 100 1/16W
D109
MLL5232B 5.6V
GND
PC5V
R131
2.7K 1/16W
R101 100 OHM
R119 100 1/16W
D111
MLL5232B 5.6V
+5V
C106 0.047uF
D101
BAV99
3
1
2
GND
HSI
R100 100 1/16W
FB104 0 1/16W
R117
47K 1/16W
C108 0.047uF
DDC_/WP 2
C111
NC
DDC_SDA 2
GND
DDC_SCL 2
VSYNC 2
R128 100 1/16W
C118
NC
CN100
VGA
1
6
2
7
3
8
4
9
5
11
12
13
14
15
10
1716
PC5V
GND
R132
2.7K 1/16W
C112 0.047uF
CLK_DDC
U103
M24C 02W MN 6
4
8 1
2
3
7
6
5GND
VCC A0
A1
A2
WP
SCL
SDA
RED+ 2
GND
R104 100 OHM
C110
NC
VGA_CON
R106
75 1/16W
BLUE- 2
GND
DAT_DDC
GND
PC5V
VSI
R156
47K 1/16W
FB101 22 1/16W
gndR
D106
BAV99
3
1
2
R112 47 1/16W
TXD 2
RIN
R113 100 1/16W
FB103 22 1/16W
GND
VSI
C113 0.047uF
D112
MLL5232B 5.6V
D105
BAV99
3
1
2
D108
MLL5232B 5.6V
R108
75 1/16W
gndB
GND
Zan3 SL MAIN BOARD
C
Input Connector
A
15Friday , February 13, 2004
Tit le
Size Document Number Rev
Date: Sheet of
D104
MLL5232B 5.6V
GREEN+2

Great user manuals database on UserManuals.info
DELL E173FP Service Manual
19
3.3V_LAVDD
R124-RESET
FUNCT ION
RDn
R133
4.7K 1/16W
83.4m A
LVDS_E8
/WP
R139 100 1/16W
L106
120 OHM
1.8V_DVDD
GND
LED_G 3
R140 NC
R135
4.7K 1/16W
C125
0.1uF/16V
R123
4.7K 1/16W
Close to respective power Pins
1.8V_AVDD
6.4m A
C144
0.1uF/16V LVD S_E0
VGA_CAB
R142 0 1/16W
LVDS_O0
L103
120 OHM
KEY _ONOF F 3
U101
SOCKET
2
3
4
5
6
7
8
9
10
11
13
14
15
16
17
18
19
20
21
22
24
25
26
27
28
29
30
31
32
33
35
36
37
38
39
40
41
42
43
44
1
12
23
34
P1.0/ T2
P1.1/ T2EX
P1.2/ ECI
P1.3/ CEX0
P1.4/ CEX1
P1.5/ CEX2
P1.6/ CEX3/WAIT#
P1.7/ CEX4/A17/W
RST
P3.0/ RXD
P3.1/ TXD
P3.2/ INT0#
P3.3/ INT1#
P3.4/ T0
P3.5/ T1
P3.6/ WR#
P3.7/RD#/A16
XTA L 2
XTA L 1
VSS
A8/P2. 0
A9/P2. 1
A10/P2.2
A11/P2.3
A12/P2.4
A13/P2.5
A14/P2.6
A15/P2.7
PSEN#
ALE/PROG#
EA#/VPP
AD7/ P0.7
AD6/ P0.6
AD5/ P0.5
AD4/ P0.4
AD3/ P0.3
AD2/ P0.2
AD1/ P0.1
AD0/ P0.0
VCC
P4.2
P4.3/INT2
P4.0
P4.1
3.3V_DVDD
+5V
DDC_SCL1
C141
0.1uF/ 16V
RDn
8.1m A
A15
R126
100 1/16W
+
C122
22uF/16V
G-PROBE
C150
0.1uF/ 16V
GND
GND
C124
0.1uF/16V
LED_O 3
R122
4.7K 1/16W
R151 NC
+5V
C126
0.1uF/16V
139m A
GND
GND
LVDS_E5
C137
0.1uF/ 16V
X101
14.318MHz
R152 NC
LVDS_O3
LVDS_O2
1.8V_AVDD
3.3V_PVDD
KEY _MENU 3IRQn
LVDS_E[0..9]
C134
0.1uF/16V
OPTIONAL
FOR
DEBUGGING
PURPOSES
ONLY
GREEN+1
Re fe r BOOT STRAP OPT IONS
42.2m A
R148 4.7K 1/16W
LVDS_E3
PBIAS
3.3V_LAVDD
U102
GMZAN3 SL
QFP-100
77
78
74
75
70
71
87
88
62
63
39
40
1
42
43
44
45
41
35
90
46
2
82
84
80
76
72
33
51
89
47
31
67
30
29
95
96
32
48
64
68
100
81
16
14
13
12
11
10
7
6
5
28
8
9
93
85
69
94
92
66
61
60
59
58
73
55
54
53
52
50
49
57
56
65
34
38
91
83
86
37
36
17
18
19
20
21
22
23
24
25
26
4
3
15
27
99
79
97
98
RED+
RED-
GREEN+
GREEN-
BLUE+
BLUE-
XTA L
TCLK
STI_TM1
STI_TM2
GPIO12/AD6
GPIO11/AD5
AVDD_LV_3.3
HDATA3/AD3
HDATA2/AD2
HDATA1/AD1
HDATA0/AD0
HF S/AD4
HCLK/ALE
RESETn
GPIO10/IRQn
VCO_LV
VDD_ADC_1.8
VDD_RPLL_1.8
AGND_ADC
AGND_ADC
AGND_ADC
RVDD_3.3
RVDD_3.3
AVDD_RPLL_3.3
CVDD_1.8
CVDD_1.8
CVDD_1.8
PPWR
PBIAS
HSYNC
VSY NC
CRVSS
CRVSS
CRVSS
CRVSS
CRVSS
GND_ADC
VDD_OUT_LV_3.3
CH0N_LV_E/G1
CH0P_LV_E/G0
CH1N_LV_E/R7
CH1P_LV_E/R6
CH2N_LV_E/R5
CLKP_LV_E/R2
CH3N_LV_E/R1
CH3P_LV_E/R0
VDD_OUT_LV_3.3
CLKN _LV_E/R3
CH2P_LV_E/R4
CRVSS
VBUF S_RPLL
AVDD_ADC_3.3
RVDD_3.3
CVDD_1.8
NC
NC
GPIO8/B6
GPIO7/B4
GPIO6/B7
SOG_MCSS
GPIO3/DVS
GPIO2/DHS
GPIO1/PWM1
GPIO0/PWM0
GPIO9/B5
NC
GPIO5/DCLK
GPIO4/DEN
CVDD_1.8
MEM_REG
GPIO13/AD7
RESET_OUT
VSS_RPLL
AVSS_RPLL
RDn
WRn
CH3P_LV_O/G2
CH3N_LV_O/G3
CLKP_LV_O/G4
CLKN_LV_O/G5
CH2P_LV_O/G6
CH2N_LV_O/G7
CH1P_LV_O/B0
CH1N_LV_O/B1
CH0P_LV_O/B2
CH0N_LV_O/B3
VDD_OUT_LV_3.3
AVSS_LV
VSS_OUT_LV
VSS_OUT_LV
CVDD_1.8
AVDD_ADC_3.3
DDC_SCL
DDC_SDA
C147
10pF
TXD1
GND
BRIGHTNESS 5
A14
GND
Zan3 SL MAIN BOARD
C
ZAN3 SL & MCU
C
25Friday , F ebruary 13, 2004
Tit l e
Size Document Number Rev
Dat e: Sheet of
R136 NC
3.3V_AVDD
NVRAM_SDA
L102
120 OHM
CN102
1
2
3
4
R173
NC
BLUE-1
GND LVDS_E9
R130
100 1/16W
R125
100 1/16W
1.8V_DVDD
LVDS_O5
C135
0.1uF/16V
UDART_DO
C133
0.1uF/ 16V
A14 => MEM_REG(ZAN3SL)
LVDS_O[0.. 9]
VSY NC1
GND
GND
KEY _RI GHT 3
C139
0.1uF/16V
LVDS_E[0..9] 4
L104
120 OHM
LVDS_O1
+
C136
22uF/16V C142
0.1uF/16V
NVRAM_SCL
WRn
A15 => HCLK(ZAN3SL)
3.3V_AVDD
3.3V_DVDD
+5V
PPWR
A15
C128
0.1uF/ 16V
R146 0 1/16W
R124
NC
Philips P89C51RD2
Winbond W78E65P-PLCC44
SyncMOS SM2965
RED-1
+5V
GND
3.3V_PVDD
C148
10pF
C127
0.1uF/ 16V
UDART_DI
UDART_DO
LVDS_O4
+1.8V_VDD
GND
KEY _LEFT 3
LVDS_E2
R150
NC
R147 4.7K 1/16W
LVDS_O[0.. 9] 4
LVDS_E6
GND
+5V
PPWR
R138 NC
TCLK
KEY _MENU
R127
4.7K 1/16W
PBIAS 5
GND
RED+1
Hardwave ISP function
C151
NC
GND
LVDS_O7
+5V
R143 4.7K
TCLK FOR ZAN3SL
RXD1
R153
NC
R134
4.7K 1/16W
R145
NC
+5V
+
C140
22uF/16V
PBIAS
HSYNC1
WRn
U104
M24C 16 -MN6T
1
2
3
4 5
6
7
8
A0
A1
A2
VSS SI
SCK
WP
VCC
C145
0.1uF/16V
Close to respective power Pins
LVDS_E1
+3.3V_VDD
GND
+5V
LVDS_O6
PPWR 5
LVDS_O9
C149
0.1uF/ 16V
R144 4.7K
KEY _ONOF F
C138
0.1uF/16V
R121 22 1/16W
GND
GND
GREEN-1
C131
0.1uF/16V
KEY _RI GHT
C123
0.1uF/ 16V
R137 100 1/16W
Close to respective power Pins
+
C129
22uF/16V
WINBOND W78E65P-40-56L1125-137-X
BLUE+1
C132
0.1uF/ 16V
VGA_CAB 1
LVDS_E4
GND
+5V
LVDS_O8
DDC_SCL
DDC_SDA
L105
120 OHM
L101
120 OHM
/WP
A14
ALE
+
C143
22uF/16V
PLCC44 - SOCKET-87L202-44
UDART_DI
58.27m A
3.3V_DVDD
+5V
KEY _LEFT
DDC_SDA1
DDC_/WP1
C130
0.1uF/16V
ALE
LVDS_E7
R141 100 1/16W

Great user manuals database on UserManuals.info
DELL E173FP Service Manual
20
C153
0.001uF
KEY_LEFT
GND
LED_ORANGE
KEY_ONOFF
C152
0.001uF
LEFT
LED_O
2
+5V
GND
R155
4.7K 1/16W
LED_G
KEY_ONOFF2
C156
0.001uF
CN101
CONN
1
2
3
4
5
6
7
8
KEY_RIGHT
Q102
PMBS3904
32
1
C155
0.001uF
GND
GND
LED_GREEN
C154
0.001uF
Zan3 SL MAIN BOARD
C
KEYS CONNECTION
A
35Friday , February 13, 2004
Tit le
Size Document Number Rev
Date: Sheet of
+5V
GND
LED_O
R158 220 1/16W
RIGHT
RP103
4.7K 1/16W
1
2
3
4
8
7
6
5
To keyboard
ENTER
KEY_MENU2KEY_MENU
R160 220 1/16W
GND
KEY_RIGHT2
KEY_LEFT2
R154
4.7K 1/16W
R159 220 1/16W
GND
R157 220 1/16W
Q101
PMBS3904
32
1
POWER
LED_G
2
C157
0.001uF
+5V
Other manuals for E173FP
1
Table of contents
Other Dell Monitor manuals

Dell
Dell G3223D User manual

Dell
Dell W2600 User manual

Dell
Dell D2721H User manual

Dell
Dell S1709W - 17" LCD Monitor User manual

Dell
Dell P2222H User manual

Dell
Dell E770S - 17" CRT Display User manual

Dell
Dell E2220H User manual

Dell
Dell P992 User manual

Dell
Dell C5519Q User manual

Dell
Dell UltraSharp U2715H User manual

Dell
Dell 1708FP - UltraSharp - 17" LCD Monitor User manual

Dell
Dell U2421E User manual

Dell
Dell UP3221Qb Instructions for use

Dell
Dell UltraSharp 1800FP User manual

Dell
Dell E176FP - 17" LCD Monitor User manual

Dell
Dell D825TM User manual

Dell
Dell S2719DM User manual

Dell
Dell UltraSharp U2713HM User manual

Dell
Dell S1909WX Instruction Manual

Dell
Dell S2716DGb User manual