Note that all components must run on a single VLAN or subnet with the
exception of the iDRAC interface, which can be on a separate subnet or VLAN.
For further information about IP addresses, see Table 1 on page 5.
The DP4400 installation requires IP addresses strictly from a single subnet
having a single gateway.
2. Register the 13 IP addresses in DNS with forward and reverse lookup entries for
each address. Ensure that the router for the 13 IP addresses can be pinged.
When you reserve the IP addresses, you must assign the IP addresses to the
hostnames in the DNS server. Ensure that the hostnames that are assigned to
the point products do not have an underscore (_). If the hostnames have an
underscore (_), the configuration fails.
Ensure that ICMP is enabled in your network environment. The deployment of
the appliance fails if ICMP is disabled.
3. Download the license files for Data Domain Virtual Edition (DDVE), Avamar
Virtual Edition (AVE), and Data Protection Advisor (DP Advisor) from the Dell
EMC Software Licensing Central.
For DP4400, only during the initial activation, the license keys are automatically
downloaded from the ELMS server if the appliance is connected to the internet.
The contact person mentioned on your sales order should have received the
License Authorization Code (LAC) letter through an email during the order
fulfillment process. The LAC letter includes the license authorization code
associated with your order, instructions for downloading software binaries, and
instructions for activating the entitlements online through Dell EMC Software
Licensing Central.
Follow the steps mentioned in the LAC letter to activate the software and
download the license keys. For additional information, see the Standard
Activation Process section in the
License Activation Guide
.
The LAC letter has the link https://licensing.emc.com/deeplink/
<LAC> which directs you to Dell EMC Software Licensing Central.
<LAC>
is a
unique alphanumeric value that is mentioned in your LAC letter.
After the activation is complete, download the license keys that are generated
for Data Domain Virtual Edition (DDVE), Avamar Virtual Edition (AVE), and Data
Protection Advisor (DP Advisor). Use these license keys during the IDPA
configuration.
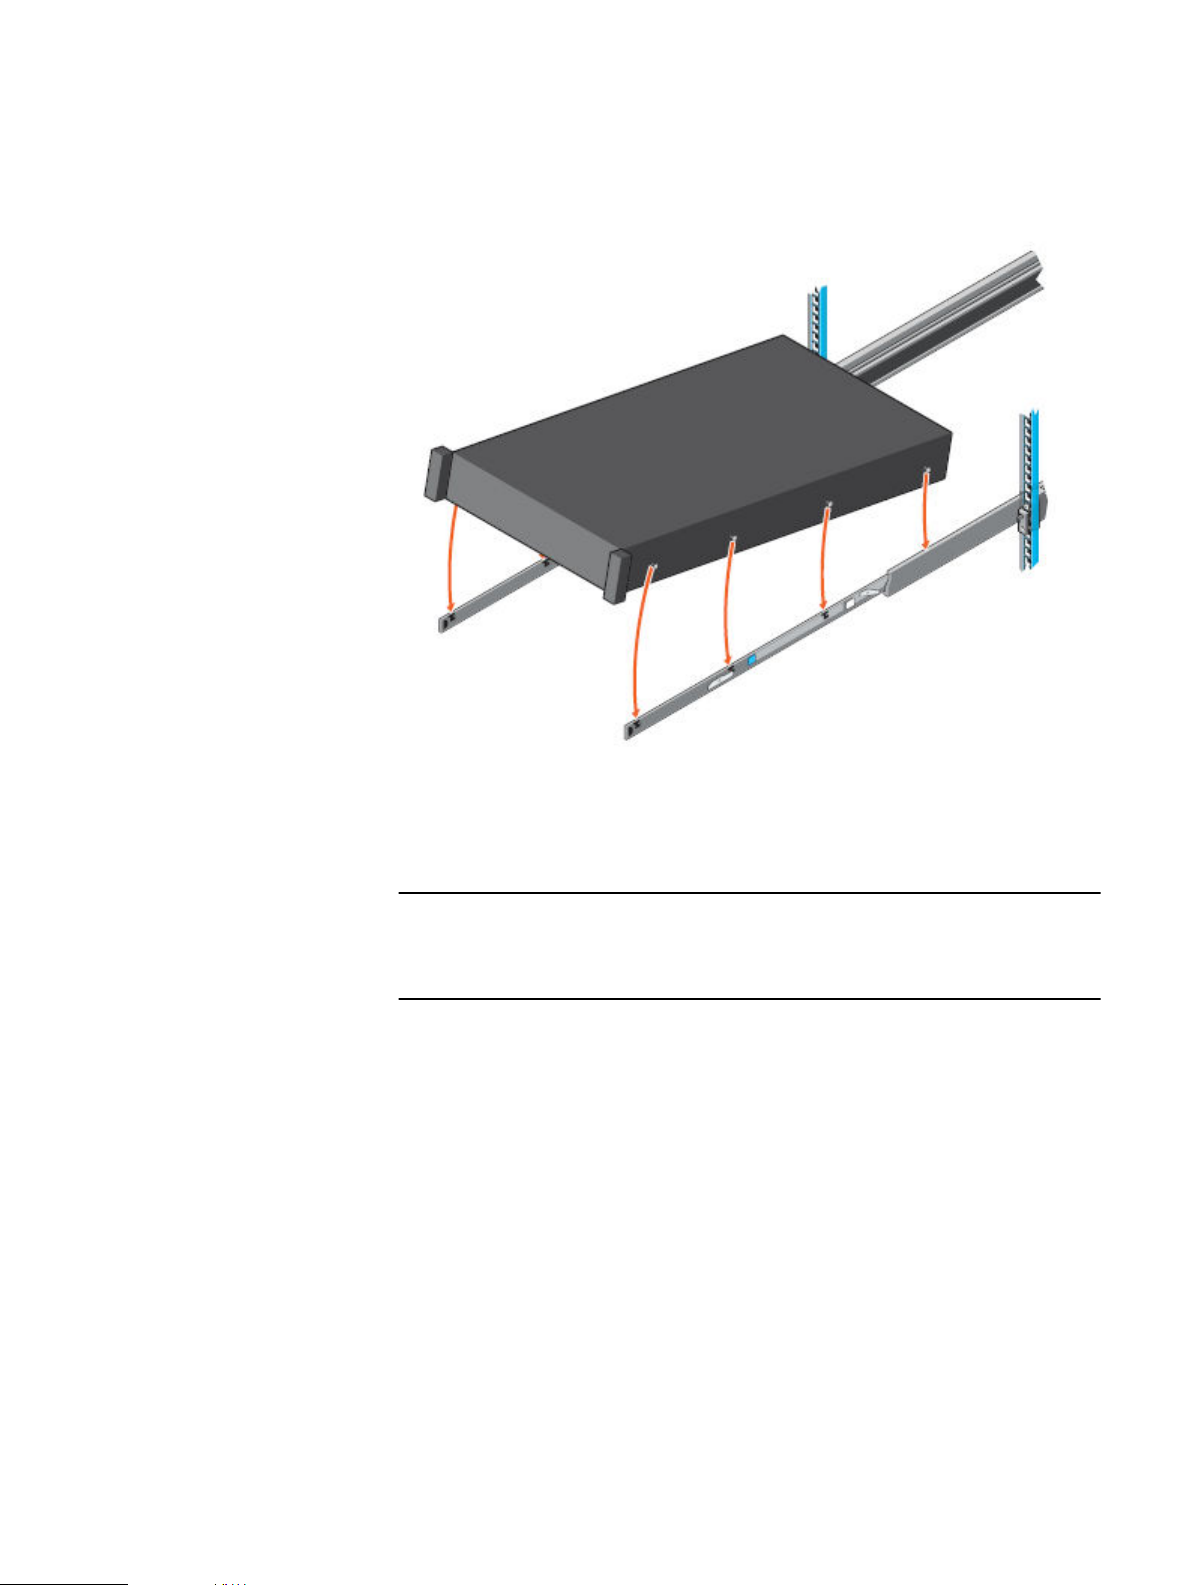
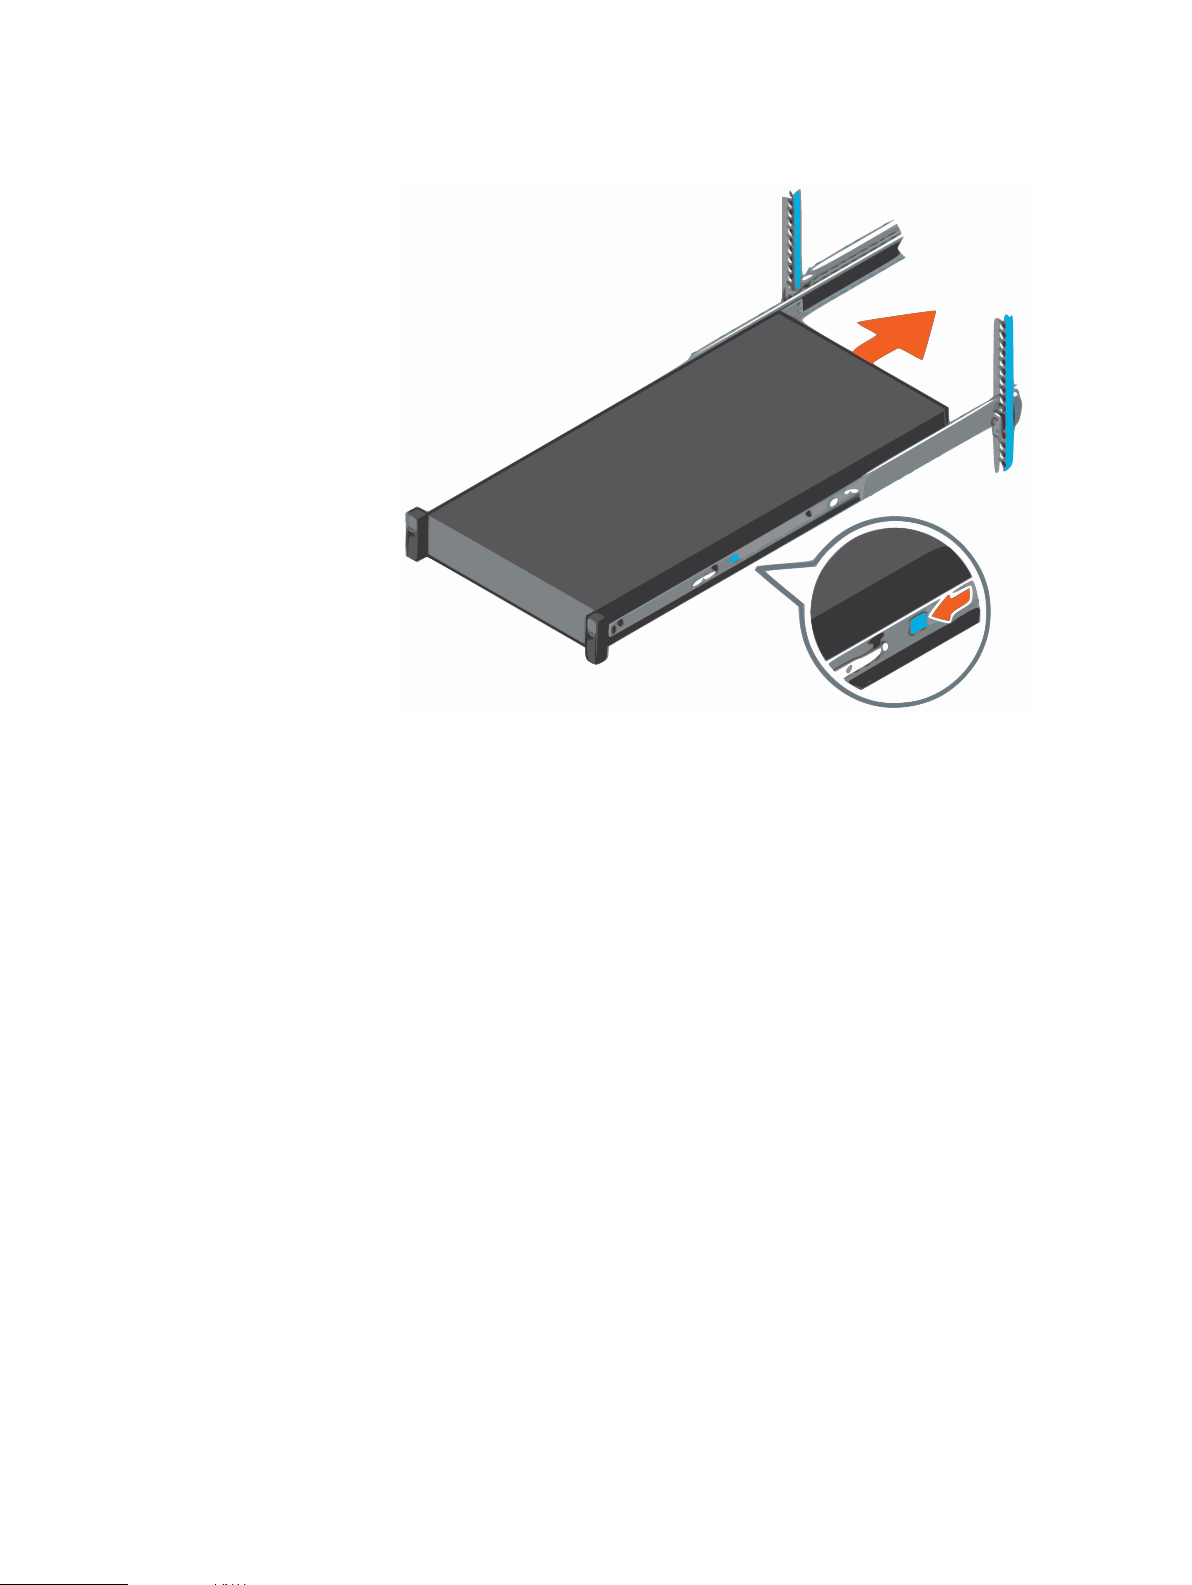
Hardware Installation Guide
4Integrated Data Protection Appliance DP4400 2.4 Hardware Installation Guide