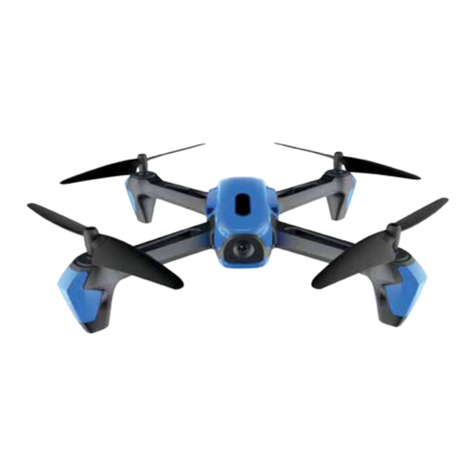
DELTA-SPORT 283163 User manual

QUADROCOPTER
IAN 283163IAN 283163
DELTA-SPORT HANDELSKONTOR GMBH
Wragekamp 6 • D-22397 Hamburg
Version: 04/2017
Delta-Sport-Nr.: QC-3042
GB Instructions and Safety Notice Page 10
FI Käyttö- ja turvallisuusohjeet Sivu 17
SE Bruks- och säkerhetsanvisningar Sidorna 24
PL Wskazówki bezpieczeństwa i obsługi Strona 30
LT Valdymo ir saugos nurodymai Puslapyje 38
DE/AT/CH Gebrauchs- und Sicherheitshinweise Seite 45
Before reading, fold out the illustration page and get to know all of the functions of your unit.
Ennen lukemista käännä käyttöohjeen kuvasivu esiin ja tutustu senjälkeen laitteen kaikkiin toimintoihin.
Öppna sidan med avbildningarna innan du läser manualen och gör dig sedan bekant med alla
apparatens funktioner.
Przed przeczytaniem należy rozłożyć bok z ilustracjami a następnie zapoznać się ze wszystkimi
funkcjami urządzenia.
Prieš skaitydami atlenkite puslapį su iliustracijomis, o po to susipažinkite su visomis prietaiso funkcijomis.
Klappen Sie vor dem Lesen die Seite mit den Abbildungen aus und machen Sie sich anschließend mit
allen Funktionen des Artikels vertraut.
QUADROCOPTER
Instructions for use
QUADROCOPTER
Bruksanvisningen
NELIKOPTERI
Käyttöohje
QUADROCOPTER
Gebrauchsanweisung
QUADROCOPTER
Instrukcja obsługi
KVADROKOPTERIS
Naudojimo instrukcija

1x 1
1x 2
1x 4
1x 512x 6
1x 7
3x 3
A
1a
1b
1c
1d
1e
1f1g
B
4a
1e
4b
F
C
2a
2b
2c
2d
2e
D2f
2g
4a
1e
4b
ON
OFF
G
H
E
B
A
BA

5
I
J
K

6
L
M

7
CONTENTS/SISÄLLYSLUETTELO
Toimituksen sisältö (kuva A) ...............................17
Quadrokopteri (kuva B) ............................ 17
Kauko-ohjain (kuva C) ............................... 17
Tekniset tiedot ...................................................... 17
Määräystenmukainen käyttö ............................. 17
Käytetyt symbolit .................................................17
Turvallisuusohjeet ............................................... 17
Paristoja/akkua koskevat varoitukset! ......18
Paristojen asettaminen
kauko-ohjaimeen (kuva D) ................................. 19
Akun lataaminen (kuva F) ..................................19
Akun irrottaminen ................................................20
Lennätykseen sopiva ympäristö .........................20
Lennättämisen valmisteleminen ..........................20
Lennättämisen aloittaminen ja
quadrokopterin ohjaaminen ..............................20
Lennättämisen aloittaminen .......................20
Nopeuden säätäminen .............................20
Quadrokopterin ohjaaminen ....................20
360° silmukka (kuva L) .............................20
Kalibrointi (kuva M) ...................................21
Puhdistus, korjaus ja säilytys .............................. 21
Roottorin lapojen vaihtaminen ..................21
Hävittämistä koskevat ohjeet ............................. 21
3 vuoden takuu ...................................................21
Mahdolliset viat ..................................................23
Scope of delivery (figure A) ..............................10
Quadrocopter (figure B) ...........................10
Remote control (figure C) ..........................10
Technical data .....................................................10
Correct use ..........................................................10
Symbols used ......................................................10
Safety notes .........................................................10
Warning notes for the batteries/
storage battery!.......................................... 12
Inserting the batteries into
the remote control (figure D).............................. 12
Charging the storage battery (figure F) ............13
Removing the storage battery............................13
Suitable flying surroundings...............................13
Flight preparation ...............................................13
Starting to fly and steering
the quadrocopter ................................................ 13
Starting to fly .............................................. 13
Setting the speed .......................................13
Steering the quadrocopter ........................14
360° rollover (figure L) ............................. 14
Calibration (figure M) ............................... 14
Cleaning, repair, and storage ...........................14
Replace the rotor blades ...........................14
Notes on disposal...............................................14
3-year warranty ..................................................15
Possible errors .....................................................16

8
INNEHÅLLSFÖRTECKNING/SPIS TREŚCI
Leveransomfattning (bild A) ...............................24
Quadrocopter (bild B) ...............................24
Fjärrstyrning (bild C) ..................................24
Teknisk information .............................................24
Avseddanvändning .............................................24
Använda symboler .............................................24
Säkerhetsanvisningar .........................................24
Observera följande
angående batterier! ..................................25
Sätta i batterierna i fjärrstyrningen (bild D) .....26
Ladda batteriet (bild F).......................................26
Ta ut batteriet ......................................................26
Lämpligt flygområde ...........................................27
Förberedelser ......................................................27
Starta flygningen och styra quadrocoptern .....27
Starta flygningen ........................................27
Ställa in hastigheten ..................................27
Styra quadrocoptern .................................27
360°-vridning (bild L) ...............................27
Kalibrering (bild M) ...................................27
Rengöring, reparation och förvaring ............... 28
Byta ut rotorbladen ....................................28
Avfallshantering ..................................................28
3 års garanti ........................................................28
Möjliga fel ...........................................................29
Zakres dostawy (rys. A) .....................................30
Quadrocopter (rys. B) ...............................30
Pilot do zdalnego sterowania (rys. C) .....30
Dane techniczne .................................................30
Zastosowanie zgodne z przeznaczeniem .......30
Zastosowane symbole ........................................30
Wskazówki bezpieczeństwa .............................30
Komunikaty ostrzegawcze odnośnie
baterii/akumulatora! .................................32
Wkładanie baterii do pilota do
zdalnego sterowania (rys. D) ............................33
Ładowanie akumulatora (rys. F) ........................33
Wyjmowanie akumulatora .................................33
Odpowiednie otoczenie do latania .................33
Przygotowanie do lotu .......................................33
Rozpoczynanie lotu i sterowanie
quadrocopterem .................................................34
Rozpoczęcie lotu .......................................34
Ustawianie prędkości ................................34
Sterowanie quadrocopterem ....................34
Obrót o 360° (rys. L) ................................34
Kalibracja (rys. M) .....................................34
Czyszczenie, naprawa i przechowywanie ......35
Wymiana łopatek wirnika .........................35
Wskazówki dotyczące utylizacji ......................35
3 lata gwarancji .................................................35
Możliwe usterki ...................................................37

9
TURINYS/INHALTSVERZEICHNIS
Komplekto sudėtis (A pav.) ................................38
Kvadrokopteris (B pav.) .............................38
Nuotolinio valdymo pultas (C pav.) .........38
Techniniai duomenys ..........................................38
Tinkamas naudojimas .........................................38
Vartojami simboliai .............................................38
Saugos nuorodos ................................................38
Įspėjimai dėl baterijų /akumuliatoriaus! . . 40
Baterijų įdėjimas į nuotolinio
valdymo pultą (D pav.) ......................................40
Akumuliatoriaus įkrovimas (F pav.) ................... 41
Akumuliatoriaus išėmimas ..................................41
Tinkama skraidymo aplinka ...............................41
Pasiruošimas skrydžiui ........................................41
Skrydžio pradžia ir
kvadrokopterio valdymas .................................. 41
Skrydžio pradžia ....................................... 41
Greičio reguliavimas .................................42
Kvadrokopterio valdymas .........................42
Apsivertimas 360 ° (L pav.) .....................42
Kalibravimas (M pav.) ...............................42
Valymas, remontas ir laikymas ..........................42
Orsraigčių keitimas ....................................42
Pastabos dėl atliekų tvarkymo ...........................43
3 metų garantija .................................................43
Galimos triktys ....................................................44
Lieferumfang (Abb. A) ........................................45
Quadrocopter (Abb. B) .............................45
Fernsteuerung (Abb. C) .............................45
Technische Daten ...............................................45
Bestimmungsgemäße Verwendung ..................45
Verwendete Symbole .........................................45
Sicherheitshinweise ............................................45
Warnhinweise Batterie/Akku! .................47
Batterie in die Fernsteuerung
einsetzen (Abb. D) ..............................................48
Akku laden (Abb. F) ...........................................48
Akku entfernen ....................................................48
Geeignete Flugumgebung .................................48
Flugvorbereitung .................................................48
Flug starten und Quadrocopter steuern ...........48
Flug starten .................................................48
Geschwindigkeit einstellen ........................49
Quadrocopter steuern ........................................49
360°-Überschlag (Abb. L) ........................49
Kalibrierung (Abb. M) ...............................49
Reinigung, Reparatur und Lagerung ................49
Rotorblätter austauschen ...........................49
Hinweise zur Entsorgung ..................................50
3 Jahre Garantie ...............................................50
Mögliche Fehler ..................................................51

10
Technical data
Energy supply battery:
LR03 1.5V AAA batteries
Energy supply storage battery:
3.7V lithium-polymer 250mAh
Range: approx. 30m
Flying time: approx. 6 - 8min
= protection class II
Correct use
This article is designed as a toy for children from
8 years of age and only for use in the private,
domestic settings (house and garden).
Symbols used
The toy may only be connected to devices
of protection class II that carry this symbol.
Safety notes
• Attention! Not suitable for children under the
age of 8.
• Before initial use: read the user information
together with your child.
• Attention! The packaging/mounting material
is not a constituent part of the toy and must be
removed for safety reasons before the article is
given to children for them to play with.
• Note for adult supervisors: check that the
quadrocopter is assembled in accordance with
the instructions for use. The assembly must be
undertaken under adult supervision.
• Flying the quadrocopter requires skill and
the user must be instructed under the direct
supervision of an adult.
• If you do not have adequate knowledge about
handling remote-controlled quadrocopters,
please consult with an experienced model
aircraft operator or a model-building club.
• Caution! There is a risk of eye injuries. Do not
use the article close to your face in order to
avoid injury to your eyes.
Congratulations!
With your purchase you have decided on a high-
quality product. Get to know the product before
you start to use it.
Carefully read the following operating
instructions.
Use the product only as described and only
for the given areas of application. Keep these
instructions safe. When passing the product
on to a third party, always make sure that the
documentation is included.
Scope of delivery (figure A)
1 x Quadrocopter (1)
1 x Remote control (2)
3 x AAA batteries (3)
1 x USB charger cable (4)
1 x Tool (5)
12 x Replacement rotor blades (6)
1 x Philips screwdriver (7)
1 x Instructions for use
Quadrocopter (figure B)
• Rotor blade (1a)
• Rotor guard (1b)
• Control lamps (1c)
• Storage battery plug connector (1d)
• Quadrocopter plug connector (1e)
• Quadrocopter feet (1f)
• Storage battery (1g)
Remote control (figure C)
• Throttle (control for upwards/downwards/
right/left) (2a)
• On and off switch (2b)
• Speed selection switch (2c)
• Joystick (forwards/backwards/to the left side/
to the right side) (2d)
• Control lamp (2e)
GB

11
• Please test the functional safety of your
quadrocopter and the remote control before
each use. Inspect both for visible damage,
such as defective plug connectors or damaged
cables. All the moving parts on the article must
function smoothly but may not have too great
an allowance in the bearings.
• Check that the rotors are fixed correctly and
securely in place before each use.
• Do not operate the quadrocopter if it is
damaged.
• Do not undertake any conversions or
modifications on the quadrocopter.
• Arrange for any damaged cables or connectors
to be exchanged by authorised specialist
personnel or the customer service department.
• Always switch the remote control on first.
Please ensure that the throttle is set to the
lowest position (motors off) when you switch the
remote control on! Only then may the storage
battery on the model be connected. Otherwise
the article may display unforeseeable reactions
and the rotors could start unintentionally!
• When the rotors are moving, please ensure that
neither objects nor body parts are within the
turning or intake area of the rotors. Keep hands,
face, hair, and loose clothing away from the
rotors. Do not touch moving parts.
• Always disconnect the storage battery from the
quadrocopter while carrying out maintenance
and cleaning work.
• Do not take any risks while operating the
quadrocopter! Your own safety and that of
your surroundings depend on your responsible
handling of the quadrocopter.
• Caution! Do not start and fly the article if there
are people, animals, or other obstacles in the
area where the quadrocopter is flying.
• The area in which the quadrocopter is used
must be large enough for safe use.
• Select a suitable location (open area) to
operate the quadrocopter. Do not fly in areas
with free-hanging cables, e.g. power lines.
Keep your distance from buildings, masts, wind
turbines, chimneys etc.
• Do not fly the quadrocopter in areas where the
temperature can change rapidly, e.g. over a fire
or bodies of water.
• Do not fly the quadrocopter if your
responsiveness is impaired. Tiredness, alcohol,
and medications can cause you to make
mistakes.
• Never fly the quadrocopter directly towards
spectators or towards yourself.
• The motor, electronics, and storage battery can
heat up during operation of the quadrocopter.
You should therefore take a break for 5-10
minutes before charging the storage battery
again or starting the article again with any
replacement storage battery.
• Incorrect operation can cause serious damage
to persons and property! You must therefore
ensure a sufficiently safe distance from people,
animals, and objects during flights.
• Always leave the remote control on while the
quadrocopter is in operation. Only disconnect
the storage battery plug connector from the
quadrocopter plug connector after landing.
Only then should you switch the remote control
off.
• In the event of a defect or malfunction the cause
of the fault must be resolved before starting the
quadrocopter again.
• Do not subject the quadrocopter or the remote
control to direct sunlight or high heat over long
periods of time.
• The electronic gyro sensors could be damaged
or misaligned in the event of a serious crash
(for example from a great height). You must
therefore always check full functionality before
the next flight!
• Reduce the throttle to zero immediately
following a crash. Turning rotors could be
damaged if they come into contact with
obstacles or the ground. They must be inspected
for any cracks or breakage before flying again!
• Pay attention to the light signals on the
undervoltage indicator in order to prevent
damage to the quadrocopter from a crash
caused by low undervoltage.
• Model aircraft and helicopters flown outdoors
require insurance in some countries. Please ask
a private liability insurer and ensure that your
quadrocopter is included in this insurance.
GB

12
Warning notes for the
batteries/storage battery!
• Only use batteries from the same manufacturer
and of the same type.
• Remove the batteries if they are empty or if you
are not going to use the article for a prolonged
period.
• New and used batteries may not be used
together.
• Warning! Batteries may not be charged or
reactivated by other methods, may not be taken
apart, thrown in the fire, or short-circuited.
• Always keep the batteries out of reach of
children.
• Non-rechargeable batteries may not be
charged.
• Rechargeable batteries may only be charged
under adult supervision.
• Rechargeable batteries must be removed from
the article before they are charged.
• Do not short-circuit the terminals. Danger!
• Handle damaged or leaking batteries with
great care and dispose of them immediately in
accordance with regulations. Wear gloves.
• If you come into contact with battery acid then
wash the relevant area with soap and water. If
battery acid gets in your eyes then rinse with
water and seek medical treatment immediately!
• Cleaning and user maintenance may not be
carried out by children without supervision.
• Batteries must not be swallowed!
• Never charge the storage battery immediately
after use. Always allow the storage battery to
cool down first (at least 5-10 minutes).
• It is not possible to charge the storage battery
using standard chargers because of the special
storage battery plug connector.
• Only use the supplied USB charger cable to
charge the storage battery.
• The storage battery must be disconnected
from the electronics on the quadrocopter after
the flight. Do not leave the storage battery
plugged into the electronics while it is not in use
(e.g. during transport or storage). Otherwise
the storage battery can become completely
discharged, which will destroy it and render
it unusable! There is also a risk of malfunction
from electrical pulses. The rotors may start
unintentionally and cause damage or injuries.
• Only charge intact and undamaged storage
batteries. If the outer insulation on the storage
battery becomes damaged, or the storage
battery is deformed or swollen, it must never be
charged. In this case there is an acute risk of
fire or explosion!
• Never damage the outer case of the storage
battery. Do not cut through the foil cover. Do
not puncture the storage battery with sharp
objects. There is a risk of fire or explosion!
• Sufficient ventilation must be ensured as both
the USB charger cable and the storage battery
heat up during charging. Never cover the USB
charger cable or the storage battery!
• Never charge storage batteries unattended.
• Disconnect the storage battery from the USB
charger cable when it is completely charged.
• The USB charger cable may only be operated
in dry, closed, indoor spaces. The USB charger
cable and the storage battery may not become
damp or wet.
Inserting the batteries into the
remote control (figure D)
CAUTION! Pay attention to the following
instructions in order to avoid mechanical
and electrical damage.
Insert the included batteries (3) into the battery
compartment (2g) of the remote control (2).
Inserting the batteries
1. Release the screw on the battery compartment
(2g) on the underside of the remote control
using a Philips screwdriver and remove the
cover (2f).
2. Carefully insert the batteries into the battery
compartment. The batteries must be entirely
inside the battery compartment.
Note: Pay attention to the positive and negative
poles on the batteries and make sure you insert
them correctly.
3. Screw the cover on the underside tightly back
in place.
GB

13
Changing the batteries
CAUTION! Pay attention to the following
instructions in order to avoid mechanical
and electrical damage.
Change the batteries as described in “Inserting
the batteries” if the batteries stop working.
Remove the batteries from the article before
inserting the new batteries.
Charging the storage battery
(figure F)
1. Connect the end of the cable (4a) on the USB
charger cable (4) to the storage battery plug
connector (1e) on the quadrocopter (1).
2. Insert the other end of the cable (4b) on
the USB charger cable to a USB port on a
computer that is switched on or to a charger
station with a USB port.
3. The charge control lamp at the end of the cable
(4b) will switch off.
Note: The charging time is 40 minutes. The
charge control lamp will switch on as soon as the
storage battery is charged.
Removing the storage battery
Pull on the storage battery plug connector (1d) in
order to remove the storage battery (1g) from the
quadrocopter (1).
Suitable flying surroundings
Surroundings for an optimal flight should fulfil the
following criteria:
• Windless, enclosed area.
• People must maintain a safety distance of 1-2m
from the quadrocopter at the start.
• There must not be any devices in the vicinity
such as air-conditioners, fans, etc. that could
create airflow.
• The room should have no obstacles (e.g. no
lamps etc.)
• A minimum room size of approx. 10 x 6 x 3m
(L x W x H) is required.
• There should be 10m of space on all sides to
perform aerobatics such as loop the loops.
Flight preparation
Pay attention to the following before beginning to
fly the quadrocopter:
1. To start always place the quadrocopter (1) on
a level surface.
2. Always move the throttle (2a) and the joystick
slowly, carefully, and gently.
3. Always watch the quadrocopter during the
flight!
Starting to fly and steering the
quadrocopter
Here are a few tips on steering the quadrocopter
before you start to fly:
• Move the throttle (2a) downwards slightly as
soon as the quadrocopter (1) lifts off.
• Move the throttle (2a) upwards slightly if the
quadrocopter (1) dips.
• Tap the joystick (2d) very gently in the desired
direction in order to fly in a curve.
Starting to fly
1. Set the on and off switch (2b) on the remote
control (2) to ON. The control lamp (2e) will
flash.
2. Set the throttle (2a) to the back.
3. Connect the storage battery plug connector
(1d) to the quadrocopter plug connector (1e).
The control lamps (1c) on the quadrocopter (1)
will light up and a signal tone will sound from
the remote control (2).
4. Push the throttle (2a) all the way forward and
then all the way backward.
5. A signal tone will sound from the remote
control (2). The control lamps (1c) on the
quadrocopter’s (1) will light constantly. The
quadrocopter is now ready to fly.
Setting the speed
You can set two flight speeds on the remote
control (2).
Position -
For the first attempts and with little flying
experience.
Position +
For experienced pilots. Set the speed selection
switch (2c) to the desired position.
GB

14
Steering the quadrocopter
You have different steering options:
• Upwards/downwards
Move the throttle (2a) upwards/downwards
(figure H).
• Sideways (left/right)
Move the joystick (2d) to the left/to the right
(figure I)
• Forwards/backwards
Move the joystick (2d) forwards/backwards
(figure J).
• Turning (left/right)
Move the throttle (2a) to the left/to the right
(figure K).
360° rollover (figure L)
1. Steer the quadrocopter (1) to a height of
approx. 2-3m.
2. Keep it hovering and push the joystick (2d)
downwards. A signal tone will sound.
3. Move the joystick (2d) in a flying direction. The
quadrocopter will perform a 360° rollover in
the selected direction.
Note: You need sufficient room height for a
360° rollover.
Calibration (figure M)
It is possible that the quadrocopter may fly in an
uncontrolled manner and needs to be calibrated.
Proceed as follows:
1. Place the quadrocopter (1) on a level,
horizontal surface.
2. Simultaneously push the throttle (2a)
downwards and to the left and the joystick (2d)
downwards and to the right. The control lamps
(1c) on the quadrocopter will flash for approx.
3 seconds. As soon as the control lamps light
constantly the calibration is complete and the
quadrocopter is ready to fly.
Note: Repeat the calibration if the quadrocopter
still flies in one direction in an uncontrolled
manner.
Cleaning, repair, and storage
The quadrocopter must always be kept dry and
must be freed of any soiling such as wool threads,
hairs, dust, etc. after every flight.
Use a dry cloth to clean the article and avoid
contact of the electronics, storage battery, and
motors with water.
Store the quadrocopter in a dry and dust-free
place out of direct sunlight. Disconnect the
storage battery plug connector (1d) from the
quadrocopter plug connector (1e) and the
charger cable (4). Remove the batteries (3) from
the remote control.
Replace the rotor blades
Replace the rotor blades (1a) as soon as they are
damaged.
Note: If the rotor blades are damaged there
is a risk that sections of material will separate
during use and lead to damage or risks to
the surroundings. There are two different rotor
blades distinguished by markings A and B on the
underside. The markings must correspond to the
markings on the quadrocopter (figure E).
Proceed as follows to change the rotor blades
(1a):
1. Place the tool (5) under the rotor blade (1a)
that you wish to replace and lever it off the
quadrocopter (1).
2. Place the new rotor blade (6) at the position
where the damage rotor blade (1a) was
previously.
Note: Please ensure that the new rotor blade (6)
is approximately 0.5mm away from the motor
casing on the quadrocopter.
Attention! Always place a rotor blade
marked A on the rotor arms marked A.
Place rotor blades marked B on rotor
arms marked B.
Notes on disposal
Dispose of the article and the
packaging materials in accordance
with corresponding, local regulations.
Packaging materials such as foil bags
must be kept away from children. Keep
the packaging material out of the reach
of children.
Devices that are marked with this symbol
should not be disposed of as domestic
waste. You are obliged to dispose of these
GB

15
kinds of used electrical and electronic devices
separately. Please ask your local authority about
options for proper disposal. Remove the battery
from the article prior to disposal.
Battery disposal measures
Please note: Batteries are hazardous
waste and may not, by law, be disposed of
with domestic waste. You can deposit used
batteries at communal collection points or with
your retailer free of charge. Special collection
containers are available there.
3-year warranty
The product was produced with great care and
under constant supervision. You receive a three-
year warranty for this product from the date of
purchase. Please retain your receipt.
The warranty applies only to material and
workmanship and does not apply to misuse
or improper handling. Your statutory rights,
especially the warranty rights, are not affected by
this warranty.
With regard to complaints, please contact the
following service hotline or contact us by e-mail.
Our service employees will advise as to the
subsequent procedure as quickly as possible. We
will be personally available to discuss the situation
with you.
Any repairs under the warranty, statutory
guarantees or through goodwill do not extend
the warranty period. This also applies to replaced
and repaired parts.
Repairs after the warranty are subject to a charge.
IAN: 283163
Service Great Britain
Tel.: 5000 720 (£ 0.10/Min.)
E-Mail: deltaspor[email protected]
You can also find spare parts for your product at:
www.delta-sport.com, category Service - Lidl Spare Parts Service
GB

16 GB
Possible errors
The following is a list of possible errors, their causes and their resolution.
Error Possible cause Resolution
Remote control (2) does not
react.
Remote control (2) is switched
off.
Switch remote control (2) on.
Batteries (3) are inserted
incorrectly.
Insert batteries (3) correctly.
Batteries (3) are empty. Replace batteries (3).
Quadrocopter (1) does not
react.
Batteries (3) in the remote
control (2) are inserted
incorrectly or are empty.
Check batteries (3) and replace
if necessary.
Storage battery (1g) in the
quadrocopter (1) is empty.
Charge storage battery (1g).
Control lamps (1c) are not
flashing or lit.
Connect storage battery
plug connection (1d) with
quadrocopter plug connection
(1e).
Quadrocopter (1) out of range. Ensure that the distance
between the remote control (2)
and the quadrocopter (1) is no
more than 30m.
Quadrocopter (1) cannot be
controlled.
Wind too strong or breeze. The quadrocopter (1) is only
suitable for use in a wind-still
environment without a breeze.
Quadrocopter (1) does not fly
upwards.
Insufficient gas. Push the throttle (2a) all the way
forwards.
Storage battery (1g) is empty. Charge the storage battery
(1g).

17
Määräystenmukainen käyttö
Tämä tuote on 8-vuotiaille ja sitä vanhemmille
lapsille tarkoitettu leikkikalu. Se on tarkoitettu vain
yksityiseen kotikäyttöön (sisällä ja ulkona).
Käytetyt symbolit
Leikkikalun saa liittää vain suojausluokan
II laitteisiin, joihin on merkitty oheinen
symboli.
Turvallisuusohjeet
• Varoitus! Ei sovellu alle 8-vuotiaille lapsille.
• Ennen ensimmäistä käyttökertaa: lue
käyttöohjeet lapsen kanssa.
• Varoitus! Mitkään pakkaus-/kiinnitysmateriaalit
eivät kuulu leikkikaluun, ja ne on
turvallisuussyistä poistettava, ennen kuin tuote
annetaan lapsille leikkimistä varten.
• Ohjeita tuotteen käyttöä valvovalle aikuiselle:
Tarkista, että quadrokopteri on koottu
käyttöohjeen mukaisesti. Tuote on koottava
aikuisen valvonnassa.
• Quadrokopterin lennättäminen vaatii taitoa.
Lennättämisen on tapahduttava aikuisen
opastuksella aikuisen valvonnassa.
• Mikäli sinulla ei vielä ole riittävästi kokemusta
kauko-ohjattavien quadrokopterien käsittelystä,
käänny kokeneen pienoismalliharrastajan
puoleen.
• Varo! Silmävammojen vaara. Jotta
silmävammoilta vältytään, älä käytä tuotetta
kasvojen lähellä.
• Tarkista aina ennen käyttöä quadrokopterin ja
kauko-ohjaimen turvallinen toiminta. Kiinnitä
huomiota näkyviin vaurioihin, kuten esim.
viallisiin pistoliittimiin tai johdon vaurioihin.
Tuotteen kaikkien liikkuvien osien tulee toimia
vaivattomasti, mutta laakereissa ei saa olla
välystä.
• Tarkista roottorien asianmukainen ja tukeva
kiinnitys aina ennen käyttöä.
• Älä ota vaurioitunutta quadrokopteria käyttöön.
• Älä tee quadrokopteriin muutoksia tai lisäyksiä.
• Jos johdot tai liitännät ovat vaurioituneet,
anna valtuutetun ammattihenkilöstön tai
asiakaspalvelun vaihtaa ne.
Onnittelumme!
Olet hankkinut itsellesi korkealaatuisen tuotteen.
Tutustu tuotteeseen ennen ensimmäistä käyttöä.
Lue käyttöohje huolellisesti läpi. Käytä tuotetta
vain ohjeissa kuvatulla tavalla ja mainitussa
tarkoituksessa. Säilytä käyttöohje
myöhempää tarvetta varten.
Jos annat tuotteen eteenpäin, liitä käyttöohje
tuotteen mukaan.
Toimituksen sisältö (kuva A)
1 quadrokopteri (1)
1 kauko-ohjain (2)
3 paristoa (tyyppi AAA) (3)
1 USB-latausjohto (4)
1 työkalu (5)
12 roottorin varalapaa (6)
1 ristipäinen ruuvimeisseli (7)
1 käyttöohje
Quadrokopteri (kuva B)
• roottorin lapa (1a)
• roottorin suojus (1b)
• merkkivalot (1c)
• akun pistoliitin (1d)
• quadrokopterin pistoliitin (1e)
• quadrokopterin jalat (1f)
• akku (1g)
Kauko-ohjain (kuva C)
• kaasuvipu (ohjaus ylös/alas/oikealle/
vasemmalle) (2a)
• virtakytkin (2b)
• nopeuden valintakytkin (2c)
• ohjausvipu (eteen/taakse/vasemmalle/
oikealle) (2d)
• merkkivalo (2e)
Tekniset tiedot
Virransyöttö, paristo:
1,5 V AAA-paristo, LR03
Virransyöttö, akku:
3,7 V litiumpolymeeri 250 mAh
Kantama: noin 30 m
Lentoaika: noin 6–8 min
= suojausluokka II
FI

18
• Kytke aina ensin kauko-ohjaimen virta. Varmista,
että kauko-ohjaimen virtaa kytkettäessä
kaasuvipu on asetettu alimpaan asentoon
(moottorit pois toiminnasta)! Vasta sen jälkeen
mallin akun saa liittää. Muussa tapauksessa
seurauksena voivat olla tuotteen ennalta
arvaamattomat liikkeet ja roottorit voivat
käynnistyä tahattomasti!
• Huolehdi roottorien käydessä, että niiden
pyörimis- ja imualueella ei ole esineitä eikä
kehonosia. Pidä kädet, kasvot, hiukset ja löysät
vaatteet etäällä roottoreista. Älä kosketa
liikkuvia osia.
• Irrota akku quadrokopterista aina, kun teet
huolto- tai puhdistustöitä.
• Älä ota riskejä quadrokopterin käytön
yhteydessä! Oma ja ympäristösi turvallisuus
riippuu siitä, miten vastuuntuntoisesti käsittelet
quadrokopteria.
• Varo! Älä käynnistä tai lennätä quadrokopteria,
jos sen lentoalueella on ihmisiä, eläimiä tai
esteitä.
• Jotta käytön turvallisuus voidaan taata, tilan,
jossa quadrokopteria käytetään, on oltava
riittävän suuri.
• Valitse quadrokopterin käyttöön sopiva paikka
(avoin tila). Älä lennätä alueella, jossa on
ilmajohtoja, kuten esim. korkeajännitejohtoja.
Säilytä etäisyys rakennuksiin, mastoihin,
tuulivoimaloihin, savupiippuihin, jne.
• Älä lennätä quadrokopteria alueella, jossa
lämpötila voi vaihdella nopeasti, esim. tulen tai
vesipintojen yläpuolella.
• Lennätä quadrokopteria vain, kun reaktiokykysi
ei ole rajoittunut. Väsymys sekä alkoholin
tai lääkkeiden vaikutus voivat aiheuttaa
virhereaktioita.
• Älä koskaan lennätä quadrokopteria muita tai
itseäsi kohti.
• Sekä moottori, elektroniikka että akku voivat
lämmetä quadrokopterin käytön aikana. Odota
siksi 5–10 minuuttia, ennen kuin lataat akun
uudelleen tai käynnistät tuotteen uudelleen
mahdollisella vara-akulla.
• Epäasianmukainen käyttö voi aiheuttaa vakavia
henkilö- tai esinevahinkoja! Huolehdi siis
lennättäessä riittävästä turvaetäisyydestä
ihmisiin, eläimiin ja esineisiin.
• Pidä kauko-ohjaimen virta kytkettynä aina kun
käytät quadrokopteria. Irrota laskeutumisen
jälkeen aina ensin akun pistoliittimen ja
quadrokopterin pistoliittimen välinen liitäntä.
Katkaise vasta tämän jälkeen kauko-ohjaimen
virta.
• Jos quadrokopterissa ilmenee vika tai
toimintahäiriö, korjaa sen syy ennen kuin
käynnistät quadrokopterin uudelleen.
• Älä altista quadrokopteria ja kauko-ohjainta
pidemmäksi ajaksi suoralle auringonvalolle tai
korkeille lämpötiloille.
• Kovaa maahan pudotessa (esimerkiksi
korkealta) elektroniset gyro-anturit voivat
vaurioitua tai säätyä väärin.
Tarkista siis ehdottomasti täysi toimintakunto
ennen uudelleenlennättämistä!
• Tuotteen pudottua maahan kaasuvipu on
välittömästi käännettävä nolla-asentoon.
Pyörivät roottorit voivat vaurioitua esteisiin
osuessaan tai iskeytyessään. Tarkista ennen
uudelleenlennättämistä, onko roottoreissa
havaittavissa repeytymiä tai murtumia!
• Jotta vältytään vaurioilta, jotka syntyvät
quadrokopterin pudotessa alijännitteestä
tai akun purkautumisesta johtuen, tarkkaile
ehdottomasti alijännitteen osoittavia
merkkivaloja.
• Joissain maissa ulkona lennätettävät
pienoismallilentokoneet ja -helikopterit
on vakuutettava. Varmista omasta
vakuutusyhtiöstäsi, kuuluuko quadrokopteri
vakuutustesi piiriin.
Paristoja/akkua koskevat
varoitukset!
• Käytä vain saman valmistajan samantyyppisiä
paristoja.
• Poista paristot, jos ne ovat tyhjät tai tuotetta ei
käytetä pidempään aikaan.
• Älä käytä samanaikaisesti uusia ja käytettyjä
paristoja.
• Varoitus! Paristoja ei saa ladata eikä aktivoida
uudelleen muulla tavoin, purkaa, heittää tuleen
tai oikosulkea.
• Säilytä paristoja aina lasten ulottumattomissa.
• Paristoja, joita ei ole tarkoitettu uudelleen
ladattaviksi, ei saa ladata.
FI

19
• Ladattavia paristoja saa ladata vain aikuisen
valvonnassa.
• Ladattavat paristot on poistettava tuotteesta,
ennen kuin ne ladataan.
• Liitinnastoja ei saa oikosulkea. Vaara!
• Käsittele vahingoittunutta tai vuotanutta paristoa
äärimmäisen varovasti ja hävitä se välittömästi
asiaankuuluvalla tavalla. Käytä tällöin käsineitä.
• Jos paristohappoa joutuu päällesi, pese
kyseiset kohdat vedellä ja saippualla. Jos
paristohappoa joutuu silmiin, huuhdo silmät
vedellä ja hakeudu välittömästi lääkärin
hoitoon!
• Lapset eivät saa puhdistaa laitetta eivätkä tehdä
käyttäjälle kuuluvaa huoltoa ilman valvontaa.
• Paristoja ei saa niellä!
• Älä koskaan lataa akkua heti käytön jälkeen.
Anna akun aina ensin jäähtyä (vähintään 5–10
minuuttia).
• Koska tuotteessa on erityinen akun pistoliitin,
akkua ei voi ladata tavallisilla latureilla.
• Käytä akun lataamiseen ainoastaan mukana
toimitettua USB-latausjohtoa.
• Irrota akku lennättämisen jälkeen
quadrokopterin elektroniikasta. Älä pidä
akkua elektroniikkaan liitettynä, kun et käytä
tuotetta (esim. kuljetus tai varastointi). Muuten
akku voi syväpurkautua. Seurauksena on akun
tuhoutuminen käyttökelvottomaksi! Lisäksi
vaarana ovat häiriöimpulsseista aiheutuvat
virhetoiminnot. Roottorin voivat käynnistyä
tahattomasti ja aiheuttaa vaurioita tai vammoja.
• Lataa vain ehjiä ja toimintakuntoisia akkuja.
Mikäli akun ulkoeristys on vaurioitunut tai akku
on muuttanut muotoaan tai paisunut, akkua ei
missään tapauksessa saa ladata. Tällöin on
olemassa välitön palo- ja räjähdysvaara! •
Älä koskaan vaurioita akun ulkokuorta. Älä
leikkaa kalvoa. Älä iske akkua terävillä
esineillä. Palo- ja räjähdysvaara!
• Koska sekä USB-latausjohto että akku
lämpenevät latauksen aikana, riittävästä
ilmanvaihdosta on huolehdittava. Älä koskaan
peitä USB-latausjohtoa tai akkua!
• Älä koskaan lataa akkuja ilman valvontaa.
• Irrota akku USB-latausjohdosta, kun se on
ladattu täyteen.
• USB-latausjohtoa saa käyttää vain kuivissa ja
suljetuissa sisätiloissa. USB-latausjohto ja akku
eivät saa kostua tai kastua.
Paristojen asettaminen kauko-
ohjaimeen (kuva D)
VAROITUS! Vältä mekaaniset tai sähköön
liittyvät vauriot noudattamalla seuraavia
ohjeita.
Aseta mukana toimitetut paristot (3) kauko-
ohjaimen (2) paristolokeroon (2g).
Paristojen asettaminen paikoilleen
1. Avaa kauko-ohjaimen (2) taustapuolella
olevan paristolokeron (2g) ruuvi ristipäisellä
ruuvimeisselillä (7) ja irrota kansi (2f).
2. Aseta paristot varovasti paristolokeroon.
Paristojen on oltava kokonaan
paristonpidikkeessä.
Ohje: varmista, että paristojen plus-/miinusnavat
tulevat oikein päin ja että paristot ovat oikein
paikoillaan.
3. Kiinnitä kansi takaisin taustapuoleen ruuvilla.
Paristojen vaihtaminen
VAROITUS! Vältä mekaaniset tai sähköön
liittyvät vauriot noudattamalla seuraavia
ohjeita.
Jos paristot eivät enää toimi, vaihda ne paristojen
asettamista käsittelevän kohdan ohjeiden
mukaisesti. Poista tuotteesta vanhat paristot ennen
uusien paristojen asettamista.
Akun lataaminen (kuva F)
1. Liitä USB-latausjohdon (4) johtopää (4a)
quadrokopterin (1) akun pistoliittimeen (1e).
2. Työnnä USB-latausjohdon toinen pää (4b)
käynnistetyn tietokoneen USB-porttiin tai
latausaseman USB-porttiin.
3. Johdon päässä (4b) oleva latauksen merkkivalo
sammuu.
Ohje: Latausaika on noin 40 minuuttia. Latauksen
merkkivalo syttyy heti, kun akku on ladattu.
FI

20
Akun irrottaminen
Irrota akku (1g) quadrokopterista (1) vetämällä
akun pistoliittimestä (1d).
Lennätykseen sopiva ympäristö
Lennätykseen käytettävän ympäristön tulee
täyttää seuraavat edellytykset, jotta lennättäminen
onnistuu mahdollisimman hyvin:
• tuuleton, suljettu tila
• käynnistettävään quadrokopteriin on
säilytettävä 1–2 metrin turvaetäisyys
• läheisyydessä ei ilmavirtausta aiheuttavia
laitteita, kuten esim. ilmastointilaitteita,
tuulettimia, jne.
• esteetön tila (esim. ei lamppuja)
• tilaa tulee olla käytettävissä vähintään noin
10 x 6 x 3 m (P x L x K)
• taitolentoa, kuten silmukoita varten tilaa tulee
olla joka suuntaan noin 10 m.
Lennättämisen valmisteleminen
Ota seuraavat seikat huomioon ennen kuin aloitat
quadrokopterin lennättämisen:
1. Aseta quadrokopteri (1) käynnistämistä varten
aina tasaiselle alustalle.
2. Liikuta kaasuvipua (2a) ja ohjausvipua (2d)
aina hitaasti ja varovasti.
3. Pidä katseesi kohdistettuna quadrokopteriin
koko lennättämisen ajan!
Lennättämisen aloittaminen ja
quadrokopterin ohjaaminen
Ennen kuin aloitat lennättämisen, lue seuraavat
vinkit quadrokopterin ohjaukseen liittyen:
• Liikuta kaasuvipua (2a) hieman alaspäin heti,
kun quadrokopteri (1) irtoaa maasta.
• Liikuta kaasuvipua (2a) hieman ylöspäin, kun
quadrokopteri (1) laskeutuu.
• Kaarra napauttamalla ohjausvipua (2d) aivan
kevyesti haluamaasi suuntaan.
Lennättämisen aloittaminen
1. Aseta kauko-ohjaimen (2) virtakytkin (2b)
asentoon ON. Merkkivalo (2e) vilkkuu.
2. Aseta kaasuvipu (2a) taakse.
3. Liitä akun pistoliitin (1d) quadrokopterin
pistoliittimeen (1e). Quadrokopterin (1)
merkkivalot (1c) syttyvät ja kauko-ohjaimesta
(2) kuuluu äänimerkki.
4. Siirrä kaasuvipu (2a) aivan eteen ja sen jälkeen
aivan taakse.
5. Kauko-ohjaimesta (2) kuuluu äänimerkki.
Quadrokopterin (1) merkkivalot (1c) palavat
jatkuvasti. Quadrokopteri on nyt lentovalmis.
Nopeuden säätäminen
Voit säätää kauko-ohjaimesta (2) kaksi eri
lentonopeutta.
Asento -
Ensimmäisiä lentokertoja varten ja kun kokemusta
on vielä vähän.
Asento +
Kokeneille lennättäjille.
Aseta nopeuden valintakytkin (2c) haluamaasi
asentoon.
Quadrokopterin ohjaaminen
Voit ohjata quadrokopteria eri suuntiin:
• Ylös/alas
Liikuta kaasuvipua (2a) ylös/alas (kuva H).
• Sivuttain (vasemmalle/oikealle)
Liikuta ohjausvipua (2d) vasemmalle/oikealle
(kuva I).
• Eteenpäin/taaksepäin
Liikuta ohjausvipua (2d) eteenpäin/taaksepäin
(kuva J).
• Käännös (vasemmalle/oikealle)
Liikuta kaasuvipua (2a) vasemmalle/oikealle
(kuva K).
360° silmukka (kuva L)
1. Ohjaa quadrokopteri (1) noin 2–3 metrin
korkeuteen.
2. Pidä se liitolennossa ja paina ohjausvipu (2d)
alas. Kuuluu äänimerkki.
3. Liikuta ohjausvipua (2d) lentosuuntaan.
Quadrokopteri tekee 360° silmukan
valitsemaasi suuntaan.
Ohje: 360° silmukan lentäminen edellyttää, että
tilan korkeus on riittävä.
FI

21
Kalibrointi (kuva M)
Quadrokopteri saattaa alkaa lentää hallitse-
mattomasti, jolloin se on kalibroitava. Toimi tällöin
seuraavasti:
1. Aseta quadrokopteri (1) vaakasuoralle ja
tasaiselle pinnalle.
2. Työnnä samanaikaisesti kaasuvipu (2a) alas
vasemmalle ja ohjausvipu (2d) alas oikealle.
Quadrokopterin merkkivalot (1c) vilkkuvat
noin 3 sekunnin ajan. Kun merkkivalot
palavat jatkuvasti, kalibrointi on päättynyt ja
quadrokopteri on lentovalmis.
Ohje: toista kalibrointi, jos quadrokopteri
edelleen lentää hallitsemattomasti yhteen
suuntaan.
Puhdistus, korjaus ja säilytys
Quadrokopteri on pidettävä aina kuivana, ja se
on puhdistettava jokaisen lennon jälkeen liasta,
kuten langoista, hiuksista ja pölystä.
Käytä puhdistamiseen kuivaa liinaa ja vältä veden
pääsemistä kosketuksiin elektroniikkaosien, akun
ja moottorien kanssa.
Säilytä quadrokopteria kuivassa ja pölyttömässä
tilassa suoralta auringonvalolta suojattuna. Irrota
akun pistoliitin (1d) quadrokopterin pistoliittimestä
(1e) ja latausjohdosta (4). Poista paristot (3)
kauko-ohjaimesta.
Roottorin lapojen vaihtaminen
Vaihda vaurioituneet roottorin lavat (1a).
Ohje: Jos roottorin lavat ovat vaurioituneet,
vaarana on materiaaliosien irtoaminen
käytön aikana ja sen seurauksena
ympäristön vaurioituminen tai vaarantuminen.
Quadrokopterissa on kahdenlaisia roottorin
lapoja. Ne tunnistaa roottorin lavan alapinnan
merkinnöistä A ja B. Merkintöjen on vastattava
quadrokopterin merkintöjä (kuva E).
Vaihda roottorin lapa (1a) seuraavasti:
1. Aseta työkalu (5) vaihdettavan roottorin lavan
(1a) alle ja kampea lapa irti quadrokopterista (1).
2. Aseta uusi roottorin lapa (6) kohtaan, johon
vaurioitunut lapa (1a) oli kiinnitetty.
Ohje: varmista, että uusi roottorin lapa (6)
asettuu noin 0,5 mm päähän quadrokopterin
moottorin kotelosta.
Varoitus! Aseta kirjaimella A merkityt
roottorin lavat aina kirjaimella A
merkittyihin lavan kiinnitysvarsiin. Aseta
kirjaimella B merkityt roottorin lavat
aina kirjaimella B merkittyihin lavan
kiinnitysvarsiin.
Hävittämistä koskevat ohjeet
Hävitä tuote ja pakkausmateriaalit
paikallisten määräysten mukaisesti.
Pakkausmateriaalit, kuten esim.
muovipussit, eivät kuulu lasten käsiin.
Säilytä pakkausmateriaalia lasten
ulottumattomissa.
Laitteita, joihin on merkitty oheinen symboli,
ei saa hävittää kotitalousjätteen mukana.
Olet velvollinen hävittämään tällaisen
sähkö- ja elektroniikkalaiteromun erikseen.
Lisätietoa säännellystä hävittämisestä saat omasta
kunnastasi. Poista paristot tuotteesta ennen
tuotteen hävittämistä.
Paristojen hävittäminen
Huomioitavaa: Paristot luetaan
vaaralliseksi jätteeksi, jota lain mukaan ei
saa hävittää kotitalousjätteen mukana. Voit
toimittaa käytetyt paristot maksutta keräyspisteisiin
tai vähittäiskauppaan. Niissä on paristoille varatut
keräysastiat.
3 vuoden takuu
Tämä tuote on valmistettu erityistä tarkkuutta
noudattaen ja jatkuvan tarkastuksen alaisena.
Tälle tuotteelle saat kolmen vuoden takuun
ostopäivästä lähtien. Säilytä kassakuitti
huolellisesti.
Takuu koskee ainoastaan materiaali- ja
valmistusvirheitä ja raukeaa, jos tuotetta käytetään
vääränlaisesti tai ei määräysten mukaisesti. Tämä
takuu ei rajoita laissa määrättyjä oikeuksiasi,
erikoisesti koskien takuu- ja reklamointioikeuksia.
Mahdollisissa reklamaatiotapauksissa ota
meihin yhteyttä soittamalla allaolevaan
asiakaspalvelunumeroon tai lähettämällä viesti
sähköpostitse. Asiakaspalvelijamme sopivat
kanssasi tarvittavista toimenpiteistä mitä
pikimmin. Palvelemme sinua joka tapauksessa
henkilökohtaisesti.
FI

22
Mahdolliset korjaukset, jotka on suoritettu
tämän takuun, laillisen reklamointioikeuden tai
harkintaoikeuden perusteella eivät pidennä
takuuaikaa. Tämä koskee myös vaihdettuja ja
korjattuja osia. Takuuajan päätyttyä suoritetut
korjaukset ovat maksullisia.
IAN: 283163
Huolto Suomi
Tel.: 010309 3582
E-Mail: deltasport@lidl.fi
Varaosia tuotteeseesi löydät myös osoitteesta:
www.delta-sport.com, välilehdestä Palvelu - Lidl varaosapalvelu
FI
Other manuals for 283163
1
Table of contents
Languages:
Other DELTA-SPORT Quadcopter manuals

DELTA-SPORT
DELTA-SPORT 283163 User manual

DELTA-SPORT
DELTA-SPORT QK-3045 User manual

DELTA-SPORT
DELTA-SPORT 322151 1901 User manual
DELTA-SPORT
DELTA-SPORT QC-3042 User manual
DELTA-SPORT
DELTA-SPORT 345898 2004 User manual

DELTA-SPORT
DELTA-SPORT 293841 User manual
DELTA-SPORT
DELTA-SPORT QK-3045 User manual

DELTA-SPORT
DELTA-SPORT 300162 User manual
DELTA-SPORT
DELTA-SPORT QC-3152 User manual
