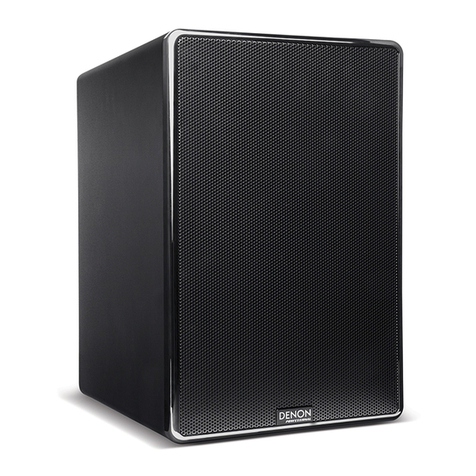
Denon SPK611 User manual

2 / 25
Contents
I. Preparation ............................................................................................................................................4
I-1. Send the product over to a service agent...........................................................................................4
I-2. Contents of the upgrade kit box........................................................................................................5
II. Upgrade procedure................................................................................................................................6
II-1. Remove the external parts...............................................................................................................6
II-2. Remove the HDMI PCB ....................................................................................................................7
II-3. Attach the HDMI 8K label and A label to the rear panel .....................................................................9
II-4. Install the HDMI 8K PCB of the upgrade kit .....................................................................................10
II-5. Tidy up the wires ..........................................................................................................................12
II-6. Update the firmware.....................................................................................................................14
II-7. Attach the external parts ...............................................................................................................15
II-8. Attach the label and door cushion..................................................................................................17
II-9. Pack the product...........................................................................................................................18
III. Upgrade information ..........................................................................................................................20
III-1. Information customers should know prior to the upgrade ..............................................................20

3 / 25
III-2. Basic information about the upgrade kit........................................................................................21
III-3. Specification changes after the upgrade ........................................................................................22
III-4. Specification changes of the FL display after the upgrade ...............................................................24
III-5. Other notes .................................................................................................................................25

4 / 25
I. Preparation
I-1. Send the product over to a service agent
Instruct your dealer to follow the packing procedure in this step (I-1) properly to protect the product and the
parts of the upgrade kit during shipment.
The dealer collects customer unit and ships it in the new box together with the Upgrade Kit Box to the service
agent.
1) In order to protect the door, place the door cushion assy on the inside of the door and secure the door
with two blue tapes which are peeled from the sheet attached.
2) Secure the upgrade kit box to the top front cushion with tape.
To protect the parts in the upgrade kit box, such as the PCB, fix the upgrade kit box to the cushion.
(Top view) (Bottom view)
Note: Match the figure on the right by aligning the side
marked in red with the side marked in blue.
3) Appearance of the packaged box
“TOP”, “FRONT” indication Two tape fixing.
DOOR CUSHION ASSY (Attached in the Upgrade Kit Box)
Blue tape
(Attached sheet)
Wrap the product with the supplied sheet and seal the
sheet with yellow sealing tape on the top and sides.

5 / 25
I-2. Contents of the upgrade kit box
1) For inside of product
HDMI 8K PCB (Upgraded PCB)
PCB BRACKET and SCREW
CORD HOLDER and SCREW
2) For REAR PANEL
HDMI 8K LABEL
“A” LABEL
3) For DOOR
CAUTION LABEL (DOOR)
DOOR CUSHION ASSY
4) ACCESSORIES
QUICK START GUIDE
HDMI 8K UPGRADE
INFORMATION
POP LABEL (A)
POP LABEL (B)

6 / 25
II. Upgrade procedure
II-1. Remove the external parts
1) Remove the top cover. (Note: The removed screws are reused in step II-7-4))
2) Remove the side covers (left and right). (Note: The removed screws are reused in step II-7-1), 2) and
3))
SIDE COVER (L) SIDE COVER (R)

7 / 25
II-2. Remove the HDMI PCB
1) Remove the HDMI connector fixing screw on the rear. (Note: The removed screws are reused in step
II-4-3))
2) Remove the two PCB fixing screws. (Note: The removed screws are reused in step II-4-4))
(Front view)
HDMI PCB
3) Remove all the connections to the HDMI PCB (connectors, HDMI cable, PCB connections, and antenna
cables).

8 / 25
4) Cut and remove the three clamp bands that are securing the HDMI cable.
(Top view) (Side view)
5) Remove the HDMI PCB.

9 / 25
II-3. Attach the HDMI 8K label and A label to the rear panel
HDMI 8K LABEL
“A” LABEL
Note:
・Before attaching the HDMI 8K label, remove the stickers on the HDMI 8K label that are
covering the screw holes.

10 / 25
II-4. Install the HDMI 8K PCB of the upgrade kit
1) Use the supplied screw to attach the PCB bracket.
PCB BRACKET SCREW (Supplied)
Screw hole for attaching the PCB bracket.
2) Attach the HDMI 8K PCB included in the upgrade kit.
HDMI 8K PCB
3) Use the 10 screws removed in step II-2-1) to fix the HDMI connector.

11 / 25
4) Use the two screws removed in step II-2-2) to attach the HDMI 8K PCB.
(Top view) (Front view)
5) Reconnect all the connections related to the HDMI 8K PCB.

12 / 25
II-5. Tidy up the wires
1) Tidy up the cables of the HDMI 8K PCB.
1)-1. Place the excess N6010 cable length
between the DAC PCB and the AUDIO /
VIDEO PCB.
1)-2. Place the excess N6011 cable length
between the HDMI 8K PCB and the DAC
PCB.
1)-3. Place the N8001 cable on the surface of
the bottom chassis.
(Front view)
2) Attach the cord holder to the front panel.
2)-1. Remove the screw on the attachment point. (This screw is not used beyond this point)
2)-2. Attach the cord holder with the supplied screw.
SCREW (Supplied)
CORD HOLDER
HDMI 8K PCB
AUDIO/VIDEO PCB
DAC PCB
N6010
N6011
N8001 cable

13 / 25
3) Tidy up the HDMI cable.
3)-1. Route the HDMI cable between the PCB and the bracket.
3)-2. Secure the HDMI cable with the cord holder to a position so that the HDMI cable will not hit the
top cover.
3)-3. Place the HDMI cable inside the chassis.
(Side view)
3)-1
3)-2
3)-3

14 / 25
II-6. Update the firmware
For details on how to update the firmware, refer to the service manual of the base model.
1) Update to the latest firmware.
2) Check the displayed version of the current firmware.
3) Check the input/output operation for each of the following connectors.
・HDMI I/O
・Audio I/O
・Analog Video to HDMI
・Front HDMI
・USB (Front)
・Network (Wired/Wi-Fi)

15 / 25
II-7. Attach the external parts
How to identify the left and right side covers
Hole
1) Use the screws removed in step II-1-2) to secure the upper front of the side covers (left and right).
Notes:
・Secure the side covers while holding the front panel
so that there are no gaps between the front panel
and the side covers.
・The front and back screws are different.
2) Use the screws removed in step II-1-2) to fix the upper rear of the side cover (left and right).
SIDE COVER (L)
(inside)
SIDE COVER (R)
(inside)
< Front side of
There is a circular hole on the front side
Front side of product >
There is a circular hole on the front side
Screw for top/front
SIDE COVER(L)

16 / 25
3) Use the 10 screws removed in step II-1-2) to attach the side covers (left and right).
SIDE COVER (L) SIDE COVER (R)
Note:
・The length of the screws for the side cover and for
the top cover are different. The longer screws are for
the side cover.
4) Use the eight screws removed in step II-1-1) to attach the top cover.
Notes:
・Make sure there are no gaps between the front panel and the top cover/side covers.
・If the gaps are unusually large, remove each cover and then reattach them.
For TOP COVER
For SIDE COVER

17 / 25
II-8. Attach the label and door cushion
1) Attach the Caution label (door) to the inside of the
door.
If the same label is already attached, the new label does
not need to be attached.
2) Place the door cushion on the inside of the door and
then close the door. (Reuse what the dealer used to
ship the product)
3) Fix the door with tape. (Reuse what the dealer used to
ship the product)
CAUTION LABEL(DOOR)
DOOR CUSHION ASSY

18 / 25
II-9. Pack the product
Reuse the packing materials (carton case, spacers, pad, cushions, and cabinet sheet) the dealer used to ship
the product.
1) Wrap the product with the cabinet sheet.
2) Set two spacers (front and rear), the pad, and the bottom cushions (front and rear) in the carton case.
・The side that has the inner flap shown in the right
figure is the front of the product.
・Match the orientation of the cushion with
the orientation shown in the figure.
“BOTTOM”, “REAR” indication
“BOTTOM”, “
“, “FRONT” indication
FRONT side of carton box
FRONT side of product
CABINET SHEET
FRONT PANEL

19 / 25
3) Place the product in the correct orientation.
4) Place the top cushions (FRONT and REAR) in the
correct orientation.
5) Place the accessories (Quick Start Guide / Pop
Label(A) / Pop Label(B)) in the box.
6) Seal the carton case with tape.
FRONT side of product
“TOP”, “REAR” indication
“TOP”, “
“, “FRONT” indication

20 / 25
III. Upgrade information
III-1. Information customers should know prior to the upgrade
Once the upgrade is performed, the following settings will reset to factory default settings. The backup
memory such as volume level will be erased as well. It is necessary to setup the product once again when the
product is returned.
・Audyssey® Setup
・Speaker Config.
・Changing the “Quick Select Name”
・Network connection
・Last function memory
・Various settings using the custom installer
・All the other settings in the backup memory
Notes:
The "Save & Load" function does not work. The saved settings can not be restored once the upgrade is
performed on the product.
This manual suits for next models
1
Table of contents
Other Denon Speakers manuals

Denon
Denon HEOS 1 User manual

Denon
Denon DN-306S User manual

Denon
Denon UTP-250 User manual

Denon
Denon HEOS 7 HS2 User manual

Denon
Denon SM50 User manual

Denon
Denon DN-205W User manual

Denon
Denon DN-303S User manual

Denon
Denon SC-F109 User manual

Denon
Denon HEOS 3 HS2 User manual

Denon
Denon Envaya DSB-150BT User manual