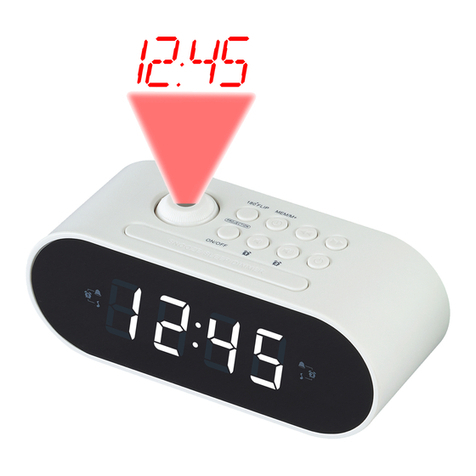
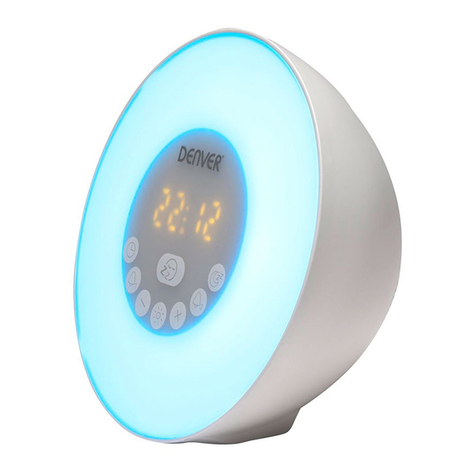
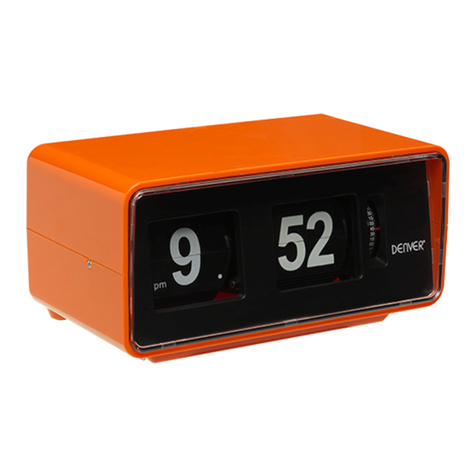
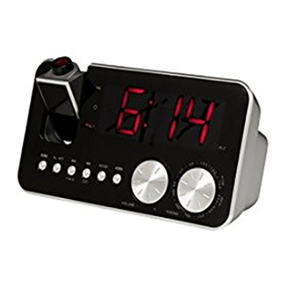
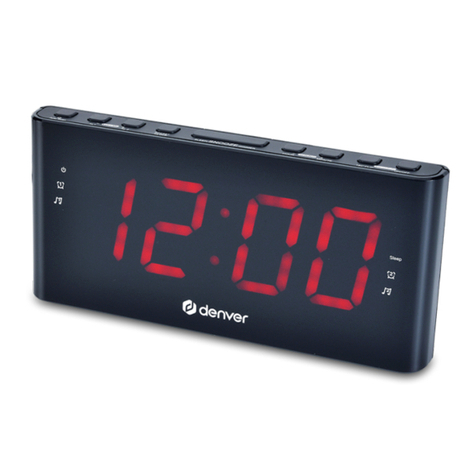
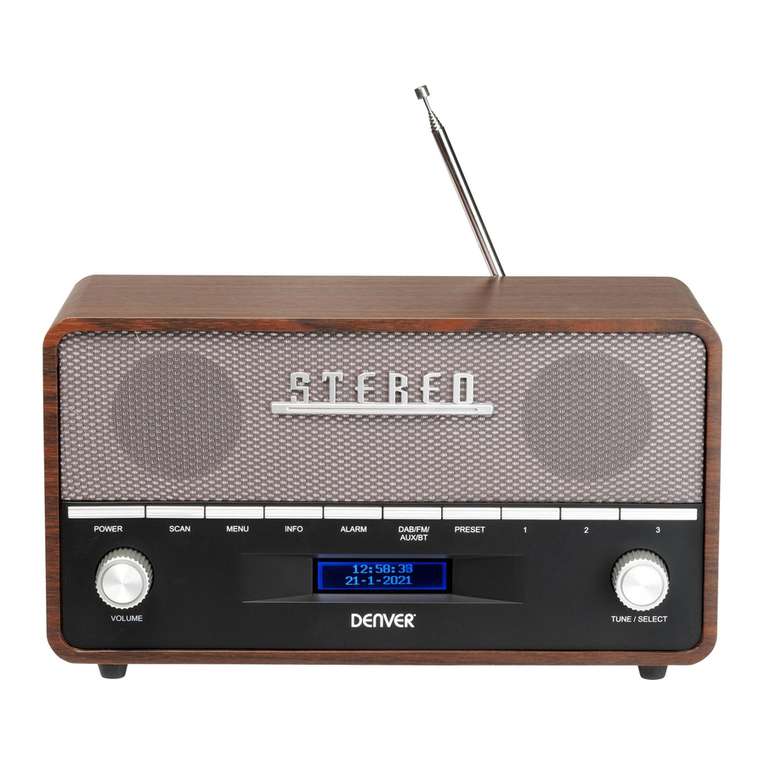
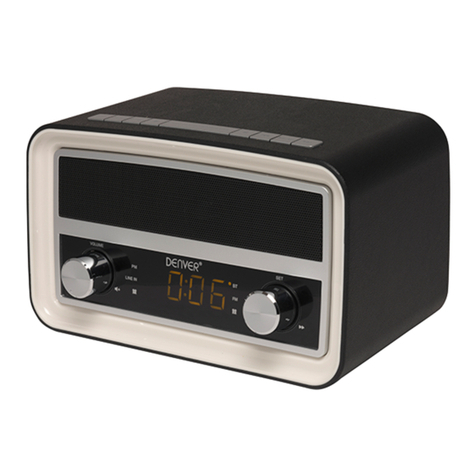
Denver CR-26 DABPLUS User manual

Digitaler DAB+/DAB/UKW Radiowecker
Radio-réveil numérique DAB+/ FM
Radiosveglia Digitale DAB+/DAB/FM
Radio Reloj Despertador Digital DAB+/DAB/FM
Clock Radio with DAB+/DAB/FM
DAB/
CR-26 DABPLUSCR-26 DABPLUS
BEDIENUNGSANLEITUNG
MANUEL D'UTILISATION
MANUALE D'ISTRUZIONI
MANUAL DE INSTRUCCIONES
INSTRUCTION MANUAL

DE-1
SICHERHEITSHINWEISE
Fürbesten Hörgenuss undLeistung,sowieummitden Funktionen vertrautzuwerden,lesen Sie
diesesHandbuch bitteaufmerksamdurch,bevorSiedasGerätinBetriebnehmen.Diesgarantiert
Ihnen diebeste,fehlerfreieLeistungundHörgenuss.
WichtigeHinweise
*Bewahren SiedieSicherheits-undBedienungsanleitungen fürkünftigeNachschlagezweckeauf
*Stellen SiedasGerätnichtan den folgenden Orten auf:
§Orte,diedirekterSonneneinstrahlungausgesetztsindoderinderNähe von
wärmeabstrahlenden Geräten,wieelektrischen Heizkörpern
§Aufanderen Stereoanlagen,diezuvielHitzeabstrahlen.
§AnOrten,an denen dieBelüftunggestörtwirdoderan staubigen Orten.
§AnOrten mitpermanenten Vibrationen
§Anfeuchten odernassen Orten.
*VergewissernSiesich,dass dieLüftungsschlitzenichtverstelltwerden.
*Bedienen SiedieReglerundSchalter,wieindiesemHandbuch erläutert.
*BevorSiedasGerätdasersteMaleinschalten,vergewissernSiesich bitte,dass dasStromkabel
richtigangeschlossen ist.
AusSicherheitsgründen dürfen keine Gehäuseabdeckungen abgenommen undVeränderungen
imInneren desGerätsvorgenommen werden.
Überlassen SieWartungsarbeiten demKundendienst.
Versuchen SienichtSchrauben zuentfernen oderdasGerätegehäusezuöffnen.ImInneren
befinden sich keine vomBenutzerzuwartenden
Teile.Überlassen SieWartungsarbeiten qualifizierten Kundendienstmitarbeitern.
VORSICHT:ZURVERMEIDUNGEINES ELEKTRISCHENSCHLAGES DASGEHÄUSE (ODER
DIERÜCKSEITE)NICHTENTFERNEN,IMGERÄTBEFINDENSICH KEINEDURCH DEN
BENUTZERZUWARTENDENTEILE.WENDENSIESICH ANDENKUNDENDIENST.
GEFÄHRLICHESTROMSPANNUNG
Diegefährliche StromspannungimInneren desGerätskann elektrische Schläge
verursachen.
ACHTUNG
DiesesBedienungshandbuch enthältwichtigeBedienungs-undWartungsanleitungen.
ZuIhrereigenen Sicherheitisteswichtig,dass SiedieAnleitungen indiesemHandbuch
befolgen.
WARNUNG:ZURVERMEIDUNGEINES BRANDES ODERDERGEFAHREINES ELEKTRISCHEN
SCHLAGES DASPRODUKTKEINEMTROPF-ODERSPRITZWASSERAUSSETZEN.
Hinweis:
DiesesGerätheiztsich nach einerlängeren Betriebsdauerauf. Diesistnormalunddeutetnicht
aufeinen Gerätefehlerhin.
DiesesGerätistmitMikroprozessoren ausgestattet, diebeielektrischen Störungen oder
Geräuschen fehlerhaft arbeiten könnten Wenn dasGerätnichtkorrektarbeiten sollte,trennen Sie
esbittevon derStromquelleundschließen esdann wiederan
VARNING
RISK FÖR ELEKTRISK
STÖT ÖPPAN EJ

FUNKTIONEN UND BEDIENELEMENTE
1. STANDBY/ON (Taste STAND-BY/EIN)
2. DAB/FM (Taste DAB/UKW)
3. SLEEP (Einschlaftaste)
4. INFO (Infotaste)
5. SNOOZE (Schlummertaste)
6. ALARM 1 (TasteAlarm 1)
7. ALARM 2 (TasteAlarm 1)
8. AUTOTUNE (Taste automatischer
Suchlauf)
9. PRESET (Vorbelegungstaste)
10. SELECT (Auswahltaste)
11. SELECT CONTROL
(Auswahlsteuerung)
12. VOLUME (Lautstärkeregler)
13. KOPFHÖRERBUCHSE
14. ANTENNE
15. AC NETZKABEL
16. ALARM 1-ANZEIGE
17. ALARM 2-ANZEIGE
18. LCD-DISPLAY
UHR EINSTELLEN
Wenn das Radio zum ersten Mal angeschlossen wird, befindet es sich im Standby-Modus.
Das Display zeigt „00:00“ an und die Uhrzeit beginnt zu laufen. Zum Einschalten des Geräts
drücken Sie einmal die Taste STANDBY/ON (STAND-BY/EIN).Der DAB-Modus wird
automatisch aufgerufen und führt eine vollständige, automatische DAB-Sendersuche durch.
Nachdem die Suche beendet ist, wird der zuerst gefundene Sender automatisch ausgewählt.
Die Uhr wird dann in wenigen Sekunden mit der aktuellen Ortszeit synchronisiert. Eine
manuelle Uhrzeiteinstellung ist nicht notwendig.
DE-2
WECKFUNKTION
Dieses Radio besitzt zwei identische Weckfunktionen. Sie können zwei getrennte Weckzeiten
und Weckmodi zum Aufwecken mittels elektronischen Summers oder Ihres Lieblingssenders
(DAB/UKW) einstellen.
Einstellung der Weckzeit und des Weckmodus
1. Halten Sie die Taste ALARM (1 oder 2) länger als 2 Sekunden gedrückt, um die
Weckzeiteinstellung aufzurufen. Auf dem Display wird „Alarm ‚Nr.‘ Time Set” angezeigt
und die „Minuten“ blinken.
2. Zum Einstellen der Weckzeit drehen Sie SELECT CONTROL (Auswahlsteuerung)
und drücken anschließend die SELECT-Taste (Auswahl-Taste)zur Bestätigung –
Stellen Sie zuerst die Minuten und dann die Stunden ein. (F.1) (F.2)
3. Nach dem Einstellen der Weckzeit können Sie jetzt mit dem Einstellen des Weckmodus
weitermachen – Stellen Sie zuerst den SUMMERTON (1 oder 2), dann die
DAB-VOREINSTELLUNG (1-10), die UKW-VOREINSTELLUNG (1-10) und
abschließend die LAUTSTÄRKE (1-20) des Weckers ein. (F.3) (F.4) (F.5)
4. Drehen Sie zur Auswahl die SELECT CONTROL (Auswahlsteuerung) mit
anschließender Bestätigung mittles der SELECT-Taste (Auswahl-Taste). Nach
dem Bestätigen der Lautstärkeeinstellung des Weckers ist die Einstellung des Weckers
jetzt vollständig.
5. Zum Einstellen des anderen Weckers (1 oder 2) wiederholen Sie die obigen Schritte.
Ein-/Ausschalten des Weckers und Auswahl des Weckmodus
1. Drücken Sie zum Aktivieren der Weckfunktion wiederholt die ALARM-Taste (1 oder 2)
und wählen den Weckmodus. Der entsprechende Weckmodus ändert sich bei jedem
Tastendruck der Reihe nach. “OFF > BEEP > DAB > FM > OFF > BEEP > …” (AUS >
SUMMER > DAB > UKW > AUS > SUMMER > …). (F.6) (F.7) (F.8)
2. Wenn das Display den gewünschten Weckmodus anzeigt, lassen Sie die ALARM-Taste
los und die Alarmfunktion ist aktiviert. Das Display stellt den entsprechenden Alarm mit
einem Symbol dar – Oben wird „Alarm 1” und darunter wird „Alarm 2” angezeigt. Die
Alarmsymbole blinken abwechselnd, wenn beide Alarme aktiviert wurden.(F.9)
3. Bei Erreichen der gewählten Weckzeit wird der gewünschte Weckmodus eingeschaltet.
Er läuft eine Stunde und schaltet sich dann automatisch aus. Um den Alarm vorher zu
beenden, drücken Sie einmal die entsprechende ALARM-Taste (1 oder 2) oder drücken
Sie die Taste STANDBY/ON (STAND-BY/EIN) zumAusschalten des Geräts. (F.10)
F1
F2
F3
F4
F5
F6
F7
F8
F9
1 2 346
578 9 10
1816 17
11 12
15
13 14

4. Um den Status des Alarms während der UKW-Wiedergabe zu überprüfen, drücken Sie die INFO-Taste. Während der
DAB-Wiedergabe drücken Sie mehrmals INFO-Taste, bis das Display den Alarmstatus anzeigt.
Anmerkung: Der zuerst aktivierte Weckalarm hat eine höhere Priorität und läuft eine Stunde. Die Schlummertaste schaltet
den Alarm währenddessen nur zeitweilig aus, so dass, falls sich der zweite Alarm in dem Zeitraum einschaltet, dieser nicht
funktioniert. Wenn aber der erste Alarm sich vor dem Einschalten des zweiten Alarms ausschaltet, dann wird der zweite
Alarm aktiviert.
SCHLUMMERFUNKTION
Durch Drücken von SNOOZE (Schlummer-Taste) wird der Alarm für 5 Minuten unterbrochen und das Schlummersymbol
„z“ wird angezeigt. Dieser Vorgang kann eine Stunde lang wiederholt werden. (F.11)
EINSCHLAFFUNKTION
Mit dieser Funktion können Sie das Radio sich nach einer eingestellten Zeit ausschalten lassen. Sie können die
Einschlafzeit entweder im Standby- oder eingeschalteten Modus einstellen. Wenn die Einschlafzeit ikm Standby-Modus
eingestellt wird, schaltet sich das Radio automatisch ein, nachdem die Einstellung bestätigt wurde.
1. Zum Aktivieren der Einschlaffunktion drücken Sie SLEEP (Einschlaf-Taste) und „Sleep 90 min“ wird auf dem
Display angezeigt.
2. Drücken Sie wiederholt SLEEP (EINSCHLAF-Taste). Die im Display angezeigte Zeit ändert sich bei jedem
Tastendruck der Reihe nach:
3. Wenn die gewünschte Einschlafzeit im Display angezeigt wird, lassen Sie die Taste los. Der Einschlaf-Timer ist
jetzt aktiviert. Die „zweite“ Ziffer der Zeitanzeige zeigt „Sx“ an, wobei „S1“ für „10 Minuten“ Einschlafzeit steht usw. (F.12)
4. Wenn der Einschlaf-Timer bis Null herunter gezählt hat, schaltet sich das Gerät aus.
5. Um die Einschlaffunktion bei laufenden Einschlaf-Timer auszuschalten, drücken Sie einmal SLEEP
(Einschlaf-Taste). Das Display zeigt „Sleep OFF“ an und statt der Anzeige „Sx“ werden wieder die
„Sekunden“ angezeigt.
RADIO
Tipps für besseren Empfang
Das Radio besitzt eine DAB/UKW-Wurfantenne. Wickeln Sie die Wurfantenne bitte vollständig ab und suchen die
Position, bzw. Richtung für den besten Empfang. Für optimalen DAB-Empfang ist es ratsam, die Wurfantenne senkrecht
auszurichten (hinter dem Gerät nach oben oder unten).
DAB-Modus
Wenn das Radio zum ersten Mal angeschlossen und aus dem Standby-Modus eingeschaltet wurde, wird automatisch der
DAB-Modus gewählt und das Gerät führt einen vollständigen Sendersuchlauf durch. Während der Suche wird mit einem
wachsenden Balken der Fortschritt der Suche angezeigt. Nach Abschluss der Suche wird die Anzahl der gefundenen
Sender angezeigt und dann der erste, in alphanumerischer Reihenfolge gefundene Sender automatisch ausgewählt.
Anders als bei normalen Radios, führt DAB mehrere Radiosender zusammen und sendet sie über eine Frequenz.
Diese Gruppen werden als Multiplexe und Ensembles bezeichnet. Jedesmal, wenn eine dieser Gruppen gefunden
wurde, wird der Name dieser Gruppe angezeigt.
Modi der autom. Dienstsuche
Es gibt zwei Modi für die Dienstsuche, der Schnellsuchlauf und der vollständige Suchlauf. Der Schnellsuchlauf
durchsucht nur den mittleren Bereich der DAB Band III Kanäle und der vollständige
Suchlauf die gesamten DAB Band III Kanäle. Sobald der Suchlauf beendet ist, wählt
das Radio den ersten, in alphanumerischer Reihenfolge gefundenen Sender.
1. Zum Starten des Schnellsuchlaufs drücken Sie einmal die AUTOTUNE-Taste
(automatischer Suchlauf), das Display zeigt „Scan Services Quick
Scan“ (Schnellsuchlauf Dienste) und dann einen Fortschrittsbalken an. (F.13)
2. Zum Starten einer vollständigen Suche halten Sie die AUTOTUNE-Taste
(automatischer Suchlauf) gedrückt, bis das Display „Scan Services Full
Scan“ (Vollständiger Suchlauf Dienste) anzeigt. (F.14)
3. Um die gefundenen Sender zu durchsuchen, drücken Sie einmal die
SELECT-Taste (Auswahl-Taste) und wenn das Display „< SELECT >“ anzeigt,
drehen Sie die SELECT CONTROL (Auswahlsteuerung) für die Sender.
Manuelle Sendersuche
1. Für die manuelle Sendersuche halten Sie die INFO-Taste gedrückt, bis das Display „Manual
Tune“ (Manuelle Suche) anzeigt und bestätigen dann mit der SELECT-Taste (Auswahl-Taste).
2. Bewegen Sie sich mit der SELECT CONTROL (Auswahlsteuerung) durch die DAB-Kanäle. Das Display zeigt
„5A to 13F“ (5A bis 13F) und ihre entsprechenden Frequenzen an. Wenn das Radio eine Sendergruppe
(Ensemble/Multiplex) auf einem der DAB-Kanäle findet, wird der Name der Sendergruppe unten auf dem Display
angezeigt.
3. Um die Ensemble oder den Multiplex zu wählen, drücken Sie die SELECT-Taste (Auswahl-Taste) und das
Display zeigt den ersten Sender in dem Ensemble oder dem Multiplex an.
DE-3
4. Durchsuchen Sie mit SELECT CONTROL (Auswahlsteuerung) die in dem Ensemble oder dem Multiplex
vorhandenen Sender. Wenn Sie den gewünschten Sender gefunden haben, drücken Sie die SELECT-Taste
(Auswahl-Taste) und verlassen damit die manuelle Sendersuche.
F13
F14
F12
F11
F10

Autom. Auswahl ein/aus
Wenn die automatische Auswahl eingeschaltet („ON“) ist, während Sie mittels SELECT CONTROL
(Auswahlsteuerung) die gefundenen Sender durchsuchen, wird der im Display angezeigte Sender automatisch
ausgewählt. Wenn die automatischeAuswahl ausgeschaltet („OFF“) ist, müssen Sie die SELECT-Taste (Auswahl-Taste)
drücken, um zum angezeigten Sender umzuschalten. Andernfalls kehrt das Gerät nach wenigen Sekunden zur Auswahl
zurück. Um die automatische Auswahl zwischen „ON“ (Ein) und „OFF“ (Aus) umzuschalten, halten Sie die
SELECT-Taste (Auswahl-Taste) gedrückt, bis das Display „Auto Enter ON“ (Autom. Eingabe ein) oder „Auto Enter
OFF“ (Autom. Eingabe aus) anzeigt. (F.15)(F.16)
Datendienste
Manchmal sehen Sie ein „>“-Symbol nach dem Sendernamen, mit dem angezeigt wird, dass Datendienste für diesen
Sender vorhanden sind. Diese Datendienste enthalten Zusatzdienste, die sich auf den Hauptsender beziehen, d.h. ein
Sportsender möchte zusätzliche Textkommentare hinzufügen. Die Datendienste befinden sich direkt nach dem
Hauptsender in der Senderliste. Zum Auswählen des Datendienstes drücken Sie die SELECT-Taste (Auswahl-Taste),
wenn „>“ vor dem Sendernamen angezeigt wird. Wenn der Datendienst beendet ist, schaltet das Radio automatisch
zum Hauptsender zurück.
UKW-Modus
1. Wählen Sie mit der DAB/FM-Taste (DAB/UKW-Taste) die Option UKW. Das Display zeigt „UKW“ und die Frequenz
an.
2. Um die manuelle Sendersuche zu aktivieren, drücken Sie zuerst einmal die SELECT-Taste (Auswahl-Taste) und
wenn das Display “< TUNING >” (< Sendersuche >) anzeigt, drehen Sie die SELECT CONTROL
(Auswahlsteuerung), bis die richtige Frequenz angezeigt wird oder der Empfang am Besten ist.
3. Zum Aktivieren des automatischen Suchlaufs in Richtung höherer Frequenzen drücken Sie einmal die
AUTOTUNE-Taste (automatischer Suchlauf). Das Frequenzband wird aufsteigend durchsucht und die Suche hält
automatisch an, sobald ein Sender gefunden wurde.
4. Zum Aktivieren des automatischen Suchlaufs in Richtung niedrigerer Frequenzen halten die AUTOTUNE-Taste
(automatischer Suchlauf) gedrückt, bis das Frequenzband absteigend durchsucht wird.
SPEICHERN UND AUFRUFEN GESPEICHERTER SENDER
Sie können entweder im DAB- oder UKW-Modus bis zu 10 Sender auf den Voreinstellungstasten speichern. Damit haben
Sie direkten Zugriff auf Ihre Lieblingssender.
1. Um eine Vorbelegung zu speichern, suchen Sie zuerst den gewünschten Sender. Halten Sie dann die
PRESET-Taste (Vorbelegungstaste) gedrückt, bis auf dem Display „Preset x“ (Voreinstellung x.) blinkt. (F.17)
2. Zum Auswählen der Vorbelegungsnummer für den gewünschten Sender drehen Sie SELECT CONTROL
(Auswahlsteuerung) und bestätigen dann mit der PRESET-Taste (Vorbelegungstaste). Auf dem Display
erscheint „Press & Saved” (Gedrückt und gespeichert). (F.18)
3. Um einen vorbelegten Sender aufzurufen, drücken Sie einmal die PRESET-Taste (Vorbelegungstaste) und
wählen durch Drehen der SELECT CONTROL (Auswahlsteuerung) einen der Sender, den Sie gespeichert
haben. Auf dem Display erscheint „Preset x Loaded” (Vorbelegung und geladen).
4. Wenn der Vorbelegungnummer kein Sender zugeordnet wurde, zeigt das Display „Preset # Free” (Vorbelegung
x frei).
DAB-ANZEIGEMODI
Jedes Mal, wenn Sie im DAB-Modus die INFO-Taste drücken, schalten Sie zwischen den folgenden Displaymodi um:
Ensemble/Multiplex (Gruppenname)
Ein Ensemble/Multiplex ist eine Sammlung von
Radiosendern, die zusammengefasst und gemeinsam auf
einer einzelnen Frequenz übertragen werden. Es gibt
nationale und lokale Multiplexes. Die lokalen Multiplexes
enthalten Sender, die für ein bestimmtes Gebiet gedacht
sind.
Zeit und Datum
Zeit und Datum werden automatisch mittels der
gesendeten Informationen aktualisiert. Es ist nicht nötig,
die Uhr manuell einzustellen.
DLS
DLS steht für „Dynamic Label Segment“ (Radio-Kurztext),
wobei es sich um Lauftext handelt, den der
Rundfunkanbieter seinen Sendungen hinzufügt. Der Text
enthält normalerweise Informationen, wie z.B.
Programmdetails usw.
Signalstärke
Auf dem Display wird ein Aussteuerbalken zur Anzeige
der Signalstärke dargestellt. Je stärker das Signal ist,
umso länger wird der Balken (von rechts nach links).
Programmtyp
Beschreibung des Programmtyps der Sendung.
Audio-Bitrate
Anzeige der empfangenen, digitalen Audio-Bitrate auf
dem Display.
Weckerstatus
Das Display zeigt den Weckerstatus (ein/aus), die
Weckzeit und die Einstellungen des Weckmodus an.
DE-4
F18
F17
F16
F156

ERWEITERTE DAB ANZEIGEMODI
Halten Sie die INFO-Taste im DAB-Betrieb länger als 2 Sekunden gedrückt, um den erweiterten Displaymodus aufzurufen.
Wenn das Display “Manual Tune” (Manueller Sendersuche) anzeigt, drücken Sie wiederholt die INFO-Taste. Das
Display schaltet zwischen den folgenden Modi um:
INFO > 2 Sek. drücken
WERKSEINSTELLUNGEN
Wenn Sie sich mit dem Radio in einem anderen Gebiet aufhalten, sind Ihre vorbelegten und gespeicherten DAB-Sender
nicht mehr verfügbar. In diesem Fall müssen Sie das Radio auf die Werkseinstellungen zurücksetzen. Führen Sie das
Rücksetzen auf die Werkseinstellungen wie folgt durch:
1. Schalten Sie das Radio ein und wählen den DAB-Modus.
2. Halten Sie die INFO-Taste länger als 2 Sekunden gedrückt. Wenn das Display „Manual Tune“ (Manuelle
Sendersuche) anzeigt, drücken Sie erneut die INFO-Taste, das Display zeigt „System Reset“ (System rücksetzen)
an.
3. Bestätigen Sie mit der SELECT-Taste (Auswahl-Taste). Das Radio führt einen vollständigen Sendersuchlauf durch.
4. Sobald die Suche beendet ist, wählt das Radio automatisch den ersten, in alphanumerischer
Reihenfolge gefundenen Sender.
Anmerkung: Bei einem Rücksetzen auf die Werkseinstellungen gehen alle gespeicherten DAB- und
UKW-Vorbelegungen verloren.
AUTOM. DISPLAY-DIMMER
Die Helligkeit des Displays wird automatisch an die Lichtverhältnissen im Zimmer angepasst. Die Helligkeit wird reduziert,
wenn die Zimmerbeleuchtung ausgeschaltet wird, so dass Ihr Schlaf nicht gestört wird. Das Display wird zur besseren
Erkennung bei Tageslicht oder dem Einschalten der Zimmerbeleuchtung wieder automatisch heller.
KOPFHÖRERBUCHSE
Die Stereo-Kopfhörerbuchse befindet sich auf der Rückseite des Geräts. Schließen Sie für privaten Hörgenuss ein Paar
Kopfhörer (nicht mitgeliefert) an diese Buchse an. Die Lautsprecher werden bei Kopfhöreranschluss automatisch
stummgeschaltet.
WICHTIG: Bei der Verwendung von Kopfhöreren stellen Sie stets die Lautstärke auf einen niedrigen Pegel, bevor Sie
diese aufsetzen. Erhöhen Sie die Lautstärke nach dem Aufsetzen schrittweise auf einen angenehmen Pegel.
TECHNISCHE DATEN
STROMVERSORGUNG : AC/WS 230 V~50 Hz
AUSGANGSLEISTUNG : 2 x 0.5 Watt
FREQUENZBEREICH : DAB 174 - 240 MHz
FM/UKW 87,5 - 108 MHz
GERÄTEABMESSUNGEN : 228 (B) x 87 (T) x 103 (H) mm
GEWICHT: 0,7kg
DIE TECHNISCHEN DATEN UNTERLIEGEN ÄNDERUNGEN OHNEVORANKÜNDIGUNG.
DE-5
Elektrische und elektronische Geräte sowie Batterien enthalten Materialien, Komponenten und Substanzen, welche
für Sie und Ihre Umwelt schädlich sein können, sofern die Abfallmaterialien (entsorgte elektrische und elektronische
Altgeräte sowie Batterien) nicht korrekt gehandhabt werden.
Elektrische und elektronische Geräte sowie Batterien sind mit der durchgestrichenen Mülltonne, wie unten abgebildet,
kenntlich gemacht. Dieses Symbol bedeutet, dass elektrische und elektronische Altgeräte sowie Batterien nicht mit
dem Hausmüll entsorgt werden dürfen, sie müssen separat entsorgt werden.
Als Endverbraucher ist es notwendig, dass Sie Ihre erschöpften Batterien bei den entsprechenden Sammelstellen abgeben. Auf
diese Weise stellen Sie sicher, dass die Batterien entsprechend der Gesetzgebung recycelt werden und keine Umweltschäden
anrichten.
Städte und Gemeinden haben Sammelstellen eingerichtet, an denen elektrische und elektronische Altgeräte sowie Batterien
kostenfrei zum Recycling abgegeben werden können, alternativ erfolgt auch Abholung. Weitere Informationen erhalten Sie bei der
Umweltbehörde Ihrer Gemeinde.

UK-1
To achievethe utmostinenjoymentandperformance,pleasereadthismanualcarefullybefore
attemptingtooperatethe unitinordertobecamefamiliarwithitsfeatures,andassureyou years
offaithful,troublefree performance andlisteningpleasure.
ImportantNotes
*Thissafetyandoperatinginstructionsshouldberetainedforfuturereference.
*Avoidinstallingthe unitinlocationsdescribedbelow:
-Placesexposedtodirectsunlightorclosetoheatradiatingappliancessuch aselectric
heaters.
-Ontopofotherstereo equipmentthatradiatetoo much heat.
-Placeslockingventilation ordustyplaces.
-Placessubjecttoconstantvibration.
-Humidormoistplaces.
*Makesurenottoobstructthe ventilation openings.
Operatetuningcontrolsandswitchesasinstructedinthe manual.
*Beforeturningon the powerforthe firsttime,makesurethe powercordisproperlyinstalled.
Forsafetyreasons,donotremoveanycoversorattempttogainaccess tothe insideofthe
product. Referanyservicingtoqualifiedpersonnel.
Donotattempttoremoveanyscrews,oropen the casingofthe unit; thereareno userserviceable
partsinside,referall servicingtoqualifiedservice personnel.
CAUTION:TOREDUCETHERISKOFELECTRICSHOCKDONOTREMOVE COVER(OR
BACK),NOUSERSERVICEABLEPARTSINSIDE,REFERSERVICINGTOQUALIFIEDSERVICE
PERSONNEL.
DANGEROUSVOLTAGE
Conductordangerousvoltage,thatmaybeofsufficientmagnitudetoconstitutea
risk ofelectricshocktopersonsispresentwithinthisproduct’s enclosure.
ATTENTION
The owner’s manualcontainsimportantoperatingandmaintenance instructions,for
yoursafety,itisnecessarytorefertothe manual.
WARNING:TOPREVENTFIREORSHOCKHAZARD,DONOTEXPOSE THISAPPLIANCETO
RAINORMOISTURE.
CAUTION:TOPREVENTELECTRONICALSHOCK,MATCH WIDEBLADEPLUGTOWIDESLOT,
FULLYINSERT.
Note:
Thisunitwill becomewarmwhen usedforalongperiodoftime.Thisisnormalanddoesnot
indicateaproblemwiththe unit.
Thisunitincludesmicro-processorswhich maymalfunction asaresultofexternalelectricalinter-
ference ornoise.If the unitisnotworkingproperly,disconnectthe powersource andthen
reconnectit.
CAUTION
RISKOFELECTRICSHOCK
DONOTOPEN

UK-2
1 2 346
578 9 10
1816 17
11 12
15
13 14
FEATURES AND CONTROLS
CLOCK SETTING
When the radio is connected to the power for the first time, it will be in standby, the
display will show “00:00” and start to run. Press the STANDBY/ON button once to
switch on the unit, it will automatically enter into the DAB mode and perform DAB auto
tune full scan function, after the scan has finished, the first alphanumerically found
station will be automatically selected. The clock will then be synchronized to the
current local time in a few seconds. Manual clock setting is not required.
ALARM FUNCTION
This radio incorporates an identical Dual Alarm function. You can have two individual
alarm wake-up time and wake-up mode settings to wake you to an electronic buzzer
tone or your favourite radio station (DAB/FM).
Wake-up time and wake-up mode settings
1. Press and hold the ALARM button (1 or 2) for more than 2 seconds to enter into
the alarm set up, the display will show “Alarm # Time Set” and the “minute” digits
will flash.
2. To set the wake-up time, rotate the SELECT CONTROL followed by pressing
the SELECT button to confirm - first set the minute and then the hour. (F.1) (F.2)
3. After the alarm wake-up time is set, you can now continue to go for the wake-up
mode settings - first set the BEEP TONE (1 or 2), then the DAB PRESET (1-10),
the FM PRESET (1-10) and finally the alarm wake-up VOLUME LEVEL (1-20).
(F.3) (F.4) (F.5)
4. Rotate the SELECT CONTROL for the selections followed by pressing the
SELECT button to confirm. After the confirmation of the wake-up volume level
setting, the alarm set up is now completed.
5. Repeat the above procedures to set the other Alarm (1 or 2).
Setting the alarm on/off and selecting the wake-up mode
1. Repeatedly press the ALARM button (1 or 2) to activate the alarm function and
select the wake-up mode, the corresponding wake-up mode will change in
sequence on every press: “OFF > BEEP > DAB > FM > OFF > BEEP > …….”.
(F.6) (F.7) (F.8)
2. When the display shows your desired wake-up mode, release the ALARM
button and the alarm function is activated. The display will show the associated
alarm on icon - The one on the top is for “Alarm 1” and the one underneath is to
indicate “Alarm 2”. The alarm icons will be alternating flashing when both the
two alarms are activated.(F.9)
3. At the selected wake-up time, the desired wake-up mode will be turned on. It will
continue for one hour and then shut off automatically. To stop the alarm sooner,
press the associated ALARM button (1 or 2) once or press the STANDBY/ON
button to switch off the unit.(F.10)
1. STANDBY/ON BUTTON
2. DAB/FM BUTTON
3. SLEEP BUTTON
4. INFO BUTTON
5. SNOOZE BUTTON
6. ALARM 1 BUTTON
7. ALARM 2 BUTTON
8. AUTOTUNE BUTTON
9. PRESET BUTTON
10. SELECT BUTTON
11. SELECT CONTROL
12. VOLUME CONTROL
13. HEADPHONE JACK
14. ANTENNA
15. AC POWER CORD
16. ALARM 1 INDICATOR
17. ALARM 2 INDICATOR
18. LCD DISPLAY
F1
F2
F3
F4
F5
F6
F7
F8
F9

UK-3
4. To check the alarm status, during FM operation, press the INFO button; and in DAB operation, repeatedly
press the INFO button until the display shows the alarm status.
Note : The alarm comes first will have the priority and it would continue for a one hour duration, the snooze will
just switch off this alarm temporary during this duration, so if the second alarm comes in this period, it will
not function. But if the first alarm is switched off before the second alarm arrives, then the second alarm
will be activated.
SNOOZE FUNCTI ON
During alarm, press the SNOOZE button will temporary switch off the alarm for 5 minutes and the snooze icon “
z “ will be displayed. This is repeatable in the one hour alarm duration. (F.11)
SLEEP FUNCTION
This function allows you to program the radio to switch off itself after a set period of time. You can set your
sleep time in either standby or on mode; if the sleep time is set in standby, the radio will switch to on
automatically after the setting is confirmed.
1. To activate the sleep function, press the SLEEP button, “Sleep 90 min” will appear in the display.
2. Repeatedly press the SLEEP button, the time in the display will change in sequence on every press:
3. When your desired sleep time appears in the display, release the button and the sleep timer is activated.
The “second” digits of the clock will change to display “S#” where “S1” is to represent “10 minutes” sleep
time and so on. (F.12)
4. When the sleep timer counts to zero, the unit will go off.
5. To put the sleep function off during sleep timer on, press the SLEEP button once, the display will show
“Sleep OFF” and the “S#” will change back to show the “second”.
LISTENING TO YO UR RADIO
Hints for better reception
This radio carries a single DAB/FM lead wire antenna, to obtain the best performance, you should fully extend
the wire antenna and adjust the position as well as the direction until you find the best reception. For ideal DAB
reception, always maintain the lead wire antenna in a vertical position (holding it upward or downward behind
the unit) is highly recommended.
DAB mode
When the radio is first powered up and switched on from standby, DAB mode will be automatically selected and
it will perform services full scan function. During the scan, the display will show a slide bar that indicates the
progress of the scan. After the scan has finished, the number of services found will be displayed and then the
first alphanumerically found station will be automatically selected.
DAB-unlike normal radio-groups together several radio stations and transmits them on one frequency. These
groups are referred to as multiplexes and ensembles. Every time one of these groups has been found, the
name of that group will be displayed.
Auto services scan modes
There are two types of services scan modes, one is quick scan and the other is full
scan. Quick scan will only search for the middle part of the DAB Band III channels
and full scan will search for the entire DAB Band III channels. Once the scan has
finished, the radio will select the first alphanumerically found station.
1. To activate the quick scan, press the AUTOTUNE button once, the display will
show “Scan Services Quick Scan“ and then a progressing slide bar. (F.13)
2. To activate full scan, press and hold the AUTOTUNE button until the display
shows “Scan Services Full Scan”. (F.14)
3. To explore the stations those have been found, press the SELECT button once
and when the display shows “< SELECT >”, rotate the SELECT CONTROL for
stations.
Manual tuning
1. To select manual tuning, press and hold the INFO button until the display shows “Manual Tune”, then
press the SELECT button to confirm.
2. Rotate the SELECT CONTROL to move through the DAB channels, the display will show “5A to 13F” and
their associated frequencies. When your radio locates a station group (ensemble/multiplex) on one of the
DAB channels, the name of the station group will appear on the bottom of the display.
3. To select the ensemble/multiplex, press the SELECT button, the display will show the first station in the
ensemble/multiplex.
4. Rotate the SELECT CONTROL to explore the stations existed in the ensemble/multiplex, when you have
located your desired station, press the SELECT button, and at the same time, you will also exit from the
manual tuning mode.
F12
F11
F10
F13
F14

Auto select on/off
While you are rotating the SELECT CONTROL to explore the found stations, if the auto select is “ON”, the
station appeared on the display will be automatically selected. If the auto select is “OFF”, you have to press the
SELECT button to switch to the station displayed; otherwise it will revert back in a few seconds. To toggle
between the auto select “ON” and “OFF”, press and hold the SELECT button until the display shows the “Auto
Enter ON” or “Auto Enter OFF”.(F.15)(F.16)
Secondary Services
On some occasions you will see a “>” symbol after the name of the station, this indicates that there are
secondary services available to that station. These secondary services contain extra services that relate to the
primary station. E.g. a sports station may want to add extra commentaries. The secondary services are
inserted directly after the primary station in the station list.To select the secondary station, press the SELECT
button when the “>” appears in the display before the station name. When the secondary service ends, the
radio will automatically switch back to the primary station.
FM mode
1. Press the DAB/FM button to select FM, the display will show “FM” and the frequency.
2. To activate manual tuning, first press the SELECT button once, and when the display shows “< TUNING
>”, rotate the SELECT CONTROL until you read the correct frequency or the reception is at its best.
3. To activate auto search up, press the AUTOTUNE button once, it will start scanning up the frequency
band and stop automatically once a station has been found.
4. To activate auto search down, press and hold the AUTOTUNE button until it starts to scan down the
frequency band.
STORING AND RECAL LING STORED STATIONS
In either DAB or FM mode, you can store up to 10 stations to the station presets; this will enable you to get
direct access to your favourite stations.
1. To store a preset, first tune to your desired station, then press and hold the PRESET button until the
display shows “Preset #” and flash. (F.17)
2. Rotate the SELECT CONTROL to select your desired station preset number, then press the PRESET
button to confirm, the display will show “Preset # Saved”. (F.18)
3. To recall a preset station, press the PRESET button once, then rotate the SELECT CONTROL to select
the stations that you have stored, the display will show “Preset # Loaded”.
4. If the preset hasn't been allocated a station, the display will show “Preset # Free”.
DAB DISPLAY MODE S
In DAB mode, every time you press the INFO button, the display will cycle through the following display modes:
F18
F17
F16F15
Ensemble/Multiplex (Group name) Signal strength
Time and date
Audio bit rate
DLS
Alarm status
The Ensemble/Multiplex is a collection of radio The display will show a slide bar to indicate the signal
stations that are bundled and transmitted together in strength, the stronger the signal, the longer the bar
a single frequency. There are national and local will be from left to right.
multiplexes, local ones contain stations that are
specific to that area.
This describes the style of the programme that is
being broadcast.
The time and date will be automatically updated by
the broadcasted information; there is no need to set
the clock manually. The display will show the digital audio bit rate being
received.
DLS stands for Dynamic Label Segment which is a
scrolling message that the broadcaster may include The display will show the alarm on/off status, the
in their transmissions. The message usually includes wake-up time and the wake-up mode settings.
information such as programme details …etc.
Programme type
ADVANCED DAB DISPLAY MODES
In DAB operation, press and hold the INFO button for longer than 2 seconds will enter into the advanced
display mode, when the display shows “Manual Tune”, repeatedly press the INFO button, the display will cycle
through the following modes:
UK-4

FACTORY RESET
When you move the radio to another part of the country, your pre-tuned and stored DAB stations may no longer
be available. If this is the case then you will need to reset your radio back to its original factory settings; to
perform a factory reset, please do the following:
1. Switch on the radio and select DAB mode.
2. Press and hold the INFO button for longer than two seconds, when the display shows “Manual Tune”,
again press the INFO button once, the display will show “System Reset”.
3. Press the SELECT button to confirm, the radio will then perform services full scan function.
4. When the scan has finished, the radio will automatically select the first alphanumerically found station.
Note: All of your stored DAB & FM presets will be lost once the reset has taken place.
DISPLAY AUTO DIMMER
The brightness of the display is automatically adjusted for the room light conditions. It will be reduced when the
room lighting is turned off so as not to interfere your sleep. The display will brighten automatically in the
daylight or when the room lights are turned on again for better visibility.
HEADPHONE JACK
The stereo headphone jack is located at the back of the unit. Connect a set of stereo headphones (not
included) to this jack for private listening. When headphones are in use, the speaker will be automatically cut
off.
IMPORTANT: When using headphones always set the volume control to a low level before you put the
headphones on, then put the headphones on and gradually increase the volume to a comfortable listening
level.
SPECIFICATION
POWER SUPPLY : AC 230V~50Hz
OUTPUT POWER : 2 x 0.5 W
FREQUENCY RANGE : DAB 174 - 240 MHz
FM 87.5 - 108 MHz
UNIT DIMENSION : 228 (L) x 87 (W) x 103 (H) mm
WEIGHT: 0.7Kg
SPECIFICATION SUBJECT TO CHANGE WITHOUT FURTHER NOTICE.
UK-5
Electric and electronic equipment and included batteries contains materials, components and substances that can be
hazardous to your health and the environment, if the waste material (discarded electric and electronic equipment and
batteries) is not handled correctly.
Electric and electronic equipment and batteries is marked with the crossed out trash can symbol, seen below. This
symbol signifies that electric and electronic equipment and batteries should not be disposed of with other household
waste, but should be disposed of separately.
As the end user it is important that you submit your used batteries to the approriate and designated facility. In this manner you
make sure that the batteries are recycled in accordance with legislature and will not harm the environment.
All cities have established collection points, where electric and electronic equipment and batteries can either be submitted free of
charge at recycling stations and other collection sites, or be collected from the households. Additional information is available at
the technical department of your city.

FR-1
SÉCURITÉSÉCUSÉCURITÉ
Pour profiter pleinement des performances de votre appareil et vous familiariser avec son fonctionnement,
veuillez lire attentivement ce manuel avant toute utilisation.
Informations importantes
* Conservez soigneusement ces consignes de sécurité et de fonctionnement pour consultation ultérieure.
* Ne pas exposer cet appareil aux gouttes et aux éclaboussures. Les objets contenant du liquide, tels que des
vases, ne doivent pas être posés sur l'appareil.
* Évitez d'installer l'appareil dans les endroits :suivants
- Endroits exposés aux rayons directs du soleil ou proches d'une source de chaleur rayonnante comme un appareil de
chauffage électrique.
- Sur un autre équipement stéréo produisant de la chaleur.
- Endroits bloquant la ventilation ou endroits poussiéreux.
- Endroits sujets à une vibration constante.
- Endroits humides ou moites.
* Ne jamais placer une source de flamme nue (par ex., bougie allumée) sur l'appareil.
* Déposez les piles dans un point de collecte approprié.usagées
* Veillez à ne pas obstruer les un espace minimum de 10 cm doit être respecté autour orifices de ventilation.
de l'appareil pour assurer la ventilation.
* La ventilation ne doit pas être bloquée en couvrant les ouvertures avec des objets tels qu'un journal, des
nappes, des rideaux, etc.
* Utilisez cet appareil seulement sous climats tempérés.
* Actionnez les commandes et les commutateurs comme indiqué dans le manuel.
* assurez-vous que le cordon du secteur est correctement installé.Avant la première utilisation,
* Le cordon d'alimentation est utilisé comme dispositif de et . Pour déconnexion doit demeurer accessible
débrancher complètement , la prise de courant de l'appareil doit être débranchée du l'alimentation électrique
secteur.
Pour des raisons de sécurité, n'enlevez aucun et n'essayez pas d'accéder à l'intérieur de l'appareil. capot
Confiez l'entretien à un personnel qualifié.
N'essayez pas d’enlever les vis et d'ouvrir le boitier ; il n'y a aucune pièce réparable par l'utilisateur à l'intérieur ;
pour toute réparation, contactez le service technique qualifié.
ATTENTION : Pour réduire le risque d'électrocution, ne pas déposer le capot (ou la face arrière). L'appareil ne contient
TENSION DANGEREUSE
L'appareil contient des conducteurs de tensions dangereuses, suffisamment importantes pour
présenter un risque d'électrocution.
ATTENTION
La notice d'utilisation contient des informations importantes sur le fonctionnement et l'entretien
de l'appareil ; pour votre sécurité, il est indispensable de lire attentivement la notice.
AVERTISSEMENT : Pour éviter tout risque d'incendie ou d'électrocution, veillez à ne pas exposer l'appareil aux
projections de liquides.
Note :
Ce produit chauffera s'il est utilisé pendant une longue période. Cela est normal et n'indique pas un problème.
Dans le cas où l'affichage deviendrait illisible suite à une décharge d'électricité statique, débranchez puis
rebranchez le cordon d'alimentation ; il sera peut-être nécessaire de régler l'appareil à nouveau.
ATTENTION
RISQUE DE DECHARGE
ELECTRIQUE
aucune pièce réparable par l'utilisateur. Confiez l'entretien à un personnel technique qualifié.

FR-2
FONCTIONS ET COMMANDES
EN VEILLE)
7. BOUTONALARM 2 (ALARME 2)
TION
13. PRISE CASQUE
TIONN CA
Gsion pour la première fois, elle est en mode de veille, puis
d'alarme identiques. V
ARM (1 ou 2) pendant plus de 2
2.
3.
4.
5.
tiva our activer la fonction
2.
3.
BOUTON STANDBY/ON (MISE EN1. ATTENTE/MARCHE)
2. BOUTON DAB/FM
3. BOUTON SLEEP (MISE
4. BOUTON INFO (RAPPEL5. BOUTON SNOOZE
D’ALARME)
6. BOUTONALARM 1 (ALARME 1)
8. BOUTON AUTOTUNE (RÉGLAGE
D’ACCORD AUTOMATIQUE)
9. BOUTON PRESET (PRÉRÉGLAGE)
10. BOUTON SELECT
(SÉLECTIONNER)
11. CONTRÔLE DE SÉLEC
12. CONTRÔLE DU VOLUME
14. ANTENNE IMENTA15. CORDON D'AL
16. INDICATEUR D'ALARME 1
17. INDICATEUR D'ALARME 2
18. AFFICHAGE LCD
É LAGE DE L'HORLOGER
Lorsque la radio est mise sous ten
“ ”
l'affichage affiche. 00:00 et démarre. Appuyez une fois sur le bouton STANDBY/ON pour
mettre l'appareil en marche, il passe automatiquement au mode DAB (radiodiffusion
numérique) et procède au balayage complet des stations de radio (accord automatique) ;
lorsque le balayage est terminé, la première station trouvée de manière alphanumérique est
sélectionnée automatiquement. L'horloge est ensuite mise à l'heure locale courante en
quelques secondes. Le réglage manuel de l'horloge n'est pas requis.
ONCTION D'ALARMEF
Cette radio dispose de deux fonctions ous pouvez avoir deux heures
différentes de réveil et des paramètres différents du mode réveil pour être réveillé par la
tonalité d'un bruiteur électronique ou par votre station de radio favorite (DAB/FM).
eure de réveil et paramètres du mode réveilH
1. Appuyez et maintenez enfoncé le bouton AL
secondes pour entrer dans la configuration de l'alarme, l'affichage affiche alors “Alarm
# Time Set” (Alarme # heure réglée) et les chiffres représentant les "minutes"
s'affichent.
Pour régler l'heure de réveil, tournez SELECT CONTROL et appuyez ensuite sur le
bouton SELECT pour confirmer - réglez d'abord les minutes, ensuite les heures. (F.1)
(F.2)
Après le réglage de l'heure de l'alarme, vous pouvez maintenant continuer avec les
paramètres du mode réveil - réglez d'abord la TONALITÉ du BIP (1 ou 2), puis le
PRÉRÉGLAGE DAB (1-10), le PRÉRÉGLAGE FM (1- 10) et enfin le VOLUME (1-10)
de l'alarme de réveil. (F.3) (F.4) (F.5)
Tournez SELECT CONTROL pour effectuer des sélections et appuyez ensuite sur le
bouton SELECT pour confirmer. Après la confirmation du réglage du volume de réveil,
la configuration de l'alarme est maintenant terminée.
Répétez les procédures ci-dessus pour configurer l'autre Alarme (1 ou 2).
c tion/Désactivation de l'alarme et sélection du mode réveil.A
1. Appuyez à plusieurs reprises sur le bouton ALARM (1 ou 2) p
d'alarme et sélectionnez le mode réveil ; le mode réveil correspondant change selon
un certain ordre à chaque pression : “OFF > BEEP > DAB > FM > OFF > BEEP
> …….”. (F.6) (F.7) (F.8)
Lorsque l'affichage affiche le mode réveil que vous désirez, relâchez le bouton
ALARM et le mode réveil est activé. L'affichage montre l'alarme associée sur l'icône -
celle qui se trouve en haut représente "Alarm 1" ( "Alarme 1") et celle qui se trouve en
dessous symbolise "Alarm 2" ("Alarme 2"). Les icônes des deux alarmes s'affichent
alternativement lorsqu'elles sont toutes les deux activées. (F.9)
À l'heure de réveil sélectionnée, le mode réveil se déclenche. Il continue pendant une
heure, puis s'arrête automatiquement. Pour arrêter l'alarme plus tôt, appuyez une fois
sur le bouton (1ou 2) ALARM ou appuyez sur le bouton STANDBY/ON pour éteindre
l'unité.(F.10)
F1
F2
F3
F4
F5
F6
F7
F8
F9
1 2 346
578 9 10
1816 17
11 12
15
13 14

4. e statut de l'alarme, en mode FM, appuyez sur le bouton ; et en mode DAB, appuyez à plusieurs
ur le bouton pour l'arrêter temporairement pendant 5 minutes et
Pour vérifier l INFO
reprises sur le bouton INFO jusqu'à ce que l'affichage affiche le statut de l'alarme.
que : L'alarme qui se déclenche en premier a la priorité et continue pendant une heure, le rappel d'alarme l'arrête justeRemar
temporairement pendant cette durée ; si la seconde alarme se déclenche donc au cours de la même période, elle ne
fonctionne pas. Mais la première alarme est interrompue avant le déclenchement de la seconde qui est ensuite activée.
LA FONCTION DE RAPPEL D'ALARME
Pendant l'intervention de l'alarme, appuyez s SNOOZE
l’icône de rappel d'alarme “z” s'affiche. Cela peut se répéter pendant l'heure que dure l'alarme. (F.11)
LA FONCTION DE MISE EN VEILLE
Cette fonction vous permet de programmer la radio pour qu'elle s'éteigne après un laps de temps prédéterminé. Vous
pouvez régler le temps de mise en veille soit en attente, soit en mode ; si le temps de mise en veille est réglé en attente, la
radio s'y accorde automatiquement après confirmation du réglage.
1. Pour activer la fonction de mise en veille, appuyez sur le bouton SLEEP, “Sleep 90 min” ("Mise en veille 90 min")
apparaît à l'affichage.
2. Appuyez à plusieurs reprises sur le bouton SLEEP ;l'heure de l'affichage change selon un certain ordre à chaque
pression :
t le
FR-3
3. Lorsque le temps de mise en veille que vous désirez apparaît à l'affichage, relâchez le bouton ; e minuteur est
4. r de mise en veille est activé, appuyez une
/FM en plomb et unique ; pour obtenir une qualité d'écoute optimale, vous
dio est mise sous tension pour la première fois, et mise en marche en attente (standby), le mode DAB est
apide, et l'autre est complet.
2.
age d'accord manuel, appuyez et maintenez enfoncé le bouton INFO jusqu'à ce que
3.
activé. Les chiffres représentant les "secondes" sur l'horloge changent pour afficher “S#” où “S1” représente “10
minutes” de temps de mise en veille, ainsi de suite.(F.12)
Lorsque le minuteur de mise en veille marque zéro, l'unité s'éteint. u5. Pour désactiver la fonction de mise en veille pendant que le minute
fois sur le bouton SLEEP,“Sleep OFF” (Mise en veille désactivée) apparaît à l'affichage et le “S#” revient pour
afficher les secondes.
ÉCOUTER VOTRE RADIO
Conseils pour une meilleure réception
Cette radio est munie d'une antenne DAB
devez tirer complètement l'antenne et ajuster sa position et son orientation jusqu'à obtenir la qualité d'écoute
escomptée. Pour une réception DAB idéale, il est fortement recommandé de toujours maintenir l'antenne filaire en
plomb dans une position verticale (la tenir par le haut ou par le bas derrière l'unité).
Mode DAB
Lorsque la ra
automatiquement sélectionné et procède au balayage complet des stations de radio. Pendant le balayage, l'affichage
présente une barre de progression qui indique l'évolution du balayage. À la fin du balayage, le nombre de stations de
radio détectées s'affiche et ensuite la première station trouvée de manière alphanumérique est automatiquement
sélectionnée.
Contrairement à la radio ordinaire, DAB groupe plusieurs stations de radio et les retransmet sur une seule fréquence.
Ces groupes sont désignés par les termes : multiplexes et ensembles. Chaque fois que l'un de ces groupes est trouvé,
son nom s'affiche.
Modes de balayage automatique de stations de radio
Il y a deux modes de balayage de stations de radio, l'un est r
Le balayage Rapide recherche uniquement les chaînes du milieu de la Bande III de DAB,
tandis que le balayage Complet recherche les chaînes de toute la Bande III de DAB. À la
fin du balayage, la radio sélectionne la première station trouvée de manière
alphanumérique.
1. Pour activer le balayage rapide, appuyez une fois sur le bouton ,AUTOTUNE
l'affichage met
“
Scan Services Quick Sca (Balayage rapide du Balayage de stations
de radio
“
en évidence, et présente ensuite une barre de progression. (F.13)
Pour activer le balayage complet, appuyez et maintenez enfoncé le bouton
AUTOTUNE jusqu'à l'affichage de “Scan Services Full Scan”. (F.14)
Pour explorer les stations qui ont été détectées, appuyez une fois s3. ur le bouton
SELECT et lorsque l'affichage affiche “< S ELECT >”, tournez SELECT CONTROL
pour capter des stations de radio.
Réglage d'accord manuel
1. Pour sélectionner le régl
l'affichage mette en évidence “Manual Tune
”
, appuyez ensuite sur le bouton SELECT pour confirmer.
2. Tournez le bouton SELECT CONTROL pour faire défiler les chaînes DAB, l'affichage présente celles allant de“5A
à 13F” et leurs fréquences associées. Lorsque votre radio localise un groupe de stations (ensemble/multiplex) sur
l'une des chaînes DAB, le nom du groupe de stations apparaît au bas de l'affichage.
Pour sélectionner l'ensemble/multiplex, appuyez sur le bouton SELECT, l'affichage affiche la première station de
l'ensemble/multiplex.
Tournez le bouton SEL4. ECT CONTROL pour explorer les stations existantes dans l'ensemble/ multiplex ; lorsque
vous avez localisé votre station désirée, appuyez sur le bouton SELECT, et vous quitterez en même temps le
mode réglage d'accord manuel.
F13
F14
F12
F11
F10

FR-4
pour explorer les stations trouvées, si la sélection automatique
ous verrez le symbole “>” après le nom d'une station, ceci indique qu'il s'agit de services
sur le bouton pour sélectionner FM, l'affichage met en évidence “FM” et la fréquence. ge met en
3.
s préréglages des stations ; cela vous permet
4.
Séle ée
Pendant que vous tournez le bouton SELECT
ction automatique activée/désactiv CONTROL
est “ON” (activée) ; la station qui apparaît à l'affichage est automatiquement sélectionnée. Si la sélection automatique est
“OFF”, (désactivée) il vous faut appuyer sur le bouton SELECT pour capter la station affichée ; sinon elle disparaît en
quelques secondes. Pour alterner entre les touches de sélection automatique “ON” (activé) et “OFF” (désactivé),
appuyez et maintenez enfoncé le bouton SELECT jusqu'à ce que l'affichage mette “Auto Enter ON” ou “Auto Enter
OFF” en évidence. (F.15)(F.16)
Services secondaires
À certaines occasions v
secondaires disponibles sur cette station. Ces services secondaires contiennent des services supplémentaires se
rapportant à la station principale. Par exemple, une station de sports peut vouloir ajouter des commentaires
supplémentaires. Les services secondaires sont insérés directement après la station principale dans la liste de
stations. Pour sélectionner une station secondaire, appuyez sur le bouton SELECT lorsque le symbole “>” apparaît à
l'affichage avant le nom de la station. À la fin du service secondaire, la radio s'accorde automatiquement sur la station
principale.
Mode FM
1. Appuyez DAB/FM
2. Pour activer le réglage d'accord manuel, appuyez d'abord une fois sur le bouton SELECT, et lorsque l'afficha
évidence “< TUNING >”, tournez le bouton SELECT CONTROL jusqu'à ce que vous puissiez lire correctement la
fréquence ou que la réception soit à son meilleur niveau.
Pour activer la recherche automatique, appuyez une fois sur le bouton ; cela lance la recherche de laAUTOTUNE
bande de fréquence qui s'arrête automatiquement lorsqu'une station est trouvée.
4. Pour activer la recherche automatique, appuyez et maintenez enfoncé le bouton jusqu'au lancementAUTOTUNE
de la recherche de la bande de fréquence.
ENREGISTREMENT ET ACCÈS AUX STATIONS ENREGISTRÉES
En mode DAB ou FM, vous pouvez enregistrer jusqu'à 10 stations dans le
d'avoir un accès direct à vos stations favorites.
1. Pour enregistrer un préréglage, accordez votre radio sur votre station désirée, ensuite appuyez et maintenez
enfoncé le bouton PRESET jusqu'à l'affichage et au clignotement de “Preset #”. (F.17)
2. Tournez le bouton SELECT CONTROL pour sélectionner le numéro de préréglage de votre station désirée,
appuyez ensuite sur le bouton PRESET pour confirmer ; l'affichage met en évidence Press # Saved”. (F.18)
3. Pour accéder à une station préréglée, appuyez une fois sur le bouton PRESET ; tournez ensuite le bouton
SELECT CONTROL pour sélectionner les stations que vous avez enregistrées ; l'affichage met en évidence
“Preset # Loaded” (“Préréglage # Chargé”).
Si le préréglage n'a pas été assigné à une station, l'affichage met en évidence “Preset # Free” (“Préréglage #
Libre”).
MODES D'AFFICHAGE DAB
En mode DAB, chaque fois que vous appuyez sur le bouton INFO, l'affichage fait défiler les modes d'affichage
ci-après :
Ensemble/Multiplex (Nom de groupe)
Ensemble/Multiplex est une collection de stations de radio
te sont automatiquement mises à jour par
Force du Signal te une barre de progression pour s la
e des programmes qui sont
Statut de l'alarme e statut de l'alarme : on (activé)/off t
qui sont groupées et retransmises sur une fréquence
unique. Il y a des multiplexes nationaux et locaux ; les
locaux contiennent des stations spécifiques à la région
concernée.
eure et dateH
L'heure et la da
les informations diffusées ; il n'est pas nécessaire de
régler l'horloge manuellement.
DLS
DLS signifie Dynamic Label Segment ; c'est un message
défilant que le diffuseur peut inclure dans ses
retransmissions. Le message contient en général des
informations telles que les détails de programmes, etc.
L'affichage présen
indiquer la force du signal ; plus le signal est fort, plu
barre s'allonge de la gauche vers la droite.
Ty de Programmespe
Ce qui suit décrit le styl
diffusés.
Dé t binaire audio
L'affichage montre le
bi débit binaire audionumérique reçu.
L'affichage présente l
(désactivé), ainsi que les paramètres de l'heure de réveil e
ceux du mode réveil.
MODES D'AFFICHAGE DAB AVANCÉS
En mode DAB, appuyez et maintenez enfoncé le bouton INFO pendant plus de 2 secondes pour lancer le mode
d'affichage avancé ; lorsque l'affichage met en évidence
“
Manual Tune
”
, appuyez à plusieurs reprises sur le bouton
INFO , l'affichage fait défiler les modes ci-après :
F18
F17
F16
F156

Appuyez sur INFO >2s
RESTAURATION DU RÉGLAGE D'ORIGINE
Lorsque vous déplacez la radio vers une autre partie du pays, vos stations préréglées et les stations DAB enregistrées
peuvent ne plus être disponibles. Si c'est le cas, réglez votre radio sur ses paramètres d'origine ; pour le faire, veuillez
suivre les étapes ci-après.
1. Mettez la radio en marche et sélectionnez le mode DAB.
2. Appuyez et maintenez enfoncé le bouton INFO pendant plus de 2 secondes ; lorsque l'affichage met en évidence
“
Manual Tune
”
, appuyez encore une fois sur le bouton INFO ;l'affichage met en évidence
“
System Reset
”
.
3. Appuyez sur le bouton SELECT pour confirmer ; la radio procède alors au balayage complet des services.
4. À la fin du balayage, la radio sélectionne automatiquement la première station trouvée de
manière alphanumérique.
Remarque : Tous vos préréglages DAB & FM se perdent après la réinitialisation.
AFFICHAGE DU GRADATEUR AUTOMATIQUE
La luminosité de l'affichage est automatiquement ajustée aux conditions d'éclairage de la pièce. Elle est réduite lorsque
l'éclairage de la pièce est éteint pour ne pas déranger votre sommeil. L'affichage brille automatiquement en journée ou
lorsque les ampoules de la pièce sont encore allumées pour une meilleure visibilité.
PRISE CASQUE
La prise casque stéréo se trouve à l'arrière de l'unité. Connectez un jeu de casques stéréo (pas compris) à cette prise
pour une écoute privée. Lorsque le casque est en cours d'utilisation, les baffles sont automatiquement déconnectés.
IMPORTANT : Lorsque vous utilisez le casque, réglez toujours le contrôle du volume sur un niveau bas avant de le mettre
en marche ; mettez ensuite le casque en marche en augmentant progressivement le volume jusqu'à un niveau
d'écoute confortable.
CARACTÉRISTIQUES
ALIMENTATION: AC 230V~50Hz
PUISSANCE DE SORTIE: 2 x 0.5 W
GAMME DE FRÉQUENCES: DAB 174 – 240 MHz
FM 87.5 – 108MHz
DIMENSION: 228(L)x87(l)x103(H)mm
POIDS: 0.7kg
LES CARACTÉRISTIQUES SONT SUJETTES À CHANGEMENT SANS AUTRE AVERTISSEMENT.
FR-5
Les appareils électriques et électroniques et les batteries contiennent des matériaux, composants et substances qui
peuvent nuire à votre santé et à l'environnement si ces déchets ne sont pas traités de façon appropriée.
Les appareils électriques et électroniques et les batteries sont marqués par le symbole de poubelle avec roulettes et
une croix dessus, voir ci-dessous. Ce symbole indique que les appareils électriques et électroniques et les batteries
doivent être collectés et jetés séparément des ordures ménagères.
En tant qu'utilisateur final, il est important que vous jetiez les batteries usagées dans des centres de collecte appropriés. En
mettant en rebus les batteries pour être recyclées conformément à la règlementation vous contribuez à préserver l’environnement.
Dans toutes les villes existent des points de collecte où les appareils électriques et électroniques et les batteries peuvent y être
déposés sans frais pour le recyclage. Vous pouvez obtenir des informations supplémentaires auprès des autorités locales de la
ville.

IT-1
PRECAUZIONIPERLASICUREZZA
Perottenereil massimointerminididivertimentoeprestazioni,eperacquisiredimestichezzacon
lesue funzioni,leggereattentamentequestomanualeprimadiusarel’apparecchio;questogarantirà
annidiperfettofunzionamentoedifedeleriproduzione.
Noteimportanti
Conservareleistruzioniperconsultazionifuture.
Evitarediinstallarel’apparecchionelleseguentiposizioni:
-luoghiespostialuce solaredirettaoprossimiadapparecchiche emanano calorecomeradiatori
elettrici
-sullasommitàdiapparecchiaturestereo che emanano caloreeccessivo
-luoghipolverosiocon scarsaventilazione
-luoghisoggettiavibrazione costante
-luoghiumidi.
Non ostruireleaperturediventilazione.
Usareicomandiegli interruttoricomedescrittonelmanuale.
Almomentodellaprimaaccensione,verificareche il cavodialimentazione siacorrettamente
inserito.
Permotividisicurezza,non rimuovereicoperchienon tentarediaccedereall’interno delprodotto.
Perlamanutenzione,rivolgersiesclusivamenteapersonalequalificato.
Non tentaredirimuoverelevitiodiaprirel’alloggiamentodell’apparecchio;all’interno non sono
presenticomponentiriparabili dall’utente;
perlamanutenzione,rivolgersiesclusivamenteapersonalequalificato.
ATTENZIONE:
PERRIDURREILRISCHIODISCOSSE ELETTRICHE,NONRIMUOVEREICOPERCHI;
ALL’INTERNONONVISONOCOMPONENTIRIPARABILIDALL’UTENTE;PERL’ASSISTENZA
RIVOLGERSIAPERSONALEQUALIFICATO
.
TENSIONEPERICOLOSA
All’interno delprodottosono presenticonduttoriatensione pericolosa,sufficientea
trasmetterescosseelettriche allepersone.
ATTENZIONE
Ilmanualeutentecontiene importantiistruzionid’usoemanutenzione;aifinidella
sicurezza,ènecessariofarsempreriferimentoalmanuale.
AVVERTENZA:PERRIDURREILRISCHIODICHOCELETTRICO,NONESPORREQUESTO
DISPOSITIVOASPRUZZIOGOCCIOLAMENTO.
Nota:
Dopoun prolungatoutilizzo,l’apparecchiosiriscalderà.Questofenomeno ènormaleenon
rappresentaun problema.
All’interno dell’apparecchiosono presentimicroprocessoriche potrebberopresentare
malfunzionamentiinseguitoainterferenzeodisturbiesterni.Incasodimalfunzionamento,scollegare
ericollegarel‘apparecchio.
VARNING
RISK FÖR ELEKTRISK
STÖT ÖPPAN EJ

CARATTERISTICHE E COMANDI
1. PULSANTE STANDBY/ON
2. PULSANTE DAB/FM
3. PULSANTE SLEEP
4. PULSANTE INFO
5. PULSANTE SNOOZE
6. PULSANTE SVEGLIA 1
7. PULSANTE SVEGLIA 2
8. PULSANTE AUTO-TUNE
9. PULSANTE PRESET
10. PULSANTE SELEZIONE
11. CONTROLLO SELEZIONE
12. CONTROLLO VOLUME
13. PRESA CUFFIE
14. ANTENNA
15. CAVO DI ALIMENTAZIONE ELETTRICA
16. INDICATORE SVEGLIA 1
17. INDICATORE SVEGLIA 2
18. DISPLAY LCD
IMPOSTAZIONE DELL’OROLOGIO
Quando si collega la radio alla rete elettrica per la prima volta questa va in standby, sul display
appare
“
00:00
”
e il dispositivo si mette in funzione. Premere una volta il pulsante STANDBY/ON
per accendere il dispositivo; questo va automaticamente in modalità DAB ed effettua una
scansione completa della sintonizzazione automatica DAB. Una volta completata la scansione,
viene selezionata automaticamente la prima stazione trovata in ordine alfanumerico. In pochi
secondi l’orologio viene sincronizzato all’ora locale corrente. Non è necessario regolare l’orologio
manualmente.
FUNZIONE SVEGLIA
Questa radio include anche la funzione Dual Alarm. È possibile impostare due diversi orari di
sveglia e due diverse modalità di sveglia che permettono di svegliarsi al suono di un segnale
acustico elettronico o con la propria stazione radio preferita (DAB/FM).
Impostazione modalità orario di sveglia
1. Premere e tenere premuto il pulsante SVEGLIA (1 o 2) per più di 2 secondi per
accedere alla sezione impostazione sveglia; sul display compare “Alarm # Time Set” e il
quadrante dei “minuti” lampeggia.
2. Per impostare l’orario di sveglia, ruotare la manopola CONTROLLO SELEZIONE e
premere il pulsante SELEZIONA per confermare – impostare prima i minuti e poi le ore.
(F.1) (F.2)
3. Dopo aver impostato l’orario di sveglia, è possibile impostare la modalità di sveglia –
impostare prima il TIPO DI SUONERIA (1 o 2), poi DAB PRESET (1-10), FM PRESET
(1-10) ed infine il VOLUME della sveglia (1-20). (F.3) (F.4) (F.5)
4. Ruotare la manopola CONTROLLO SELEZIONE per selezionare e premere il pulsante
SELEZIONA per confermare. Una volta confermato il volume della sveglia, l’impostazione
della sveglia è completa.
5. Ripetere la procedura per impostare l’altra sveglia (1 o 2).
Impostazione della sveglia su on/off e selezione della modalità di sveglia
1. Premere ripetutamente il pulsante SVEGLIA (1 o 2) per attivare la funzione sveglia e
selezionare la modalità di sveglia; la relativa modalità di sveglia si modifica ad ogni
pressione nel seguente ordine: “OFF > BEEP > DAB > FM > OFF > BEEP > …….”. (F.6)
(F.7) (F.8)
2. Quando sul display compare la modalità di sveglia desiderata, rilasciare il pulsante
SVEGLIA e la funzione sveglia sarà attiva. Sul display compare l’icona associata alla
sveglia scelta – Quella in alto è per “Alarm 1” e quella in basso indica “Alarm 2”. Le icone
della sveglia lampeggiano alternativamente quando entrambe le sveglie sono attive.(F.9)
3. All’ora impostata per la sveglia si attiva la modalità di sveglia desiderata che continua a
suonare per un’ora per poi spegnersi automaticamente. Per fermare prima la sveglia,
premere una volta il pulsante SVEGLIA associato (1 o 2) o premere il pulsante
STANDBY/ON per spegnere il dispositivo.(F.10)
IT-2
F1
F2
F3
F4
F5
F6
F7
F8
F9
1 2 346
578 9 10
1816 17
11 12
15
13 14

4. Per controllare lo stato della sveglia, durante l’ascolto della radio in FM premere il pulsante INFO, durante l’ascolto
della radio in DAB premere ripetutamente il pulsante INFO finché sul display non compare lo stato della sveglia.
Nota: La sveglia numero uno ha la priorità e continua a suonare per un’ora; la funzione snooze spegne la sveglia solo
temporaneamente nell’arco di questo tempo, dunque se la sveglia numero due è prevista durante questo lasso di tempo non
si attiverà. Ma se la sveglia numero uno viene spenta prima dell’attivazione della sveglia numero due, in questo caso la
sveglia numero due si attiverà.
FUNZIONE SNOOZE
Mentre la sveglia suona, premendo il pulsante SNOOZE si può spegnere temporaneamente la sveglia per 5 minuti e
l’icona “z” della funzione snooze compare sul display. Quest’operazione può essere ripetuta più volte durante l’ora in
cui la sveglia suona. (F.11)
FUNZIONE SLEEP
Questa funzione permette di programmare la radio in modo che si spenga automaticamente dopo un determinato periodo
di tempo. È possibile impostare questo tempo sia in modalità standby sia quando la radio è accesa; se si imposta questo
tempo in modalità standby, la radio si accende automaticamente dopo la conferma dell’impostazione.
1. Per attivare la funzione sleep, premere il pulsante SLEEP, sul display compare “Sleep 90 min”.
2. Premendo ripetutamente il pulsante SLEEP il tempo sul display si modifica ad ogni pressione nel seguente ordine:
3. Quando sul display compare il tempo desiderato, rilasciare il pulsante per attivare la funzione sleep. Il quadrante
dei “secondi” nell’orologio cambia in “S#”, dove “S1” sta per “10 minuti” e così via (F.12)
4. Quando il tempo della funzione sleep arriva a zero, la radio si spegne.
5. Per disattivare la funzione sleep durante il suo funzionamento, premere una volta il pulsante SLEEP; sul display
compare “Sleep OFF”, nel quadrante dei “secondi” “S#” scompare e ricompaiono i secondi.
IT-3
SCOLTO DELLA RADIO e
e si collega la radio alla rete elettrica e la si accende, questa va in standby, la modalità DAB si attiva
ione: una rapida e una completa. La scansione rapida
TOTUNE, sul
ione manuale, premere e tenere premuto il pulsante INFO finché sul display non
, sul display are “5A to 13F” e le
e dalla
A
Come migliorare la ricezion
Questa radio è dotata di un’antenna DAB/FM in filo di piombo. Per ottenere prestazioni ottimali, estendere al massimo
l’antenna e regolarne la posizione e la direzione fino ad ottenere la ricezione migliore. Per una ricezione DAB ottimale,
consigliamo di tenere sempre l’antenna in posizione verticale (fissandola verso l’alto o verso il basso dietro la radio).
Modalità DAB
La prima volta ch
automaticamente ed effettua una scansione completa delle stazioni. Durante la scansione, il display visualizza una barra di
scorrimento che mostra il grado di completamento della scansione. Una volta completata la scansione, viene visualizzato
il numero di stazioni trovate e la prima stazione trovata in ordine alfanumerico viene selezionata automaticamente.
Le normali stazioni radio non DAB sono riunite in gruppi e trasmesse su un’unica frequenza. Questi gruppi sono detti
multipli o insiemi. Ogni volta che viene trovato uno di questi gruppi, il nome del gruppo compare sul display.
Modalità di autoscansione
Ci sono due modalità di scans
cerca solo la parte centrale dei canali DAB della Banda III, mentre la scansione
completa cerca tutti i canali DAB della Banda III. Una volta completata la scansione,
la radio seleziona la prima stazione trovata in ordine alfanumerico.
1. Per avviare la scansione rapida, premere una volta il pulsante AU
display compare
“
Scan Services Quick Scan
“
e successivamente una barra di
scorrimento che mostra il grado di completamento. (F.13)
Per avviare la scansione completa, premere e tenere p2. remuto il pulsante
AUTOTUNE finché sul display non compare “Scan Services Full Scan”. (F.14)
Per scorrere le stazioni trovate, premere una volta il pulsante SELEZIONA e,3. quando sul display compare “< SELECT >”, ruotare la manopola CONTROLLO
SELEZIONE per scorrere le stazioni.
Sintonizzazione manuale
Per selezionare la sintonizzaz
compare “Manual Tune
”
, poi premere il pulsante SELEZIONA per confermare.
1. Ruotare la manopola CONTROLLO SELEZIONE per scorrere i canali DAB comp
frequenze associate. Quando la radio individua un gruppo di stazioni (insieme/multiplo) o uno dei canali DAB, in
fondo al display compare il nome del gruppo di stazioni.
Per selezionare l’insieme/multiplo, premere il pulsante2. SELEZIONA, sul display compare la prima stazione
dell’insieme/multiplo.
Ruotare la manopola CONTR3. OLLO SELEZIONE per scorrere le stazioni esistenti nell’insieme/multiplo.
4. una volta individuata la stazione desiderata, premere il pulsante SELEZIONAe contemporaneamente si esc
modalità di sintonizzazione manuale.
F13
F14
F12
F11
F10
S
IT-4
elezione automatica on/off NTROLLO SELEZIONE per scorrere le stazioni trovate, se la selezione automatica è su
rasmissioni Aggiuntive della stazione, compare il simbolo “>” che sta ad indicare che per quella specifica stazione
odalità FM il pulsante DAB/FM per selezionare FM; sul display compare “FM” e la frequenza. l display compare “<
3. atica verso l’alto, premere una volta il pulsante AUTOTUNE che avvia
4.
EMORIZZAZIONE E RICHIAMO DELLE STAZIONI are fino a 10 stazioni; questo vi permette di accedere
nizzarsi sulla stazione desiderata, premere e tenere premuto il pulsante
2. ro su cui memorizzare la stazione, poi
3. otare la manopola
4.
ODALITÀ DI VISUALIZZAZIONE DAB sequenza le seguenti informazioni:
Mentre si ruota la manopola CO
“ON”, viene selezionata automaticamente la stazione che compare sul display. Se la selezione automatica è su “OFF”, è
necessario premere il pulsante SELEZIONA per ascoltare la stazione visualizzata; se questo non avviene, in pochi
secondi si torna alla visualizzazione precedente. Per passare dalla selezione automatica “ON” ad “OFF”, premere e
tenere premuto il pulsante SELEZIONA finché sul display non compare “Auto Enter ON” o “Auto Enter OFF”.
(F.15)(F.16)
T
In alcuni casi, dopo il nome
sono disponibili trasmissioni aggiuntive. Queste trasmissioni aggiuntive offrono servizi extra legati alla stazione
principale. Ad esempio una stazione sportiva potrebbe voler aggiungere radiocronache extra. Le trasmissioni
aggiuntive sono inserite subito dopo la stazione principale nell’elenco delle stazioni. Per selezionare una trasmissione
aggiuntiva, premere il pulsante SELEZIONA quando sul display compare il simbolo “>” prima del nome della stazione. Al
termine della trasmissione aggiuntiva, la radio si risintonizza automaticamente sulla stazione principale.
M
1. Premere
2. Per avviare la sintonizzazione manuale, premere una volta il pulsante SELEZIONA e quando su
TUNING >”, ruotare la manopola CONTROLLO SELEZIONE finché non compare la frequenza desiderata o non si
raggiunge la ricezione ottimale.
Per avviare la ricerca autom
automaticamente la scansione della banda di frequenza e si ferma automaticamente quando trova una stazione.
Per avviare la ricerca automatica verso il basso, premere e tenere premuto il pulsante AUTOTUNE finché non
inizia a scansionare la banda di frequenza.
M
Sia in modalità DAB che in modalità FM, è possibile memorizz
direttamente alle vostre stazioni preferite.
1. Per memorizzare una stazione, sinto
PRESET finché sul display non compare e lampeggia “Preset #”. (F.17)
Ruotare la manopola CONTROLLO SELEZIONE per selezionare il nume
premere il pulsante PRESET per confermare; sul display compare “Preset # Saved”. (F.18)
Per richiamare una stazione memorizzata, premere una volta il pulsante PRESET, poi ru
CONTROLLO SELEZIONE per selezionare le stazioni memorizzate; sul display compare “Preset # Loaded”.
Se alla stazione memorizzata non è stato assegnato un numero, sul display compare “Preset # Free”.
M
In modalità DAB, ogni volta che si preme il pulsante INFO, il display visualizza in
Insieme/Multiplo (Nome gruppo) azioni radio unite
no
ata e ora ra vengono aggiornate automaticamente
LS ta per Dynamic Label Segment che indica un i
sui
Potenza segnale e una barra di scorrimento che , più
po di programma programma trasmesso.
it rate audio pare il bit rate del segnale audio digitale
tato sveglia pare lo stato della sveglia (on/off), l’orario
Un Insieme/Multiplo è un gruppo di st
tra loro e trasmesse insieme su un’unica frequenza.
Esistono multipli nazionali e locali: quelli locali includo
stazioni specifiche della zona.
D
La data e l’o
grazie alle informazioni trasmesse; non è necessario
regolare l’orologio manualmente.
D
DLS s
messaggio in scorrimento sul display che le emittent
possono includere nelle proprie trasmissioni.
Solitamente il messaggio include informazioni
programmi, … ecc.
Sul display compar
indica la potenza del segnale: più forte è il segnale
lunga è la barra, da sinistra a destra.
Ti
Descrive il genere di
B
Sul display com
ricevuto.
S
Sul display com
di sveglia e la modalità di sveglia.
F18
F17
F16
F156
Table of contents
Languages:
Other Denver Clock Radio manuals

Denver
Denver CRL-330 User manual

Denver
Denver CRP-612 User manual

Denver
Denver CRP-712 User manual

Denver
Denver REC-34 User manual

Denver
Denver CRCD-213 User manual

Denver
Denver CRL-330 User manual

Denver
Denver CR-414 User manual

Denver
Denver CRP-210 User manual

Denver
Denver CRP-112 User manual

Denver
Denver TR-52 Specification sheet

Denver
Denver CR-515 User manual

Denver
Denver CRP-515 User manual

Denver
Denver CR-421 User manual

Denver
Denver CRL-330 User manual

Denver
Denver DAB-36 User manual

Denver
Denver CRP-714 User manual

Denver
Denver DAB-45PLUS User manual

Denver
Denver CRL-330 User manual

Denver
Denver IFM-90 User manual

Denver
Denver CRP-615 User manual