Denver IFI-1500 User manual

2010/12/14
EHWO1-100098
309-991i02-0001
IFI-1500 EB-991I
96 8国语言说明书
A5
Silvia Liao 10-12-20, 15:49

Speaker System for iPod / iPhone
INSTRUCTION MANUAL
Model No.: IFI-1500

CAUTION
Symbol Work Denitions
DANGER – Indicates an imminently hazardous situation, which, if not avoided,
will result in death or serious injury. This symbol appears only in the most extreme
situations.
WARNING - Indicates a potentially hazardous situation which could result in death
or serious injury.
CAUTION - Indicates a potentially hazardous situation, which, if not avoided, may
result in minor/ moderate injury or product/ property damage. It also warns against
unsafe practices.
READ ALL INSTRUCTIONS BEFORE USE
CAUTION
RISK OF ELECTRIC SHOCK
DO NOT OPEN
The lightning ash with
arrowhead symbol,
within an equilateral
triangle is intended to
alert the user to the
presence of insulated
‘dangerous voltage’
within the product’s
enclosure that may be
of sucient magnitude
to constitute a risk
of electric shock to
persons.
Always follow basic safety precautions when using electrical products,
especially when children are present.
- 1 -
WARNING: TO REDUCE THE
RISK OF ELECTRIC SHOCK
DO NOT REMOVE COVER
(OR BACK) , NO USER
SERVICEABLE PARTS INSIDE
REFER SERVICING TO
QUALIFIED SERVICE
PERSONNEL.
The exclamation point
within an equilateral
triangle is intended
to alert the user
to the presence of
important operating
and maintenance
(servicing) instructions
in the literature
accompanying
the appliance.
ENGLISH

SAFETY INSTRUCTIONS
1) Read this Instruction Manual before you attempt to connect or operate the
appliance.
2) Keep these instructions in good condition. Heed all warnings. Follow all
instructions.
3) Save this Instruction Manual for future reference.
4) The apparatus shall not be exposed to dripping or splashing and no objects lled
with liquids, such as vases, shall be placed on the product. Dry location use only.
5) No naked ame source, such as candles, should be placed on the product.
6) Children should be supervised to ensure that they do not play with the appliance.
7) Ventilation should not be impeded by covering the ventilation openings.
8) Ensure that the unit is plugged into an AC 230V 50 Hz power outlet. Using higher
voltage may cause the unit to malfunction or even re catching. Turn o the unit
before unplugging it from power source to completely switch it o.
9) Do not plug/ unplug the power plug into/ from an electrical outlet with wet hands.
10) If the power plug does not fit into your outlet, do not force the plug into an
electrical socket if it does not t.
11) Only use attachments/ accessories, which are specied by the manufacturer.
12) Use replacement parts, which are specied by the manufacturer.
13) Install the unit in accordance with the manufacturer’s instructions.
14) Place the unit where there is good ventilation. Place the system on a at, hard and
stable surface. Do not expose to temperatures above 35°C. Allow at least 10 cm
clearance from the rear and the top of the unit and 5 cm from each side.
15) Press the player’s buttons gently. Pressing them too hard can damage the player.
16) Dispose of used batteries in an environmental-responsible manner.
17) Always ensure that the product is unplugged from the electrical outlet before
moving or cleaning. Clean it with dry cloth only.
18) Unplug the product during lightning, storms or when it will not be used for long
periods of time.
19) This product has no user-serviceable parts. Do not attempt to repair this product
yourself. Only qualified service personnel should perform servicing. Take the
product to the electronics repair shop of your choice for inspection and repair.
20) NEVER let anyone, especially children, push anything into holes, slots or any other
openings in the unit’s casing as this could result in a fatal electric shock.
21) Don’t mount this product on a wall or ceiling.
22) Do not place the unit near TVs, speakers and other objects that generate strong
magnetic elds.
23) This unit is for indoor use only.
24) Do not leave the unit unattended when it is in use.
25) Battery shall not be exposed to excessive heat such as the sunshine, re or the like.
26) The mains plug is used as disconnect device, the disconnect device shall remain
readily operable
NOTE: when the system is switched to standby mode, it is still consuming some
power. To disconnect the system completely, remove the AC power plug from the
wall outlet.
- 2 -

PREPARATION FOR USE
1. STANDARD ACCESSORIES
Carefully remove all the accessories from the display carton. Please verify that you
have all the following accessories before you dispose of the carton. Do not remove any
labels or stickers on the back panels of the main unit. Place your unit on a level surface
such as a table, desk or shelf.
• Instructionmanualx1
• Remotecontrolx1
• AUXincablex1
2. CONNECTING POWER SOURCE
This unit was designed to operate with an AC 230V ~ 50Hz
power supply.
Connecting this system to any other power source may cause
damage to the system. Unwind the AC power cord to its full
length. Connects the plug to the AC mains inlet of the unit, and
then the mains plug into a standard AC socket outlet. Make
sure the AC plug is fully inserted into the socket outlet. The set
is now connected and ready to use.
If the operation of the remote control becomes unsatisfactory, replace the original
battery with a new 3-volt lithium battery.
1. Slide out the battery holder from the remote control case. (Push tab "A" towards the
middle rst, see diagram).
2. Place one 3V CR2025 battery into the battery holder, observing the polarity marking.
If the battery is placed incorrectly, the remote control will not work. Dispose of the
old battery properly. Do not leave it lying around where a young child or pet could
play with or swallow it.
3. Battery may explode or leak if mistreated. Do not attempt to recharge it or
disassemble it. Do not dispose of the old battery in a re.
CAUTION: Danger of explosion exists if the battery is replaced incorrectly. Replace
only with the same or equivalent type of battery.
3. Installing and replacing the batteries on the remote
control
The remote control requires one "CR2025 type" 3-Volt lithium battery
(included). To extend the life of the original battery we have inserted
a small clear plastic spacer tab between the lithium battery and the
battery terminal. You must remove this battery spacer tab before you
use the remote control. To remove the tab, pull it in the direction of
the arrow in the illustration, as shown:
To switch the unit o completely, withdraw the power cord from the wall outlet.
1. Unwind the AC power cord on the rear of the unit. Do not plug or unplug the power
cable in wet hands.
2. Once connected to the power supply, the unit will enter standby mode. Press the
STANDBY button on the remote control to power the unit on.
3. Please disconnect the mains plug from the AC outlet if the appliance is not going to
be used for a long period of time.
ENGLISH
- 3 -

LOCATION OF CONTROLS AND INDICATORS
1. FRONT PANEL OF THE UNIT
2. TOP PANEL OF THE UNIT
4. Insert the battery holder into the battery compartment.
Note: Please remove all of the batteries to prevent damage or injury from possible
battery leakage if the unit will not be used for a long period of time. Use only the
specied size and type of battery.
1.) Speaker
2.) VOLUME - Button
3.) VOLUME + Button
4.) PLAY/PAUSE Button
5.) iPod Connector
- 4 -

LOCATION OF CONTROLS AND INDICATORS
3. REAR PANEL OF THE UNIT
4. PANEL OF THE REMOTE CONTROL
Remote Control
6.) Video output
7.)AUXInput
8.) AC mains inlet
9.) Mains Power Switch
ENGLISH
- 5 -
1.) STANDBY Button
2.) iPod UP Button
3.) PLAY / PAUSE Button
4.) TUNE/SKIP Button
5.) ENTER Button
6.) TUNE/SKIP Button
7.) MENU Button
8.) iPod/AUX Button
9.) iPod DOWN Button
10.) TREBLE – Button
11.) TREBLE + Button
12.) BASS – Button
13.) BASS + Button
14.) MUTE Button
15.) VOLUME + Button
16.) VOLUME – Button

OPERATING INSTRUCTIONS
- 6 -
1. BASIC OPERATION
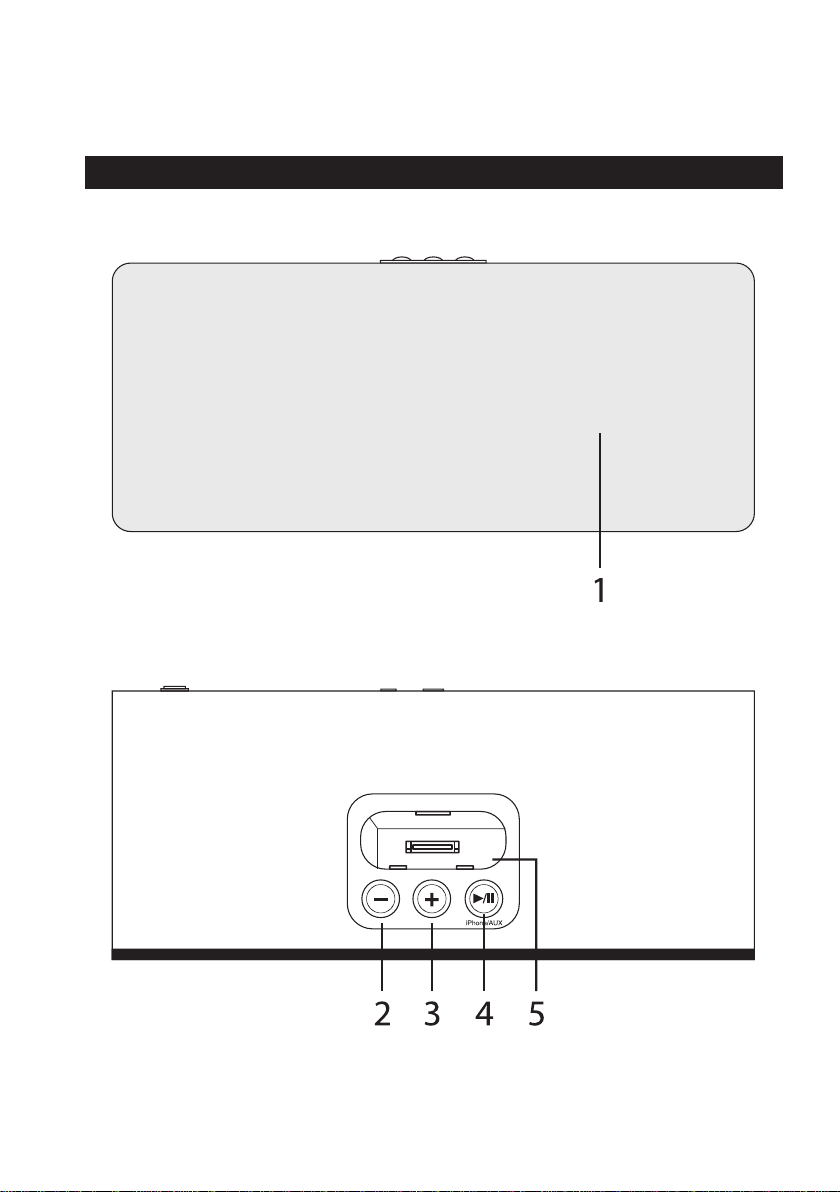
1). Turning on/ o the unit
Slide the mains power switch to ON position, press the STANDBY button on the
remote control to turn on the unit (press it again to switch the unit to standby
mode).
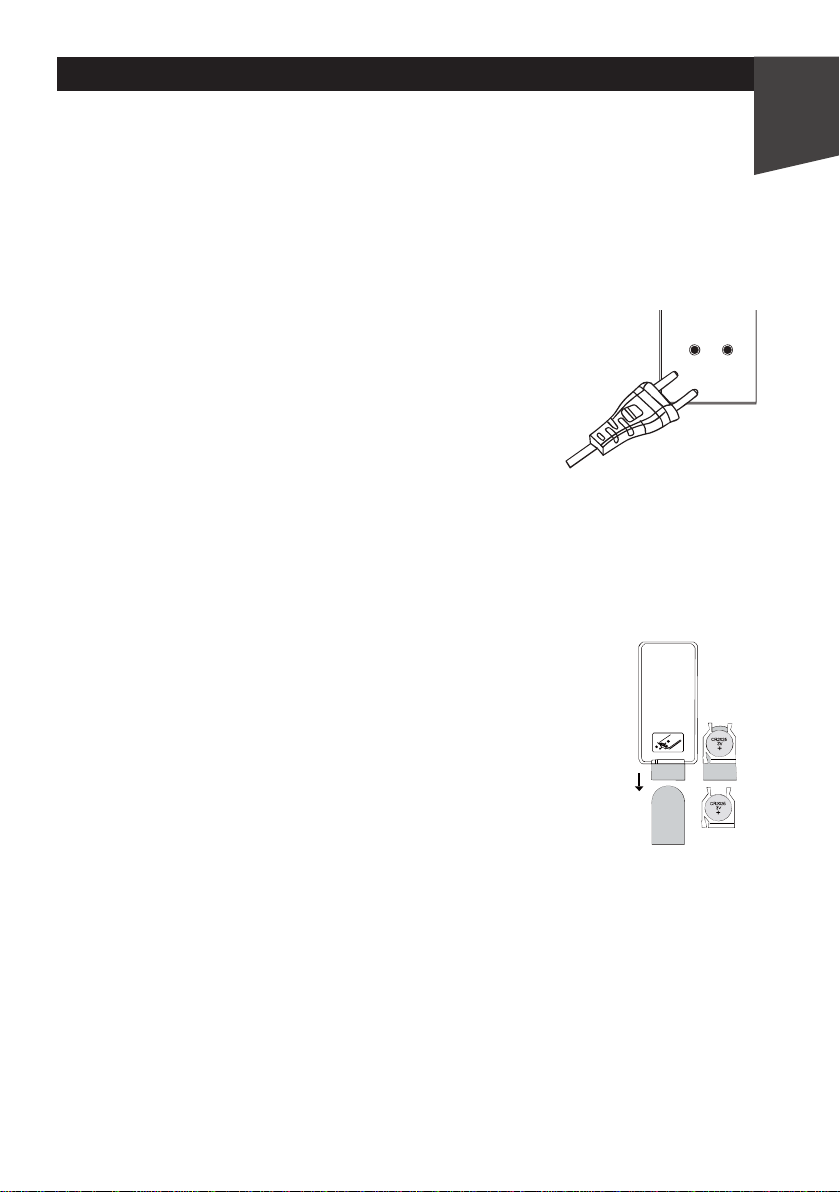
Note: Make sure the power plug is properly connected to a 230V ~ 50Hz
household AC power outlet.
2). Operating mode selection (FUNCTION)
PresstheAUX/iPodbuttononremotecontrolorpressandholdthePLAY/PAUSE
buttonontheunittoselectiPodMode,AUXMode.
3). VOLUME - /VOLUME + Button
Press the VOLUME- / VOLUME+ button on the remote to adjust the sound level to
the desired level.
4). Operating mute function
WhenlisteningtoiPod,orAUXin,pressthemutebuttonontheremoteto
activate the mute function (the LED indicator on the top panel will begin
ashing on the display). Press it again to cancel the mute function or press the
VOLUME+/- button to resume the normal mode.
5). Adjust the BASS level
Press BASS + / BASS – on the remote control to adjust the BASS level, it will
enhance/reduce the BASS eect.
6). Adjust the TREBLE level
Press TREBLE + / TREBLE – on the remote control to adjust the BASS level, it will
enhance/reduce the TREBLE eect.
2. LISTENING TOYOUR iPod (iPod is not included)
This unit can support various models of iPod players with 30-pin dock connectors,
such as iPod Mini, iPod photo, iPod video, iPod nano 1st/2nd/3rd/4th/5th Generation
and 3rd /4th (video) generation, iPod 5th generation (video), iPod touch 1st/2nd , iPod
classic and iPhone. Grip the iPod and pull it upwards and out carefully.
It can also act as a battery charger for your iPod when the iPod is connected via the
dock connector. Universal docking station for all iPod own inserts.
Select the iPod universal cradle (not included, check your iPod packing if it came with
this cradle) that ts with your iPod model. Install the cradle with 2 tabs facing the front
by pushing it down in the universal dock on top of the unit. To remove the cradle,
press its inside rear surface and pull it upward.
1). Operating iPod with the main unit
(1) Switch the mains power to on position, press the STANDBY button on the
remote control, or press the PLAY/PAUSE button on the top panel to power on
theunit.PressiPod/AUXbuttonontheremotecontrolorpressandholdthe
PLAY/PAUSE button on the unit to select iPod function.
(2)If the iPod player is connected, the unit will start playback. The iPod battery
will be charged automatically until it is fully charged.
Select your desired music, photo, or videos, etc., and play the connected iPod
as usual.

OPERATING INSTRUCTIONS
ENGLISH
- 7 -
3. AUX IN FUNCTION
Connect the Audio Output jacks of your auxiliary sound source (TV, VCR, DVD Player,
MP3player,CassetteDeck,MiniDiscplayer,etc.,)totheAUXinsocketontheback
paneloftheunit.TheauxiliaryfunctionwillonlybesupportedwhentheAUXinjack
hasasuitablesoundsourceconnectedviaanAUXincable.(Theaudiocableisnot
included.) The auxiliary function will only activate when the aux in cable is connected.
1. Press the STANDBY button on the remote control to power on the unit.
2.OncetheAUXincableisconnectedwithyouraudiodeviceandyourspeaker
system, turn your auxiliary source‘On’and operate it as usual.
3.PresstheAUX/iPodbuttonontheremoteorpressandholdthePLAY/PAUSEbutton
ontheunittoselectAUXfunction.Thesoundfromtheauxiliarysourcewillbeheard
through the speakers of this system.
4. Press the VOLUME+/-, BASS +/- or the TREBLE -/+ to adjust the sound eect level as
desired.
4. Video out function
When an iPod Video is plugged into this unit, videos can be viewed on another display
screen by connecting the VIDEO OUT jack of the main unit to the desired video display (
video connection cable is not included ).
2). Control iPod menu by Remote Control only
Press the “iPod Menu” button on the remote control. The iPod will go to the
previous menu. Press the iPod MENU UP/DOWN button on the remote control to
select iPod menu; then press the iPod ENTER button to enter the selected menu.
Note: The unit cannot show any music information of your iPod. Please view the
music information through you iPod display.
3). Charge your iPod
If the iPod is docked to the unit, it will charge automatically in
STANDBYmode,iPodMode,andAUXMode.
Note:
The i150W10 was designed for high audio power output. We
recommend that you turn o your iPhone/iPod“Shake to shue”
setting to avoid the unit accidentally activating it when operating
at high volume levels.
(3)Press PLAY/PAUSE button on top panel or remote control to control play and
pause functions. Press it again to resume the playback.
(4)Press Previous/Next button on the remote control to select the previous or
next song.
(5)Press the VOLUME + / VOLUME – button on the top panel or remote control to
adjust the volume as desired.
(6)Press the BASS+/– or the TREBLE +/– button on the remote control to adjust
the sound eect as desired.

CARE AND MAINTENANCE
TROUBLE SHOOTING
- 8 -
CARE OF THE APPLIANCE
Disconnect the appliance from the power source when cleaning.
If the unit becomes dusty, wipe it with a soft and dry duster. Use a soft cloth to clean
this appliance. Do not use any wax, polish sprays, or abrasive cleaners on the unit.
CAUTION
Never allow any water or other liquids to get inside the unit while cleaning. Dispose of
used batteries in an environmental-responsible manner. This product is not intended
for commercial use. Household use only.
Before taking the unit to be repaired, please check the following table when a problem
occurs. Consult your dealer or service center if the problem cannot be solved with the
following information.
RESETTING THE UNIT
If the system does not respond, the unit may have experienced an electrostatic
discharge or a power surge that triggered the internal computer to automatically shut
down. If this occurs, disconnect the unit from the AC power outlet and reconnect it
again after a few seconds.
Problem Remedy
Power
System does not turn on or does not
respond to the remote control.
- Make sure AC power plug is connected
to the wall socket outlet properly and it
has power.
- If this does not help, leave the unit
unplugged before seeking advice.
iPod
The unit doesn’t play iPod les or doesn’t
function as expected.
- Make sure the function is set to iPod
mode.
- Make sure iPod is connected properly.
- Make sure the proper cradle for your iPod
is tted to the unit.
- Pause mode may be activated; press the
Play/Pause button again.
- Make sure the iPod is switched on.
- Vibrations may have caused the iPod to
come loose from the docking station.
Remote control
No functions or short range.
- Insert new batteries.
- Aim remote directly towards the remote
sensor.
Note: Please make sure the TV Out function is set to ON in the iPod Video Setting
menu. Otherwise, the video signal will not be able to show on the display.(For details,
please check the iPod Video Instruction Manual.)
For iPod touch users: Simply choose the video le you would like to play and the iPod
touch will display “Display on TV? Yes/No.” Choose “YES” if you want to output the le
to the desired video display.

TECHNICAL INFORMATION
ENGLISH
- 9 -
AC Power: AC 100-240V ~ 50/60Hz
Remote Handset: DV3Vsize:CR2025X1
Unit Output Power: 2 x 20W (L/R Speakers) 110W (Subwoofer)
Power Consumption: 150W
Unit Dimensions: Approx, 500(L) x 215(W) x 215(H) mm
Operation temperature: +5°C +35°C
Electric and electronic equipment and included batteries contains
materials, components and substances that can be hazardous to your
health and the environment, if the waste material (discarded electric
and electronic equipment and batteries) is not handled correctly.
Electric and electronic equipment and batteries is marked with the
crossed out trash can symbol, seen below. This symbol signifies
that electric and electronic equipment and batteries should not be
disposed of with other household waste, but should be disposed of
separately.
As the end user it is important that you submit your used batteries to the approriate
and designated facility. In this manner you make sure that the batteries are recycled
in accordance with legislature and will not harm the environment.
All cities have established collection points, where electric and electronic equipment
and batteries can either be submitted free of charge at recycling stations and other
collection sites, or be collected from the households. Additional information is
available at the technical department of your city.
“Made for iPod,” and “Made for iPhone” mean that an
electronic accessory has been designed to connect
specically to iPod,or iPhone, respectively, and has been
certified by the developer to meet Apple performance standards. Apple is not
responsible for the operation of this device or its compliance with safety and
regulatory standards. Please note that the use of this accessory with iPod, or iPhone,
may aect wireless performance.
iPhone, iPod, iPod classic, iPod nano, iPod shue, and iPod touch are trademarks of
Apple Inc., registered in the U.S. and other countries.
NOTE: As a result of continual improvements, the design and specications of
the product within may dier slightly to the unit illustrated on the packaging.
All rights reserved
Copyright Denver Electronics
www.denver-electronics.com

Högtalarsystem för iPod/iPhone
BRUKSMANUAL
Modell NR.: IFI-1500
LÄS DENNA BRUKSANVISNING INNAN APPARATEN TAS I DRIFT OCH SPAR
DEN FÖR FRAMTIDA REFERENS .

FÖRSIKTIGHET
SYMBOLER FÖR ARBETSDEFINITIONER
FARA – Indikerar en omedelbart farlig situation som om den inte undviks kan
resultera i dödsfall eller allvarlig skada. Den här symbolen visas endast i de mest
extrema situationerna.
VARNING - Indikerar en potentiell farlig situation som kan resultera i dödsfall eller
allvarlig skada.
FÖRSIKTIGHET - Anger en potentiell farlig situation som om den inte undviks, kan
resultera i mindre/personskador eller/skada på egendom. Den varnar också för
osäkra metoder.
LÄS ALL INSTRUKTION INNAN ANVÄNDNING
CAUTION
RISK OF ELECTRIC SHOCK
DO NOT OPEN
Blixten med
pilspetssymbolen i
en liksidig triangel
är avsedd att varna
användaren för
närvaron av isolerad
”farlig spänning”
innanför produktens
hölje som kan vara
tillräcklig för att utgöra
en risk för elektriska
stötar.
Utropstecknet i en liksidig
triangel är avsedd att varna
användaren för närvaron av
användning och underhåll
(service) instruktioner i
litteraturen som medföljer
apparaten.
Följ alltid de grundläggande säkerhetsföreskrifterna vid användning av
elektriska produkter, särskilt när barn är närvarande.
- 1 -
VARNING: FÖR ATT MINSKA
RISKEN FÖR ELEKTRISK
STÖT
TA INTE BORT LOCKET
(ELLER BAKRE DELEN), INGA
ÅTGÄRDBARA DELAR FINNS
PÅ INSIDAN REMITTERA
SERVICE TILL KVALIFICERAD
SERVICEPERSONAL.
SWEDISH

SÄKERHETSFÖRESKRIFTER
1) Läs denna instruktionsmanual innan du försöker ansluta eller sätta ingång
apparaten.
2) Förvara dessa instruktioner i gott skick. Var observant på alla varningar. Följ alla
anvisningar.
3) Spara bruksanvisningen för framtida referens.
4) Apparaten får inte utsättas för droppar eller stänk och att inga föremål fyllda med
vätskor av något slag, som exempelvis vaser, får placeras på apparaten. Endast torra
utrymmen får brukas.
5) Inga öppna brandkällor, såsom exempelvis stearinljus, får placeras på produkten.
6) Barn skall övervakas så att de inte leker med apparaten.
7) Ventilationen får inte täppas igen genom att täcka över ventilationsöppningar.
8) Se till att enheten är ansluten till ett AC 230 V 50 Hz eluttag. Användandet av högre
spänning kan orsaka att enheten inte fungerar eller att den börjar brinna. Slå av
enheten innan du kopplar den från strömkällan med att helt stänga av den.
9) Anslut inte/ dra ur kontakten till/ från ett eluttag med blöta händer.
10) Om stickkontakten inte passar in i ditt eluttag, tvinga inte in kontakten i ett eluttag
om det inte passar.
11) Använd endast don/tillbehör som angivits av tillverkaren.
12) Använda reservdelar som speciceras av tillverkaren.
13) Installera enheten i enlighet med tillverkarens anvisningar.
14) Placera enheten där det finns god ventilation . Placera systemet på en plan, hård
och stabil yta. Utsätt inte för temperaturer över 35° C. Lämna minst 10 cm avstånd
mellan den bakre och enhetens ovansida och 5 cm från varje sida.
15) Tryck försiktigt på spelknappen . Om du trycker dem för hårt kan det skada spelaren.
16) Kassera använda batterier på ett miljöansvarsfullt sätt.
17) Försäkra alltid om att produkten är frånkopplad från eluttaget innan du yttar eller
rengör den. Rengör den med en torr trasa.
18) Koppla ur produkten under åska, storm eller när den inte inte kommer användas
under en längre tid.
19) Denna produkt har inga delar som kan servas av användaren. Försök inte reparera
produkten själv. Endast kvalificerad personal bör utföra service på apparaten.
Ta med produkten till en elektronik verkstad som du väljer för granskning och
reparation.
20) Låt ALDRIG någon, speciellt barn, trycka in något in hål, skåror eller andra öppningar
i enhetens hölje, då detta kan resultera i en olycksbringande elchock.
21) Montera inte denna produkt på en vägg eller i ett tak.
22) Placera inte enheten nära TV-apparater, högtalare och andra föremål som genererar
starka magnetfält.
23) Denna enhet är endast avsedd för inomhusbruk.
24) Lämna inte enheten utan uppsikt när den används.
25) Batteriet får inte utsättas för stark värme som solsken, eld eller liknande.
26) Nätkontakten används som en frånkopplingsenhet, där den skall vara ständigt
driftsduglig.
OBS: när systemet är i standby-läge, förbrukar det fortfarande lite ström. För att
koppla bort systemet helt, ta bort nätkabeln från vägguttaget.
- 2 -

FÖRBEREDELSER FÖR ANVÄNDNING
1. STANDARD TILLBEHÖR
Försiktigt ta ut alla tillbehör från kartongen Kontrollera att du har alla följande tillbehör
innan du kastar kartongen. Ta inte bort några etiketter eller klisterlappar på baksidan
av panelen till huvudenheten. Placera enheten på en plan yta såsom ett bord,
skrivbord eller en hylla.
• Instruktionsmanualx1
• Fjärrkontrollx1
• AUXinkabelx1
2. ANSLUTA STRÖMKÄLLA
Denna enhet var avsett att fungera med en AC 230V ~ 50Hz
strömförsörjning.
Anslutning av systemet till någon annan strömkälla kan
skada systemet. Veckla ut nätkabeln till sin fulla längd. Anslut
kontakten till kraftnätet för enheten och sedan stickproppen
i en standard AC vägguttag. Se till att stickkontakten är
ordentligt insatt i vägguttaget. Apparaten är nu ansluten och
klar att användas.
Om driften av ärrkontrollen blir otillfredsställande, ersätt det ursprungliga batteriet
med en ny 3-volts litiumbatteri.
1. Dra ut batterihållaren från ärrkontrollens hus. (Tryck på iken ”A” mot mitten först,
se diagram).
2. Placera ett 3V CR2025 batteri i batterihållaren, och observera polaritetens märkning.
Om batteriet är felaktigt insatt, kommer ärrkontrollen inte att fungera. Kassera det
gamla batteriet på ett korrekt sätt. Lämna det inte liggande runt, där ett litet barn
eller husdjur kan börja leka med det eller svälja.
3. Batteriet kan explodera eller börja läcka om det inte sköts på ett riktigt sätt. Försök
inte att ladda eller plocka isär det. Kasta inte det gamla batteriet i en eld.
FÖRSIKTIGHET: Fara för explosion kan existera om batteriet sätts in inkorrekt. Byt
endast ut batteri av samma eller motsvarandemärke.
3. Installation och byte av batterier på ärrkontrollen
Fjärrkontrollen kräver en "CR2025 typ" 3-Volt litiumbatteri (inkluderad).
För att förlänga livslängden på det ursprungliga batteriet har vi satt
ett litet genomskinnligt plastmellanlägg mellan litiumbatteriet och
batteriterminalen. Du måste ta bort detta plastmellanlägg till batteriet
innan du kan använda ärrkontrollen. För att ta bort iken, dra den i
pilens riktning på bilden, som visas:
För att stänga av enheten helt, dra ut nätsladden från vägguttaget.
1. Veckla ut nätsladden på baksidan av enheten. Anslut inte eller koppla ur
strömkabeln med blöta händer.
2. Efter att den är ansluten till elnätet, kommer enheten inta standby-läge. Tryck på
knappen STANDBY på ärrkontrollen för att starta enheten.
3. Vänligen koppla ur stickkontakten ur vägguttaget om apparaten inte ska användas
under en längre tid.
- 3 -
SWEDISH

PLACERING AV KONTROLLER OCH INDIKATORER
1. ENHETENS FRONTPANEL
2. ENHETENS TOPP PANEL
4. Sätt in batterihållaren i batterifacket.
OBS: Ta bort alla batterier för att förhindra skador eller olyckor från eventuella
batteriläckage om enheten inte kommer att användas under en längre tid. Använd
endast den angivna storleken och typ av batteri.
1.) Högtalare
2.) VOLYM - Knappen
3.) VOLYM + Knappen
4.) SPELA/PAUSA Knappen
5.) iPod Kontaktdon
- 4 -

PLACERING AV KONTROLLER OCH INDIKATORER
3. ENHETENS BAKRE PANEL
4. FJÄRRKONTROLLENS PANEL
Fjärrkontroll
6.)Video utgång
7.)AUXingång
8.)AC nätingång
9.)Strömbrytare till nätanslutningen
- 5 -
1.) STANDBY Knappen
2.) iPodUPP Knappen
3.) SPELA/ PAUSA Knappen
4.) TUNE/SKIP Knappen
5.) ENTER Knappen
6.) TUNE/SKIP Knappen
7.) MENY Knappen
8.) iPod/AUX Knappen
9.) iPod NED Knappen
10.) DISKANT– Knappen
11.) DISKANT+ Knappen
12.) BASS– Knappen
13.) BASS+ Knappen
14.) MUTE (TYST) Knappen
15.) VOLYM + Knappen
16.) VOLYM– Knappen
SWEDISH

BRUKSMANUAL
- 6 -
1. GRUNDLÄGGANDE DRIFT
1). Sätta på/ av enheten
Slå på elnätets strömbrytare till läge ON, tryck på knappen STANDBY på
fjärrkontrollen för att sätta på enheten (tryck igen för att byta enheten till
standby-läge).
NOTERA: Se till att kontakten är korrekt ansluten till ett 230V ~ 50Hz
hushållseluttag.
2). Val av driftläget (FUNKTION)
TryckpåAUX/iPodknappenpåfjärrkontrollenellerhållnedknappenSPELA/
PAUSApåenhetenförattväljaiPodMode,AUXläge.
3). VOLYM -/VOLYM + Knappen
Tryck på VOLYM-/ VOLYM + knappen på fjärrkontrollen för att justera den
ljudnivån till önskad nivå.
4). Drift av mute (tyst) funktionen
NärdulyssnarpåiPod,ellerAUXintryckerdupåmute(tyst)knappenpå
ärrkontrollen för att aktivera mute funktionen (lysdiodindikatorn på den övre
panelen börjar blinka på displayen). Tryck igen för att upphäva mute (tysta)
läget eller tryck på VOLYM + / - knappen för att återgå till normalläge.
5). Justera BASNIVÅN
Tryck på BASS + / BASS - på fjärrkontrollen för att justera BAS-nivån, det
kommer att öka/minska baseekten.
6). Justera TREBLE (DISKANT) nivån
Tryck på TREBLE + / TREBLE – på fjärrkontrollen för att justera BAS-nivån
kommer det att öka/minska TREBLE eekten.
2. LYSSNA PÅ DIN iPod (IPod är inte inkluderad)
Denna enhet kan stödja olika modeller av iPod spelare med 30-stifts
dockningskontakter, såsom iPod Mini, iPod foto, iPod video, iPod Nano för första/
andra/tredje/fjärde/femte generation och tredje/fjärde (video) generationen, iPod
femte generation (video), iPod touch första/andra, iPod klassisk och iPhone. Grip iPod
och dra den uppåt och ut försiktigt.
Den kan också fungera som en batteriladdare för din iPod när iPod ansluts via
dockningskontakten. Universal dockningsstation för alla iPod ägda insatser.
Välj iPod universalhållaren (ingår inte, kontrollera din iPod kartong om den kom med
denna hållare) som passar din iPod modell. Installera vaggan med 2 ikar vänd mot
framsidan genom att trycka ned den i den universala dockningen ovanpå enheten. Vill
ta bort vaggan trycker dess insidas baksida och dra uppåt. `
1). Drift av iPod med huvudenheten
(1)Sätt på strömmen, tryck på knappen STANDBY på fjärrkontrollen eller tryck
på PLAY/PAUSE knappen på den övre panelen för att slå på enheten. Tryck
iPod/AUXknappenpåärrkontrollenellerhållanedknappenPLAY/PAUSEpå
enheten för att välja iPod funktion.
(2)Om iPod spelaren är ansluten kommer enheten att starta uppspelningen. IPod
batteriet kommer att laddas automatiskt tills det är fulladdat.
Välj önskad musik, foton eller videofilmer, etc., och spela den anslutna iPod
som vanligt.

BRUKSANVISNING
- 7 -
3. AUX I FUNKTION
Anslut ljudutgången för din extra ljudkälla (TV, VCR, DVD spelare, MP3-spelare,
kassettdäck,minidiskspelareetc.,)tillAUXINuttagetpåbaksidanavenheten.Den
extrafunktionärendasttillgänglignärAUXinuttagetharenlämpligljudkällaansluten
viaenAUXikabeln.(Ljudkabelningårinte.)Denextrafunktionkommerendastatt
aktiverasnärAUXikabelnäransluten.
1. Tryck på knappen STANDBY på ärrkontrollen för att starta enheten.
2.NärAUXikabelnäranslutenmedljudenhetenochhögtalarsystemet,slå”On”(På)
din extra källa och använd den som vanligt.
3.TryckpåAUX/iPodknappenpåärrkontrollenellerhållnedknappenPLAY/PAUSE
påenhetenförattväljaAUXfunktion.Ljudetfråndehjälpfunktionernaförkällan
kommer att höras i högtalarna till detta system.
4. Tryck på VOLUME+/-, BASS +/- or the TREBLE -/+ för at justera nivån på ljudeekten
som så önskas.
4. Video ut funktion
När en iPod Video är ansluten till denna enhet, kan videon visas på en annan
bildskärm genom att ansluta VIDEO UT-uttaget på huvudenheten till önskad
bildskärm (videokabel ingår inte).
2). Kontroll iPod menyn med endast ärrkontrollen
Tryck på “iPod Meny” knappen fjärrkontrollen. IPod kommer att gå till
föregående meny. Tryck på iPod menyn Up/down knappen på ärrkontrollen för
att välja iPod meny; sedan tryck på iPod ENTER för att bekräfta den valda menyn.
NOTERA: Enheten kan inte visa någon musikinformation på din iPod. Läs vår
musikinformation genom din iPod skärm.
3). Ladda din iPod
Om iPod är dockad till enheten, kommer den att
laddas automatiskt i STANDBY-läge, iPod läge, och
AUXläge.
(3)Tryck på knappen PLAY/PAUSE ovanpå panelen eller fjärrkontrollen
för att styra spelet och paus funktionerna. Tryck igen för att återuppta
uppspelningen.
(4)Tryck på Previous/ Next-knappen på fjärrkontrollen för att välja föregående
eller nästa låt.
(5)Tryck på VOLYM + / VOLYM – knappen på den övre panelen eller ärrkontrollen
för att justera volymen som önskas.
(6)Tryck på BASS+/– eller TREBLE +/– knappen på ärrkontrollen för att justera
ljudeekten som önskas.
SWEDISH
IFI-1500 har designats för ljud med hög uteekt. Vi rekommenderar
att du stänger av din iPhone/iPod ”Shake to Shue” inställning för att
undvika att enheten olyckligtvis aktiverar den vid höga volymnivåer.

SKÖTSEL OCH UNDERHÅLL
FELSÖKNING
- 8 -
VÅRD AV APPARATEN
Koppla bort apparaten från strömkällan när du rengör den.
Om enheten blir dammig, torka av den med en mjuk och torr dammtrasa. Använd
en mjuk trasa för att rengöra apparaten. Använd inte vax, spray polish, eller frätande
rengöringsmedel på enheten.
FÖRSIKTIGHET
Låt aldrig vatten eller andra vätskor tränga in i apparaten vid rengöring. Kassera
använda batterier på ett miljöansvarsfullt sätt. Denna produkt är inte avsedd för
kommersiellt bruk. Endast för hushållen.
Innan enheten ska repareras, kontrollera följande tabell när ett problem uppstår.
Konsultera din handlare eller servicecenter om problemet inte kan lösas med följande
information.
ÅTERSTÄLLNING AV ENHETEN
Om systemet inte svarar, kan enheten har upplevt en elektrostatisk urladdning eller
en effekt ökning som utlöste den inre datorn att automatiskt stängas av. Om detta
inträar, koppla bort enheten från eluttaget och anslut den igen efter några sekunder.
Problem Lösning
Power
Systemet startar inte eller svarar
inte på ärrkontrollen.
– Kontrollera att nätkabeln är ansluten till
vägguttagets utlopp på rätt sätt och att den har
ström.
– Om detta inte hjälper, lämna enheten
frånkopplad innan du söker råd.
iPod
Enheten spelar inte iPod ler eller
fungerar inte som den ska.
– Kontrollera att funktionen är inställd på iPod
läge.
– Kontrollera att iPod är ansluten på rätt sätt.
– Kontrollera att rätt hållare för din iPod är
monterad på enheten.
– Pausläge kan aktiveras; tryck på Play/Pause
knappen igen.
kontrollera att din iPod är påslagen.
– Vibrationer kan ha orsakat att iPod lossnat från
dockningsstationen.
Fjärrkontroll
Inga funktioner eller kort räckvidd.
– Infoga nya batterier.
– Sikta in ärrkontrollen direkt mot ärrsensorn.
Notera: Se till att TV ut funktionen är inställd på ON i iPod Video inställningsmeny.
Annars kommer videosignalen inte att kunna visas på displayen. (För detaljer, se iPod
Video bruksanvisningen.)
För iPod touch användare: Välj den videol du vill spela och iPod touch kommer att
visa“Display på TV? Ja/Nej.”Välj“JA”Om du vill skriva ut len till önskad bildskärm.
Table of contents
Languages:
Other Denver Speakers manuals

Denver
Denver WRD-60 User manual

Denver
Denver BTG-158 User manual

Denver
Denver IPT-400 User manual

Denver
Denver BTV-220 User manual

Denver
Denver BTL-54NR User manual

Denver
Denver BTP-103 User manual

Denver
Denver TSP-205 User manual

Denver
Denver BPS-350NR User manual

Denver
Denver GAS-500 User manual

Denver
Denver SP-1000 User manual

Denver
Denver BTB-410 User manual

Denver
Denver BTB-410 User manual

Denver
Denver TSP-306NR User manual

Denver
Denver BTV-222NRB User manual

Denver
Denver BTS-50 User manual

Denver
Denver BTS-400 User manual

Denver
Denver BTG-212 User manual

Denver
Denver BTV-230 User manual

Denver
Denver BPS-351NR User manual

Denver
Denver BTS-120 User manual