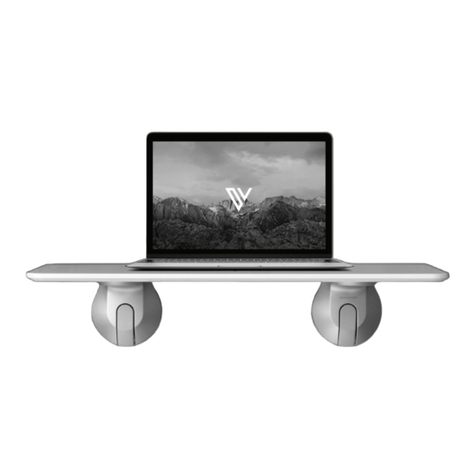
DESKVIEW Lightweight standing desk User manual

INSTRUCTION MANUAL

Clean the rubber suction
discs and the glass with
standard household
cleaning agents and
micro-fiber towel to ensure
there is no dust or debris.
Grip the brackets with your thumbs
on the inside, fingers on the outside,
and levers resting against your palm.
Ensure that the surface
selected is (1) smooth,
(2) flat, and (3) rated to
withstand the forces that
will be placed upon it once
DeskView is installed.
WARNING:
TIP:
TIP:
STEP 1 CLEAN:
STEP 2 GRIP:
Check to see DeskView is level, then
press firmly against the clean, flat
glass surface (see “Testing Non-Glass
Surfaces” on page 3 for testing other
materials).
Ensure that every part of
the rubber suction discs
contact the surface and
that the discs do not
overlap any joints or
imperfections in the
surface.
STEP 3 PRESS:
PAGE | 01
INSTALLATION
A B
With your palms, press down the levers, one at a time. You should
feel resistance as you engage the suction force.
The resistance of the negative pressure generated must be clearly
felt. The greater the resistance felt on the lever, the better the
suction force.
STEP 4 SECURE:

WARNING:
INSTALLATION
PAGE | 02
Grab the working surface on each side – Pull Down and then
Pull Away from the glass to ensure secure suction. Re-test
in 5 minutes and then every 12 hours.
If the required suction force has not been achieved, repeat
steps 1-4 before using your DeskView.
STEP 5 TEST:
Changes in temperature and impurities in the surface can
weaken the suction force over time. Protect your
valuables and take the extra few seconds to test your
DeskView’s suction force regularly.
A
B
MAX. LOAD: 40 LBS.
MAX. WINDOW TEMPERATURE: 120oF
ENJOY!

PAGE | 03
HERE’S WHY:
If the non-glass surface allows air into the vacuum
chambers, it will weaken the suction force, causing
DeskView to fall.
TIP:
You must re-test after 5 minutes and 30 minutes.
The non-glass surface may slowly allow air into
the vacuum chambers so DeskView initially
appears secure but loses force. Do not place any
items on DeskView while testing.
Following Installation Steps 1-5 on pages 1 - 2,
install DeskView on the non-glass surface
(avoiding grout and seams) 1-6 inches above the
safety area. Test for secure install after 5 minutes
and 30 minutes.
If DeskView remains secure on the non-glass surface after 30 minutes, follow
Installation Steps 1-5 on pages 1 - 2 at the desired height.
Ensure the non-glass surface is rated to withstand theweight you will be placing
on DeskView. Do not use DeskView on any surface that fails Step B.
STEP B TEST INSTALLATION:
STEP C FINAL INSTALLATION:
WARNING:
Using pillows, blankets, or other soft items, create a
safety area directly below DeskView (1-6 inches below
where DeskView will be tested) to protect DeskView from
damage.
STEP A SAFETY:
TESTING NONGLASS
SURFACES
DeskView is designed and tested for commercial, high-rise glass. The following
testing procedures must be followed before using DeskView on any other surfaces
to ensure strong, long-lasting suction force can be maintained.*
IMPORTANT NOTICE:
1-6 in.
Avoid Seams
*DeskView DOES NOT adhere to drywall, cement, and
other textured or painted surfaces.

PAGE | 04
Remove all items placed on DeskView’s working surface.
STEP 1
Grip the brackets with your thumbs on the inside, fingers on the outside, and levers resting against your palm.
To release the lever, rotate your hand so your palms are facing up with your middle two fingers touching the
bottom of the lever. Slowly pull up on the lever with your middle two fingers. Release the lever into your
palm to allow for a slow release.
WARNING:
The levers can release at high-speed. Avoid injury and damage to your DeskView by keeping your
palms on the lever as you release with your middle two fingers. DO NOT place your thumb on the
lever at any time.
STEP 2
If DeskView cannot be removed after releasing the levers, then while gripping the brackets as
described in Step 2, slide your fingertip between the glass and the rubber suction disc to release
the suction force.
STEP 3
REMOVAL
INSTRUCTIONS
REMOVE ITEMS:
SLOWLY RELEASE EACH LEVER:
BREAK SUCTION SEAL:

PAGE | 05
MAINTENANCE
Always keep the rubber suction discs clear of oil, dust, and debris.
Clean the rubber suction discs with standard household cleaning agents and a micro-fiber towel before
every use.
Check the rubber suction discs for possible deterioration. If rubber suction discs show damage, contact us
at contact@shopdeskview.com and replace immediately.*
DO NOT remove the top surface or try to replace the rubber suction discs or any other components
without first receiving proper replacement instructions from us by contacting contact@shop-
deskview.com
*Deskview offers FREE REPLACEMENT for
damaged rubber suction discs.
https://DeskView.co

PAGE | 06
COPYRIGHT
Copyright © Abvious, LLC 2017.
Contents subject to revision without prior notice.
DeskView is a registered trademark of Abvious, LLC (the “Company”). All rights reserved. No part of this
manual may be reproduced, transmitted, transcribed, or translated into any language, in any form or by any
means, without the prior written consent of the Company.
DISCLAIMER
The Company does not warrant that the product will work properly in all environments and applications, and
makes no representations or warranties, either implied or express, with respect to the quality, performance,
or fitness for a particular purpose.
The Company shall not be responsible for products found to be defective as a result of misuse, mishandling,
or neglect.
Information contained in this manualis subject to change without notice and the Company reservesthe right
to make improvements to this manual and/or to the products described in this manual, at any time without
notice.
If you would like an electronic copy of the most up-to-date manual or if you find information contained in
this manual that is inaccurate, misleading, or incomplete, please contact us at contact@shopdeskview.com.
THE COMPANY MAKES NO OTHER REPRESENTATIONS OR WARRANTIES OTHER THAN THOSE SPECIFIED IN
THIS MANUAL, OF ANY KIND WHATSOEVER, EXPRESS OR IMPLIED, AND ALL WARRANTIES OF MERCHANTABIL-
TIY AND FITNESS FOR A PARTICUALR PURPOSE ARE HEREBY DISCLAIMED BY THE COMPANY AND EXCLUDED
FROM THE TERMS OF SALE.
Please follow these instructions for the
best performance and long life of your
DeskView.

Table of contents
Other DESKVIEW Indoor Furnishing manuals
Popular Indoor Furnishing manuals by other brands

Costway
Costway HONEY JOY JV10035 user manual
YitaHome
YitaHome FTKDRH-0005 Assembly instructions

Lightolier
Lightolier EXTENSION WAND Attachment instructions
Enwork
Enwork Equilibrium Installation instruction
Oklahoma Sound
Oklahoma Sound WZD Product handbook
Sauder
Sauder North Avenue 422313 Assembly instructions
