Devantech ESP32LR20 User manual

ESP32LR20 User Manual v1.02
Table of Contents
Overview....................................................................................................................................................3
Control Protocols.......................................................................................................................................3
WiFi............................................................................................................................................................3
Configuration.............................................................................................................................................3
USB Configuration Comman s.................................................................................................................4
ST Status. Return the system status.......................................................................................................4
RB ReBoot............................................................................................................................................5
IP Sets the mo ules IP a ress..............................................................................................................5
SB Sets the SuBnet mask......................................................................................................................5
GW Sets the GateWay a ress..............................................................................................................5
PD Sets the Primary DNS.....................................................................................................................6
SD Sets the Secon ary DNS.................................................................................................................6
SS This sets the SSID............................................................................................................................6
PW Sets your networks WIFI passwor ................................................................................................6
PA Sets the TCP/IP port number for the ASCII comman s..................................................................6
MS Sets the MQTT broker a ress.......................................................................................................7
MD Sets the MQTT ID for this mo ule................................................................................................7
MP Sets the MQTT broker’s port..........................................................................................................7
R1-R2 Sets the MQTT topic this relay is subscribe to........................................................................7
TCP/IP Comman s.....................................................................................................................................8
SR Set Relay..........................................................................................................................................8
GR Get Relay.........................................................................................................................................8
HTML Comman s.....................................................................................................................................9
Webpage...................................................................................................................................................10
Schematics................................................................................................................................................11
CPU.....................................................................................................................................................11
Power Supply......................................................................................................................................12
Relay Outputs......................................................................................................................................13
PCB imensions.......................................................................................................................................14
Notes........................................................................................................................................................15
Copyright © 2018, Devantech Ltd.
ll rights reserved. www.robot-electronics.co.uk 2

ESP32LR20 User Manual v1.02
Overview
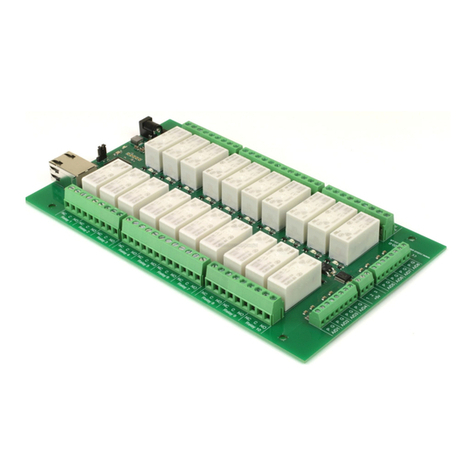
The ESP32LR20 is a WIFI connecte relay mo ule using the popular ESP32.
It provi es 2 relays capable switching up to 16Amps. The normally open relay contacts have snubbers
fitte across them, an can rive in uctive loa s such as contactors an solenoi s.
Power for the boar is 12v c, which can be provi e by a stan ar universal wall power supply. A 1A
or greater supply shoul be selecte .
Control Protocols
1. Simple plain text comman s sent to the mo ule.
2. HTML comman s
3. MQTT
4. A built in webpage
WiFi
The ESP32LR20 connects via WiFi to your network. Therefore it must be locate in a position where it
gets a goo WiFi signal. The mo ule shoul not be enclose in a metal box/cabinet as this will shiel
the WiFi signal.
You can check the signal level by looking at the RSSI figure which is reporte by the ST (STatus)
comman .
Configuration
The ESP32LR20 is configure by connecting a USB cable to your PC an running a terminal program.
PuTTY is a goo option if you on’t have any other preferences.
The serial port shoul be set to 115200 bau , 8 bit, 1 stop, no parity, no flow control.
Copyright © 2018, Devantech Ltd.
ll rights reserved. www.robot-electronics.co.uk 3

ESP32LR20 User Manual v1.02
US Configuration Commands
ST Status. Return the system status
Status:
Firmware Version: 1.2
IP: 0.0.0.0 (192.168.0.19)
Subnet: 0.0.0.0
Gateway: 0.0.0.0
Primary DNS: 0.0.0.0
Secondary DNS: 0.0.0.0
SSID: ********
Password: ********
SCII TCP Port: 17123
RSSI: -72
MQTT Server: 192.168.0.115
MQTT Port: 1883
MQTT ID: ESP32LR20
Relay1 Topic: R1Topic
Relay2 Topic: R2Topic
When the IP address is set to 0.0.0.0 this means that the IP address is being provided by
your networks DHCP server. In that case the assigned IP address is also provided, as
above.
When the SSID and Password are setup, they will be displayed until the next reset, fter
that they will only show as ********.
Copyright © 2018, Devantech Ltd.
ll rights reserved. www.robot-electronics.co.uk 4

ESP32LR20 User Manual v1.02
R Re oot.
This will restart the module. It may produce a lot of random characters as the
ESP32’s boot logging runs at a different baud rate. If it succeeds in connecting to your
network it will report the IP address.
Re-Booting.. .
崳⸮⸮⸮⸮⸮⸮⸮⸮#XL###C 5)5) ia b⸮⸮⸮⸮⸮ ⸮⸮⸮ ⸮ ⸮⸮⸮⸮⸮⸮⸮⸮奅# UY o ##i#U 5⸮⸮*⸮⸮ ⸮ ⸮⸮⸮⸮⸮ ⸮ Q⸮ ⸮⸮⸮⸮⸮
WiFi connected.
IP address:
192.168.0.6
IP Sets the modules IP address.
Enter IP followed by the required IP address. Entering address 0.0.0.0 means the IP will be
obtained from your networks DHCP server. The new IP address will take effect after the
next re-boot.
IP “192.168.0.123”
OK. Saved IP ddress: 192.168.0.123
S Sets the Su net mask.
SB “255.255.255.0”
OK. Saved Subnet Mask: 255.255.255.0
GW Sets the GateWay address.
This is normally the IP address of your router.
GW “192.168.0.1”
OK. Saved Gateway ddress: 192.168.0.1
Copyright © 2018, Devantech Ltd.
ll rights reserved. www.robot-electronics.co.uk 5

ESP32LR20 User Manual v1.02
PD Sets the Primary DNS.
The can be the IP address of your router which will then use your ISP provided DNS.
You can also specify the DNS such as 8.8.8.8 for Googles DNS server.
PD “192.168.0.1”
OK. Saved Primary DNS: 192.168.0.1
SD Sets the Secondary DNS.
The can be the IP address of your router which will then use your ISP provided DNS.
You can also specify the DNS such as 8.8.4.4 for Googles DNS server.
SD “8.8.4.4”
OK. Saved Secondary DNS: 8.8.4.4
SS This sets the SSID.
The SSID is the public name of your WIFI network Enter your WIFI’s SSID here.
SS “Devantech”
OK. Saved SSID: Devantech
PW Sets your networks WIFI password.
PW "K]~kCZUV*UG 6SG~"
OK. Saved Password: K]~kCZUV*UG 6SG~
PA Sets the TCP/IP port number for the ASCII commands.
P 17126
OK. Saved SCII port number: 17126
Copyright © 2018, Devantech Ltd.
ll rights reserved. www.robot-electronics.co.uk 6

ESP32LR20 User Manual v1.02
MS Sets the MQTT broker address
MS “192.168.0.121”
OK. Saved MQTT Server: 192.168.0.121
MD Sets the MQTT ID for this module
MS “UniqueModuleName”
OK. Saved MQTT ID: UniqueModuleName
MP Sets the MQTT broker’s port.
Normally, this should be set to 1883.
mp 1883
OK. Saved MQTT port number: 1883
If you are not using MQTT, set the port to 0. This will turn off MQTT, otherwise it will continuously
try to connect if there is no MQTT broker.
R1-R2 Sets the MQTT topic this relay is subscribed to.
R2 "Workshop/Heater"
OK. Saved Relay 2 Topic: Workshop/Heater
In use, the payload for relay topics should be a string with the first character set to ‘0’ or ‘1’
( SCII characters 0x30/0x31).
Copyright © 2018, Devantech Ltd.
ll rights reserved. www.robot-electronics.co.uk 7

ESP32LR20 User Manual v1.02
TCP/IP Commands.
The ESP32LR20 has a built in TCP/IP command set which allows you to control the module
remotely.
ll commands are sent using plain SCII text. PuTTY is a good cross platform terminal program to
use for testing. The TCP/IP port is the one you set-up with the P command during USB
configuration. Do not use port 80 as that is reserved for the HTML commands and Webpage.
SR Set Relay.
This is used to turn a relay on or off
To turn Relay 1 on:
SR 1 1
The first number is the relay number from 1 to 2.
The second number is 1 or 0, on or off.
So turn turn relay 1 off again:
SR 1 0
The command will respond with ok or fail.
SR 1 1
ok
SR 1 6
fail < 6 is not valid, only 1 or 0 for on/off
SR 9 1
fail < relay 9 does not exist.
GR Get Relay.
Will return the state of the relay.
To get the status of relay 2:
GR 2
1
GR 2
0
GR 9
fail < relay 9 does not exist.
Copyright © 2018, Devantech Ltd.
ll rights reserved. www.robot-electronics.co.uk 8

ESP32LR20 User Manual v1.02
HTML Commands.
There are a set of HTML commands that can be used to control the module.
?Rly2=1 This will turn on relay 2
?Rly2=0 This will turn off relay 2
?Rly2=2 This will toggle relay 2 to the opposite state.
You can enter the commands into a browser immediately after the IP address.
http://192.168.0.3/?Rly 2 =1
This will turn on relay 2.
In response the module will return an XML file, which your browser will display.
<ESP32LR20DATA>
<RELAYS>
<RLY1>off</RLY1>
<RLY2>on</RLY2>
</RELAYS>
</ESP32LR20DATA>
The XML file is generated after the command has executed, therefore will reflect the new status of
the relays.
Copyright © 2018, Devantech Ltd.
ll rights reserved. www.robot-electronics.co.uk 9

ESP32LR20 User Manual v1.02
Webpage
The built in webpage can be used as a remote app to monitor and control the relays. Your can
access the page as a default with just the IP address or by specifying index.htm.
The webpage contains the Javascript to send an HTML toggle command, as described in the
previous section. It will send the toggle command each time a button is clicked. It then uses the
responding XML file to colour the buttons.
Copyright © 2018, Devantech Ltd.
ll rights reserved. www.robot-electronics.co.uk 10

ESP32LR20 User Manual v1.02
Relay Outputs
1 of 2 i entical circuits shown
The relays are capable of switching up to 16 Amps at 24v c or 230vac. A ata sheet of the relay can be
foun here. Only the normally open (N/O) contact has the snubber circuitry.
Copyright © 2018, Devantech Ltd.
ll rights reserved. www.robot-electronics.co.uk 13
Table of contents
Other Devantech Relay manuals

Devantech
Devantech ESP32LR88 User manual

Devantech
Devantech dS2824 User manual

Devantech
Devantech tcp184 User manual

Devantech
Devantech dS2832 User manual

Devantech
Devantech ETH8020 Guide

Devantech
Devantech dS378 User manual

Devantech
Devantech dS3484 User manual

Devantech
Devantech ESP32LR42 User manual

Devantech
Devantech ESP32SR88 User manual

Devantech
Devantech dS2824 User manual
Popular Relay manuals by other brands

c3controls
c3controls 900 Series instruction manual

CAMDEN
CAMDEN CX-12 PLUS installation instructions

Areva
Areva MiCOM P521 Documentation update

INIM Electronics
INIM Electronics EB0020 quick start guide

Basler
Basler BE1-50/51B-237 instruction manual

ABB
ABB CM Series Operating and installation instructions