DeVilbiss Healthcare SOMNOplus Operating and installation instructions

SOMNOplus
Nasal Mask
Device Description and Instructions for Use
Caution:
Federal Law (U.S.A.) restricts this device to sale by or on the order of a physician.
Latex-free
SOMNOplus

2Contents
Contents
1. Overview . . . . . . . . . . . . . . . . . . . .3
2. Device Description . . . . . . . . . . . . . .4
2.1 Intended use . . . . . . . . . . . . . 4
2.2 Functional description . . . . . . . 4
2.3 Before use by the patient . . . . . 4
3. Safety instructions . . . . . . . . . . . . . .5
3.1 Warnings and cautions . . . . . . 5
3.2 Side effects . . . . . . . . . . . . . . 7
4. Operation . . . . . . . . . . . . . . . . . . . .8
4.1 Assembling and adjusting
forehead support . . . . . . . . . . 8
4.2 Disassembling forehead support. 9
4.3 Adjusting headgear. . . . . . . . . 9
4.4 Connecting the mask to a
therapy device . . . . . . . . . . . 11
4.5 Combining the mask with other
devices . . . . . . . . . . . . . . . . 11
4.6 Using the mask with humidifiers 12
4.7 Pressure measurement . . . . . . 12
4.8 After use . . . . . . . . . . . . . . . 12
4.9 Disassembling the mask . . . . . 13
4.10Reassembling the mask . . . . . 13
5. Cleaning Instructions . . . . . . . . . . .14
5.1 Schedule . . . . . . . . . . . . . . . 14
5.2 Procedures allowed . . . . . . . . 15
6. Functional Checks . . . . . . . . . . . . .17
7. Troubleshooting . . . . . . . . . . . . . .18
8. Scope of supply . . . . . . . . . . . . . .19
9. Technical Data . . . . . . . . . . . . . . .21
9.1 Specifications. . . . . . . . . . . . 21
9.2 Materials. . . . . . . . . . . . . . . 22
9.3 Characteristic pressure/
flow graph. . . . . . . . . . . . . . 22
10. Warranty . . . . . . . . . . . . . . . . . . .23

Overview 3
1. Overview
2Mask cushion
SOMNOplus (with WEINMANNstrap)
3Forehead cushion
6Port caps
5Support
7Mask frame
1Head gear
12 Rotating sleeve
8Elbow
9Exhalation
connector
10 Exhalation slot
11 Hose
connector
4Forehead support
13 EasyClip
SOMNOplus (with HEADstrap)

4Device Description
2. Device Description
2.1 Intended use
The Weinmann SOMNOplus is intended for prescrip-
tion use to be used during nasal CPAP or Bi-level Pos-
itive Pressure therapy for adult patients (>66 pounds or
30 kg).
2.2 Functional description
The nasal mask and the headgear are attached over
your nose so that the flow of air from the therapy de-
vice is routed through the nasal mask to the nose. The
form and flexible material of the mask cushion creates
an airtight bond to the face. The elbow connection al-
lows the greatest possible freedom in positioning the
hose.
The inhaled air flows through the mask/hose system.
The exhaled air escapes through a slot between the el-
bow and the rotating sleeve. This allows you to
breathe quietly during therapy. The exhalation connec-
tor avoids the risk of re-inhalation.
2.3 Before use by the patient
Patients must be instructed in the use of the mask by
qualified personnel before therapy begins.

Safety instructions 5
3. Safety instructions
3.1 Warnings and cautions
For your safety, please observe the following points:
Warning
• Please read these instructions for use very careful-
ly. They are an essential part of the mask and must
be available at all times.
• This mask should be used only with CPAP or
bi-level systems recommended by your physician
or respiratory therapist.
• If oxygen is used with the CPAP or bi-level system,
the oxygen flow must be turned off when the CPAP
or bi-level machine is not operating.
Explanation of the warning: When the CPAP or
bi-level device is not in operation and the oxygen
flow is left on, oxygen delivererd into the CPAP
tubing may accumulate within the CPAP or bi-level
machine enclosure. Oxygen accumulated in the
CPAP or bi-level machine enclosure will create a
risk of fire. This warning applies to most types of
CPAP or bi-level systems.
• The mask is designed for therapy pressure be-
tween 4 and 30 cm H2O. The nasal mask must
not be used at higher or lower therapy pressures.
• Patients with limited spontaneous respiration must
be monitored at all times. The appropriate nega-
tive pressure/leak alarm on the ventilation device
must be activated.
• Patients with obstructive and restrictive lung diseas-
es should be examined on an individual basis dur-
ing use of the SOMNOplus, for example with
regard to re-inhalation of CO2.

6Safety instructions
•TheSOMNOplus has an integrated exhalation
system. Do not connect any other exhalation sys-
tem or exhalation valve to the nasal mask.
• Only put the nasal mask over your face for a pro-
longed period when the therapy device is
switched on. The flow of air from the therapy de-
vice serves among other things to remove the ex-
haled air from mask and hose. If the therapy
device is not switched on, there is a risk of re-inha-
lation. In some circumstances this may lead to suf-
focation.
• Do not block any of the openings in the nasal
mask. This may lead to re-inhalation of exhaled air
and in some circumstance to suffocation.
• The connection to the device’s hose system must
be airtight and should not be allowed to loosen
due to therapy pressure.
• Do not use a breathing hose that is electrically con-
ductive (exception: heated breathing tubes).
• Clean the mask as described under Section 5.
“Cleaning Instructions”. Inappropriate cleaning
procedures, unsuitable cleaning agents and infre-
quent cleaning can result in an infection or bacte-
rial contamination and can impede the functioning
of the mask.
Caution
• At low CPAP pressures the flow through the exha-
lation slots may be inadequate to clear all exhaled
gas from the tubing. Some rebreathing may occur.
• If supplemental oxygen is used, the inhaled oxy-
gen concentration will vary, depending on the
pressure settings, patient breathing pattern, mask
selection and the leak rate.

Safety instructions 7
• Malfunctions and a lack of biocompatibility may
result if third-party articles are used. Please bear in
mind that in these cases any warranty entitlement
and liability shall lapse where the accessories rec-
ommended in the instructions for use or original
spare parts are not utilized.
3.2 Side effects
The following side effects may occur during short-term
or long-term use: Nasal congestion, dry nose, dry
mouth in the morning, sinus pressure, irritation of the
conjunctiva as well as irritating noises during exhala-
tion.
Wearing the mask can also lead to tenderness of the
face or reddening of the skin.

8Operation
4. Operation
Some users may prefer to clean the mask and the
headgear before using it for the first time (See chap-
ter“5. Cleaning Instructions” on page 14).
4.1 Assembling and adjusting forehead support
The forehead support is made up of a support and a
forehead cushion. The support makes it possible to ad-
just the mask to your face while the forehead cushion
allows for comfortable distribution of the mask pressure
across the forehead. By adjusting the support, pressure
on the bridge of the nose can be minimized (Fig. A).
Select the support size that best suits your face (Fig. B).
Attach the forehead cushion to the support and place
the support in the slit on the mask frame. In most cases,
the size 3 support will be appropriate. The forehead
cushion is already set up on this support when you re-
ceive the mask.
Place the mask on your face and check to see if you
have chosen the correct support.
If the mask is not tight or if it causes uncomfortable ten-
derness, shift the support within the slot of the mask or
choose a different support size.
A)
B)

Operation 9
4.2 Disassembling forehead support
Loosen the forehead support by pressing on the clamp
on the mask frame (Fig. C). Pull forehead cushion off
support.
4.3 Adjusting headgear
When you first apply the nasal mask with the head-
gear, it is a good idea to ask another person for help.
1. Thread the four hook and loop fasteners of the
headgear into the slots on the mask frame. You
can use either the lateral slots or the top hoop to
attach the forehead straps. This is not necessary
the first time the nasal mask is applied, as the
headgear is already assembled.
2. Release the EasyClip.
3. Guide the headgear over your head and fasten
the EasyClip to the mask.
C)
D)

10 Operation
4. Adjust the headgear with the aid of the hook-and-
loop closures so that the mask seals on the face but
is not too tight (Fig. E).
WEINMANNstrap only:
The WEINMANNstrap headgear provides the fol-
lowing options for you to do this (Fig. F):
– hook-and-loop closures on both sides.
– hook-and-loop closure on top of the head:
release the hook-and-loop closure, pull gently on
the ends of the headgear with both hands and
push the hook-and-loop closure back on.
You can tell whether the headgear is correctly at-
tached by the hook-and-loop tabs. The hook-and-
loop tabs on the forehead are the same color as
the inside of the headgear.
HEADstrap only:
The HEADstrap headgear provides the following
options for you to do this.
– coarse adjustments: slots of the headgear.
– fine adjustments: four hook-and-loop-straps.
5. If necessary, re-adjust the forehead support.
E)
F)

Operation 11
4.4 Connecting the mask to a therapy device
Push the hose of your therapy device onto the rotating
sleeve (Fig. G). In doing so, ensure that there is a se-
cure, airtight connection to the hose. The connection
should not come loose as a result of therapy pressure.
If you wish to interrupt therapy briefly, you can pull the
rotating sleeve out of the elbow. It is not necessary to
remove the mask or pull the breathing hose off the ro-
tating sleeve with this nasal mask.
4.5 Combining the mask with other devices
This nasal mask can be combined with any device to
perform the therapies described under "Purpose of
use”, as long as the following conditions are met:
When combining the nasal mask with other devices, be
aware that the therapy pressure in the nasal mask de-
pends on the combination of devices. Ask your physi-
cian or homecare provider whether the correct therapy
pressure can be achieved in the mask using the desired
combination of devices. Have the settings of your ther-
apy device checked by your physician or homecare
provider.
Warning In situations where the risk of contamination between
the patient and the therapy device is high, a bacteria
filter should be placed between the therapy device
and the patient. Also refer to the instructions for use of
your therapy device.
G)

12 Operation
Take account of the specifications in the instructions for
use for the devices you intend combining with the na-
sal mask.
4.6 Using the mask with humidifiers
The nasal mask system can be used with a cold-air or
warm-air humidifier. The degree of humidity you
choose should not be so high that water condenses in
the air hose. Please be sure to read the instructions for
use for your humidifier and your therapy device.
4.7 Pressure measurement
SOMNOplus is supplied with two ports. They can be
used for external pressure measurement.
If only one port is required, turn the connection up-
wards (Fig. H). When the functions with the ports are
no longer required, they should be made airtight with
the enclosed seal. Otherwise air can escape through
the ports and therapy pressure will not be maintained.
4.8 After use
1. Release the EasyClip and guide headgear over
your head to remove.
2. Clean the mask as described in Chapter “5.
Cleaning Instructions” on page 14.
H)

Operation 13
4.9 Disassembling the mask
1. Remove the headgear from the nasal mask.
2. Loosen the forehead support from the mask frame
by pressing on the clamp. Pull the forehead cush-
ion off the support.
3. Pull the mask cushion off the mask frame and re-
move the seal for the ports.
4. Pull the rotating sleeve out of the elbow and re-
move the elbow from the mask frame by pressing
gently inwards (Fig. I).
4.10 Reassembling the mask
1. Push the elbow into the mask frame from inside.
Push the rotating sleeve into the elbow. Make sure
both parts engage properly.
2. Push the mask cushion onto the mask frame and
the port seal onto the pressure measuring port.
3. Attach the forehead support to the mask frame as
described under "Assemble and adjust forehead
support”.
4. Attach the headgear to the nasal mask as de-
scribed under “4.3 Adjusting headgear” on
page 9.
I)

14 Cleaning Instructions
5. Cleaning Instructions
5.1 Schedule
Note:
Wash the headgear before using for the first time, as
the color might run.
Daily
Please clean the nasal mask after every usage as de-
scribed in item “5.2 Procedures allowed“ under “Man-
ual Cleaning“. For cleaning purposes we recommend
taking the mask apart as described above.
Weekly
• The nasal mask should be cleaned thoroughly at
least once per week. To do so, disassemble the
mask as described above.
• Wash the headgear weekly by hand in warm wa-
ter. Use a mild detergent. Then rinse all parts in
clean water and allow to air-dry.
Note:
• The headgear may only be washed by hand!
• Do not iron the headgear, otherwise the hook-and-
loop closures will no longer work.
• Do not dry the headgear in a dryer.

Cleaning Instructions 15
5.2 Procedures allowed
The following procedures are allowed:
Dry all parts thoroughly after cleaning. Check compo-
nents for residual dirt or damage. Repeat cleaning if
necessary. If parts are damaged, replace them. As-
semble the nasal mask as described above.
Note
This mask system is approved for multiple-patient
use in a hospital or clinic environment such as
sleep laboratories provided that appropriate hy-
gienic measures are taken. Please contact your
distributor to obtain detailed cleaning and disin-
fecting instructions for multiple-patient use (order
no. DV67113).
Procedures
Parts
Mask cushion X
Forehead cushion X
Port caps X
Mask frame X
Support X
Elbow X
Rotating sleeve X
Headgear X
Manual Cleaning Clean in warm water, free of residues with a
mild detergent as for dishwashing.
Carefully rinse the parts with clear water.
Manual Cleaning

16 Cleaning Instructions
Warning
For patients with a weakened immune system or a
special medical history daily disinfection or steril-
ization may be necessary. In this case, please
consult your physician.

Functional Checks 17
6. Functional Checks
Carry out a visual check once per week.
If the mask cushion is no longer airtight due to cracks
or splits, replace it with a new one. Yellowing of the
mask cushion does not indicate malfunction or dam-
age.
Please check the functional capacity and air-tightness
of the ball-and-socket joint. If it no longer moves easily
or is no longer airtight due to cracks or splits, replace
the elbow connection and/or the body of the mask ac-
cordingly.
Parts no longer used can be disposed of as normal
household waste.

18 Troubleshooting
7. Troubleshooting
Problem Cause Remedy
In the
morning you
have pain
from
pressure on
your face.
The nasal mask
is too tight.
Loosen the headgear a bit.
Change the position of the
forehead support on the mask
frame. If necessary, select a
different support size for the
forehead cushion.
You have
dry eyes.
The mask is too
loose
Tighten the headgear a bit.
If necessary, select a different
support size for the forehead
cushion.
The mask
doesn’t fit.
You may need a different size
mask. Your equipment provider
can advise you.
Therapy
pressure is
not reached.
The mask is not
airtight.
Correct the fit, adjust the
headgear.
Change the position of the
forehead support on the mask
frame. If necessary, select a
different support size for the
forehead cushion.
Tears in the mask
cushion. Change the mask cushion.
Supply system is
not airtight.
Check the plug connection and
the fit of the hose muff.
Air leaks through
open ports. Place the seal on the ports.

Scope of supply 19
8. Scope of supply
Standard scope of supply
All masks are supplied fully assembled and consist of
mask cushion, mask frame, port caps, forehead sup-
port (sizes 1-4, size 3 already assembled), exhalation
connector, headgear, instructions for use.
Replacement parts
Description Item No.
SOMNOplus‚ size XS WM 25800
SOMNOplus‚ size S WM 25810
SOMNOplus‚ size M WM 25820
SOMNOplus‚ size L, WM 25830
Description Item No.
Mask cushion, size XS WM 15723
Mask cushion, size S WM 15712
Mask cushion, size M WM 15713
Mask cushion, size L WM 15714
Set of replacement parts, size XS
consisting of
:
Mask frame, forehead support (sizes 1-4, size
3 already assembled), exhalation connector,
port caps
WM 15722
Set of replacement parts, size S consisting of:
Mask frame, forehead support (sizes 1-4, size
3 already assembled), exhalation connector,
port caps
WM 15709
Set of replacement parts, size
M
consisting
of:
Mask frame, forehead support (sizes 1-4, size
3 already assembled), exhalation connector,
port caps
WM 15710
Set of replacement parts, size L consisting of:
Mask frame, forehead support (sizes 1-4, size
3 already assembled), exhalation connector,
port caps
WM 15711

20 Scope of supply
Headgear (WEINMANNstrap/HEADstrap),
Universal Size WM 26375
Forehead support (sizes 1-4, size 3 already
assembled) WM 25160
Forehead cushion WM 15700
Forehead support size 1 WM 15701
Forehead support size 2 WM 15702
Forehead support size 3 WM 15703
Forehead support size 4 WM 15704
Exhalation connector WM 25713
Port caps WM 15718
Mask frame Size XS WM 15724
Mask frame Size S WM 15715
Mask frame Size M WM 15716
Mask frame Size L WM 15717
EasyClip WM 15855
Instructions for use WM 67112
Cleaning and disinfecting instructions for
multiple-patient use (for sleep laboratory
applications only)
DV67113
Instructions for use for HEADstrap headgear WM 67110
Description Item No.
Table of contents
Other DeVilbiss Healthcare Respiratory Product manuals
DeVilbiss Healthcare
DeVilbiss Healthcare Innova Small 50166 Manual

DeVilbiss Healthcare
DeVilbiss Healthcare Traveler 6910 Series Manual

DeVilbiss Healthcare
DeVilbiss Healthcare Traveler 6910P-DR Manual
DeVilbiss Healthcare
DeVilbiss Healthcare DeVilbiss Mask A-9352 User manual
DeVilbiss Healthcare
DeVilbiss Healthcare HYBRID Dual Airway User manual
DeVilbiss Healthcare
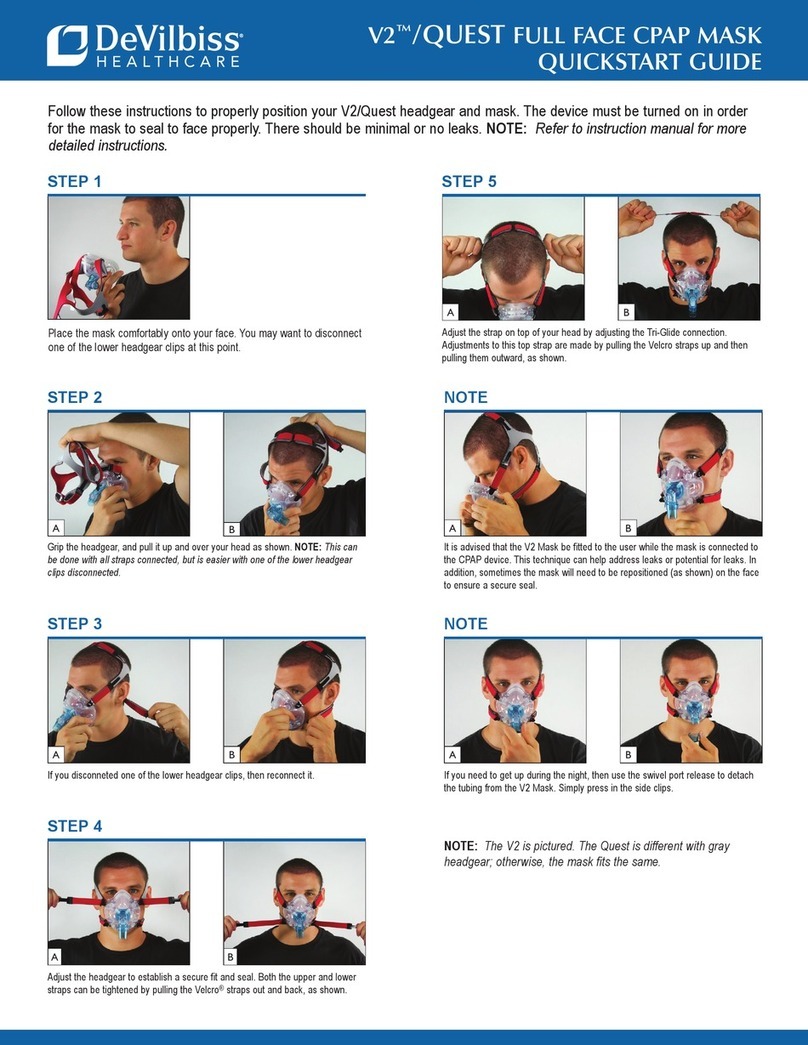
DeVilbiss Healthcare V2 User manual
DeVilbiss Healthcare
DeVilbiss Healthcare Pulmo-Aide 5650C Manual
