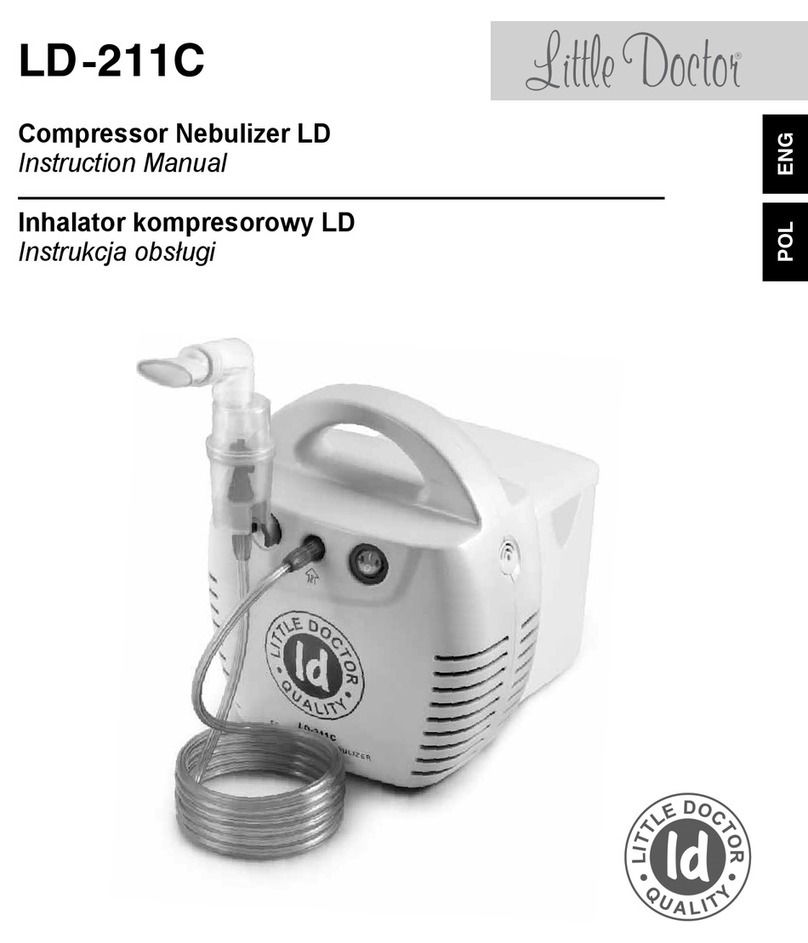
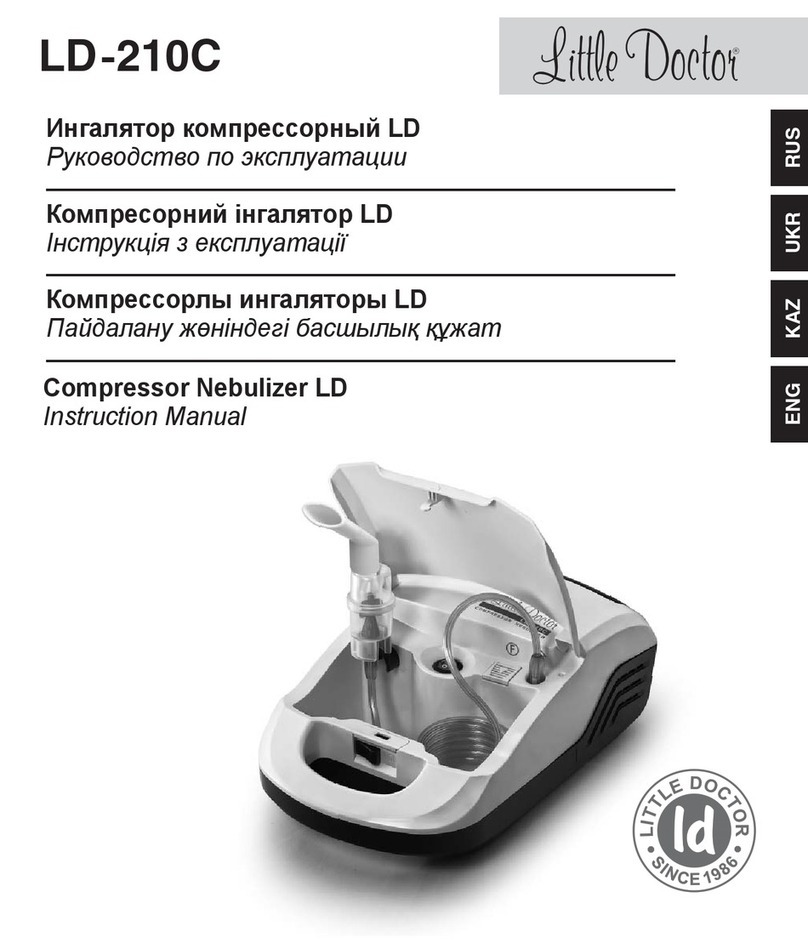
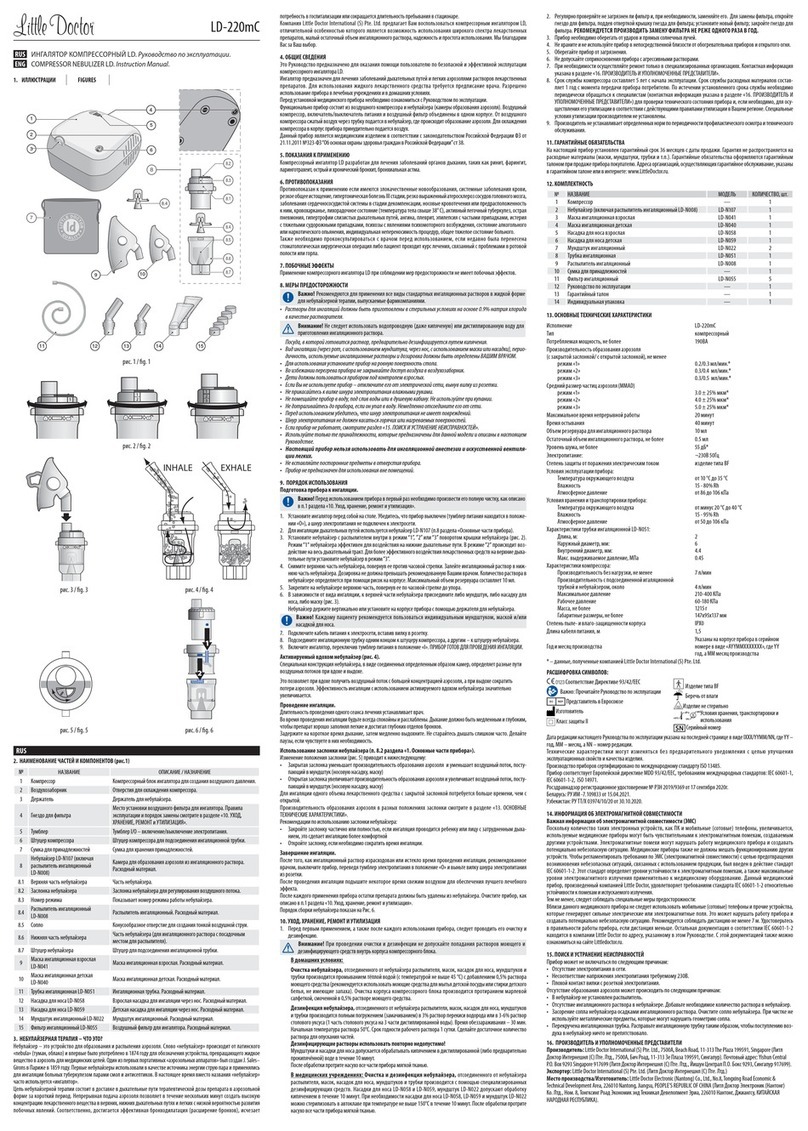
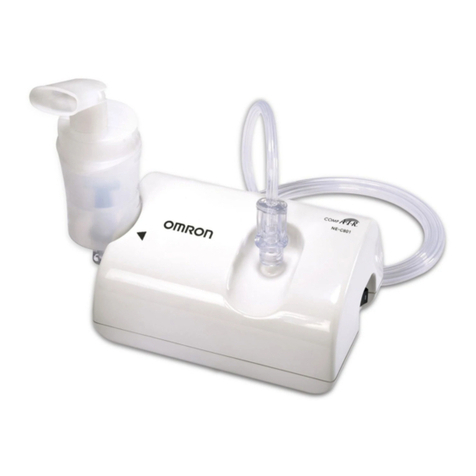
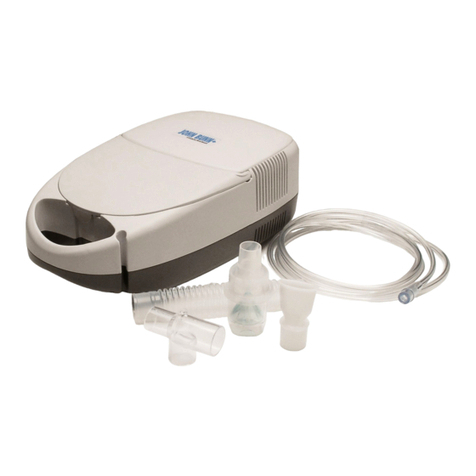
Little Doctor LD-212C User manual

LD-212С
ENGPOL
Compressor Nebulizer LD
Instruction Manual
Inhalator kompresorowy LD
Instrukcja obsługi

ENG
2
T1AL/250V
#
2
5
7.1
7.2
7.3
7.4
7.5
7.6
6
11
3
910
12 13 14 15
7
8
16
"
17 18
4
1
PARTS AND COMPONENTS

ENG
3
DESCRIPTION OF PARTS UNIT
№
position on
the scheme
NAME DESCRIPTION
1 Compressor Nebulizer compressor unit for to create air pressure.
2 Intake Holes for air intake to cool the compressor.
3 Socket for the filter Position the air filter for nebulizer.
4 Slot with safety fuse Safety fuse 1,5 A 250 V. Consumable material.
5 Power switch Tumbler I/O – switch on/switch off power.
6
Connector of compressor
Fitting compressor for connecting an inhalation tube.
7 Nebulizer
Chamber of the inhalation of aerosol solution.
7.1 Coupling The angular coupling for connecting nebulizer with a mouthpiece or
nozzles.
7.2 Upper part of nebulizer Part of the aerosol chamber. Place connected to the coupling.
7.3 Dispenser «B» (blue) Inhalation dispenser (universal).
Consumable material.
7.4 Nozzle
Conical hole to create a thin jet of air.
7.5 Bottom of nebulizer
Part of the aerosol chamber designed for inhalation solution with a
seat for the dispenser.
7.6
Connector of nebulizer
Connector for connectning the inhalation tube
8 Adult mask Adult inhalation mask. Consumable material.
9 Сhild mask Childrens' inhalation mask. Consumable material.
10 Сhild mask (small) Childrens' inhalation mask (small). Consumable material.
11 Inhalation tube Inhalation tube the length of 2 m. Consumable material.
12 Adult nozzle to the nose
Adult nozzle for inhalation through the nose. Consumable material.
13 Childrens' nozzle to the nose
Детская насадка для ингаляции через нос. Consumable material.
14 Mouthpiece Inhalation mouthpiece. Consumable material.
15 Filter inhaled Air filter for nebulizer. Consumable material.
16 Dispenser «C» (red) Inhalation dispenser (mainly the upper respiratory tract).
Consumable material.
17 Dispenser «A» (yellow)
inhalation dispenser (mainly the lower respiratory tract). Consist of
two parts: cone and cylinder.
Consumable material.
18 Guard 1A 250V Spare guard. Consumable material.

ENG
4
CONTENTS
PARTS AND COMPONENTS. . . . . . . . . . . . . . . . . . . . . . . . . . . . . . . . . . . . . . . . . . . . . . . . . 2
DESCRIPTION OF PARTS UNIT. . . . . . . . . . . . . . . . . . . . . . . . . . . . . . . . . . . . . . . . . . . . . . 3
NEBULIZER THERAPY – WHAT IS IT?. . . . . . . . . . . . . . . . . . . . . . . . . . . . . . . . . . . . . . . . . 5
GENERAL INFORMATION. . . . . . . . . . . . . . . . . . . . . . . . . . . . . . . . . . . . . . . . . . . . . . . . . . . 5
SAFETY PRECAUTIONS. . . . . . . . . . . . . . . . . . . . . . . . . . . . . . . . . . . . . . . . . . . . . . . . . . . . 5
USAGE. . . . . . . . . . . . . . . . . . . . . . . . . . . . . . . . . . . . . . . . . . . . . . . . . . . . . . . . . . . . . . . . . . 6
CARE, STORAGE, REPAIR AND DISPOSAL . . . . . . . . . . . . . . . . . . . . . . . . . . . . . . . . . . . . 8
WARRANTY . . . . . . . . . . . . . . . . . . . . . . . . . . . . . . . . . . . . . . . . . . . . . . . . . . . . . . . . . . . . . . 9
COMPLETENESS . . . . . . . . . . . . . . . . . . . . . . . . . . . . . . . . . . . . . . . . . . . . . . . . . . . . . . . . . 9
TECHNICAL SPECIFICATIONS . . . . . . . . . . . . . . . . . . . . . . . . . . . . . . . . . . . . . . . . . . . . . 10
TROUBLESHOOTING TIPS . . . . . . . . . . . . . . . . . . . . . . . . . . . . . . . . . . . . . . . . . . . . . . . . 11
CERTIFICATION AND STATE REGISTRATION . . . . . . . . . . . . . . . . . . . . . . . . . . . . . . . . . 11

ENG
5
NEBULIZER THERAPY – WHAT IS IT?
NEBULIZER IS A DEVICE FOR FORMATION AND SPRAYING OF AEROSOL. THE WORD
“NEBULIZER” IS DERIVED FROM THE LATIN WORD “NEBULA” (FOG, CLOUD) AND
WAS FIRST USED IN 1874 FOR A DEVICE THAT TURNS A LIQUID SUBSTANCE INTO
AN AEROSOL FOR MEDICAL PURPOSES. ONE OF THE FIRST PORTABLE “AEROSOL
APPARATUSES” WAS CREATED BY J. SALES-GIRONS IN PARIS IN 1859. THE FIRST
NEBULIZERS WERE USED AS STEAM JET ENERGY SOURCES AND WERE APPLIED FOR
INHALING THE VAPORS OF RESINS AND ANTISEPTICS BY TUBERCULOSIS PATIENTS.
PRESENTLY, THE TERM “INHALER” IS OFTEN USED INSTEAD OF “NEBULIZER”.
The purpose of the nebulizer therapy is to quickly deliver to the respiratory passages a therapeutic
doze of a preparation in aerosol form. Continuous supply of aerosol allows, within several minutes,
creating high concentration of a medicine in the upper and lower respiratory passages and lungs,
with low probability of any by-effects. Respectively, effective bronchodilation (bronchi expansion) is
reached, and the need for hospitalization is eliminated or the hospital stay is reduced.
Little Doctor Internatiоnаl (S) Pte. Ltd. offers you to use inhaler LD-212C, whose distinctive features
are the possibility to use a wide range of medicines, low inhaling solution residual volume, and
reliable and simple use. We thank you for your choice.
GENERAL INFORMATION
Pressurized inhaler LD is designed for treating the diseases of respiratory passages and lungs by
medicine solution aerosols in clinic and at home.
This Instruction Manual is designed to assist the user with safe and effective operation of the
Compressor Nebulizer LD.
Use this Device according to the rules described in this Manual. Operate the Device only as
intended. Do not use the Device for any other purposes. Read and understand the whole Instruction
Manual
.
Functionally, the device consists of an air compressor and nebulizer (aerosol formation chamber).
The air compressor, on/off power switch and air filter are united in one casing. From the air
compressor, the compressed air is fed through a pipe to the nebulizer, where aerosol is formed. For
cooling the compressor, air is force-feed into the device’s casing.
SAFETY PRECAUTIONS
NOTE: Recommended for all types of standard inhalation solution in liquid form for inhalation
therapy, produced by pharmaceutical companies.
•
Solutions for inhalation have to be prepared under sterile conditions on the basis of 0.9% sodium chloride as a
solvent. DO NOT USE WATER (EVEN BOILING) or distilled water to prepare inhalation solution. Dishes,
which is preparing the solution, previously should be disinfected by boiling.

ENG
6
• Nature of inhalation (through the mouth using a mouthpiece or a nose, using a mask or a nozzle), the
frequency used by inhalation solutions and dosage should be determined by your physician.
• When using the device on a flat table surface.
• To prevent overheating of the device does not block the access of air to the air intake.
• Children should use the device under adult supervision..
•
If you are not using the device - unplug it from the electrical outlet by removing the plug from the socket.
• Do not touch the power cord plug with wet hands.
• Do not place the device in water, drain, or in the shower. Do not use while bathing.
• Do not touch the device if it fell into the water. Immediately disconnect from the network.
• Before use, make sure the power cord is not damaged.
• The power supply cord must not touch hot or heated surfaces.
• If the device does not work, see «TROUBLESHOOTING TIPS».
• Use only accessories that are designed to LD-210S and described in this manual.
• This unit can not be used for inhalation anesthesia and artificial ventilation.
• Do not insert any object into holes of the device.
• The device is not designed for outdoor use.
USAGE
Preparing for inhalation.
IMPORTANT: Before using the appliance for the first time it is necessary to make
a full cleaning, as described in paragraph 1 of section «CARE, STORAGE,
REPAIR AND DISPOSAL».
1.
Place the nebulizer in front of you on the table. Make sure the device is turned off
(power switch is in position «O»), and the power cord is not plugged into the mains.
2. Remove the top of the nebulizer by turning it counterclockwise (Fig.1).
3. Set the desired dispenser.
In the factory-installed inside the nebulizer spray «B» is blue, which is effective to
affect the entire respiratory tract.
For a more effective impact medicines on the upper respiratory tract, set, instead
of the blue dispenser, red dispenser «C».
For a more effective impact on the lower respiratory tract - dispenser «A» yellow
color, which consists of two parts (Fig. 2, figures indicate the order of assembly).
Graphics of the differential particle size distribution by mass for different nozzles
are shown in Fig. 4.
4. Fill the bottom of the nebulizer inhalation solution. The dosage should not exceed
the recommended by your doctor. The number of nebuliser solution is determined
by the scratches on the case. The maximum reservoir volume of 10 ml.
5. Attach the nebuliser at the top, turning it clockwise until it stops.
6. Attach the mouthpiece for inhalation through the coupling to the top of
the nebulizer (Fig. 3). Depending on the type of inhalation, using either a
mouthpiece or nozzle or mask.
Fig. 1
Fig. 2

ENG
7
The mask is connected directly to the upper part of the nebulizer. When a
mouthpiece or nose nozzle is used, connect it through a coupling.
Hold the nebulizer vertically.
IMPORTANT: Each patient is encouraged to use personal mouthpiece, a
mask and / or nozzle for the nose.
7. Plug the power cord to an electrical outlet.
8. Connect one end of the inhalation tube to the fitting of compressor, and
others - to the fitting of nebulizer.
9. Turn on the nebulizer, switching the power switch in position «I».
NEBULIZER IS READY FOR INHALATION.
Fig. 3
QBSUJDMFTJ[FTNLN
UPUIFUPUBMNBTT
0
5
10
15
QBSUJDMFTJ[FTNLN
UPUIFUPUBMNBTT
0
5
10
15
QBSUJDMFTJ[FTNLN
UPUIFUPUBMNBTT
0
5
10
15
NBJOMZUIFVQQFS
SFTQJSBUPSZUSBDU
%JTQFOTFS$SFE
%JTQFOTFS#CMVF
%JTQFOTFS"ZFMMPX
VOJWFSTBM
NBJOMZMPXFSSFTQJSBUPSZUSBDU
'PSFGGFDUJWFEFMJWFSZNFEJDJOFTUPBTQFDJGJDTJUF
PGSFTQJSBUPSZUSBDU OFFEUP VTFUIFBQQSPQSJBUF
EJTQFOTFS
Fig. 4
Depending on the type of dispenser, the particles of different sizes are distributed aerosols as follows:

ENG
8
Performing inhaling.
The length of one treatment session should not exceed 20 minutes. Consult your attending physician
about the length of the inhaling procedure.
You should always be calm and relaxed during inhaling. Breathing should be slow and deep, so that
the preparation could fill the lungs well and reach the deep portions of bronchi.
Briefly hold your breath, and then exhale slowly. Do not attempt to breathe too rapidly. Make pauses if
you feel that you need it.
Breath-actuated nebulizer.
The special design of the nebulizer in the form of chambers
connected in a certain manner provides different ways of air streams
during inhaling and exhaling.
It allows obtaining the air stream with greatest aerosol concentration
when inhaling and reducing aerosol loss when exhaling. The
effectiveness of inhaling using the breath-actuated nebulizer is
increased significantly.
Finishing inhaling.
When the inhaling solution is used up and the inhaling time recommended by the doctor has expired,
turn the device off by putting the tumbler in «O» position and unplug it.
After inhaling, breathe fresh air for some time for better treatment effect.
After each application of the device, the residual preparation should be removed out of it. Clean and wash
the device as described in paragraph 1 «
CARE, STORAGE, REPAIR AND DISPOSAL
».
CARE, STORAGE, REPAIR AND DISPOSAL
1. Regularly clean the device and all accessories. It is recommended that all the accessories should
be wiped with a 3% solution of hydrogen peroxide with addition of 0.5% solution of a detergent (for
example, a laundry powder). After that, the nebulizer should be washed by a rich jet of water. The
mouthpieces and nose nozzles may be treated by boiling for 10 minutes or autoclaving at 150°С. After
the treatment, wipe dry all parts of the device with a soft cloth.
2. Regularly check the filter for dirt and replace it when needed.
FILTER REPLACEMENT IS
RECOMMENDED AT LEAST ONCE A YEAR.
3. Keep this Unit from exposure to direct sunlight, shocks.
4. Do not keep and use this Unit near heating installations and open fire.
5. Keep the Unit clean and protect it from dust.
6. Contact of device with aggressive solutions is not allowed.
7.
Repair the Unit only in authorized organizations.
8. Service life of Compressor 5 years from the moment of its delivery to the customer. Service
life of Consumable material 1 year. On expiration of the warranted service life apply from time
to time to authorized repair organizations to check the technical condition of the Unit. Dispose

ENG
9
to time to authorized repair organizations to check the technical condition of the Unit. Dispose
of the Unit and its components according to the application local regulations. No special
requirements to disposal of this Unit are defined by the manufacturer.
WARRANTY
The following LD product is covered by warranty for the period specified in the warranty card.
The warranty does not apply to the consumables (masks, mouthpieces, inhalation tubes etc.). The
warranty liabilities are contained in the warranty card given at the sale of this unit to a purchaser. The
addresses of organizations for warranty maintenance are given in the warranty card.
COMPLETENESS
1. Compressor – 1 pcs.
2. Nebulizer LD-N105 (Coupling, Inhalation dispenser «B» (blue) LD-N002, Upper part and
Bottom of nebulizer) – 1 pcs.
3. Inhalation dispenser «A» LD-N001 – 1 pcs.
4. Inhalation dispenser «C» LD-N003 – 1 pcs.
5. Adult inhalation mask LD-N041 – 1 pcs.
6. Childrens' inhalation mask LD-N042 – 1 pcs.
7. Childrens' inhalation mask (small) LD-N040 – 1 pcs.
8. Adult nozzle to the nose LD-N058 – 1 pcs.
9. Childrens' nozzle to the nose LD-N059 – 1 pcs.
10. Inhalation mouthpiece LD-N022 – 2 pcs.
11. Inhalation tube the length of 2m LD-N051 – 1 pcs.
12. Inhalation filter LD-N055 – 5 pcs.
13. Guard 1,5 А250 В(set of spare safety devices) – 1 pcs.
14. Instruction Manual – 1 pcs.
15. Warranty Card – 1 pcs.
16. Package – 1 pcs.

ENG
10
TECHNICAL SPECIFICATIONS
Model LD-212C
Type Compressor Nebulizer
Power, no more 60 W
Nebulization
rate, approximately
Inhalation dispenser
«A» LD-N001
Inhalation dispenser
«B» LD-N002
Inhalation dispenser
«C» LD-N003
0.31 ml/min.
0.43 ml/min.
0.50 ml/min.
Particle size (ММАD)
Inhalation dispenser
«A» LD-N001
Inhalation dispenser
«B» LD-N002
Inhalation dispenser
«C» LD-N003
3.5 mkm
4.0 mkm
5.0 mkm
Max. operating time 20 minutes
Cooling time 40 minutes
Max. capacity of medication cup 10 ml
Residual volume of inhalation solution
,
or below 0.5 ml
Extreme pressure 2.0 Bar
Noise level, or below 55 dB
Rated voltage: ~200-240V 50Hz
Electric shock protection level
Type BF
Operation conditions:
Temperature, °C 10 to 35
Relative humidity , %Rh 80% and lower
Atmospheric pressure 86 to 106 kPa
Storage and transportation conditions:
Temperature, °C -20 °C to 40
Relative humidity , %Rh 95% Rh
Atmospheric pressure 50 to 106 kPa
Net Weight, no more 1270 g
Size (electronic block), mm 130 х205 х95
Year of manufacture
Year the manufacture is given in the
bottom of the unit body in a serial number
after symbols “AA”

ENG
11
TROUBLESHOOTING TIPS
No power on unit when the power switch is on:
Turn the power switch off. Plug the power plug into an electrical outlet. Turn the device on.•
No nebulization or low nebulization rate when the power is on:
Add the correct amount of prescribed medication to the medication cup.•
Make sure the nebulizer kit is correctly assembled and the inhalation accessory is correctly attached.•
Hold the nebulizer kit correctly. Do not tilt the nebulizer kit so the angle of the kit is greater than 45•
degrees.
Make sure the air tube is correctly attached to the compressor and the nebulizer kit.•
Make sure the air tube is not folded, kinked or bent. Inspect the air tube for any damage. Replace the•
air tube if damaged.
The device is very hot:
Do not cover the compressor with any type of cover during use. Turn the device off. Wait 40 minutes•
before using the device again.
CERTIFICATION AND STATE REGISTRATION
This unit manufacturing is certified according to international standard ISO 13485:2003. Unit comply
with the requirements of European Directive MDD 93/42/ЕЕС, international standards EN 980, EN
1041, EN 1060-1, EN 1060-3, EN 10601-1-2, ISO 14971, EMC (IEC 60601-1-2:2001/A1:2004,CISPR
11:2003/A2:2006 (Group 1, Class A), IEC 61000-3-2:2005, IEC 61000-3-3:1994/A2:2005).
Complaints and requests should be addressed to:
Little Doctor Europe Sp. z o.o.
57G Zawila Street, 30-390, Krakow, Poland
Service phone: +48 12 2684748, 2684749
Manufactured under control:
Little Doctor International (S) Pte. Ltd., 35 Selegie Road # 09-02 Parkline Shopping Centre,
Singapore 188307
Manufacturer:
Little Doctor Electronic (Nantong) Co. Ltd., No.8, Tongxing Road Economic & Technical
Development Area, Nantong 226010, Jiangsu, PEOPLE'S REPUBLIC OF CHINA
Distributor in Europe:
Little Doctor Europe Sp. z o.o.
57G Zawila Street, 30-390, Kraków, Poland
Sales Office phone: +48 12 2684746, 12 2684747, fax: +48 12 268 47 53
E-mail: biuro@littledoctor.pl
www.LittleDoctor.pl
Authorized Representative in the EU:
Shanghai International Trading Corp.GmbH
Eiffestrasse 80, 20537 Hamburg, Germany.

POL
12
T1AL/250V
#
2
5
7.1
7.2
7.3
7.4
7.5
7.6
6
11
3
910
12 13 14 15
7
8
16
"
17 18
4
1
PODSTAWOWE CZĘŚCI URZĄDZENIA

POL
13
FUNKCJE I CZĘŚCI URZĄDZENIA
NR NA
SCHEMACIE NAZWA UMOWNA OPIS/FUNKCJA
1 Kompresor
Blok kompresorowy inhalatora, w którym wytwarzane jest ciśnienie
powietrza.
2
Otwór powietrzny
Otwór, przez który wlatuje powietrze chłodzące kompresor.
3 Otwór na filtr Miejsce instalacji filtra powietrza.
4Gniazdo
bezpiecznika Bezpiecznik 1,5 А250 V. Materiałeksploatacyjny
5 Przełącznik Przełącznik I/O – włączanie/wyłączanie zasilania elektrycznego.
6Złącze kompresora Złącze kompresora umożliwiające podłączenie przewodu powietrznego.
7 Nebulizator Komora, w której z roztworu do inhalacji wytwarzany jest aerozol.
7.1 Złączka Złączka kolankowa umożliwiająca połączenie nebulizatora z ustnikiem
lub widelcami nosowymi.
7.2 Górna część
nebulizatora Część nebulizatora, miejsce połączenia ze złączką.
7.3 Rozpylacz «В»
(niebieski)
Rozpylacz do inhalatora (uniwersalny).
Materiałeksploatacyjny.
7.4 Dysza
Stożkowaty otwór, dzięki któremu powstaje cienki strumieńpowietrza.
7.5 Dolna część
nebulizatora
Część nebulizatora z miejscem do instalacji nasadki na dyszęw której
znajduje sięroztwór do inhalacji.
7.6 Złącze nebulizatora Złącze do podłączenia przewodu powietrznego.
8 Maska dla dorosłych Maska inhalacyjna dla dorosłych. Materiałeksploatacyjny.
9 Maska dziecięca Maska inhalacyjna dla dzieci. Materiałeksploatacyjny.
10
Maska dziecięca (mała)
Maska inhalacyjna dla dzieci (mała). Materiałeksploatacyjny.
11 Przewód powietrzny Rurka inhalacyjna o długości 2 m. Materiałeksploatacyjny.
12 Widelec nosowy dla
dorosłych Widelec nosowy dla dorosłych do inhalacji przez nos. Materiał
eksploatacyjny.
13 Widelec nosowy dla
dzieci Widelec nosowy dla dzieci do inhalacji przez nos. Materiał
eksploatacyjny. Materiałeksploatacyjny.
14 Ustnik Ustnik do inhalatora. Materiałeksploatacyjny.
15 Filtr Filtr powietrza do inhalatora
.
Materiałeksploatacyjny.
16 Rozpylacz «С»
(czerwony) Rozpylacz do inhalatora (głównie górne drogi oddechowe).
Materiał
eksploatacyjny.
17 Rozpylacz «А» (żółty) Rozpylacz do inhalatora (głównie dolne drogi oddechowe) składający się
z dwóch części, tj. ze stożka i cylindra.
Materiałeksploatacyjny.
18 Bezpiecznik Bezpiecznik zapasowy. Materiałeksploatacyjny.

POL
14
SPIS TREŚCI
PODSTAWOWE CZĘŚCI URZĄDZENIA. . . . . . . . . . . . . . . . . . . . . . . . . . . . . . . . . . . . . . . 12
FUNKCJE I CZĘŚCI URZĄDZENIA. . . . . . . . . . . . . . . . . . . . . . . . . . . . . . . . . . . . . . . . . . . 13
NEBULIZACJA - CO TO TAKIEGO? . . . . . . . . . . . . . . . . . . . . . . . . . . . . . . . . . . . . . . . . . . 15
INFORMACJE OGÓLNE . . . . . . . . . . . . . . . . . . . . . . . . . . . . . . . . . . . . . . . . . . . . . . . . . . . 15
ŚRODKI OSTROŻNOŚCI . . . . . . . . . . . . . . . . . . . . . . . . . . . . . . . . . . . . . . . . . . . . . . . . . . 16
UŻYTKOWANIE . . . . . . . . . . . . . . . . . . . . . . . . . . . . . . . . . . . . . . . . . . . . . . . . . . . . . . . . . . 17
KONSERWACJA, PRZECHOWYWANIE, NAPRAWA I UTYLIZACJA. . . . . . . . . . . . . . . . . 20
GWARANCJA. . . . . . . . . . . . . . . . . . . . . . . . . . . . . . . . . . . . . . . . . . . . . . . . . . . . . . . . . . . . 21
W ZESTAWIE . . . . . . . . . . . . . . . . . . . . . . . . . . . . . . . . . . . . . . . . . . . . . . . . . . . . . . . . . . . . 21
PODSTAWOWE DANE TECHNICZNE . . . . . . . . . . . . . . . . . . . . . . . . . . . . . . . . . . . . . . . . 22
USTALENIE I ROZWIĄZANIE PROBLEMU . . . . . . . . . . . . . . . . . . . . . . . . . . . . . . . . . . . . 23
DOKŁADNOŚĆ POMIARU . . . . . . . . . . . . . . . . . . . . . . . . . . . . . . . . . . . . . . . . . . . . . . . . . . . . . 23

POL
15
NEBULIZACJA - CO TO TAKIEGO?
Nebulizator to urządzenie do wytwarzania i rozpylania aerozolu. Słowo „nebulizator” pochodzi
od łacińskiego „nebula” (mgła, chmura). Po raz pierwszy użyto go w 1874 roku w celu nazwania
urządzenia przetwarzającego substancje płynne w aerozol do celów medycznych. Jeden z
pierwszych przenośnych “aparatów aerozolowych” stworzyłJ. Sales-Girons w Paryżu w 1859
roku. Pierwsze nebulizatory wykorzystywały jako źródło energii strumieńpary. Stosowano je
do inhalacji dla chorych na gruźlicę. Obecnie zamiast nazwy „nebulizator” często używa się
określenia „inhalator”.
Celem nebulizacji jest dostarczenie do dróg oddechowych terapeutycznej dawki preparatu w
formie aerozolu w krótkim czasie. Nieprzerwane podawanie aerozolu pozwala na osiągnięcie
w ciągu kilku minut wysokiego stężenia substancji leczniczej w górnych i dolnych drogach
oddechowych, a także w płucach, przy czym ryzyko pojawienia sięzjawisk ubocznych jest
niewielkie. Dzięki temu rozszerzająsięoskrzela (efektywna bronchodylatacja), znika potrzeba
hospitalizacji lub skraca siępobyt w szpitalu.
Firma Little Doctor Internatiоnаl (S) Pte. Ltd. oferuje inhalator LD-212C wyróżniający sięmałą
ostatecznąobjętościąroztworu do nebulizacji, niezawodnościąi prostotąużytkowania, a także
tym, że umożliwia on stosowanie wielu preparatów leczniczych. Dziękujemy za zakup naszego
produktu.
INFORMACJE OGÓLNE
Inhalator kompresorowy LD przeznaczony jest do leczenia chorób dróg oddechowych oraz
płuc przy pomocy aerozolów wytwarzanych z roztworów preparatów leczniczych. Można z
niego korzystaćzarówno w placówkach medycznych, jak i w warunkach domowych.
Niniejsza instrukcja pomoże użytkownikom bezpiecznie i efektywnie korzystaćz inhalatora
kompresorowego LD.
Aparat należy użytkowaćzgodnie z zasadami określonymi w niniejszej instrukcji. Nie powinien
on byćużywany do celów innych niżte, które sąw niej opisane. Należy przeczytaći zrozumieć
całą instrukcję.
Urządzenie składa sięz kompresora oraz nebulizatora (komory, w której wytwarzany jest
aerozol). Kompresor, włącznik/wyłącznik i filtr powietrza połączone sąw jednym bloku.
Z kompresora sprężone powietrze trafia przez przewód powietrzny do nebulizatora, gdzie
wytwarzany jest aerozol. W celu ochładzania kompresora do obudowy urządzenia musi być
doprowadzane powietrze.

POL
16
ŚRODKI OSTROŻNOŚCI
UWAGA:
Zaleca sięstosowanie wszystkich oferowanych przez firmy farmaceutyczne rodzajów
standardowych roztworów do inhalacji w postaci płynnej, które przeznaczone sądo nebulizacji.
• Roztwory do inhalacji powinno sięprzygotowywaćw sterylnych warunkach na bazie 0,9% chlorku
sodu jako rozpuszczalnika. DO PRZYGOTOWANIA ROZTWORU DO INHALACJI NIE NALEŻY
STOSOWAĆWODY Z WODOCIĄGU (NAWET PRZEGOTOWANEJ) ANI DESTYLOWANEJ.
Naczynie, w którym zostanie przygotowany roztwór, należy najpierw zdezynfekować, wygotowując je.
• Rodzaj inhalacji (przez usta, z wykorzystaniem ustnika, lub przez nos, z wykorzystaniem maski bądź
widelca), częstotliwość, roztwory do inhalacji i dozowanie powinny zostaćokreślone przez LEKARZA
PROWADZĄCEGO.
• Używany inhalator powinien staćna równej powierzchni stołu.
• Aby zapobiec przegrzaniu sięurządzenia, nie należy odcinaćdopływu powietrza do otworu
powietrznego.
• Dzieci powinny korzystaćz urządzenia pod kontrolądorosłych.
• Jeżeli urządzenie nie jest używane, należy odłączyćje od sieci elektroenergetycznej, wyjmując
wtyczkęz gniazdka.
• Nie należy dotykaćwtyczki przewodu zasilającego wilgotnymi rękoma.
• Nie należy umieszczaćurządzenia w wodzie, pod strumieniem wody lub w kabinie prysznicowej. Nie
używaćpodczas kąpieli.
• Nie należy dotykaćurządzenia, jeśli wpadło do wody. Niezwłocznie odłączyćje od sieci.
• Przed rozpoczęciem użytkowania należy sprawdzić, czy przewód zasilający nie jest uszkodzony.
• Przewód zasilający nie powinien dotykaćpowierzchni gorących lub nagrzewanych.
• Jeśli urządzenie nie działa, należy przejrzećrozdział“USTALENIE I ROZWIĄZANIE PROBLEMU”.
•
Należy używaćjedynie akcesoriów przeznaczonych do LD-212C opisanych w niniejszej instrukcji.
• Urządzenia nie można stosowaćdo znieczulania wziewnego oraz sztucznego wentylowania płuc
.
• Nie należy wsadzaćciałobcych do otworów urządzenia.
• Urządzenie nie jest przeznaczone do użytkowania w miejscach innych niżpomieszczenia.

POL
17
UŻYTKOWANIE
Przygotowanie urządzenia do inhalacji.
UWAGA: Przed pierwszym użyciem aparatu należy umyćgo zgodnie z opisem w
punkcie 1 rozdziału “Konserwacja, przechowywanie, naprawa i utylizacja”.
1. Postawićinhalator przed sobąna stole. Upewnićsię, że urządzenie jest
wyłączone (przełącznik znajduje sięw pozycji “О”), a przewód zasilający
nie jest podłączony do sieci elektrycznej.
2. Zdjąć górnączęść nebulizatora, przekręcając jąw kierunku przeciwnym do
ruchu wskazówek zegara (rys. 1).
3. Zainstalowaćpotrzebny rozpylacz.
W fabrycznie nowym nebulizatorze zainstalowany jest rozpylacz “B” o
kolorze niebieskim, skutecznie działający na cały układ oddechowy.
W celu zapewnienia skuteczniejszego oddziaływania środków leczniczych
na górne drogi oddechowe zamiast rozpylacza o kolorze niebieskim należy
zainstalowaćrozpylacz “C” o kolorze czerwonym.
W celu bardziej efektywnego oddziaływania na dolne drogi oddechowe
należy zainstalowaćrozpylacz “A” o kolorze żółtym, składający sięz dwóch
części (rys. 2, cyframi oznaczono kolejność kroków montażu). Wykresy
podziału dyferencjalnego rozmiarów cząsteczek w zależności od masy dla
różnych rozpylaczy pokazane sąna rys. 4
4. Wlaćdo dolnej części nebulizatora roztwór do inhalacji. Dawki nie powinny
przekraczaćdawek zaleconych przez lekarza prowadzącego. Ilość roztworu
w nebulizatorze określa sięprzy pomocy kresek na obudowie. Maksymalna
pojemność zbiornika wynosi 10 ml.
5.
Zamocowaćgórnączęść nebulizatora, przekręcając jądo oporu zgodnie z ruchem wskazówek
zegara.
6. Za pomocązłączki połączyćustnik z górnączęściąnebulizatora
(rys. 3). W zależności od rodzaju inhalacji skorzystaćz ustnika,
widelca nosowego lub maski.
Maska podłączana jest bezpośrednio do
górnej części nebulizatora, natomiast ustnik lub widelec nosowy należy
podłączyćprzy pomocy złączki.
Trzymaćnebulizator w położeniu pionowym.
UWAGA: Zaleca się, by każdy pacjent korzystałz własnego ustnika,
własnej maski i/lub widelca nosowego.
7.
Podłączyćprzewód zasilający do sieci elektrycznej.
8. Podłączyćjeden koniec przewodu powietrznego do złącza
kompresora, a drugi do złącza nebulizatora.
9. Włączyćinhalator, ustawiając przełącznik w pozycji “I”.
URZĄDZENIE JEST GOTOWE DO INHALACJI.
Rys. 1
Rys. 2
Rys. 3

POL
18
W zależności od rodzaju rozpylacza cząsteczki aerozolu o różnej wielkości dzieląsięw następujący
sposób:
wielkość cząsteczek, μm
% masy ogólnej
% masy ogólnej
% masy ogólnej
0
5
10
15
110
wielkość cząsteczek, μm
0
5
10
15
110
wielkość cząsteczek, μm
0
5
10
15
110
(głównie górne drogi oddechowe)
Rozpylacz „С” (czerwony)
Rozpylacz
„В” (niebieski)
Rozpylacz
„А” (żółty)
(uniwersalny)
(głównie dolne drogi oddechowe)
Aby skutecznie dostarczyćlekarstwa do
określonej części dróg oddechowych, należy
koniecznie użyćodpowiedniego rozpylacza.

POL
19
Inhalacja.
Czas trwania jednego seansu leczenia nie powinien przekraczaćdwudziestu minut. W kwestii
długości inhalacji należy skonsultowaćsięz lekarzem prowadzącym.
W czasie inhalacji osoba z niej korzystająca powinna byćspokojna i rozluźniona. Powinna też
oddychaćpowoli i głęboko, aby preparat dobrze wypełniałpłuca i docierałgłęboko do oskrzeli.
Należy wstrzymaćna chwilęoddech, a następnie zrobićpowolny wydech. Nie próbować
oddychaćzbyt często. W razie konieczności należy robićprzerwy.
Nebulizator aktywowany wdechem.
Dzięki specjalnej konstrukcji nebulizatora (komory połączone ze
sobąw określony sposób) przy wdechu i wydechu strumienie
powietrza przepływająróżnymi drogami.
Pozwala to na uzyskanie przy wdechu strumienia powietrza
o dużej koncentracji aerozolu, a także na zmniejszenie strat
aerozolu przy wydechu. Dzięki nebulizatorowi aktywowanemu
wdechem efektywność inhalacji znacznie wzrasta.
Zakończenie inhalacji.
Po zużyciu roztworu do inhalacji lub po upływie czasu inhalacji zaleconego przez lekarza należy
wyłączyćurządzenie, ustawiając przełącznik w pozycji “O”, a następnie wyjąć z gniazdka wtyczkę
przewodu zasilającego.
Po inhalacji należy pooddychaćprzez jakiśczas świeżym powietrzem, aby uzyskaćlepszy efekt
leczenia.
Po każdym użyciu aparatu należy usunąć z niego pozostałości preparatu, wyczyścići wymyćurządzenie
zgodnie z opisem w punkcie 1 rozdziału “Konserwacja, przechowywanie, naprawa i utylizacja”.

POL
20
KONSERWACJA, PRZECHOWYWANIE, NAPRAWA I UTYLIZACJA
1. Należy regularnie czyścićurządzenie oraz wszystkie akcesoria. Zaleca sięprzecieranie
akcesoriów 3% roztworem wody utlenionej z dodatkiem 0,5% roztworu środka myjącego
(na przykład proszku do prania). Następnie należy koniecznie przemyćnebulizator pod
obfitym strumieniem wody. Ustniki i widelce nosowe można sterylizować, wygotowując
je przez 10 minut lub poprzez autoklawowanie w temperaturze do 150°С. Potem należy
wytrzećdo sucha wszystkie części urządzenia przy pomocy miękkiej szmatki.
2. Należy regularnie sprawdzać, czy filtr jest zabrudzony, i wymieniaćgo w razie konieczności.
ZALECA SIĘWYMIENIANIE FILTRA NIE RZADZIEJ NIŻRAZ DO ROKU.
3. Chronićurządzenie przed bezpośrednimi promieniami słonecznymi i uderzeniami.
4. Nie przechowywaći nie używaćaparatu w bezpośredniej bliskości urządzeńgrzejnych
oraz otwartego ognia.
5. Chronićurządzenie przed zabrudzeniem.
6. Nie dopuszczaćdo kontaktu urządzenia z agresywnymi roztworami.
7.
W razie konieczności dokonywaćnapraw jedynie w punktach zajmujących sięnaprawami.
8. Czas użytkowania kompresora wynosi 5 lat, licząc od rozpoczęcia eksploatacji. Czas
użytkowania materiałów eksploatacyjnych natomiast wynosi 1 rok. Po upływie określonego
czasu użytkowania specjaliści (w specjalnych firmach zajmujących sięnaprawami) powinni
co jakiśczas sprawdzaćstan techniczny urządzenia i w razie konieczności zutylizowaćje
zgodnie z zasadami utylizacji obowiązującymi w danym regionie. Producent nie określił
szczególnych warunków utylizacji.
Other manuals for LD-212C
1
Table of contents
Languages:
Other Little Doctor Respiratory Product manuals

Little Doctor
Little Doctor LD-211C User manual

Little Doctor
Little Doctor LD-212C User manual

Little Doctor
Little Doctor LD-211C User manual

Little Doctor
Little Doctor LD-207U User manual

Little Doctor
Little Doctor LD -250U User manual

Little Doctor
Little Doctor LD-207U User manual

Little Doctor
Little Doctor LD-221C User manual

Little Doctor
Little Doctor LD-221C User manual

Little Doctor
Little Doctor LD-220C User manual

Little Doctor
Little Doctor LD-220mC User manual