Devine Artis MKII Series User manual

Artis MKII series
Active Speaker
User Manual
The information in this user manual is subject to change at any time without notice.
Version:
1.0
Date of creation and author's initials:10-11-2018 RV Revision date and author's initials: -

Introduction
Thank you for purchasing this Devine Artis MKII Active Speaker. We advise that you read this user manual in
its entirety before unpacking the contents of the bo , so that you are familiar with all of the functionality that
this product has to offer. Please be sure to check that all of the parts and accessories listed below under 'bo
contents' are included in the package. In the event that the product does not function properly, or if you have
any issues while operating it, please remove the plug from the power socket and contact your dealer for
assistance.
Box contents:
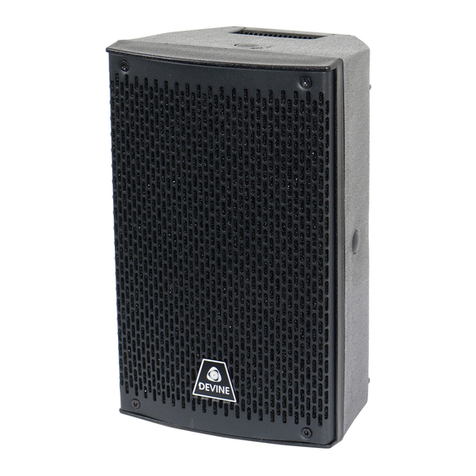
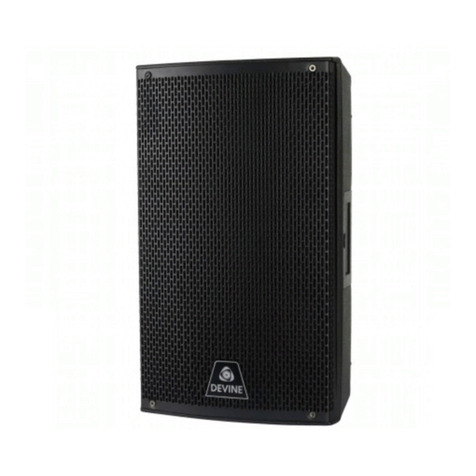
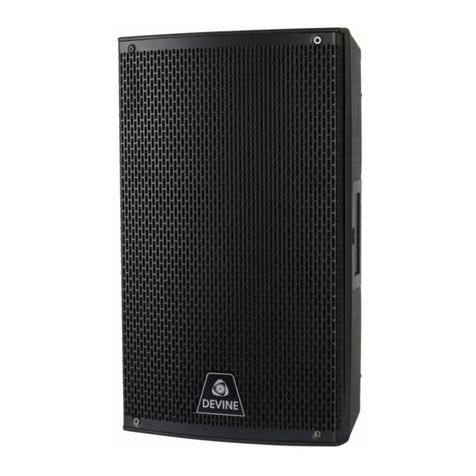
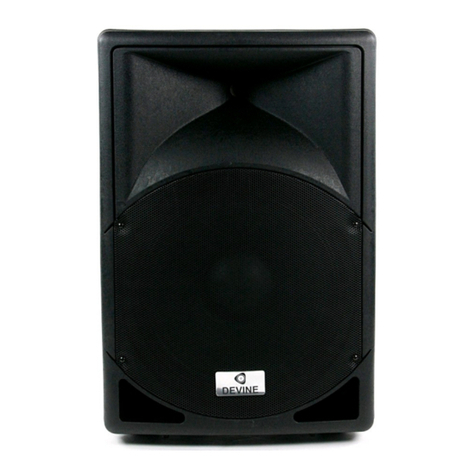
– Devine Artis MKII Active Speaker (8, 10, 12 or 15 inches)
– IR remote control
– power cable IEC C13 to Schuko
Please inspect the device and the included accessories.
Should you discover that either the device or one or more of the included parts have been damaged or
rendered defective while in transit, please contact your dealer directly.
Please note that the pictures in this user manual serve illustrative purposes only and may differ slightly from
the product you receive.
The Bluetooth® wordmark and logo are registered trademarks owned by Bluetooth SIG, Inc. and any use of
these marks by DEVINE is under license. Other trademarks and trade names are from their respective
owners.
Contact:
Devine Pro Audio Products
Verrijn Stuartweg 18
4462 GE Goes
The Netherlands
Please do not send any products to this correspondence address.
Should you wish to send in a product for repair or for a refund, please contact your dealer for an RMA
Return Merchandise Authorisation).
The information in this user manual is subject to change at any time without notice.
Version:
1.0
Date of creation and author's initials:10-11-2018 RV Revision date and author's initials: -

Safety instructions
Everyone involved with the installation, operation and maintenance of this device must:
- Be qualified
- Be skilled
- Have read the instructions in this user manual
- Be sure that neither the device nor the included accessories are damaged. Should the device or the
included accessories be damaged, please contact your dealer for more information.
- Ensure that the device is in good working condition and is safe to operate. Please follow the advice and
instructions as they are described in this user manual.
Damage caused by misuse and/or modifications made to the device are not covered by the warranty.
This device does not contain any parts that need to be repaired or replaced by the user. Should maintenance
or repairs be necessary, they must be handled by a qualified technician.
I portant infor ation regarding health and safety:
- Do not remove any labels or stickers from this device.
- Do not leave any cables lying around.
- The device should not be opened up, and any hardware or software that may be present should not be
modified.
- To achieve optimal performance, inputs on this device should not be fed with a signal higher than
necessary.
- The device should only be used indoors; contact with water, rain and moisture should always be avoided.
Do not place any objects containing liquids on top of the device.
- Remove the device from any nearby flames or heat sources; do not place it near flammable fluids, gasses
or objects.
- Disconnect this device from the power supply if it will not be used for a longer period of time, if maintenance
is necessary, or if the device needs to be cleaned.
- Do not pull on the cable to remove a connector, as this could cause damage.
- Do not use any cables other than the ones described in this manual. Do not use defective cables. Please
contact your dealer if the included or necessary cables do not function properly with this device.
- Only use this device with power from a grounded power source.
- In the event that the device is e posed to e treme temperature changes (e.g. transported through a cold
outside environment into a warm indoor environment), it should not be turned on until it has reached room
temperature. This is necessary to prevent moisture from forming in the device, which could lead to electric
shocks.
- This device is device is equipped with cooling fins at the rear for dissipating heat. Make sure that there is
sufficient air circulation around the cooling fins and do not cover them.
Guidelines and operation of this device:
- This device is intended for indoor use by adults.
- This device is not suitable for use by children, and should always be operated by an adult.
- This device may only be used in a suitable environment where no damage to the device can occur. Do not
use the device in moist or dusty environments such as:
- indoor swimming pools where chlorine is used
- beaches where there is sand and salt
- outdoors
- indoors in spaces where intense heat sources are present, or where it reaches temperature levels
that would be considered uncomfortable for a person
The information in this user manual is subject to change at any time without notice.
Version:
1.0
Date of creation and author's initials:10-11-2018 RV Revision date and author's initials: -
WARNING!
Keep this device away fro oisture, water and rain to avoid the chance of electric shocks.

- Avoid impacts and collisions during use and transport. Do not transport the device while it is in use. Avoid
using e cessive force when installing and operating the device.
- The user should become familiar with the functions of this device before using it.
- The user should be able to stop the devices's power supply in case of emergencies. At least one of the
following should therefore be accessible at all times:
- the power cable connector on the back of the unit
- the power socket the cable is plugged in to
- the power socket switch or e tension cable switch
- Should the device not be used in the manner described in this user manual, damages or even injuries could
occur. Devine cannot be held responsible for any injuries or damages that occur as a result of improper use
of this product.
Storage and transport:
- This product is designed for mobile use. It can be transported separately as long as it’s well-protected
against shocks and collisions.
- This device is not designed for permanent (24/7) use. The e pected lifespan of the device will not be
affected by occasionally turning the device off. Disconnect the device or turn off the power when it is not
actively in use.
- If the device will not be used for a longer period of time, it should be disconnected and stored in a dust-free
environment.
- Do not e pose the device to e treme temperature differences.
Housing
- Inspect the device's housing frequently, and always just before use. Avoid operating the device if there are
large dents or cracks, or if screws are missing. Do not use the device if the housing is not in good condition.
Contact your dealer or a qualified technician if you are unsure about the state of the device.
- Check the device and the screws for corrosion. Corrosion must not be present on this device. Contact your
dealer or a qualified technician if you find any corrosion on the screws.
Every power and signal connector should be securely mounted. Do not use the device if the connectors are
not secure.
Avoid dust and dirt build-up. Clean the device once a month by disconnecting it from the power supply and
wiping it down with a dry or slightly moist cloth. If the device is used frequently, the cleaning intervals should
increase.
Sy bol explanation:
WEEE: Ensure that this device is disposed of properly. This product falls under the WEEE
(Waste Electrical and Electronic Equipment) directive. The requirements of this directive apply
to all manufacturers and producers of electronic devices in the EU. Do not throw this product
away with regular rubbish. Please contact your local authority for more information about how
to recycle and dispose of these products in your region. By recycling this product in the proper
manner, we can work together to ensure that we can continue to enjoy these kinds of
products and still protect the environment as much as possible from pollution.
CE: The CE logo indicates that this product meets the European norms and requirements to
which it must legally conform.
Only suitable for indoor use: this product was only designed for indoor use. The ma imum
environmental temperature must not e ceed 40 degrees Celsius (104 degrees Fahrenheit).
Battery danger:
The information in this user manual is subject to change at any time without notice.
Version:
1.0
Date of creation and author's initials:10-11-2018 RV Revision date and author's initials: -
Warning!
Do not ingest the battery.
Risk of injury due to che ical burns.
The included re ote control co es with a button-cell battery.
If a button-cell battery is ingested, this can cause life-threatening internal burns within just 2 hours
and possibly lead to death.
Keep new and used batteries away fro children.
If the battery co part ent does not close properly, do not use the product and keep it away fro
children.
If you suspect a battery has been ingested or otherwise inserted in the body, seek edical attention
i ediately.
PLEASE NOTE!
Risk of e plosion if the battery is not replaced properly.
Only replace the battery with a new battery of e actly the same type.
Do not e pose batteries to intense heat from sunlight, open fire, etc.
Do not leave batteries out in high-temperature environments. This could cause an e plosion or flammable
fluid or gas leaks.
Do not burn batteries or place them in a hot oven. Do not try to shape the battery or make incisions in it, as
this could cause an e plosion.
Do not e pose batteries to e tremely low air pressure levels (at high altitudes), as this could cause
e plosions or fluid or gas leaks.
If equipment has gone unused for an e tended period of time (a few months for instance), then the battery
should be removed.
Remove empty batteries from the device immediately.
Do not store batteries individually or carry them in your pocket, wallet, or bag. Contact with metal objects
such as coins and keys can cause leaks, tears, or short circuits.
Keep batteries out of reach of children.
Recycling:
Never throw batteries away with the regular rubbish. Batteries contain substances that can be hazardous to
the environment. When batteries are recycled properly, they become a valuable source of sustainable
material. Contact your local authority about how to dispose of batteries in an eco-friendly way.
The information in this user manual is subject to change at any time without notice.
Version:
1.0
Date of creation and author's initials:10-11-2018 RV Revision date and author's initials: -
4
2
5
6
8
3
7
1
10
14
15
16
9
11
12 13
Guidelines and operation of this device
Please note, the images may vary from the actual model. The images below show the silkscreen for the 12A
and the 15A MKII.
1. MP3 player with Bluetooth, USB and SD functionality
(remote control included)
2. Microphone input via balanced 3-pin XLR
and TRS jack plug
3. Line input via stereo RCA or mono balanced
3-pin XLR
4. Link output (line signal) via balanced jack
TRS jack plug or 3-pin XLR
5. Speaker output via lockable
speaker connector
6. MP3 player volume control
7. Microphone volume control
8. Line signal volume control
9. Main volume control
10. Treble tone control (+/-12 dB)
11. Bass tone control (+/- 12 dB)
12. Clip LED indicator
13. Power LED indicator
14. On/off switch
15. IEC C14 power input with
fuse holder
16. Cooling fins
The information in this user manual is subject to change at any time without notice.
Version:
1.0
Date of creation and author's initials:10-11-2018 RV Revision date and author's initials: -

4
26
8
37
1
10
9
5
11
12
13 14
15
16
17
The construction of the rear panel on the 8A is slightly different than the 10A.
1. MP3 player with Bluetooth, USB and SD functionality
(remote control included)
2. Microphone input via TRS jack plug
3. Line input via stereo RCA or mono balanced 3-pin XLR
4. Link output (line signal) via balanced TRS jack plug
5. Speaker output via lockable speaker connector
6. MP3 player volume control /microphone volume
7. Line signal volume control XLR
8. Line signal volume control RCA
9. Echo function (influence on MIC / Line 1)
10. Master volume control
11. Treble tone control (+/-12 dB)
12. Bass tone control (+/- 12 dB)
13. Clip LED indicator
14. Power LED indicator
15. On/off switch
16. IEC C14 power input with
fuse holder
17. Cooling fins
The information in this user manual is subject to change at any time without notice.
Version:
1.0
Date of creation and author's initials:10-11-2018 RV Revision date and author's initials: -
MP3 player basic functionality:
- The MP3 player supports both SD cards and USB sticks of up to 32 GB (memory storage unit with higher
capacity may also be supported but this is not guaranteed). WAV and MP3 files are supported. Other file
types may be supported, but this is not guaranteed.
- The MP3 player normally starts automatically when the speaker is turned on. Press and hold the mode
button for 2 seconds to switch the MP3 player off or back on.
- Use the Mode button to switch between the various audio sources.
- Select Bluetooth mode to playback via Bluetooth. Pair the speaker by activating Bluetooth on your audio
device and selecting it from the list of Bluetooth devices nearby. Once the two are successfully paired and
the volume is turned up, you will hear a tone that indicates that the speaker is connected to your device.
- If the Bluetooth mode displays 'Disconnected', then a connection with the Bluetooth device was
unsuccessful. (12A/15A model only)
- If the Bluetooth mode displays 'Connected!', then the connection with the Bluetooth device was successful.
(12A/15A model only)
- It is not possible to pair a Bluetooth device unless Bluetooth mode is activated. It is not possible to make a
Bluetooth connection if the MP3 player is turned off or in FM mode, for instance.
- It is not possible to pair multiple Bluetooth devices with the speaker at the same time. In order to pair
another device, the current device needs to be disconnected.
- In FM radio mode, it is necessary to scan the FM range by holding down the Play/Pause button or holding it
down shortly. The radio will automatically scan for registered radio frequencies. You can interrupt this
process by pressing the Play/Pause button again, and then use the << and >> buttons to go to the following
or previous radio station. The MP3-player stores all scanned presets. If you use the speaker in another
location, it's recommended to carry out a new scan.
- The FM receiver on the MP3 player and the infrared transmitter are incorporated out of sight into the front
of the speaker. For optimal results, do not place anything in front of the speaker.
- For optimal results, it is recommended to carry out a full FM scan so you know which radio stations there
are to choose from. Once the player has completed a scan of all the available frequencies, it will
automatically switch back to the first preset.
- If you have a Bluetooth device, SD card or USB stick as your audio source, use the indicator controls on
the speaker. Play or pause a track with the >|| button, skip or go to previous tracks with the |<< or >>|
buttons.
- The MP3 player also features a main volume control. Use the V- or V+ buttons on the panel (hold the button
down until the desired volume level is reached) or use the remote control.
- The MP3 player in the Artis 8A and 10A has a mini USB plug for special types of storage media, including
certain Android devices. Compatibility with your specific device however can not be guaranteed.
The information in this user manual is subject to change at any time without notice.
Version:
1.0
Date of creation and author's initials:10-11-2018 RV Revision date and author's initials: -
Re ote control
The included infrared remote control is direction sensitive, which means it must always be pointed at the
front of the speaker for optimal coverage. Bear in mind that objects located between the transmitter and the
receiver can be negatively affected.
The speaker's infrared receiver is hidden behind the grille on the front of the speaker. It's located in the top
1/3rd of the speaker.
Functions of the remote control:
1. Play/pause button: Push this button to play or pause a track (this function does
not work in all modes, such as FM)
2. Channel +/-: Push this button to go to a previous or following channel(FM)
3. EQ function: Use this button to adjust the EQ preset of the player (this function
does not work in all modes, such as FM)
4. Vol +/-: Increase or decrease the volume level of the player. The volume is set to
ma imum value by default.
5. Prev/Ne t: Use this button to go to the previous or following track. This function
works in Bluetooth, USB and SD mode.
6. Number keys: Use these keys to go directly to a specific track in a mode that
works with files, or use it to select a radio preset in FM mode.
7. Pick Song: Use this button to confirm a number preset.
8. Enter: Use this button to select a playback mode (Artis 12A / 15A MKII models
only). It is possible to play tracks once.
9. Mode: Use this button to select the playback source. Choose between Bluetooth, USB, SD or FM. It is
possible that some modes are not available in the list, for e ample because the source device is not
connected.
Please note that other wireless infrared remote controls can have an effect on the functionality of the speaker
due to similar signals. This type of remote control is also used for consumer electronics.
When using multiple speakers with infrared functionality and only one speaker reacts to the remote control, it
is recommended to place them further apart and aim the infrared remote at the speaker in question in a way
that the other speaker(s) can not pick up the signal.
The information in this user manual is subject to change at any time without notice.
Version:
1.0
Date of creation and author's initials:10-11-2018 RV Revision date and author's initials: -

Operating the device
The Artis MKII speaker can be used for different purposes, but it's important to be aware of the following
information beforehand in order to achieve optimal performance.
Warning before use
Devine's Artis MKII speakers are capable of producing volume levels that can cause temporary or permanent
hearing damage. Use these units with care and keep the volume at a reasonable level when possible. The
volume should ideally be set to a comfortable level when listening to music.
Devine cannot be held liable for any injuries or damage resulting from the use of this product.
General use
Housing
The Artis MKII speaker has a robust housing made of moulded plastic. While this is designed to withstand
regular mobile use, it is not designed to withstand falls or damage by (relatively) sharp objects.
During use, storage and transport, ensure that the speaker cannot fall or be damaged by nearby objects that
could fall or move.
Handles
The Artis speakers are all equipped with a handle on the top and handles on both sides.
The handles are designed to make it easier to pick up and move the speakers only. They should never be
used as part of the speaker's installation. The use of harnesses or tension straps is not recommended when
stacking the speaker on top of a subwoofer, for instance. If you do decide to use harnesses or straps,
however, ensure that the handles are not subjected to great forces as this is likely to cause damage.
Protection during transport
While the Artis MKII speakers can be transported, they are not waterproof and caution is therefore advised if
they taken outside during rain or in adverse weather conditions. If they are e posed to moisture in any form,
ensure that they are completely dry again before use. Failure to do so may result in a short circuit which
could cause permanent damage or injury. E posure to moisture can also cause visible or invisible corrosion
which may cause damage in the long term.
Grille
The Artis MKII speakers are equipped with a metal grille on the front that protects the speaker components.
The grille should not be removed by the user. The acoustic foam behind the grilled keeps the components
safe from moisture, dust and other small particles.
Stand flange
The speaker is equipped with a 35 mm stand flange on the bottom which allows it to be easily mounted on a
stand. From an elevated position, the speaker's high tones will travel further thereby reaching a larger
audience.
For optimal sound dispersion, the middle of the speaker's woofer should ideally be placed at a height of
between 1.80 and 2.00 metres.
By means of a knob, the stand flange can be tightened to hold the speaker firmly in place on the stand. As
well as being secure, this also prevents undesirable vibrations and resonance.
When the speaker is mounted on a stand, make sure that the stand is not placed anywhere it will be in the
way and/or could be knocked over. The legs on a stand should always be fully e tended to ensure optimal
stability.
The information in this user manual is subject to change at any time without notice.
Version:
1.0
Date of creation and author's initials:10-11-2018 RV Revision date and author's initials: -
The 35 mm stand flange can also be used to mount the speaker on a suitable wall bracket. Consult the
manual or instructions that come with your wall bracket to ensure proper installation before mounting the
speaker.
Audio technology
The Artis MKII speaker series features the very latest in audio technology. By adhering to the following tips
and instructions, you can make the most of everything this speaker has to offer for the very best audio and
performance quality possible.
1. MP3 player with Bluetooth, USB and SD
The built-in MP3 player in the Artis MKII speaker series is full of functions and is commonly used to play
background music or backing tracks. USB sticks and SD cards of up to 32 GB including map structures are
read perfectly.
Music can be streamed endlessly via Bluetooth because it comes from an e ternal device. This can be any
audio source with Bluetooth functionality such as a computer, laptop, tablet, smartphone or MP3 player.
What's more, you don't need to use the audio source device to navigate through your tracks, as this can be
done on the MP3 player on the speaker itself or via the remote control.
Navigate through the various functions easily with the help of the display and menu keys.
Re ote control for MP3 player
The remote control for the MP3 player has infrared capability. The IR receiver is located behind the grille on
the front of the speaker just above the woofer. For optimal results, it's important to aim the remote control
directly at the IR receiver at a ma imum distance of ten metres.
Microphone input
This input is suitable for connecting a wires microphone by means of a (balanced 3-pin XLR or) TRS jack
plug. It is for a dynamic vocal microphone that does not require phantom power.
Line input
The line input is suitable for a stereo source that transmits a line signal, such as a laptop, MP3 player,
smartphone, CD player or MP3 player. The source can be connected via the stereo RCA connections.
If you use a PA mi er, DJ controller or DJ mi er with two speakers that are at a greater distance from the
audio source, then it is recommended to use the balanced 3-pin XLR input. The left signal goes to the left
speaker and the right signal goes to the right speaker.
Line output
The line output is a balanced XLR/TRS jack (depending on the model) that allows the signal to be passed on
to additional speakers. The output signal is the same signal that the speaker itself is using and is not set.
Changing the volume level on the speaker, therefore, will also affect the output signal.
2-band EQ / tone control
The Artis MKII speakers are equipped with a 2-band bass and treble tone control that influences the
character of the sound. For public speaking, for instance, it may be desirable to reduce the low frequencies
to make speech more understandable.
When playing background music at a low volume, you may wish to reduce the treble and turn up the low
frequencies for a warmer sound.
When using the speaker as a floor monitor, reduce the low frequencies to prevented unwanted vibrations
because sufficient lows will normally already be provided by the PA system.
When using the speaker for PA purposes, it's recommended to leave the tone controls in a neutral position (0
dB, 12 o'clock)
The information in this user manual is subject to change at any time without notice.
Version:
1.0
Date of creation and author's initials:10-11-2018 RV Revision date and author's initials: -

Bear in mind that the sound can distort or clip if you turn one or both controls too far to the left or right. It is
therefore recommended to only use these controls for subtle sound corrections and never turn them
completely to the left or right.
The Artis 12A and 15A MKII models also feature a 5-band equalizer that enables the user to adjust the
speakers with great accuracy.
Speaker volu e
Artis speakers offer good audio amplification for an affordable price. The built-in components are aligned in
such a way that normal use should result in good audio quality.
If you notice that the speaker sounds different than normal (distortion or crackling) and/or the Clip LED on
the rear lights up, then reduce the volume level immediately. Continuously overloading the speaker can lead
to permanent damage. Make sure your sound system is set up so that the connected audio source can not
transmit a heavily overloaded signal. DJ devices such as mi ers or controllers are capable of this.
If you are at the controls of your speaker system, set the audio source to a signal transmission of +3 to +6 dB
(with music) and adjust the speaker volume so that the Clip LED does not light up. If your equipment does
not have an indicator for this, set it to the ma imum volume (making sure the signal is not distorted) and turn
the speaker volume up gradually while remaining under the Clip level.
As long as the source device continues to transmit at 0 dB (the most ideal level for optimal volume), you can
not overload the speaker, not even with an accidental peak of +3 or +6 dB.
If you are not at the controls of your speaker system, it's recommended to use a limiter that 'penalises' heavy
overloading by reducing the volume considerably. The result is a lower volume level and an inferior sound.
This solution is much better however than allowing the speaker to overload, which can cause damage to the
speaker components.
LED indicators
The green LED on the speaker will light up whenever the speaker is connected to an active power source
and turned on.
The red LED on the speaker is an indicator for the clip limiter and will light up whenever the amplifier module
is overloaded by an input signal that is too loud . In this case, appropriate adjustments should be made until
the clip LED indicator no longer lights up.
Continually overloading the amplifier module and causing the clip LED to light up is likely to cause
permanent damage to both the amplifier module and the speaker components and shorten their lifespan
considerably. Damage caused by negligent use is not covered by the warranty.
Using a icrophone
It's possible to connect a microphone to the Artis MKII speaker by means of the microphone input only. Even
though there are two connections on certain Artis speakers, only one input can be used at a time.
For optimal sound quality, a microphone should be placed at a ma imum distance of 5 cm away from the
mouth and spoken into at a sufficient volume so that minimal amplification is necessary. A microphone is
directional and will not usually capture much sound from the back or sides.
Ensure the speaker/vocalist does not hold the microphone too far away from the mouth. If the mic is held too
far away, it becomes less sensitive so you'll need to amplify more, which increases the risk of feedback,
resulting in a loud, high-pitched tone.
Microphones should never be held directly in front of a speaker as this can cause feedback. Should this
happen accidentally, remove the microphone from the vicinity of the speaker immediately and turn down the
volume control.
People using microphones should ideally stand directly ne t to or behind speakers in order to prevent any
problems with feedback. Standing in front of a speaker will almost always result in the sound of the speaker
itself also being picked up by the microphone.
The information in this user manual is subject to change at any time without notice.
Version:
1.0
Date of creation and author's initials:10-11-2018 RV Revision date and author's initials: -
When using as a onitor
The Artis MKII series speakers are suitable for use as (floor) monitors and can be placed at an angle so that
the sound is directed towards artists, performers or presenters. No e tra adapters or supports are required.
Make sure that the speaker is not pushed across surfaces as this may damage the speaker's housing.
When using with external equip ent
It's possible to use the Artis MKII speakers with e ternal equipment like crossovers, equalisers and speaker
management systems. Bear in mind that using e ternal equipment may change the character of the
speaker's sound. Normally, it's best to ensure that the speaker's 2-band EQ is set to the neutral position
before connecting e ternal equipment.
When using with a subwoofer
When you want to use the Devine Artis MKII speakers with an optionally-available subwoofer, choose a
suitable subwoofer like Devine's Ony active subwoofers. It's best to choose a subwoofer that's a size bigger
than your speaker. Normally, the signal from your sound source (a DJ mi er, PA mi er, smartphone or laptop,
for instance) should be connected to the subwoofer first and then to your speaker. This allows the subwoofer
to filter out and reproduce the remaining frequencies and pass on the remaining mid and high frequencies to
your speaker, which ensures optimal sound reproduction overall.
The signal from your speaker can be passed on to additional speakers should you wish to use more than
one in conjunction with a subwoofer.
If you want a setup with multiple subwoofers and speakers, the left and right signals should be separated.
They should still go through the subwoofers first. Use the Link function to connect subwoofers and connect
the speakers to the last subwoofer in the chain via the filtered output. This means that each subwoofer gets
the full signal and can filter out the low frequencies itself. The last subwoofer in the chain will then pass the
filtered signal on the speakers for the best possible sound quality without having to use any e ternal
equipment.
Using additional equipment like a speaker processing system gives you additional possibilities when it comes
to tweaking the sound and making adjustments that are appropriate for your situation.
Connecting a passive speaker
It's possible to connect an additional passive speaker to one of the active Artis speakers by means of the
lockable speaker output. Ensure that the passive speaker you want to use has a minimum impedance of 8
ohms. Also ensure the speaker is turned off when you connect an additional speaker. Plug in the connector
and rotate it 1/4 turn until you hear a 'click', which indicates the connector is locked. To release it, press down
on the metal lip on the connector with your thumb and carefully pull the connector towards you until it comes
out.
Bear in mind that the output capacity of the internal amplifier module will change. Normally, it runs on an
impedance of 8 ohms that changes to 4 ohms with an additional, parallel 8-ohm speaker connection.
Basically this means that the amplifier produces almost twice as much output (less resistance = more
output), but this can be distributed over two speakers. This functionality is designed to increase the speaker
range (and achieve a wider audio dispersion angle with 2 speakers ne t to each other).
The sound pressure level will probably not increase because the addition of a similar speaker will add about
3 dB e tra. This also ensures certain frequencies either amplify each other or cancel each other out when 2
speakers side by side face the same direction, which can have an effect on the sound quality.
Always use a passive speaker with properties that are as similar to the original Artis speaker as possible.
Always use a speaker cable that is thick enough to bridge long distances. A cable thickness of 1.5mm² per
conductor is recommended.
Connecting a passive subwoofer
It is not recommended to connect a passive subwoofer to the active Artis speakers via the speaker output:
- a subwoofer requires a lot of output and the low tones need a significant amount of amplifier power. This
amount is sometimes twice the amount needed for the array speakers in order to maintain a balanced sound.
- the subwoofer needs to be equipped with a built-in filter to remove the high tones (a subwoofer can not
The information in this user manual is subject to change at any time without notice.
Version:
1.0
Date of creation and author's initials:10-11-2018 RV Revision date and author's initials: -

produce high tones). These tones are already amplified and converted to warmth by the Artis. A small portion
of the low tones remain intact as a result.
The information in this user manual is subject to change at any time without notice.
Version:
1.0
Date of creation and author's initials:10-11-2018 RV Revision date and author's initials: -

Speaker Troubleshooting Guide
If you have a problem with your speaker, please consult this troubleshooting section for possible solutions. If,
after consulting this section, the problem remains unresolved, please contact your dealer for more
information and/or help.
This troubleshooting section contains information on how to solve the most common speaker problems, but it
does not and cannot cover every eventuality. It is possible that you won't find your problem, cause and
solution in this section due to differences between various connecting devices.
Proble Possible cause Solution
Speaker does not turn on with
mains power
Defective fuse Check the fuse, which is located
under the power input, to rule out
of it's blown or not. If it is blown,
replace it with a new fuse of the
same type and class.
Problem with the power cable Check that the power cable is
plugged into an active power
socket and the speaker properly.
Try using another cable of the
same type to determine if there's a
problem with the power cable and
if there is, replace the problem
cable.
Speaker doesn't turn on Check if the power switch on the
back of the speaker is set to the
'on' position.
Power LED doesn't light up If the speaker is connected to an
active power socket, the fuse has
been checked and the power
switch is ON but the power LED is
not lighting up, there may be a
problem with speaker itself. In this
case, the speaker should be
turned off again and you should
contact your dealer for assistance.
No sound via one of the inputs Cable not connected properly Make sure the cable between your
sound source and the speaker is
connected properly.
Line/mic signal switch in wrong
position
If present on the input channel, set
the signal switch to the correct
position for the connected device.
Microphone is not on Make sure the microphone switch,
if present, is switched on.
No sound from the master output Volume control is not turned up Turn up the master control volume
to a sufficient level.
Red Clip Limiter LED lights up
often or continually
Volume is too high Decrease the volume level on the
speaker or the connected audio
source device. Continuous
e posure to overloading can cause
permanent damage.
The information in this user manual is subject to change at any time without notice.
Version:
1.0
Date of creation and author's initials:10-11-2018 RV Revision date and author's initials: -

Distorted, clipping, crackling sound Source device is transferring a
distorted signal
Check if any of the connected
source devices is transferring a
distorted signal and turn down the
volume on the device if necessary.
Volume control is too loud Turn the volume down
The tone controls for treble and/or
bass are too high or too low.
Turn the tone control back to 12
o'clock and listen to see clipping is
still audible.
Woofer or tweeter is defective If a speaker is e posed to a loud,
distorted, or clipped signal for a
longer period of time, this can
cause permanent damage to its
internal components. If you
suspect that the woofer or tweeter
is damaged, contact your local
dealer for assistance.
Sound is dull Tweeter is defective Turn the speaker to an appropriate
volume (ensure that it's not too
loud) so that you can listen directly
to the tweeter with it close to your
ear. If the tweeter is not
responding it is probably defective
and you should contact your
dealer for assistance.
Incorrect EQ settings Make sure one of the EQ controls
has not been set e tremely high or
e tremely low and set it to a
neutral position if possible.
The information in this user manual is subject to change at any time without notice.
Version:
1.0
Date of creation and author's initials:10-11-2018 RV Revision date and author's initials: -

Specifications
General specifications for all odels:
– lightweight speaker cabinet with plastic housing
– 8, 12 or 15-inch active speaker with woofer and compression driver + horn
– metal grille
– practical handles
– acoustic foam behind grille to prevent any unwanted matter from getting inside the speaker
– grille covers the front of the subwoofer for optimal protection
– various inputs for microphone, laptop, smartphone, keyboard, DJ controller and MP3 player, among others
– built-in MP3 player with Bluetooth functionality and included infrared remote control
– cabinet design also suitable for use as a floor monitor
– 35mm stand flange with tightening knob secure mounting on a speaker stand and optimal dispersion of the
high tones
– built-in clip limiter
– Power LED indicator and Clip LED indicator
– 2-band tone control (Bass / Treble)
– e tra 5-band tone control on 12A and 15A models
– microphone input via TRS jack (or 3-pin balanced XLR on 12A and 15A models)
– line input via 3-pin balanced XLR or stereo RCA
– link line output via TRS jack (or 3-pin balanced XLR on 12A and 15A models)
– speaker output via lockable speaker connector (min. 8 ohms)
– speaker output for connecting additional passive speaker to enhance audio dispersion
– IEC C14 power input with fuse holder
– on/off switch
Technical specifications per odel:
Model Artis 8A MKII Artis 10A MKII Artis 12A MKII Artis 15A MKII
Frequency range 70 Hz – 18 kHz 60 Hz – 18 kHz 55 Hz – 18 kHz 45 Hz – 18 kHz
Amplifier output power
(RMS / Peak)
70 / 150 W 100 / 200 W 150 / 300 W 200 / 400 W
Amplifier type Class AB
Sensitivity 95 dB 96 dB
Low tone speaker 8-inch woofer 10-inch woofer 12-inch woofer 15-inch woofer
High tone speaker 1-inch driver 1.35-inch driver
high tone driver with
horn dispersion
90 60°
Crossover frequency 3 kHz 2.8 kHz
Connection voltage 230V AC, 50 Hz
Fuse F2A 250V F2A 250V F3A 250V F4A 250V
Nominal ma imum
power consumption
70 W 100 W 150 W 200 W
Dimensions 330 275 580
mm
390 325 58
mm
455 375 680
mm
510 425 790
mm
Weight per speaker 6 kg 9 kg 15.5 kg 19.5 kg
The information in this user manual is subject to change at any time without notice.
Version:
1.0
Date of creation and author's initials:10-11-2018 RV Revision date and author's initials: -
Other manuals for Artis MKII Series
1
This manual suits for next models
13
Table of contents
Other Devine Speakers manuals

Devine
Devine Artis MKII Series User manual

Devine
Devine RX Series User manual

Devine
Devine Artis 10 User manual

Devine
Devine Onyx Active 10A User manual

Devine
Devine Artis Series User manual

Devine
Devine Artis Series User manual

Devine
Devine MR-5A User manual

Devine
Devine Artis 8A User manual

Devine
Devine Artis Series User manual

Devine
Devine Onyx 6 User manual