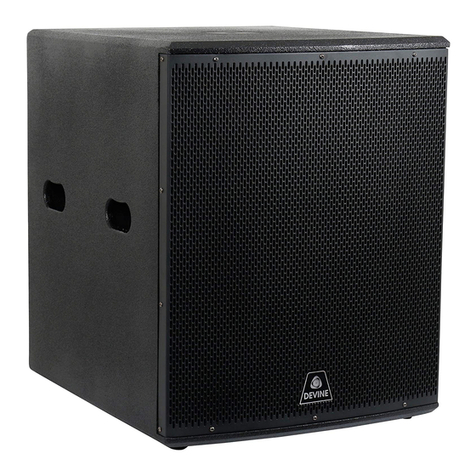
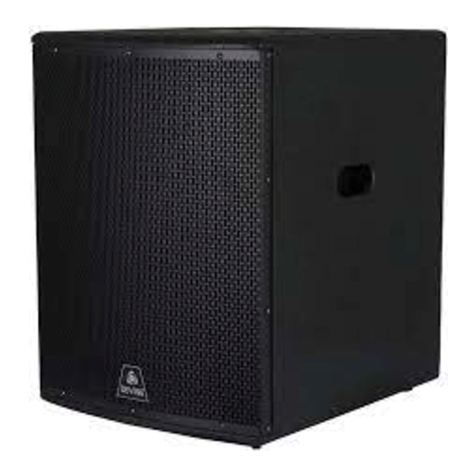
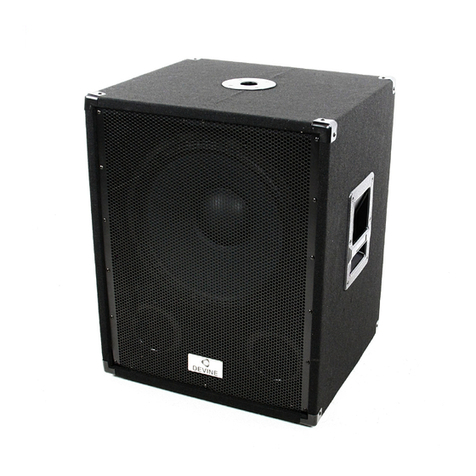
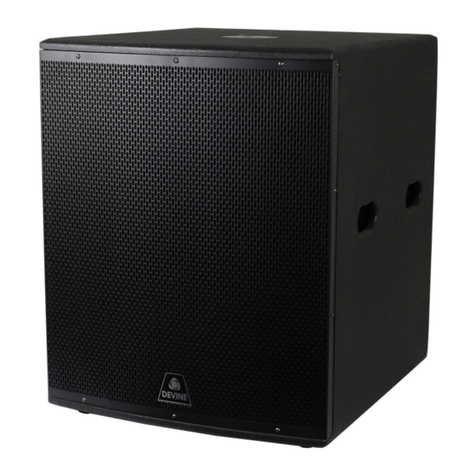
Devine Onyx 15SXA User manual

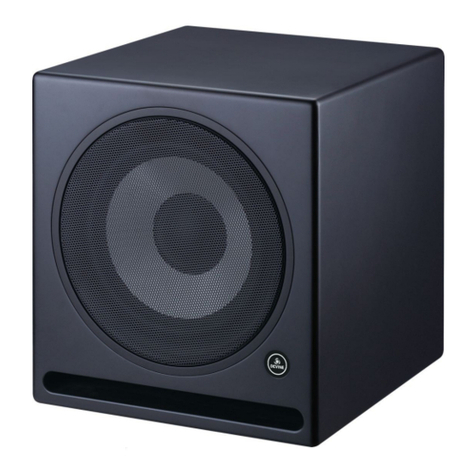
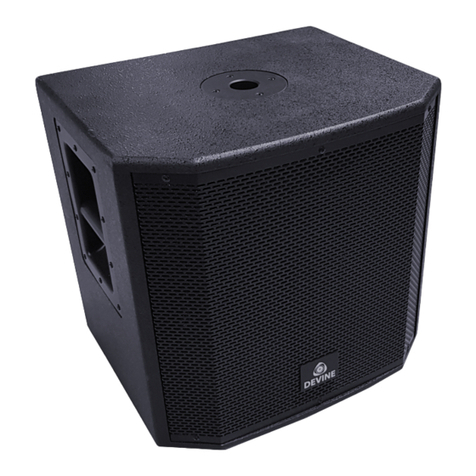
Onyx 15SXA / 18SXA
Active Subwoofer with Passive Outputs
User Manual
The information in this user manual is subject to change at any time without notice.
Version: 1.0 Date of creation and author's initials:11-01-2020 RV Revision date and author's initials: -
ntroduction
Thank you for purchasing this Devine Onyx SXA active subwoofer. We advise that you read this user manua
in its entirety before unpacking the contents of the box, so that you are fami iar with a of the functiona ity
that this product has to offer. P ease be sure to check that a of the parts and accessories isted be ow under
'box contents' are inc uded in the package. In the event that the product does not function proper y, or if you
have any issues whi e operating it, p ease remove the p ug from the power socket and contact your dea er for
assistance.
Box contents:
– Devine Onyx 15SXA / 18SXA Active Subwoofer
– Power Cab e IEC C13 to Schuko
Please inspect the device and the included accessories.
Shou d you discover that either the device or any of the inc uded parts have been damaged or rendered
defective whi e in transit, p ease contact your dea er direct y.
Please note that the images included in this user manual serve illustrative purposes only and may differ
slightly from the product you receive.
Contact:
Devine Pro Audio Products
Verrijn Stuartweg 18
4462 GE Goes
The Nether ands
Please do not send any products to this correspondence address.
Should you wish to send in a product for repair or for a refund, please contact your dealer for an RMA
Return Merchandise Authorisation).
The information in this user manual is subject to change at any time without notice.
Version: 1.0 Date of creation and author's initials:11-01-2020 RV Revision date and author's initials: -

Safety nstructions
Everyone invo ved with the insta ation, operation and maintenance of this device must:
- Be qua ified
- Be ski ed
- Have read the instructions in this user manua
- Be sure that neither the device nor the inc uded accessories are damaged. Shou d the device or the
inc uded accessories be damaged, p ease contact your dea er for more information.
- Ensure that the device is in good working condition and safe to operate. P ease fo ow the advice and
instructions as they are described in this user manua .
Damage caused by misuse and/or modifications made to the device are not covered by the warranty.
This device does not contain any parts that need to be repaired or rep aced by the user. Shou d maintenance
or repairs be necessary, they must be hand ed by a qua ified technician.
mportant information regarding health and safety:
- Do not remove any abe s or stickers from this device.
- Do not eave any cab es ying around.
- The device shou d not be opened up, and any hardware or software that may be present shou d not be
modified.
- To achieve optima performance, inputs on this device shou d not be fed with a signa higher than
necessary.
- The device shou d on y be used indoors; contact with moisture, water and rain shou d a ways be avoided.
Do not p ace any objects containing iquids on top of the device.
- Remove the device from any nearby f ames or heat sources; do not p ace it near f ammab e f uids, gasses
or objects.
- Disconnect this device from the power supp y if it wi not be used for a onger period of time, if maintenance
is necessary, or if the device needs to be c eaned.
- Do not pu on the cab e to remove a connector, as this cou d cause damage.
- Do not use any cab es other than the ones described in this manua . Do not use defective cab es. P ease
contact your dea er if the inc uded or necessary cab es do not function proper y with this device.
- On y use this device with power from a grounded power source.
- In the event that the device is exposed to extreme temperature changes (e.g. transported through a co d
outdoor environment into a warm indoor environment), it shou d not be turned on unti it has reached room
temperature. This is necessary to prevent moisture from forming in the device, which cou d ead to e ectric
shocks.
Guidelines and operation of this device:
- This device is intended for indoor use by adu ts.
- This device is not suitab e for use by chi dren, and shou d a ways be operated by an adu t.
- This device shou d on y be used in a suitab e environment where no damage to the device can occur. Do
not use the device in moist or dusty environments such as:
- indoor swimming poo s where ch orine is used
- beaches where there is sand and sa t
- outdoors
- indoors in spaces where intense heat sources are present, or where it reaches temperature eve s
that wou d be considered uncomfortab e for a person
- Avoid impacts and co isions during use and transport. Do not transport the device whi e it is in use. Avoid
using excessive force when insta ing and operating the device.
The information in this user manual is subject to change at any time without notice.
Version: 1.0 Date of creation and author's initials:11-01-2020 RV Revision date and author's initials: -
WARN NG!
Keep this device away from moisture, water and rain to avoid the chance of electric shocks.

- The user shou d become fami iar with the functions of this device before using it.
- The user shou d be ab e to stop the devices's power supp y in case of emergencies. At east one of the
fo owing shou d therefore be accessib e at a times:
- the power cab e connector on the back of the unit
- the power socket the cab e is p ugged in to
- the power socket switch or extension cab e switch
- Shou d the device not be used in the manner described in this user manua , damages or even injuries cou d
occur. Devine cannot be he d responsib e for any injuries or damages that occur as a resu t of improper use
of this product.
Storage and transport:
- This product is designed for mobi e use. It can be transported separate y as ong as it’s we -protected
against shocks and co isions.
- This device is not designed for permanent (24/7) use. The expected ifespan of the device wi not be
affected by occasiona y turning the device off. Disconnect the device or turn off the power when it is not
active y in use.
- If the device wi not be used for a onger period of time, it shou d be disconnected and stored in a dust-free
environment.
- Do not expose the device to extreme temperature differences.
Housing
- Inspect the device's housing frequent y, and a ways just before use. Avoid operating the device if there are
arge dents or cracks, or if screws are missing. Do not use the device if the housing is not in good condition.
Contact your dea er or a qua ified technician if you are unsure about the state of the device.
- Check the device and the screws for corrosion. Corrosion must not be present on this device. Contact your
dea er or a qua ified technician if you find any corrosion on the screws.
Every power and signa connector shou d be secure y mounted. Do not use the device if the connectors are
not secure.
Avoid dust and dirt bui d-up. C ean the device once a month by disconnecting it from the power supp y and
wiping it down with a dry or s ight y moist c oth. If the device is used frequent y, the c eaning interva s shou d
increase.
Symbol explanation:
WEEE: Ensure that this device is disposed of proper y. This product fa s under the WEEE
(Waste E ectrica and E ectronic Equipment) directive. The requirements of this directive app y
to a manufacturers and producers of e ectronic devices in the EU. Do not throw this product
away with regu ar rubbish. P ease contact your oca authority for more information about how
to recyc e and dispose of these products in your region. By recyc ing this product in the proper
manner, we can work together to ensure that we can continue to enjoy these kinds of
products and sti protect the environment as much as possib e from po ution.
CE: The CE ogo indicates that this product meets the European norms and requirements to
which it must ega y conform.
Only suitable for indoor use: this product was on y designed for indoor use. The maximum
environmenta temperature must not exceed 40 degrees Ce sius (104 degrees Fahrenheit).
The information in this user manual is subject to change at any time without notice.
Version: 1.0 Date of creation and author's initials:11-01-2020 RV Revision date and author's initials: -
Overview and Operation of the Device
Devine Onyx 15SXA/18SXA
1. Left and right vo ume contro with peak indicator
2. Line combo inputs (6.35mm TRS jack / 3-pin XLR)
3. Link outputs (ba anced 3-pin XLR)
4. Subwoofer vo ume contro with peak-indicator
5. 0 – 180-degree Phase switch
6. Stereo / Mono setup switch
7. Ground ift switch
8. DSP preset se ection (Main, music, ive, speech)
9. Sate ite outputs via ockab e speaker output, inc uding cross-over curve switch
10. IEC C14 power input with fuse ho der
11. Power switch (on/off)
12. Vo tage switch (defau t 230V)
13. Crossover / HPF switch
The information in this user manual is subject to change at any time without notice.
Version: 1.0 Date of creation and author's initials:11-01-2020 RV Revision date and author's initials: -
Operating the Device
Onyx subwoofers can be used for different purposes, but it's important to be aware of the fo owing
information before use in order to achieve optima performance.
Warning Before Use
Devine's Onyx subwoofers are capab e of producing vo ume eve s that can cause temporary or permanent
hearing damage. Use these units with care and keep the vo ume at a reasonab e eve when possib e. The
vo ume shou d idea y be set to a comfortab e eve when istening to music.
Devine cannot be he d iab e for any injuries or damage resu ting from the use of this product.
General Use
Housing
This Onyx subwoofer has a housing made of wood that’s reinforced with bracing on the inside for an overa
so id construction. The exterior has been finished using a specia acquer that’s resistant to ight impacts and
scratches.
Ensure that during use, storage and transport the subwoofer is secure y p aced and cannot topp e over or be
damaged by nearby objects that might fa or shift.
Handles
The Onyx subwoofers are fitted with hand es on the side. Except for the 18” version, a mode s have one
hand e on both sides. Due to the size and weight of the 18” version, it has two hand es per side.
This eases the hand ing and transporting of the subwoofer. Stacking mu tip e subwoofers is possib e with a
maximum of 3 per side. Whi e the use of fastening straps is possib e, these may damage the acquer finish.
Wheels
The subwoofers have screw threads and bo ts to accommodate the mounting of whee s. Standard
80/100mm whee s from a we -known manufacturers can be mounted as ong as the distance between the
centre of the bo t ho es measures 80 x 60 mm. Any combination of fixed and swive castor whee s can be
insta ed; whether braked or not. Braked whee s are recommended, however, so that the whee s are fixed in
p ace and cannot cause any unwanted noise when the subwoofer is being used.
For transportation in a car, van or truck, it’s recommended to remove the whee s and insta the rubber feet to
prevent the subwoofer from shifting whi e in transit.
If you do not wish to insta whee s because the subwoofer is, for instance, used as part of a fixed insta ation,
it’s recommended to eave the pre-insta ed bo ts in the subwoofer as ho es and apertures in the housing wi
cause air eakage.
Protection During Transport
Whi e Onyx subwoofers can be transported, they are not waterproof and caution is therefore advised if they
are taken outside when raining or in adverse weather conditions. If they are exposed to moisture in any form,
ensure that they are comp ete y dry again before use. Fai ure to do so may resu t in a short circuit which
cou d cause permanent damage or injury. Exposure to moisture can a so cause visib e or invisib e corrosion
which may cause damage in the ong term.
Grille
Onyx subwoofers are equipped with a meta gri e on the front that protects the speaker components behind.
The gri e shou d not be removed by the user. The acoustic foam behind the gri e keeps the components
safe from moisture, dust and other sma partic es.
Distance Rod Flange
The information in this user manual is subject to change at any time without notice.
Version: 1.0 Date of creation and author's initials:11-01-2020 RV Revision date and author's initials: -

Devine Onyx subwoofers are fitted with a f ange with an M20 screw thread into which a distance rod can be
secure y screwed to form a stab e base on which a fu -range speaker (sate ite speaker) can be mounted.
Using this kind of set-up saves the space that a norma speaker stand wou d take up. Since the weight of a
subwoofer is usua y greater than that of a standard speaker and has a arger top surface, it provides a more
stab e base than a stand. A ways make sure to p ace the subwoofer on a comp ete y eve surface that is ab e
to withstand the combined weight of a fu -range set up.
Voltage Switch
This speaker is fitted with a vo tage switch so that it can be used in mu tip e set-ups. The vo tage switch is
usua y set correct y and shou d not be changed. The vo tage switch is norma y set at 230V as standard. If
you have any doubts, contact your retai er for further advice. P ease note: when using a different vo tage, a
fuse with a different va ue needs to be insta ed. For more information about this, see the specifications.
Audio Technology
The Onyx series comes with various functions that aim to make the ife of an audio technician that bit easier.
By fo owing the tips and instructions be ow, you’ be ab e to get the best possib e performance and sound
qua ity out of your new speaker.
Connecting SXA Subwoofers to Passive Speakers
The Onyx SXA subwoofers operate at their best in combination with your retai er-se ected Onyx speakers.
The SXA subwoofers come fitted with ocking speaker sockets that can be used to connect passive speakers
using compatib e cab es (not inc uded).
The impedance of any connected sate ite speakers must be a minimum of 8 Ohms. It’s not possib e to
connect mu tip e 8-Ohm speakers to a sing e output as this may resu t in prob ems due to amp ifier over oad.
Connecting Signal Sources with Cables
The Devine Onyx 10SXA is fitted with professiona ba anced combo-sockets to which both standard jack and
XLR p ugs can be connected. These sockets are compatib e with most professiona audio equipment
inc uding DJ contro ers, DJ mixers, PA mixers and so on.
LED ndicators
The green LED on the subwoofer ights up when the speaker is turned on and connected to an active power
source.
Each red LED for the vo ume contro s is an indicator for the CLIP/PEAK imiter and wi ight up when the
amp ifier modu e is over oaded after being fed an excessive y strong input signa . If this occurs, turn down the
vo ume of the corresponding speaker to attenuate the signa . Try to configure the speaker system in such a
way that the LED doesn’t ight up and keep monitoring and istening to ensure the sound maintains its qua ity.
Next to causing permanent damage, over oading the amp ifier modu e can significant y shorten the ifespan
of any of the speaker components or the amp ifier. Any damage caused by incorrect use of the subwoofer or
the speaker is not covered by the warranty.
Link Outputs
The ink outputs on the Onyx series subwoofers are inc uded to accommodate additiona active sate ite
speakers and to determine the sca abi ity of your speaker system. It is, for instance, possib e to connect a
number of sma er passive speakers for monitoring and set up arger speakers for the audience.
Using a Microphone
It’s not possib e to direct y connect a microphone to any of the Onyx subwoofers. It is advisab e to first
connect a microphone to a PA mixer so that you have contro over the sound and vo ume. The master output
of the mixer can then be direct y connected to the subwoofer.
For optimum sound qua ity, make sure to ho d the microphone c ose to the mouth: a maximum of around
5cm from the ips. Speak oud y and c ear y into the microphone so that minimum amp ification and gain is
The information in this user manual is subject to change at any time without notice.
Version: 1.0 Date of creation and author's initials:11-01-2020 RV Revision date and author's initials: -
needed. Microphones are usua y directiona y sensitive and as such, wi not pick up any sound that’s
directed at its sides or from behind.
Never ho d a microphone in front of the speakers since this wi cause a feedback oop and resu t in a very
high and piercing tone. If feedback does occur, move the microphone away from the front of the speaker
immediate y and turn the vo ume down so that the feedback oop is c osed and the noise is stopped.
It is a ways advisab e to have speakers or voca ists stand beside or behind the speakers to avoid any
possib e feedback. If it’s direct y in front of, or just to one side of a speaker, the microphone is ike y to pick up
the sound coming from the speaker and cause feedback.
Using External Equipment
It's possib e to use the Onyx subwoofers with externa equipment ike crossovers, equa isers and speaker
management systems. Bear in mind that using externa equipment may change the sound character of the
speaker.
0-180° Phase Switch
This switch can he p so ve any ow-frequency inhibiting acoustic prob ems. Norma y, this switch is set to 0°
but it is possib e to set it to 180° if you experience any acoustic prob ems in combination with the sate ite
speakers being used.
Crossover Switch/ HPF
The crossover switch can be used to send the ower frequencies to the subwoofer and the higher
frequencies to the connected passive speakers. Using the switch, the crossover frequency can be set
between 100 and 140 Hz. For a deeper sound, you can turn it to 100 Hz. If you prefer that the subwoofer
takes care of a arger portion of the ows to achieve optima passive sate ite speaker performance, then set it
to 140 Hz. Fee free to experiment with the settings to find what best suits the situation.
DSP presets
The 15SXA and 18SXA subwoofers come with bui t-in presets which can be used to determine the basic
settings depending on the situation or purpose.
The fo owing presets can be se ected:
- Main: This is the main preset to get a ba anced sound from a connected speakers.
- Music: This preset can be used when the connected combination of speakers is used for music p ayback. It
boosts the ower frequencies for a fu er sound.
- Live: This preset is perfect for ive use (e.g. a sma band inc uding voca ists). The higher frequencies are
sharpened in order to better cut through the mix.
- Speech: This preset can be used to more effective y reproduce the higher frequencies whi e attenuating the
ows. It ensures increased inte igibi ity when the system is specifica y used for speech (e.g. during
presentations).
The information in this user manual is subject to change at any time without notice.
Version: 1.0 Date of creation and author's initials:11-01-2020 RV Revision date and author's initials: -
Subwoofer Troubleshooting Guide
If you have a prob em with your subwoofer, p ease consu t this troub eshooting section for possib e so utions.
If, after consu ting this section, the prob em remains unreso ved, p ease contact your retai er for more
information and/or he p.
This troub eshooting section contains information on how to so ve the most common subwoofer prob ems,
but it does not and cannot cover every eventua ity. It is possib e that you won't find your prob em, cause and
so ution in this section because product detai s may differ.
Problem Possible cause Solution
Speaker does not turn on with
mains power
Defective fuse Check the fuse, which is ocated
under the power input, to ru e out
of it's b own or not. If it is b own,
rep ace it with a new fuse of the
same type and c ass.
Prob em with the power cab e Check that the power cab e is
p ugged into an active power
socket and the speaker proper y.
Try using another cab e of the
same type to determine if there's a
prob em with the power cab e and
if there is, rep ace the prob em
cab e.
Speaker doesn't turn on Check if the power switch on the
back of the speaker is set to the
'on' position.
Power LED doesn't ight up If the speaker is connected to an
active power socket, the fuse has
been checked and the power
switch is ON but the power LED is
not ighting up, there may be a
prob em with speaker itse f. In this
case, the speaker shou d be
turned off again and you shou d
contact your dea er for assistance.
No sound via one of the inputs Cab e not connected proper y Make sure the cab e between your
sound source and the speaker is
connected proper y.
Switch in wrong position If present on the input channe , set
the signa switch to the correct
position for the connected device.
Microphone is not on Make sure the microphone switch,
if present, is switched on.
No sound from the master output Vo ume contro is not turned up Turn up the master contro vo ume
to a sufficient eve .
Red C ip Limiter LED ights up
often or continua y
Vo ume is too high Decrease the vo ume eve on the
speaker or the connected audio
source device. Continuous
exposure to over oading can cause
permanent damage.
The information in this user manual is subject to change at any time without notice.
Version: 1.0 Date of creation and author's initials:11-01-2020 RV Revision date and author's initials: -

Connected device is transferring a
distorted signa
Check if any of the connected
source devices are transferring a
distorted signa and turn down the
vo ume on the offending device if
necessary.
Vo ume contro is too oud Turn the vo ume down
The tone contro s for treb e and/or
bass are too high or too ow.
Turn the tone contro s back to 12
o'c ock and isten to hear if c ipping
is sti audib e.
The sound from the subwoofer is
ducking out or is more present in
certain p aces
Incorrect positioning / acoustics Try to reposition the subwoofer to
see if this so ves the prob em. If it
does not, use the phase button.
This can he p norma ise the
acoustics of the room. If this
doesn’t so ve the prob em then two
or more subwoofers may be
required to further amp ify the
sound.
The information in this user manual is subject to change at any time without notice.
Version: 1.0 Date of creation and author's initials:11-01-2020 RV Revision date and author's initials: -

Specifications
General specifications for all models:
– so id subwoofer with strong p ywood housing
– avai ab e in 15 and 18 inch
– meta gri e with acoustic foam on the inside
– acoustic foam protects interna components from moisture, dust, confetti and other matter
– gri e covers the entire front for optimum protection of interna components and for a c ean ook
– high qua ity finish with b ack scratch-resistant acquer
– rubber feet
– fi tered and unfi tered ine inputs
– M20 f ange for distance rod insta ation (max. capacity 30 kg, distance rod not inc uded)
– bui t-in CLIP imiter
– power LED indicator and C ip LED indicator
– two-band tone contro (Bass / Treb e)
– bui t-in 3-channe power amp ifier
– two outputs for passive sate ite speakers (8-Ohm minimum)
– IEC C14 power input with fuse ho der
– on/off switch
Connections Mixer Section:
– combo ine inputs (6.35mm TRS jack and 3P XLR)
– ink outputs via ba anced 3P XLR
Technical specifications per model:
Model Onyx 15SXA Onyx 18SXA
Frequency Range 40 Hz – 250 Hz 30 Hz – 250 Hz
Power Capacity (RMS) 840 W (600 + 120 + 120)
Maximum SPL 126 dB 136 dB
Low Frequency Speaker 15” woofer with 3” voice coi 18” subwoofer with 4”
voice coi
Power Supp y 100 / 240V AC, 50/60 Hz
Fuse T5AL 250V (in 220 – 240 V mode)
T10AL 250V (in 100 – 120 V mode)
Nomina Maximum Power
Consumption
1000 W
Dimensions 545 x 720 x 640 mm 625 x 720 x 695 mm
Weight per Speaker 33 kg 39 kg
The information in this user manual is subject to change at any time without notice.
Version: 1.0 Date of creation and author's initials:11-01-2020 RV Revision date and author's initials: -
This manual suits for next models
1
Table of contents
Other Devine Subwoofer manuals

Devine
Devine B115A User manual

Devine
Devine Artis Series User manual

Devine
Devine Artis Series User manual

Devine
Devine Onyx Passive 12S User manual

Devine
Devine SUB 115A User manual

Devine
Devine Onyx 10SXA User manual

Devine
Devine RX Series User manual

Devine
Devine B115 User manual

Devine
Devine Onyx Active 12SA User manual
Popular Subwoofer manuals by other brands

Superior Listening systems
Superior Listening systems CM208W User& installer's manual

Meridian
Meridian D2500 instruction sheet

Kenwood
Kenwood KFC-W112S instruction manual

Morel
Morel SoundSub PSW8e-w user manual

Blaupunkt
Blaupunkt VPw 1500 Pro quick start guide

Passive House Systems
Passive House Systems GRS 8SW-4HE manual