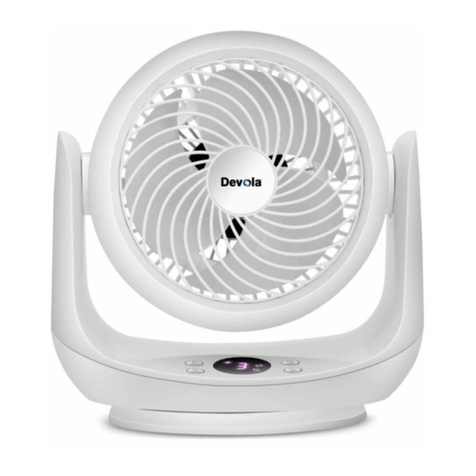
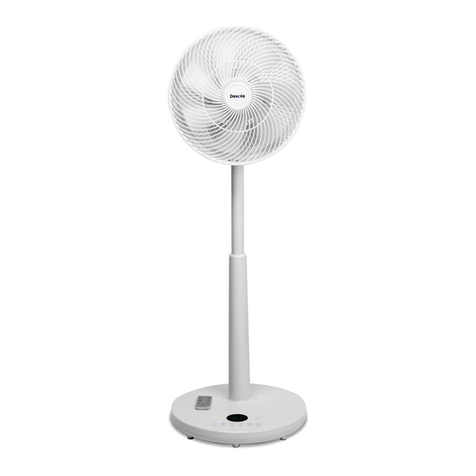
DEVOLA DV12PDCFAN User manual

Warranty
Guarantee and service policy
This product is covered by a standard parts or replacement
warranty for a period of 12 months from the date of purchase.
Extend your warranty for 12 months for free by visiting
Incorrect installation and failure to follow correct operating
instructions are excluded. Consequential costs such as labour
charges or damage to surroundings are expressly excluded.
Contact Us
If you experience a problem with this product you should first
contact us on 0121 250 2180 before taking any further action.
www.devola.co.uk/warranty
CLAIM YOUR EXCLUSIVE 5% OFF YOUR NEXT ONLINE ORDER
DISCOUNT CODE: DEV5
OFFER VALID FOR 21 DAYS. DON’T MISS OUT!
YOUR DISCOUNT CODE ALSO APPLIES TO OUR SISTER WEBSITES
Visit our websites:
www.devola.co.uk
www.energybulbs.co.uk
www.airconcentre.co.uk
www.ledbulbs.co.uk
AIR CIRCULATOR FAN : DV12PDCFAN
User Manual
* Thank you for your purchase, please read the instruction manual carefully before use.
®
®

Contents
Product Instructions
01.Parts Identification
Product Instructions
Technical Parameters
Safety and Warnings
Cleaning and Storage
Fault Analysis and Solution
Warranty
1. Rear Guard 3. Blade
4. Back Cover
Control Display
10. AC Connector
7.
Installation
Oscillation
®
-1- -2-
6. Extended Tube Switch
5. Extension Tube
11. DC Connector
2. Front Guard
8. Pedestal 9. Base Fixed Knob

02.Introduction of Operation Panel
1.Screen
5. Timer .
9.Wind Speed
ON/OFF:When the fan is connected to power, press the ON/OFF button and it will switch on.
Press the button again to switch the appliance off.
TIMER: There is a 9 hour timer which can be set by the hour to select a time for the fan
to switch off. Press the timer button repeatedly until you reach the required hour or until its
back to the default of 0, which indicates that no timer is set.
SPEED: There are 12 wind velocity speeds. Press the speed button repeatedly to
increase the fan speed. When the cycle has reached 12, pressing the speed button a
further time will decrease the fan speed back to 1.
OSC: Press the OSC button for the fan to vertically swing. Press the button again for
the fan to remain fixed in its current position.
SWING: Press the swing button for the fan to horizontally swing. Press the button again
for the fan to remain in a fixed in its current position.
MODE: The fan has three wind modes: Eco, Natural and Sleep. When the fan is in Eco mode,
the screen will display the room temperature and the fan speed will automatically adjust based
on analysis of the ambient temperature. Natural mode varies the fan speed to simulate a natural
sea breeze. In sleep mode the fan speed will remain constant to provide a consistent soothing
wind pattern. The wind speed in sleep mode is adjusted to the default wind speed selected by
the Eco mode technology in response to the current ambient temperature.
04. Operation of Remote Controller
Note:
1. The remote controller is normally used within 6 meters in the front of the product and the
deviation angle is within 45 degrees.
2. The positive and negative poles of the battery should be connected correctly.
3. Once the battery's power has ran out, please sort and recycle the battery safely.
Distance in
between 6M
Signal Receiver
03. Function Introduction
(1)
(2)
ON/OFF
TIMER
(3) SPEED+
(4) SPEED-
(5) OSC
(6) SWING
(7) MODE
2. ECO Mode 3. Natural Mode 4. Sleep Mode
6.Mode Conversion Key 7. Up-Down Swing
8. Left-Right Oscillation
10.ON/OFF
®
-3- -4-
1
2
3
4
5
6
7
8
9
10
ECO
ON/OFF SPEED OCS SWING TIMER MODE
NATURAL
SLEEP
1
3
5
7
4
6
ON/OFF TIMER
SPEED+SPEED-
SWING
MODE
OSC
2
ON/OFF TIMER
SPEED +SPEED-
SWING
MODE
OSC

Oscillation
Press the OSC button for the fan to automatically vertically oscillate.
Press the Swing button for the fan to automatically horizontally oscillate.
Note:Do not attempt manual oscillation over 100°.
Installation
1. Take out the Fan’s Assembly
Rotate the fan guard clockwise, remove the front mesh and take out the blades.
Front Guard Blade Rear Guard
Fan’s Assembly
Align motor + support with base socket
according to graphic direction, insert
lower end of support into base socket
Put the screw into the bottom
Turn the screw clockwise
and tighten the base bolt
to fix it
2. Install the Pedestal
3. Install the Rear Guard
Position the rear guard on the motor head and tighten the knob clockwise to attach
the guard to the motor head.
100°
90°
Left-right oscillation of 100° Up-down swing oscillation of 90°
Note:Ensure that the fan blade is tightend, otherwise there is a danger hazard!
-5- -6-

4.Install the Fan Blade
Put fan blade to the motor shaft, and tighten the knob clockwise. Then use the
screw to fix the front guard.
Note:Make sure that the fan blade is tightened, otherwise there is a danger hazard!
Technical Parameters
Fixed Fan Trellis
Insert the fan screw into the hole at the
bottom of the fan housing and tighten
it clockwise with a cross screwdriver.
Connect Power
Connect the power cord to the power interface
at the bottom of the base and then connect to
power. When the fan is connected to power and
switched on it will make a 'sound' alert to indicate
power connection has been established successfully.
Name: Air Circulator Fan Item No.: DV12PDCFAN
Voltage: 100-240V~ Frequency: 50/60Hz
Power Consumption: 30W Produce Size: 360*360*1030mm
N.W: 3.0Kg Noise: ≤54dB(A)
02. Name and content of hazardous substances in products
Hazardous Substance
01. Basic Parameter
Name
of Parts
Shell
PCB
Package
Inside Wire
This form is edited in accordance with SJ/T 11364
O:indicates that the content of the hazardous substances in all homogeneous materials of the component
is below the limit requirements specified in GB/T 26572.
X:indicates that the content of the hazardous substance in at least one of the homogeneous materials of
the component exceeds the requirements specified in GB/T 26572.
-7- -8-
(Pb) (Hg) (Cd) (Cr(VI)) (PBB) (PBDE)

Safety and Warnings
01. Warnings
1. Do not connect or disconnect with wet hands as it will cause short circuit or
eletronic shock.
2. Please keep the fan in a steady state when in use.
3. Do not place this product on high and uneven countertops or floors, avoid
any falling damage.
4. Do not use the power supply beyond the product load, as this may cause
overheating and cause the circuit board to burn out.
5. Do not disassemble or modify this product by yourself.
6. Do not hit or throw the product as there is a danger of causing internal
damage to the body.
7. Do not put your fingers or other objects into the fan net frame.
8. This product is not suitable for children to use unattended.
9. Do not attempt to physically vertically/horizontally oscillate the fan. Ensure
you use the control methods enclosed in this manual for automatic oscillation.
※
※02. Safety Caution
1. Please read the user manual carefully before using.
2. Do not allow children to operate the fan without supervision.
3. Do not place the fan near fire areas or high temperature areas.
4. Do not place the fan in direct radiation of strong light or hot air.
5. Do not use wet hands to operate the fan.
6. Do not use the fan near flammable gases or explosive materials.
7. Do not place the power wire under carpet to avoid fire caused by power line breakages.
8. Do not cover the fan head when in use.
9. Do not place the fan near wet areas such as bathrooms or swimming pools.
10. If the appliance is not in use for a long period of time, please cut off the power removing
the plug from the socket.
11. Any repairs or maintenance on the fan should be carried out by professional
maintenance personnel.
12. This product has not been designed for purposes other than the function specified
in this manual.
Cleaning and Maintenance
Warning: Before cleaning, please turn off the power switch and remove the plug from
the socket. Do not spray water or spray mist directly on to the fan.
Cleanable Parts: Use a screwdriver to remove the screws between the front grill and
the rear grill. Use a soft cloth or sponge with a neutral detergent to wipe the exterior.
Ensure the parts are dry before reassembling. See below image for guidance:
Use a soft damp cloth to clean the surface. Only use warm water to clean.
Storage
Cleaning of external non detachable parts
If product is not used for a long time, clean it and dry it, then put it into the original
packing box and store in a dry place.
Fault Analysis and Solution
Fault Reason Methods
Indicator light or LED
screen not working or
no wind circulating.
The power plug is not
plugged in properly.
Check the power plug and/or
socket.
To the remote control
is not working.
The battery is out of/low in power.
The battery is not properly installed.
The remote control does not
point to the receiver position or
is out of the control distance range.
Change the battery.
been
installed properly.
Check the battery has
Point the controller to the receiver
position.
Abnormal noise when in use.
The fan head has not been
assembled properly.
The fan blades are not fixed
in position correctly.
The fan cover and blades are
touching.
Ensure the fan head is installed
correctly, use this manual for
Ensure the cover and fan blades
are installed correctly and are not
touching.
Wind speed reduction. There is a build up of dust on the
blades and net.
Remove the dust with a damp
wet cloth.
If the problem can not be eliminated, please contact our local after-sales
service department.
Do not disassemble and repair by yourself.
Ensure you are within the control
distance range of 6M.
reference.
-10-
-9-
Table of contents
Other DEVOLA Fan manuals
Popular Fan manuals by other brands
Marley
Marley MS 100VFN installation instructions
KARUIZAWA
KARUIZAWA KSF1215 user manual
Fanelite
Fanelite FS-45RC USER MANUAL, INSTALLING AND OPERATING MANUAL

Kambrook
Kambrook KPF449GUN Instruction booklet
Nuaire Group
Nuaire Group MRXBOX95AB-WM2QA11179 Installation and Maintenance
Inspire
Inspire Aruba Assembly, Use, Maintenance Manual

ICC Chimney
ICC Chimney EXCELDirect Installation and maintenance instructions
Fanimation
Fanimation FP8012 series owner's manual
Rheem
Rheem RTGH-C95DVLN installation instructions

Bestron
Bestron AFT45SW/Z instruction manual
Maico
Maico ER-UP/G Installation and operating instructions
Oxygen 8
Oxygen 8 NOVA Series Operation and maintenance
