DeWalt DWV902L User manual

DWV902L
DWV902M

2
English (original instructions) 3
简体中文 12
中文(繁體) 19
26
Copyright DeWALT

1
Figure 1
g
l
f
e
d
s
j
o
n
m
a
c
h
h
t
u
q
r
k
b
Figure 2
i
Figure 3
t
j
Figure 4 Figure 5
gj
Ø 20
o
n
bb
p
p
w
gv
v

2
Figure 6 Figure 7
x
y
q
r
i
aa
z
j
s
Figure 8 Figure 9
Figure 10 Figure 11
b

ENGLISH
3
HEAVY-DUTY CONSTRUCTION DUST EXTRACTOR
DWV902L, DWV902M
Congratulations!
You have chosen a DeWALT product. Years of experience, thorough product development and innovation
make DeWALT one of the most reliable partners for professional power tool users.
Technical Data
DWV902L DWV902M
Voltage V 230 230
Type 1 1
Rated power W 1400 1400
Max power W 3600 3600
Power, normal operation (EN 60335-2-69) W 1200 1200
Frequency Hz 50 50
Protective class IPX4 IPX4
Container capacity l 38 38
Filling quantity (liquid) l 18.4 18.4
Flow rate (max at blower) l/s 68 68
Negative pressure (max at blower) kPa 21 21
Flow rate (per EN 60335-2-69) l/s 32.6 32.6
Negative pressure (per EN 60335-2-69) kPa 18.6 18.6
Filter surface m² 0.4 0.4
Power connection data of power tool W 2200 2200
Hose length m 4.1 4.1
Hose diameter mm 32 32
Weight kg 15 15
Definitions: Safety Guidelines
The definitions below describe the level of severity for each signal word. Please read the manual and pay
attention to these symbols.
DANGER: Indicates an imminently
hazardous situation which, if not avoided, will result in death or serious injury.
WARNING: Indicates a potentially hazardous situation which, if not avoided, could result in
death or serious injury.
CAUTION: Indicates a potentially
hazardous situation which, if not
avoided, may result in minor or
moderate injury.
NOTICE: Indicates a practice not
related to personal injury which, if
not avoided, may result in property
damage.
Denotes risk of electric shock.
Denotes risk of fire.
WARNING: To reduce the risk of injury,
read the instruction manual.
Important Safety Instructions
WARNING! Read all safety warnings
and all instructions. Failure to follow
the warnings and instructions may result
in electric shock, fire and/or serious
injury.

ENGLISH
4
SAVE ALL WARNINGS AND INSTRUCTIONS
FOR FUTURE REFERENCE
BEFORE USING THIS APPLIANCE, READ AND FOLLOW ALL
INSTRUCTIONS.
WARNING: Operators shall be
adequately instructed on the use of
these machines.
WARNING: To reduce the risk of
electric shock. Do not expose to rain.
Store indoors.
• Beforeuse,operatorsshallbeprovidedwith
information, instruction and training for the
use of the machine and the substances for
which it is to be used, including the safe
method of removal and disposal of the
material collected.
• Operatorsshouldobserveanysafety
regulations appropriate to the materials being
handled.
• Donotleavetheappliancewhenitis
connected to a power source. Unplug it from
outlet when not in use and before servicing.
• Donotallowtheappliancetobeusedasa
toy. Pay close attention when the appliance is
used by or near children.
• UsethisapplianceONLYasdescribedinthe
manual. Use only DeWALT recommended
attachments.
• Donotusethisappliancewithadamaged
cord or plug. If the appliance is not working
correctly, or if it has been dropped,
damaged, left outdoors, or dropped in water,
return it to a service center.
• Donotpullorcarrythisappliancebythe
cord, use the cord as a handle, close a door
on the cord, or pull the cord around sharp
edges or corners. Do not run the appliance
over the cord. Keep cord away from heated
surfaces.
• Donotunplugthisappliancebypullingon
the cord. To unplug, grasp the plug, not the
cord.
• Donothandletheplugorappliancewithwet
hands.
• Donotputanyobjectsintotheopeningsof
the appliance. Do not use the appliance with
any opening blocked; keep free of dust, lint,
hair and anything else that may reduce air
flow.
• Keephair,looseclothing,fingers,andall
body parts away from the openings and
moving parts.
• Turnoffallcontrolsbeforeunplugging
appliance.
• Useextracarewhencleaningonstairs.
• Donotusetheappliancetopickup
flammable or combustible liquids, such as
gasoline, or use in areas where flammable or
combustible liquids are present.
• Staticshocksarepossibleindryareasor
when the relative humidity of the air is low.
This is only temporary and does not affect
the use of the vacuum. To reduce the
frequency of static shocks, add moisture to
the air with a console, installed humidifier or
use DWV9316-XJ non-static hose accessory.
• Toavoidspontaneouscombustion,empty
canister after each use.
SAVE THESE INSTRUCTIONS
Additional Safety Rules
• Donotpickupanythingthatisburningor
smoking, such as cigarettes, matches, or hot
ashes.
• Donotusetovacuumcombustibleexplosive
materials, such as coal, grain, or other finely
divided combustible material.
• Donotusetovacuumhazardous,toxicor
carcinogenic materials, such as asbestos or
pesticide.
• Neverpickupexplosiveliquids(e.g.gasoline,
diesel fuel, heating oil, paint thinner, etc.),
acids or solvents.
• Donotusevacuumwithoutfiltersinplace,
except as described under Wet Pickup
Applications.
• Somewoodcontainspreservativeswhich
can be toxic. Take extra care to prevent
inhalation and skin contact when working
with these materials. Request and follow any
safety information available from your material
supplier.
• Donotusevacuumasastepladder.
• Donotplaceheavyobjectsonvacuum.
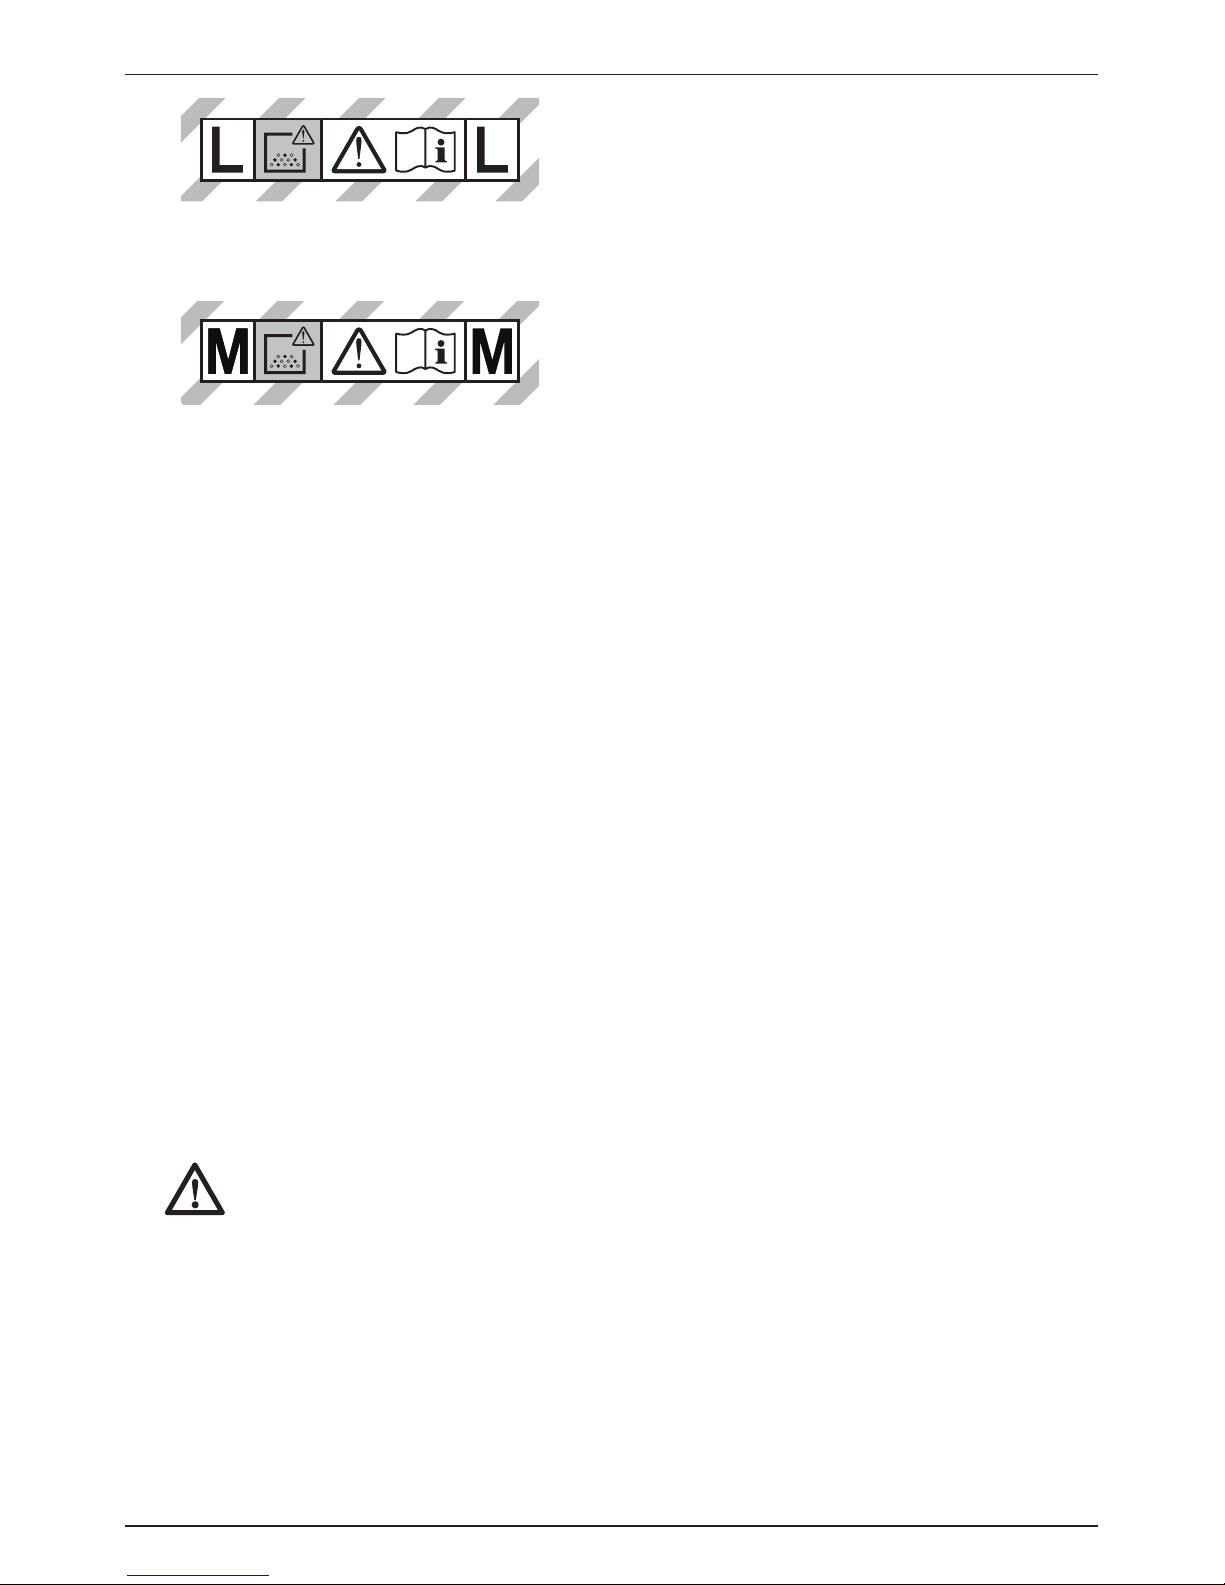
Markings on Dust Extractor
The following pictograms are shown on the
appliance:
Read instruction manual before use.
WARNING: This appliance contains
harmful dust. The emptying and
maintenance, including the removal of
the dust bag, may only be executed
by trained personnel wearing suitable
protection equipment. Do not switch on
until the complete filter system has been
installed.

ENGLISH
5
Class L dust extractors are suitable to extract dry,
non-combustable dusts with workpace limit values
of >1mg/m³.
Class M dust extractors are suitable to extract dry,
non-combustable dusts with workpace limit values
of ≥ 0.1 mg/m³.
DATE CODE POSITION (FIG. 1)
The date code (bb), which also includes the year of
manufacture, is printed into the housing.
Example:
2012 XX XX
Year of Manufacture
Package Contents
The package contains:
1 Dust extractor
1 Hose
1 DWV9210-XJ connector kit
2 Filters
1 Instruction manual
• Checkfordamagetothedustextractor,parts
or accessories which may have occurred
during transport.
• Takethetimetothoroughlyreadand
understand this manual prior to operation.
Description (fig. 1)
WARNING: Nevermodifythepower
appliance or any part of it. Damage or
personal injury could result.
a. Top handle/cord wrap
b. Power cord
c. Vacuum head
d. Canister latch
e. Wheel
f. Canister
g. Suction hose
h. Casters (one equipped with parking brake)
i. Filters
j. Twist-lock hose inlet
k. Hose clip
l. Front handle
m. Outlet for power tools
n. Variable suction dial
o. On/off/tool control switch
p. Flow alarm adjustment (Class M models only)
q. Telescoping handle release button
r. Telescoping handle
s. Inlet plug (Class M models only)
t. Bag
u. DWV9210-XJ connector kit (includes DWV9000,
DWV9120, DWV9130)
ANTI-STATIC HOSE OPTION
The DWV902L and DWV902M are each equipped
with an anti-static grounding system. An anti-static
hose must be purchased at extra cost from your
authorised service center. This hose (DWV9316-XJ)
fits into the dust extractor system the same way as
the standard hose. To contact your seller or check
the location of your nearest authorised DeWALT
repair agent in the DeWALT catalogue or contact
your DeWALT office at the address indicated in this
manual.
INTENDED USE
These vacuums are used for fine particulate pick-up,
like wallboard, concrete or surface dust.
DWV902L
This appliance can be used as industrial vacuum
cleaner and dust extractor for mobile operations to
take up all types of dry, non-combustible dusts up
to dust Class L with limit values for occupational
exposure greater than 1 mg/m³.
DWV902M
This appliance can be used as industrial vacuum
cleaner and dust extractor for mobile operations to
take up all types of dry, non-combustible dusts up
to dust Class M with limit values for occupational
exposure greater than or equal to 0.1 mg/m³.
DO NOT use in rain or in presence of flammable
liquids or gases.
These heavy-duty vacuums are for professional
use. DO NOT let children come into contact
with this appliance. Supervision is required when
inexperienced operators use this appliance.
DO NOT use the dust extractor for combustible
dust.

ENGLISH
6
DO NOT use the dust extractor in explosive
atmospheres.
NOTE: This appliance is suited for the commercial
use, e.g. in hotels, schools, hospitals, factories,
shops, offices, rental companies, and on
construction sites.
• Thisproductisnotintendedforusebypersons
(including children) suffering from diminished
physical, sensory or mental abilities; lack of
experience, knowledge or skills unless they are
supervised by a person responsible for their
safety. Children should never be left alone with
this product.
Electrical Safety
The electric motor has been designed for one
voltage only. Always check that the power supply
corresponds to the voltage on the rating plate.
WARNING: 115 V units have to
be operated via a fail-safe isolating
transformer with an earth screen
between the primary and secondary
winding.
If the supply cord is damaged, it must be replaced
by DeWALT service organisation by a specially
prepared cord which is available through the
DeWALT service organisation.
Using an Extension Cable
If an extension cable is required, use an approved
3–core extension cable suitable for the power
input of this appliance (see Technical Data).The
minimum conductor size is 1.5 mm2; the maximum
length is 30 m.
When using a cable reel, always unwind the cable
completely.
ASSEMBLY AND ADJUSTMENTS
(FIG. 1–3)
WARNING: To reduce the risk
of injury, turn appliance off and
disconnect appliance from power
source before installing and
removing accessories, before
adjusting or changing set-ups or
when making repairs. An accidental
start-up can cause injury.
WARNING: Thefilters(i)mustalways
be in place while vacuuming, except
as described under Wet Pick Up
Applications under Operation. When
vacuuming fine dust, you may also use
an additional paper bag or fleece bag to
make emptying the canister easier.
WARNING: Dust collection bags must
beusedfordustClassM.
1. If optional paper or fleece bag (t) is to be used,
install as shown in figure 2.
NOTE: Be careful not to tear the bag. Place
bag securely onto inlet (j) to provide a tight seal
for maximum dust collection performance.
2. Place the vacuum head (c) onto the canister
and secure it by closing the canister latches (d).
3. Insert end of hose (g) into twist-lock hose inlet (j)
and rotate counterclockwise to lock in place.
OPERATION
Instructions for Use (fig. 1, 4)
WARNING: Always observe the safety
instructions and applicable regulations.
WARNING: To reduce the risk
of injury, turn appliance off and
disconnect appliance from power
source before installing and
removing accessories, before
adjusting or changing set-ups or
when making repairs. An accidental
start-up can cause injury.
1. Plug the power cord into an appropriate outlet.
2. Turn the on/off/tool control switch (o) to the ON
position ( ).
3. Set the variable suction dial (n) to the desired
position. This feature allows the user to control
the vacuum's power, suction and noise.
NOTE: This setting also controls the level of
suction. This is very useful in applications where
the vacuum creates unacceptable levels of drag
to the work piece.
4. Follow the direction under Connecting to
Power Tools to connect to the power tool to
be used.
FLOW ALARM ADJUSTMENT (FIG. 4)
Class M models only
Adjust the flow alarm adjustment control (p) to
the correct hose (or tube) inside diameter size or
accessory diameter referring to the largest section.
The chosen diameter of the adjustment control must
be equal or bigger as the largest diameter of the
used hose/tube/ accessories. The hose supplied is
32mm inside diameter. An acoustic alarm will sound
if the flow rate falls below 20 m/s. The system has a
time delay to reduce unintended alarms.

ENGLISH
7
CONNECTING TO POWER TOOLS (FIG. 1, 4, 5)
WARNING: Onlyusetheoutlet(m)for
purposes specified in the instructions.
1. Plug the vacuum power cord into an
appropriate outlet.
2. Plug the power tool into the outlet (m).
NOTE: See Power connection data of
power tool under Technical Data for the
power allowance of the tool to be plugged into
the outlet (m).
3. Turn on/off/tool control switch (o) to the
ACTIVATION position . This allows the
vacuum to be turned on and off automatically
by the power tool.
NOTE: The vacuum cleaner starts automatically
within 0.5 seconds and continues to run for
15seconds after the power tool has been
turned off.
4. To switch back to manual mode, turn the on/
off/tool control switch (o) to the ON position ( ).
In manual mode the tool and the vacuum are
turned on and off independent of each other.
5. Your DeWALT construction dust extractor is
fitted with the DeWALT AirLock connection
system. The AirLock allows for a fast, secure
connection between the suction hose (g) and
power tool. The AirLock connector (w) connects
directly to DeWALT compatable tools or through
the use of an AirLock adapter (available from
your local DeWALT supplier). Refer to the
Accessories section for detail on available
adapters.
NOTE: If using an adapter ensure it is firmly
attached to the tool outlet before following the
steps below.
a. Ensure the collar on the AirLock connector
is in the unlock position. Align notches (v) on
collar and AirLock connector as shown for
unlock and lock positions.
b. Push the AirLock connector onto the adapter
connector point.
c. Rotate the collar to the locked position.
NOTE: The ball bearings inside collar lock
into slot and secure the connection.The
power tool is now securely connected to the
dust extractor.
AUTOMATIC FILTER CLEANING SYSTEM
This vacuum has a highly effective filter cleaning
system which minimizes filter clogging. Every
30seconds, one of the two filters gets automatically
cleaned. The cleaning process alternates between
the filters and continues through the life of the unit.
NOTE: It is normal to hear a clicking sound during
this process.
NOTE: After many hours of operation the automatic
filter cleaning system may not be effective. When
this happens the filters will need to be cleaned or
replaced. Refer to Filter under Maintenance.
PARKING BRAKE (FIG. 1, 6)
The parking brake will lock one wheel in place to
prevent vacuum from rolling.
1. To engage parking brake, depress
the brake button (x) to snap the brake into the
locked position.
2. To disengage parking brake, depress the brake
button and brake will snap into the unlocked
position.
REMOVE / CHANGE USED DUST COLLECTION BAG (FIG. 1)
WARNING: Appropriate personal
protective equipment like dust mask and
gloves should be used while handling
used dust bags.
1. Turn off vacuum and unplug cord from outlet.
2. Close the twist-lock hose inlet (j) with the inlet
plug (s).
3. Unlatch canister latches (d) and remove vacuum
head (c)
4. Pull the collection bag carefully from inlet (j).
5. Seal the collection bag opening tightly when
removing it from the machine.
6. Dispose of collection bag in appropriate
container according to statutory provisions.
WET PICK UP APPLICATIONS (FIG. 1, 7)
WARNING: DONOTconnectpower
toolstooutlet(m)whenusingthe
vacuum for wet pick up.
WARNING: Plug vacuum into residual
currentdevice(RCD)protectedoutlet
when using the vacuum for wet pick up.
WARNING: If foam or liquid escapes
from the machine, switch off
immediately.
CAUTION: Cleanthewaterlevellimiting
device regularly and examine it for signs
of damage.
NOTICE: DONOTremoveballfloat
(y),doingsowillcausedamagetothe
vacuum. The ball float keeps water from
entering the motor.

ENGLISH
8
Beforeusingthevacuumforwetpickup:
• Ensurethecanisterisemptyandfreeof
excessive dust.
• Removefilters(i).
• PlugvacuumintoaRCDprotectedoutlet.
WARNING: Do not use the machine
withthissetupfordustClassLandM.
TO EMPTY CANISTER (FIG. 1, 7)
The ball float valve (y) will block air to the motor
when the canister is full and the sound of the motor
will change at once. When the motor has a high
pitched sound and air/water flow stops, empty the
canister.
1. Turn off vacuum and unplug cord from outlet.
2. Unlatch canister latches (d) and remove vacuum
head (c).
3. Empty contents of canister (f) into a suitable
container or drain.
TO CONVERT BACK TO DRY VACUUM OPERATION (FIG. 1)
1. Empty Canister, refer to To Empty Canister
instructions.
2. Place canister upside down position until dry.
DO NOT use wet canister for dry pick up.
3. Place vacuum head (c) on a level surface until
dry.
4. Reinstall filters when vacuum head is dry. See
Filters under Maintenance.
5. When canister is dry place the vacuum head (c)
onto the canister and secure it by closing the
canister latches (d).
TELESCOPING HANDLE (FIG. 1, 8)
Press release button (q) to raise and lower the
telescoping handle (r).
Shut Down/Transportation
(fig. 1, 11)
1. Turn on/off/tool control switch (o) to the OFF
position.
2. Unplug the unit.
3. Class M only: Close the twist-lock hose inlet (j)
with the inlet plug (s).
4. Store the power cord (b) as shown.
5. When transporting in vehicles, secure the
machine.
MAINTENANCE
Your DeWALT appliance has been designed to
operate over a long period of time with a minimum
of maintenance. Continuous satisfactory operation
depends upon proper appliance care and regular
cleaning.
WARNING: To reduce the risk
of injury, turn appliance off and
disconnect appliance from power
source before installing and
removing accessories, before
adjusting or changing set-ups or
when making repairs. An accidental
start-up can cause injury.
WARNING: For user servicing, the
machine must be dismantled, cleaned
and serviced, as far as is reasonably
practicable, without causing risk to the
maintenance staff and others. Suitable
precautions include, decontamination
before dismantling, provision for local
filtered exhaust ventilation where the
machine is dismantled, cleaning of the
maintenance area and suitable personal
protection.
•Themanufacturer,oraninstructed
person, shall perform a technical
inspection at least annually, consisting
of, for example, inspection of filters for
damage, air tightness of the machine
and proper function of the control
mechanism.
•Whencarryingoutserviceorrepair
operations, all contaminated items
which cannot be satisfactorily cleaned,
are to be disposed of; such items
shall be disposed of in impervious
bags in accordance with any current
regulation for the disposal of such
waste.
•ForClassMmachinesthe
outside of the machine should be
decontaminated by vacuum cleaning
methods and wiped clean or treated
with sealant before being taken
out of a hazardous area. All the
machine parts shall be regarded as
contaminated when removed from the
hazardous area and appropriate action
taken to prevent dust dispersal.
•Fordustextractorsitisnecessaryto
provide for an adequate air change
rateLintheroomiftheexhaustairis
returned to the room.

ENGLISH
9
(NOTE:ReferencetoNational
Regulations is necessary.)
Filter (fig. 1, 9, 10)
FILTER CARE
The filters included with this vacuum are long life
filters. To be effective in minimizing dust recirculation,
the filters MUST be installed correctly and in good
condition.
WARNING: Appropriate personal
protective equipment like dust mask
and gloves should be used while
handling the filters.
To Remove Filters
1. Turn on/off/tool control switch (o) to the OFF
position (O) and unplug cord from outlet.
2. Release canister latches (d) and remove
vacuum head (c) from canister. Place vacuum
head on a level surface upside down.
3. Turn each filter (i) counterclockwise by gripping
it on the plastic end cover as shown, and
carefully remove from head, ensuring debris
does not fall into mounting hole.
NOTE: Use care to not damage filter material.
4 If the bottom side of the vacuum head (c) needs
to be cleaned, use a cloth dampened with
water and mild soap and allow it to dry. Dispose
of cloth in an appropriate container.
5. Inspect filters for wear, tears or other damage.
NOTE: If there is any doubt on the condition
of the filters they MUST be replaced. DO NOT
continue use if filters are damaged.
WARNING:Neverusecompressed
air or a brush to clean filters, otherwise
damage to the filter membrane will
occur which will allow dust to pass
through the filter. If needed, gently tap
against a hard surface or rinse with
room temperature water and let air
dry.Cleaningofthefiltersistypically
unnecessary, even if the filter is
covered with dust. The automatic filter
cleaning system will maintain maximum
performance and continue to function.
If visual damage to the filter membrane
exists, replace filters. Filters typically
last between six and twelve months
depending on use and care.
To Install Filters
1. Ensure filter seal (aa) is in place and is secure
2. Line up filter threads (z) to vacuum head threads
and using moderate force, turn filter clockwise
until tight.
NOTE: Use care to not damage filter material.
3. Place the vacuum head (c) onto the container
and secure it by closing the canister latches (d).
Lubrication
Your appliance requires no additional lubrication.
Cleaning
WARNING: Neverusesolventsorother
harsh chemicals for cleaning the non-
metallic parts of the appliance. These
chemicals may weaken the materials
usedintheseparts.Neverletanyliquid
get inside the machine; never immerse
any part of the appliance into a liquid.
1. Vacuum the outside of the dust extractor. For
further cleaning use a cloth dampened only with
water and mild soap if necessary.
2. After use dispose of cloth in an appropriate
container.
Storage (fig. 11)
1. Empty the canister, refer to To Empty Canister
under Operation.
2. Clean the vacuum inside and outside. Refer to
Cleaning.
3. Clean or replace filters, refer to Filters.
4. Store the suction hose and the power cord as
shown in the illustration. Place the unit in a dry
room and secure it from unauthorized use.
NOTE: Plug inlet plug (s) into inlet (j) to keep
debris inside canister when suction hose is
removed. You can also attach the ends of the
hose together and lock together with the twist-
lock end.
Optional Accessories
WARNING: Since accessories, other
than those offered by DeWALT,have
not been tested with this product, use

ENGLISH
10
of such accessories with this appliance
could be hazardous. To reduce the risk
of injury, only DeWALT recommended
accessories should be used with this
product.
ACCESSORIES
DWV9310-XJ Filter
DWV9315-XJ Crush-proof hose
DWV9316-XJ Anti-static hose
DWV9401-XJ Paper bag
DWV9400-XJ Plastic liner
DWV9402-XJ Fleece bag
DeWALT AirLock System
DWV9000 Twist-Lock
connection
DWV9110 29-35mm tapered
rubber adapter
DWV9120 35-38mm stepped
rubber adapter
DWV9130 35mm OD adapter
DWV9150 35mm OD angle
adapter
SECURING THE POWER CORD TO THE HOSE (FIG. 1)
The power cord (b) can be secured to the suction
hose (g) using the D279058CL hose clip (available
from your local DeWALT supplier).
Consult your dealer for further information on the
appropriate accessories.
Troubleshooting
PROBLEM SOLUTION
Motor
does not
run
Check power cord, plugs and outlet.
Ensure the on/off /tool control switch
is in the ON position ( ).
Suction
capacity
decreases
Remove blockages in the suction
nozzle, suction tube, suction hose
or filters.
Replace the paper or fleece bag.
Check for proper installation of the
filters.
Clean or replace the filters.
Empty canister, refer to Empty
Canister under Operation.
PROBLEM SOLUTION
Vacuum
stops
running
Thermal overload has been tripped:
1. Turn the vacuum off and
disconnect vacuum cleaner from
power source.
2. Empty the canister, if needed.
3. Allow the unit to cool.
4. Plug the power cord into an
appropriate outlet and turn on/
off/tool control switch to the ON
position ( ) to test. If vacuum will
not restart contact your seller or
check the location of your nearest
authorised DeWALT repair agent
in the DeWALT catalogue or
contact your DeWALT office at the
address indicated in this manual.
Dust
comes
out while
vacuuming
Check for proper installation of the
filters.
Ensure filters are not damaged;
replace if necessary.
Ensure filter seals are in place and are
secure.
Automatic
filter
cleaning
is not
working
Listen for the solenoid clicking to
ensure the filter cleaning mechanism
is working.
Power tool
does not
turn on.
Ensure the on/off/tool control switch is
in the ACTIVATION position .
Protecting the Environment
Separate collection. This product must
not be disposed of with normal
household waste.
Should you find one day that your DeWALT product
needs replacement, or if it is of no further use to you,
do not dispose of it with household waste. Make this
product available for separate collection.
Separate collection of used products
and packaging allows materials to be
recycled and used again. Re-use of
recycled materials helps prevent
environmental pollution and reduces
the demand for raw materials.
Local regulations may provide for separate collection
of electrical products from the household, at
municipal waste sites or by the retailer when you
purchase a new product.

ENGLISH
11
DeWALT provides a facility for the collection and
recycling of DeWALT products once they have
reached the end of their working life. To take
advantage of this service please return your product
to any authorised repair agent who will collect them
on our behalf.
You can check the location of your nearest
authorised repair agent by contacting your local
DeWALT office at the address indicated in this
manual. Alternatively, a list of authorised DeWALT
repair agents and full details of our after-sales
service and contacts are available on the Internet at:
www.2helpU.com.

中文(简体)
12
重型建筑用吸尘器
DWV902L、DWV902M
恭喜!
感谢您选购 DEWALT 产品。凭借多年的产品开发和创新经验,DEWALT 已经成为专业电动工具用户最可靠
的合作伙伴之一。
技术参数
DWV902L DWV902M
电压 V 220 220
额定功率 W 1400 1400
最大功率 W 3600 3600
频率 Hz 50 50
防护等级 IPX4 IPX4
容器容量 l 38 38
灌装量(液体) l 18.4 18.4
流速(吹风口的最大值) l/s 68 68
负压(吹风口的最大值) kPa 21 21
过滤器表面 m² 0.4 0.4
外接电动工具的最大允许功率 W 2200 2200
软管长度 m 4.1 4.1
软管直径 mm 32 32
重量 kg 15 15
定义:安全指引
下列定义描述了各警示词的严重程度。请仔细阅读本手册,并注意这些警示符号。
危险:表示存在紧急危险情况,如果不加以避免,将导致死亡或严重伤害。
警告:表示存在潜在危险情况,如果不加以避免,可能导致死亡或严重伤害。
警示:表示存在潜在危险情况,如果不
加以避免,可能导致轻度或中度伤害。
注意:表示存在不涉及人身伤害的情
况,如果不加以避免,可能导致财产损
失。
表示存在触电危险。
表示存在火灾危险。
警告:为降低伤害风险,请阅读使用手
册。
重要安全说明
警告!请仔细阅读所有安全警告和说
明。如果不遵守下列警告和说明,则可
能会导致电击、着火和/或严重伤害。
请妥善保存所有警告和说明,
以备将来查阅
在使用本设备之前,请阅读并遵循所有说明。
警告:操作人员应该充分了解这些机器
的用法。
警告:为了降低触电的风险,请不要让
设备淋雨。请将其存放在室内。

中文(简体)
13
•操作人员应该在操作前获得有关机器及所处
理物质的信息、说明和培训,包括安全拆卸
和处理所收集材料的方法。
•操作人员必须遵守适用于所处理材料的安全
法规。
•不要让通电设备处于无人值守的状态。在设
备未使用或检修设备前,请将其插头拔下。
•不得将设备用作玩具。由儿童使用设备或在
儿童旁边使用设备时要特别小心。
•请仅按照本手册中的说明使用本设备。只能
使用 DEWALT 推荐的附件。
•请不要为本设备使用破损的电线或插头。如果
设备运行不正常,或者曾经跌落、受损、置于
户外或掉入水中,请将其退回服务中心。
•不要用电线拖提设备、把电线用作手柄、关
门时夹住电线或拉动电线绕过锐边或尖角。
不要将设备压在电线上运行。避免电线靠近
热表面。
•不要通过拉动电线来拔出设备插头。要拔下
插头,请抓住插头,而不是电线。
•不要用湿手握住插头或设备。
•不要将任何物体置于设备吸嘴中。吸嘴堵塞
时不要使用设备;注意防止灰尘、线头、头
发或任何可能阻挡气流的物体堵塞吸嘴。
•头发、宽松衣物、手指和身体的所有部位都
要远离吸嘴和运动部件。
•在拔下设备插头之前,先关闭所有控件。
•清洁楼梯时需格外小心。
•请不要使用本设备吸取易燃或易爆液体(如
汽油)或将其用于存在易燃易爆液体的区
域。
•在干燥区域或空气相对湿度较低的环境下,
可能会发生静电。这种静电是短暂的,
不会影响真空吸尘器的使用。要降低静
电的频率,请使用已安装的台式加湿器增加
空气湿度或使用 DWV9316-XJ 无静电软管
附件。
•为避免自燃,请在每次使用后清空集尘盒。
请妥善保管好这些说明
附加安全规则
•不要吸取燃烧或冒烟的物体,如香烟、火柴
或热灰。
•不要使用真空吸尘器吸取煤、粉尘等易燃易
爆材料,或者其他细小的易燃材料。
•不要使用真空吸尘器吸取危险、有毒或致癌
的材料,如石棉或杀虫剂。
•切勿吸取易爆液体(例如,汽油、柴油燃
料、热油、油漆稀释剂等)、酸性物质或溶
剂。
•除
湿式吸尘应用
中说明的情况外,禁止在未
安装过滤器时使用真空吸尘器。
•一些木材包含的防腐剂可能有毒。在处理这
些材料时,请特别注意避免吸入或通过皮肤
接触到这些物质。请求您的材料供应商提供
任何可用的安全信息并按照它来操作。
•不要将真空吸尘器用作梯子。
•不要在真空吸尘器上放置重物。
吸尘器上的标记
设备上显示了以下标志:
使用前请阅读使用手册。
警告:本设备含有有害灰尘。清空和维
护操作(包括拆除集尘袋)都只能由受
过培训的人员在穿戴了适当防护装备的情
况下执行。在过滤系统完全装好之前,不
要开启设备。
L 级吸尘器适用于吸取工作场所限值 > 1 mg/m³ 且
干燥、不易燃烧的灰尘。
M 级吸尘器适用于吸取工作场所限值 ≥ 0.1 mg/m³
且干燥、不易燃烧的灰尘。
日期码位置(图 1)
日期码 (bb) 印在工具外壳上,其中还包含制造年份。
示例:
2012 XX XX
制造年份
包装内的物品
本产品包装内含有:
1 吸尘器
1 软管
1 DWV9210-XJ 连接器套件
2 过滤器
1 使用手册
•检查吸尘器、部件或附件是否在运输过程中受
到了损坏。
•操作前,请抽空仔细阅读并理解本手册。

中文(简体)
14
说明(图 1)
警告:切勿改装电动设备或其任何部
分,否则可能会导致设备受损或人员受
伤。
a. 上手柄/绕线器
b. 电源线
c. 真空头
d. 集尘盒锁闩
e. 滚轮
f. 集尘盒
g. 吸尘软管
h. 万向轮(其中一个配备驻停制动)
i. 过滤器
j. 扭锁式软管入口
k. 软管夹
l. 前手柄
m. 电动工具插座
n. 可变吸尘刻度盘
o. 开/关/工具控制开关
p. 流量报警调节(仅限 M 级机型)
q. 可伸缩手柄释放按钮
r. 可伸缩手柄
s. 入口塞(仅限 M 级机型)
t. 集尘袋
u. DWV9210-XJ 连接器套件(包括 DWV9000、
DWV9120、DWV9130)
防静电软管选件
DWV902L 和DWV902M 均配备防静电接地系统。
防静电软管必须从授权服务中心另行购买。本软管
(DWV9316-XJ) 采用与标配软管相同的方式安装到
吸尘器系统中。您可以联系您的销售商,或者通过
DEWALT 目录或联系本手册中所记载的 DEWALT
办事处,查询离您最近的 DEWALT 授权维修代理
的地址。
设计用途
这些真空吸尘器用于吸取细小颗粒,如墙板、水泥
或表面的灰尘。
DWV902L
本设备可用作移动操作的工业真空清洁器和吸尘器,
它可以吸取高达 L 级的各类干燥、不可燃烧的灰
尘,这类灰尘的质量浓度限值大于 1 mg/m³。
DWV902M
本设备可用作移动操作的工业真空清洁器和吸尘
器,它可以吸取高达 M 级的各类干燥、不可燃烧的灰
尘,这类灰尘的质量浓度限值大于或等于 0.1 mg/m³。
禁止在雨中或在有易燃液体或气体的环境中使用本
设备。
这些重型真空吸尘器用于专业用途。请勿让儿童接
触此设备。缺乏经验的操作人员需要在监督下使用
此设备。
请勿使用吸尘器吸取可燃灰尘。
不要在有爆炸危险的环境中使用吸尘器。
注:本设备适用于商业环境中,例如,酒店、学校、
医院、工厂、商店、办公室、租赁公司和建筑工
地。
•本产品不适合体力、感官或智力不足以及缺乏
经验、知识或技能的人员(包括儿童)使用,
除非一旁有能为他们的安全负责的监督人员。
不得在无人监管的情况下让儿童触及本产品。
电气安全
电机只适用一种工作电压。请务必检查电源电压是
否与铭牌上的电压一致。
警告:115V 装置必须通过故障保险隔
离变压器操作,在初级绕组和次级绕组
之间使用接地屏蔽。
如果电源线已破损,必须由 DEWALT 维修中心采用
本中心提供的专用电线进行更换。
使用延长电缆
如需使用延长电缆,请使用与本工具的输入电源
(见
技术参数
)相符且经检验的 3 芯延长电缆。导
体的最小尺寸为 1.5 平方毫米,最大长度为 30 米。
使用电缆卷筒时,务必拉出所有电缆。
组装和调整(图 1–3)
警告:为降低人身伤害的风险,在拆装
附件、调整或更改设置,或者维修设备
之前,请关闭设备并断开电源连接。意
外启动可能会导致人身伤害。
警告:除非
操作
下的湿式吸尘应用中另
有说明,否则在真空吸尘时,必须安装
过滤器 (i)。在真空吸取细小灰尘时,还
必须另外使用一个纸袋或羊毛袋,以便
轻松清空集尘盒。
警告:灰尘等级达到 M 级时必须使用
集尘袋。
1. 如果选用纸袋或羊毛袋 (t) ,请如图2所示进行
安装
注:请注意不要撕裂集尘袋。将袋子牢牢固定
在吸入口 (j) 上并封紧,以便最大程度地提高集
尘性能。
2. 将真空头 (c) 放在集尘盒上,然后关闭集尘盒锁
闩(d) 以将其固定。

中文(简体)
15
3. 将软管末端 (g) 插入钮锁式软管入口 (j) 并逆时
针旋转扭锁以将其锁定到位。
操作
使用说明(图 1、4)
警告:务必遵守安全说明和适用法规。
警告:为降低人身伤害的风险,在拆装
附件、调整或更改设置,或者维修设备
之前,请关闭设备并断开电源连接。意
外启动可能会导致人身伤害。
1. 将电源线插入相应的插座。
2. 将“开/关/工具控制”开关 (o) 切换到“开”位
置( )。
3. 将可变吸尘刻度盘 (n) 设置到所需位置。用户可
以通过此功能控制真空吸尘器的功率、吸力和
噪音。
注:此设置还可以控制吸力级别。如果真空吸
尘器会对工件产生难以承受的拖拽力,则此功
能非常实用。
4. 按照连接电动工具中的指示连接要使用的电动
工具。
流量报警调节(图 4)仅限 M 级机型
参照最大横截面,将流量报警调节控制 (p) 调节至
适当的软管(或管道)内直径尺寸。调节控制钮所
选的直径必须等于或大于所用软管/管道/附件的最
大直径。随附软管的内直径为 32 毫米。如果流速
低于 20 米/秒,声响警报将响起。系统关闭错误警
报时会有一定的时间延迟。
连接电动工具(图 1、4、5)
警告:只能将插座 (m) 用于说明中指定
的用途。
1. 将真空吸尘器的电源线插入相应的插座。
2. 将电动工具插入插座 (m)。
注:有关可插入插座 (m) 的工具的功率容差,
请参见技术参数下的
外接电动工具的最大允许
功率
。
3. 将“开/关/工具控制”开关 (o) 切换到“激活”
位置 。这样,电动工具就可以自动开启和
关闭真空吸尘器。
注:真空清洁器会在 0.5 秒内自动启动,并且
在电动工具关闭后仍会继续运行 15 秒。
4. 要切换回手动模式,请将“开/关/工具控制”开
关(o) 切换到“开”位置( )。在手动模式下,
工具和真空吸尘器的开启和关闭互不影响。
5. 您的 DEWALT 建筑用吸尘器配备 DEWALT
AirLock 连接系统。AirLock 可以快速、安全地
连接吸尘软管 (g) 和电动工具。AirLock 连接器
(w) 可直接连接与 DEWALT 兼容的工具,也可
以通过使用 AirLock 适配器(可从 DEWALT 供
应商处获得)与其连接。有关可用适配器的详
细信息,请参阅
附件
部分。
注:如果要使用适配器,请在执行以下步骤前
确保适配器已牢牢连接至工具插座。
a. 确保 AirLock 连接器的卡口处于解锁位置。
在解锁和锁定位置,将卡口上的凹口 (v) 与
AirLock 连接器对齐(如图所示)。
b. 将AirLock 连接器推至转接连接器位置。
c. 将卡口旋转至锁定位置。
注:卡口内的滚珠轴承将锁定到插槽中并固
定连接。现在,电动工具已经牢牢连接至吸
尘器。
过滤器自动清洁系统
本真空吸尘器配备一个高效的过滤器清洁系统,可
最大程度地减少过滤器堵塞。该系统每隔 30 秒就
会自动对过滤器进行清洁,清洁操作针对两个过滤
器交替进行,并且一直持续到装置使用寿命终止。
注:在清洁过程中听到“咔嗒”声是正常现象。
注:操作数小时后,过滤器自动清洁系统可能会失
效。出现这种情况则表明需要清洁或更换过滤器。
请参阅维护下的
过滤器
部分。
驻停制动(图 1、6)
驻停制动会将一个滚轮锁定,以防止真空吸尘器滚
动。
1. 要使用驻停制动,请按下制动按钮 (x) 以使制动
装置“啪嗒”一声卡入锁定位置。
2. 要松开驻停制动,请按下制动按钮,制动装置
将“啪嗒”一声卡入解锁位置。
拆卸/更换已使用的集尘袋(图 1)
警告:处理使用过的集尘袋时,必须穿
戴适当的个人防护装备(如防尘面具和
手套)。
1. 关闭真空吸尘器并从插座上拔下电线插头。
2. 使用入口塞 (s) 堵住钮锁式软管入口 (j)。
3. 打开集尘盒锁闩 (d) 并拆下真空头 (c)。
4. 小心地从 入口 (j) 上脱下集尘袋。
5. 从机器上取下集尘袋时,请封紧集尘袋开口。
6. 按照法规将集尘袋丢弃到适当的容器中。
湿式吸尘应用(图 1、7)
警告:使用真空吸尘器进行湿式吸尘
时,禁止在插座 (m) 上连接电动工具。
警告:使用真空吸尘器进行湿式吸尘
时,请将其插入受漏电保护装置 (RCD)
保护的插座。

中文(简体)
16
警告:如果机器中流出泡沫或液体,请
立即将其关闭。
注意:定期清洁水位限制装置并检查是
否有损坏迹象。
注意:不要取走浮球 (y),否则会导致
真空吸尘器受损。浮球可防止水流入电
机。
使用真空吸尘器进行湿式吸尘之前,请执行以下操
作:
•确保集尘盒已清空且没有过多灰尘。
•拆下过滤器 (i)。
•将真空清洁器插入受 RCD 保护的插座,
警告:禁止使用此设置的机器处理 L 级
和M 级灰尘。
清空集尘盒(图 1、7)
如果集尘盒已满,浮球阀 (y) 会阻止空气进入电机,
电机的转动声音也会立即变化。如果电机发出尖锐
的声音,且气流/水流停止,请清空集尘盒。
1. 关闭真空吸尘器并从插座上拔下电线插头。
2. 打开集尘盒锁闩 (d) 并拆下真空头 (c)。
3. 将集尘器 (f) 中的杂物清空到适当的容器或下水
道中。
转换回干式真空吸尘操作(图 1)
1. 清空集尘盒,请参阅清空集尘盒中的说明。
2. 将集尘盒倒放,直至沥干。不要使用湿的集尘
盒进行干式吸尘。
3. 将真空头 (c) 平放,直至晾干。
4. 在真空头晾干后重新安装过滤器。请参见维护
下的
过滤器
部分。
5. 等集尘盒沥干后,将真空头 (c) 放在集尘盒上,
然后关闭集尘盒锁闩 (d) 以将其固定。
可伸缩手柄(图 1、8)
按下释放按钮 (q) 可升高或降低可伸缩手柄 (r)。
关闭/运输(图 1、11)
1. 将“开/关/工具控制”开关 (o) 切换到“关”位
置。
2. 拔下装置插头。
3. 仅对于 M 级设备:使用入口塞 (s) 堵住钮锁式
软管入口 (j)。
4. 如图所示存放电源线 (b)。
5. 使用汽车运输机器时,请将其牢牢固定。
维护
您的 DEWALT 设备设计精良,可以长期运作,而
且只需极少的维护。要持续获得令人满意的工作效
果,需要对工具进行适当的保养和定期清洁。
警告:为降低人身伤害的风险,在拆装
附件、调整或更改设置,或者维修设备
之前,请关闭设备并断开电源连接。意
外启动可能会导致人身伤害。
警告:如果用户要对机器进行检修,则
必须拆卸、清洁并检修机器。检修操作
应合理可行,不会给维护人员及其他人
员带来危险。适当的预防措施包括:在
拆卸前先清除机器污染、遵守拆卸机器
时所在地区的当地过滤废气通风规定、
保持维护区域清洁以及提供适当的人员
防护。
•制造商或受过训练的人员应该至少每
年进行一次技术检查,内容包括检查
过滤器是否受损、机器的气密性是否
良好以及控制装置能否正常运行等。
•执行检修或维修操作时,需要丢弃所
有无法达到理想清洁效果的受污染部
件。这些部件应该按照现行废弃物处
理规定,使用不透水的袋子包装后弃
置。
•对于 M 级机器,在将其带离危险区域
之前,需使用真空清洁方法去除其外
壳上的污物并擦拭干净,或者使用密
封材料将其密封。在将机器从危险区
域移走时,所有机器部件都应被视为
污染部件,并且采取适当措施以防止
灰尘扩散。
•如果废气会回流到室内,则必须提供
足够的空气,使房间内的换气率达到
L 级。(注:必须参考国家法规。)
过滤器(图 1、9、10)
过滤器保养
本真空吸尘器配备的过滤器具有较长的使用寿命。
为了尽可能降低灰尘循环,必须正确安装运行状态
良好的过滤器。
警告:处理过滤器时,必须穿戴适当的
个人防护装备(如防尘面具和手套)。
拆卸过滤器
1. 将“开/关/工具控制”开关 (o) 切换到“关”位
置(O),然后从插座上拔下电线插头。
2. 打开集尘盒锁闩 (d) 并拆下集尘盒上的真空头
(c)。将真空头 (c) 倒过来平放。
3. 如图所示,抓住过滤器的塑料端保护盖并逆时
针旋转过滤器 (i),然后小心地将其从真空头上
拆下,确保尘屑不会掉入安装孔中。

中文(简体)
17
注:注意不要损坏过滤器材料。
4 如果需要清洁真空头 (c) 的底部,请用布蘸着中
性肥皂水擦拭,然后将其晾干。将布丢弃在适
当的容器中。
5. 检查过滤器是否有磨损、裂痕或其他破损。
注:必须更换运行状况存在疑问的过滤器。禁
止继续使用受损的过滤器。
警告:严禁使用压缩空气或刷子清洁过
滤器,否则会使过滤器膜片受损,进
而让灰尘穿透过滤器。如有需要,请
轻拍过滤器的坚硬表面或用常温水对
其进行冲洗,然后晾干。过滤器通常
不需要清洁,即便它已覆满灰尘。过
滤器自动清洁系统会保持最高性能并
持续运行。如果过滤器膜片出现明显
破损,请更换过滤器。过滤器的使用
寿命一般在六到十个二月之间,具体
取决于使用和保养情况。
安装过滤器
1. 确保过滤器密封件 (aa) 牢牢固定在适当位置
2. 将过滤器螺纹 (z) 与真空头螺纹对准,然后用适
当的力道顺时针旋转过滤器直至紧固。
注:注意不要损坏过滤器材料。
3. 将真空头 (c) 放在集尘盒上,然后关闭集尘盒锁
闩(d) 以将其固定。
润滑
本设备无需另行润滑。
清洁
警告:切勿使用溶剂或其他刺激性化
学制品来清洁设备的非金属部件。这些
化学物质可能会削弱这些部件使用的材
料。切勿让任何液体渗入机器;切勿让
设备的任何部件浸在液体中。
1. 真空清洁吸尘器外部。如需进一步清洁,请使
用布蘸水或中性肥皂水(如有必要)擦拭。
2. 使用后,请将布丢弃在适当的容器中。
存放(图 11)
1. 清空集尘盒,请参阅操作下的
清空集尘盒
部分。
2. 清洁真空吸尘器内部和外部。请参阅清洁部分。
3. 清洁或更换过滤器,请参阅过滤器部分。
4. 按图例所示存放吸尘软管和电源线。将装置存
放在干燥的房间内,防止未经授权使用。
注:将入口塞 (s) 插入入口 (j),以便取下吸尘软
管后将尘屑存放在集尘盒中。您也可以将软管
末端连接在一起,并且使用扭锁端将其锁定。
可选附件
警告:由于非供应的附件未经本产品匹
配测试,将此类附件用于本工具可能会
造成危险。为降低伤害风险,本产品仅
可使用 DEWALT 推荐的附件。
附件
DWV9310-XJ 过滤器
DWV9315-XJ 防挤压软管
DWV9316-XJ 防静电软管
DWV9401-XJ 纸袋
DWV9400-XJ 塑料衬套
DWV9402-XJ 羊毛袋
DEWALT AirLock 系统
DWV9000 钮锁式连接
DWV9110 29-35 毫米锥形橡胶适配器
DWV9120 35-38 毫米台阶式橡胶适
配器
DWV9130 35 毫米 OD 适配器
DWV9150 35 毫米 OD 斜角适配器
将电源线固定在软管上(图 1)
可以使用 D279058CL 软管夹(可从当地 DEWALT
供应商处获得)将电源线 (b) 固定到吸尘软管 (g)
上。
如需了解更多有关合适附件的信息,请向您的经销
商咨询。

中文(简体)
18
故障排除
问题 解决方案
电机不运转 检查电源线、插头和插座。
确保“开/关/工具控制”开关位于“
开”位置( )。
吸尘能力
下降
清除吸嘴、吸尘管道、吸尘软管或
过滤器中的堵塞物。
更换纸袋或羊毛袋。
检查过滤器是否正确安装。
清洁或更换过滤器。
清空集尘盒,请参阅操作下的
清空
集尘盒
部分。
真空吸尘器
停止运行
热过载装置已脱扣:
1. 关闭真空吸尘器并断开真空清
洁器的电源。
2. 根据需要清空集尘盒。
3. 等待装置冷却。
4. 将电源线插入相应的插座,然
后将“开/关/工具控制”开关切
换至“开”位置 ( ) 以进行测
试。如果真空清洁器未重启,
您可以联系您的销售商,或者
通过 DEWALT 目录或联系本手
册中所记载的 DEWALT 办事
处,查询离您最近的 DEWALT
授权维修代理的地址。
真空吸尘时
灰尘外泄
检查过滤器是否正确安装。
确保过滤器未受损;必要时进行
更换。
确保过滤器密封件牢牢固定在适
当位置
过滤器自动
清洁功能不
工作
留意是否有电磁静电干扰声,确保
过滤器清洁装置正在工作。
电动工具无
法开启。
确保“开/关/工具控制”开关位于“
激活”位置 .
保护环境
分类回收。本产品不得与普通家庭垃圾
一起处理。
如果您发现您的 DEWALT 产品需要更换或您已经不
再需要使用这些产品,请不要将它们与家庭垃圾一
起处理。请将它们单独分类回收。
分类回收使用过的产品和包装能够让材
料得以再循环和再利用。再生材料的再
利用有助于防止环境污染,并降低对原
材料的需求。
当地法规可能要求由市政废物处理点或向您出售新
产品的零售商提供从家庭中分类回收电气产品的服
务。
DEWALT 提供设施收集和回收使用寿命到期的
DEWALT 产品。若要享受这项服务,请将产品送回
任一授权维修代理,他们将代表我们回收您的产品。
您可通过联系本手册中所记载的当地 DEWALT 办
事处查询离您最近的授权维修代理的位置。您也可
以通过网站获取 DEWALT 授权维修代理名单以及
我们售后服务与联络人的完整详情,网址为:
www.2helpU.com。
制造商:百得(苏州)科技有限公司
地址:苏州工业园区苏虹中路200号出口加工区
产地:江苏苏州
Other manuals for DWV902L
3
This manual suits for next models
1
Table of contents
Languages:
Other DeWalt Dust Collector manuals
Popular Dust Collector manuals by other brands

CHIKO AIRTEC
CHIKO AIRTEC CMP-2500AT3-A instruction manual

Grizzly
Grizzly G0535 parts list

Oneida Air Systems
Oneida Air Systems Mini-Gorilla owner's manual

Donaldson Torit
Donaldson Torit Downflo Oval DFO 1-1 Installation and operation manual

Chiko
Chiko CKU-08AT2-HC instruction manual

Storch
Storch Cookie Monster manual