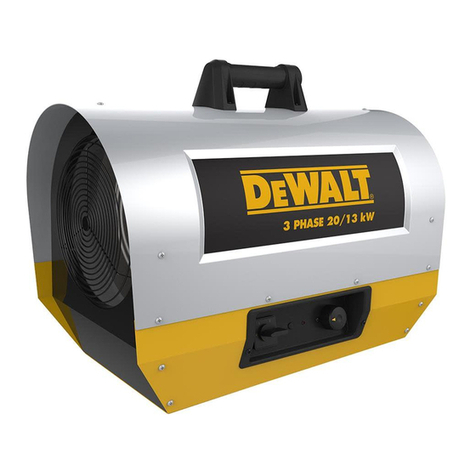
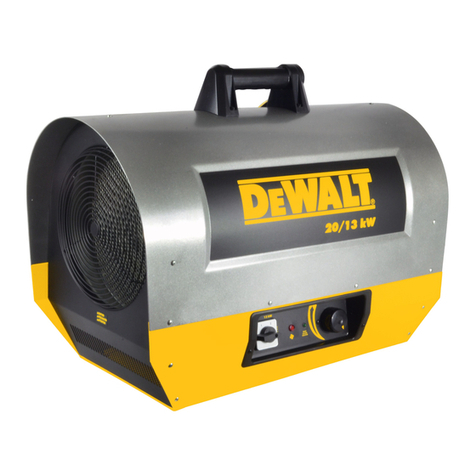
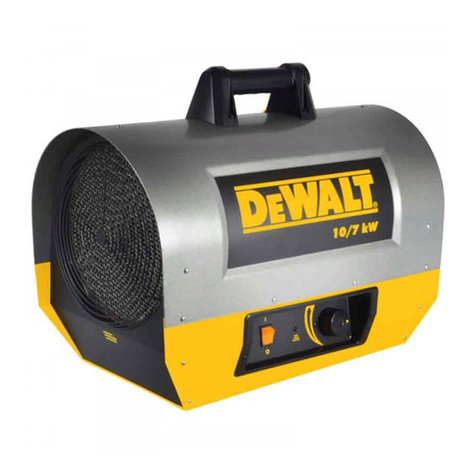
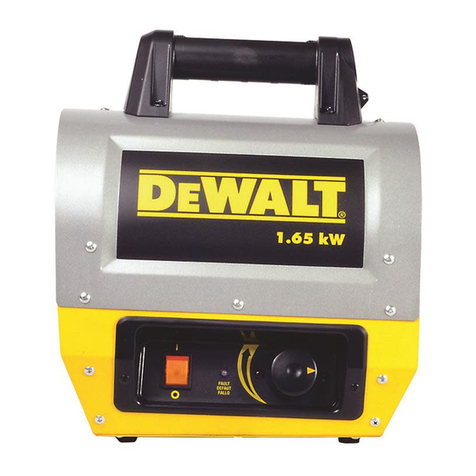
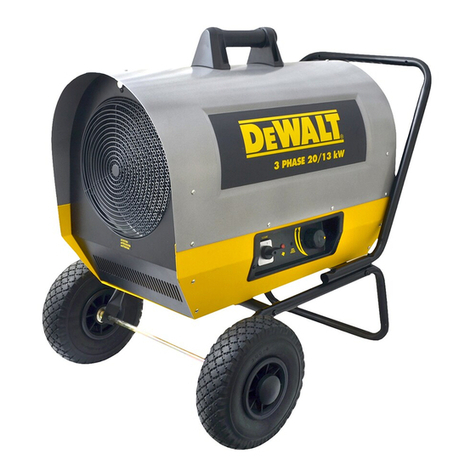
DeWalt DXH2000 User manual

NEVER LEAVE THE HEATER UNATTENDED WHILE BURNING!NEVER LEAVE THE HEATER UNATTENDED WHILE BURNING!NEVER LEAVE THE HEATER UNATTENDED WHILE BURNING!
If you have questions or comments, contact us.
Pour toute question ou tout commentaire, nous contacter. Si tiene dudas o comentarious, contéctenos.
a
855-805-5745 • www.DEWALT.com
INSTRUCTION MANUAL
GUIDE DE’UTILISATION
MANUAL DE INSTRUCCIONES
INSTRUCTIVO DE OPERACION, CENTROS DE SERVICIO Y POLIZA
DE GARANTIA, ADVERTENCIA: LEASE ESTE INSTRUCTIVO ANTES
DE USAR EL PRODUCTO.
Electric Forced Air Heater DXH2000 and DXH2003
Chauffage électrique à air forcé DXH2000 and DXH2003
Calentador eléctrico de aire forzado DXH2000 and DXH2003 41002
WARNING: READ INSTRUCTIONS
CAREFULLY: Read and follow all
instructions. Place instructions in a safe
place for future reference. Do not allow
anyone who has not read these instructions
to assemble, adjust or operate the heater.
AVERTISSEMENT:
VEUILLEZ LIRE ATTENTIVEMENT
LES INSTRUCTIONS :
Lisez et observez toutes les
instructions. Conservez ces instructions dans un endroit
sécuritaire pour vous y référer ultérieurement. Interdisez
à quiconque n’ayant pas lu les présentes directives
d’assembler, de régler ou de faire fonctionner cette
fournaise.
ADVERTENCIA:
LEA CUIDADOSAMENTE
LAS INSTRUCCIONES: Lea y siga todas las
instrucciones. Conserve estas instrucciones en un
lugar seguro para futura referencia. No permita
que nadie que no haya leído estas instrucciones
arme, ajuste o use el calentador.

2
NEVER LEAVE THE HEATER UNATTENDED WHILE BURNING!NEVER LEAVE THE HEATER UNATTENDED WHILE BURNING!NEVER LEAVE THE HEATER UNATTENDED WHILE BURNING!
English
Definitions: Safety Guidelines
The definitions below describe the level of severity for each signal word. Please read the manual and pay attention to these symbols.
DANGER: Indicates an imminently hazardous situation which, if not avoided, will result in death or serious injury.
WARNING: Indicates a potentially hazardous situation which, if not avoided, could result in death or serious injury.
CAUTION: Indicates a potentially hazardous situation which, if not avoided, may result in minor or moderate injury.
NOTICE: Indicates a practice not related to personal injury which, if not avoided, may result in property damage.
WARNING: Do not use the heater if the unit, plug or cord has
visible damage or the unit has malfunctioned. Contact a reputable
electrician before reusing.
WARNING: Do not expose to wet conditions; unit is intended
for indoor use only.
WARNING: Unit not intended for use in indoor areas where
heater may be exposed to water. Avoid use in bathrooms, laundry
rooms or any other areas where the unit may come in contact with
water.
WARNING: Do not insert or allow any foreign objects to enter
the unit via the intake or exhaust vents on the unit. Failure to
observe this warning may result in electric shock, fire or damage to
the unit.
WARNING: To prevent fire do not block either the air intake or
exhaust.
WARNING: Unit is equipped with internal active electrical
components that spark during use. Do not use in areas where
fumes from gasoline, paint or other flammable liquids may be
present.
WARNING: Extreme caution must be used when any heater is
used by or near children or invalids and whenever the heater is left
operating and unattended.
SAVE THESE INSTRUCTIONS.
WARNING: DO NOT OPERATE THIS HEATER UNTIL YOU READ AND
UNDERSTAND THIS INSTRUCTION MANUAL FOR SAFETY, OPERA-
TION, AND MAINTENANCE INSTRUCTIONS.
CAUTION: Use of this heater in any means not described in this manual
may cause fire, electric shock, personal injury and/or property damage.
CAUTION: This heater is hot when in use. To avoid burns,
do not let bare skin touch hot surfaces. Keep combustible materials, such
as furniture, pillows, bedding, papers, clothes, and curtains at least 6 feet
( 1.8 m) from the front of the heater and keep them at least 2 feet (.6 m)
away from the sides and rear
CAUTION: In order to avoid unintended cycling of the heater, always
unplug or disconnect unit from power source when not in use.
CAUTION: Do not cover the power supply wiring or run the wiring under
any carpet or rugs. Arrange cord and connections away from traffic patterns
so it is not a tripping hazard.
CAUTION: Connect unit to only properly grounded outlets and
adequately sized and grounded electrical systems.
CAUTION: Do not use this unit with unapproved or under sized electrical
connections or wiring. They may overheat and cause a risk of fire.

3
NEVER LEAVE THE HEATER UNATTENDED WHILE BURNING!NEVER LEAVE THE HEATER UNATTENDED WHILE BURNING!NEVER LEAVE THE HEATER UNATTENDED WHILE BURNING!
English
CONTENTS
WARNINGS............................................................................ 2
ASSEMBLY.......................................................................... 3-4
OPERATION ........................................................................ 5-6
SPECIFICATIONS ................................................................... 5
CLEARANCES........................................................................ 5
MAINTENANCE...................................................................... 5
TROUBLESHOOTING ............................................................ 6
WIRING DIAGRAMS ............................................................... 7
PARTS LISTS/EXPLODED VIEWS...................................... 8-11
WARRANTY ......................................................................... 12
INSTRUCTIONS FOR ORDERING PARTS ............................ 12
Assembly
• Remove the heater and all of the packaging material from the box.
• Check all of the packing material for loose parts and set aside.
• Remove and retain the four handle mounting screws that are threaded into the
top shell.
• Throughly inspect the heater for damage. If any is found do not contact the place
of purchase. Please call the Manufacturer at 855-805-5745.
• Use the four handle mounting screws to fasten the handle to the top of the heater
Note: Do not over tighten the screws as they can crack the handle.
The handle is located in the carton loose be sure not to throw out.
Operational Information
The DeWalt Electric forced air heaters are designed to be used by professionals.
Heat is created by electric current passing through coiled metal elements bringing them up to very high temperatures. The fan then passes room air over the hot elements exchanging cold air for warm.
The air moving over the coils keeps them from reaching temperatures that are not safe for the normal operation of the heater. However it is important to keep all combustible materials and any objects that
may be sucked into the fan blades at a safe distance (please refer to the table on the next page for appropriate distances). Make sure that the fan blades remain unobstructed at all times.
Keep unit clean and dust free. Do not block unit intake or exhaust at any time.
Review and understand all warnings in this manual. Follow all local codes. These heaters are designed to be used with 240v ac only.
This heater must be wired by a certified electrician.
Operation

4
NEVER LEAVE THE HEATER UNATTENDED WHILE BURNING!NEVER LEAVE THE HEATER UNATTENDED WHILE BURNING!NEVER LEAVE THE HEATER UNATTENDED WHILE BURNING!
WHEEL KIT ASSEMBLY
CONTENTS
REF# ITEM# ITEM DESCRIPTION QTY
1 40857 Handle Assembly 1
2 21875 Carriage Assembly 1
3 21897 Axle Assembly 1
4 40859 Wheels Assembly 2
5 41076 Base Plate 1
6 28787 Hardware Kit 1
Hardware Kit
Includes
Screws, w/nuts
Wheel Spacer
Hub Cap
Large Washer
Cotter Pin
Base Plate Bolts
4
2
2
2
2
4
Tools Needed -Phillips Head Screw driver
-Socket Wrench w/ 9/16 socket or wrench
After completely unpacking wheel kit, inspect for damaged or missing pieces.
If there are damaged or missing pieces please contact 1-800-805-5745
Step 1.
Remove bottom panel off heater and
reuse same screws to install the base
plate that is provided in the kit.
Install the axle and wheels to the carriage.
Step 2.
Step 3.
Set the heater on top of carriage lining the four threaded bolt
holes with the four holes on the carriage. Attach the heater to
the carriage by using the four bolts provided in hardware kit.
Step 4.
Attach the handle to the carriage using
the four nuts and bolts provided in the
hardware kit.
FOR ANY QUESTIONS:
Please call Toll Free 1-855-805-5745
Please include the model number, date of purchase and description of problem in all communications.
English

5
NEVER LEAVE THE HEATER UNATTENDED WHILE BURNING!NEVER LEAVE THE HEATER UNATTENDED WHILE BURNING!NEVER LEAVE THE HEATER UNATTENDED WHILE BURNING!
English
OPERATION MODE HEAT ON INDICATOR LIGHT THERMOSTAT
WARNING:
Never attempt to service the heater while the unit is hot, In use, or plugged in. Only qualified service
technicians should service these units.
• Thoroughly inspect the unit prior to use.
• Keep heater clean and free of dust and debris.
• The use of an air compressor can be used to blow out the dust from the heater case.
Be sure to only
use moderate air pressure as to not damage any internal components.
Starting Instructions, After Heater
Has Been Professionally Wired
1. Place the heater on a stable and level surface. Insure clearance to
combustibles are observed (see table on this page).
2. Turn thermostat counter-clockwise to lowest setting.
3. Move 4 way selector switch from the off position to the fan position for fan only
operation.
4. Move the selector switch to the 13kW position for partial power operation. The
partial power input requirement for the DXH2000 is 240Vac/54A which
requires the use of a 60A/2 pole circuit breaker. The partial power input
requirement for the DXH2003 is 240Vac/33A which requires the use of a
40A/3 pole circuit breaker.
5.
Turn thermostat knob up (clockwise) until desired temperature setting is reached.
6. Move the selector switch to the 20kW position for full power operation. The
full power input requirement for the DXH2000 is 240Vac/81A which requires
the use of a 100A/2 pole circuit breaker. The full power requirement for the
DXH2003 is 240Vac/50A which requires a 60A/3 pole circuit breaker.
7. The heating element and fan will remain on until the temperature setting is
reached. The heating element will cycle on and off as needed. The fan will remain
on as long as the control switch is in the on position.
To Stop Heating
Rotate the 4 way selector switch to the fan position for cool down. When the unit is cool move the
selector switch to the off position.
NOTE: This heater is equipped with an overheat limit switch which may cause the
heater to stop.This is indicated by a visual alarm when the power switch is in the
on position and all lights are off. (fig 1) Check and remove the cause of the
overheating before restarting. This can take up to 15 minutes to cool before it
can be restarted.
Maintenance
• A soft dry cloth should be used for cleaning of outer shell and handle.
• The fan motor is sealed and does not need to be lubricated.
Specifications
Model: DXH2000 DXH2003
Heat Output BTU/WATTS
44,357/13kW - 68,242/20kW 44,357/13kW - 68,242/20kW
Power Cord 6/3 AWG for 10’ or less 8/4 AWG for 10’ or less
Airflow (CFM) 725 725
Electrical Supply 240Vac 240Vac
Minimum Breaker Required
60A/2 Pole/Low - 100A/2 Pole/Hi 40A/3 Pole/Low - 60A/3 Pole/Hi
Amps
54/81
33/50
Thermostat 23°F - 95°F 23°F - 95°F
Dimensions: (L”xW”xH”) 27”x15”x18” 27”x15”x18”
Weight (lbs.) 49 lb. 49 lb.
Clearance to Combustibles
Outlet (Feet) 6 (1.8m)
Rear (Feet) 2 (.6m)
Top (Feet) 2 (.6m)
Bottom Non-combustible floor
FIG. 1
Fan indicator light is on when circulation fan is operating.

6
NEVER LEAVE THE HEATER UNATTENDED WHILE BURNING!NEVER LEAVE THE HEATER UNATTENDED WHILE BURNING!NEVER LEAVE THE HEATER UNATTENDED WHILE BURNING!
English
Storage
When not in use, the heater must be disconnected from power source, dusted off and the cord should
be loosely wound around the handle.
For service :
Please call Toll-Free 855-805-5745 www.dewalt.com
Our office hours are 8:00 AM – 5:00 PM, EST, Monday through Friday.
Please include the model number, date of purchase, and description of problem in all communication.
WARNING: USE ONLY MANUFACTURER’S REPLACEMENT PARTS. USE OF ANY OTHER PARTS COULD CAUSE INJURY OR DEATH. RE-
PLACEMENT PARTS ARE ONLY AVAILABLE DIRECT FROM THE FACTORY AND MUST BE INSTALLED BY A QUALIFIED SERVICE AGENCY.
Troubleshooting
Unit does not work • Defective thermostat or wrong thermostat setting
• Open circuit breaker or fuse
• Thermal overload switch has been tripped
• Faulty Connection
• Damaged or defective plug or outlet
Unit runs continuously • Defective thermostat or wrong thermostat setting
• Heat losses higher than unit capacity (unit undersized)
Elements are on but motor does not rotate • Defective Motor
• Blocked fan blades
Enclosure is extremely hot • Defective thermal protection
• Blocked air vents
• Defective motor
Desired room temperature cannot be reached • One or more elements are defective
• Defective thermostat or wrong thermostat setting
• Voltage lower than that written on Rate tag
• Heat losses higher than unit capacity (unit undersized)
Overheating • Defective thermostat or wrong thermostat setting
• Defective Motor
Heater emits a humming sound • Defective motor
• Fan blade blocked
Note: Your heater is equipped with auto cool down and warm-up features.
AUTO COOLDOWN.
When the heater is running and the selector switch is rotated to the off position,
the heater will automatically keep the fan operating until the heater is cool. The
fan will then shut off.
AUTO WARM-UP.
When the heater is stored or started in very cold conditions and a heating mode
is selected, the heating element will turn on to warm up the unit before the fan
will start to blow hot air.

7
NEVER LEAVE THE HEATER UNATTENDED WHILE BURNING!NEVER LEAVE THE HEATER UNATTENDED WHILE BURNING!NEVER LEAVE THE HEATER UNATTENDED WHILE BURNING!
English
Wiring Diagrams
DXH2003
DXH2000

8
NEVER LEAVE THE HEATER UNATTENDED WHILE BURNING!NEVER LEAVE THE HEATER UNATTENDED WHILE BURNING!NEVER LEAVE THE HEATER UNATTENDED WHILE BURNING!
English
Parts List DXH2000
REF. #..................ITEM#............ DESCRIPTION
1..........................N/A.....................COVER, TOP, SHELL, OUTER
2..........................N/A.....................PANEL, FRONT
3..........................N/A.....................PANEL, REAR
4..........................N/A.....................SHIELD, RADIATION, TUBE
5..........................N/A.....................BASE, PLATE
6..........................N/A.....................PANEL, SIDE, LEFT
7..........................N/A.....................PANEL, SIDE, RIGHT
8..........................N/A.....................BRACKET, MOUNT, MOTOR
9..........................41080 ................BRACKET, SWITCH, HIGH LIMIT
10........................N/A ....................
BRACKET, CONTACTOR, ELEMENT, HEATING
11........................41082 ................GUARD, GRILL, REAR
12........................41083 ................BLADE, FAN
13........................41084 ................ELEMENT, HEATING
14........................41085 ................PANEL, CONTROL, PLASTIC
15........................41086 ................CONTACTOR, ELEMENT, HEATING
16........................41087 ................SWITCH, MAIN, 4, POSITION
17........................41088 ................SWITCH, FAN, COOL DOWN, 37C
18........................41089 ................INDICATOR, FAN ON
19........................41090 ................BREAKER, CIRCUIT, 30AMP
20........................41091 ................BUSHING, STRAIN, RELIEF
REF. #..................ITEM#............ DESCRIPTION
21........................41092 ................BRACKET, SWITCH, FAN, COOL DOWN
22........................N/A ....................BRACKET, WIRE MOUNT
23........................N/A ....................BRACKET, BLOCK, TERMINAL, WIRING
24........................41051 ................DOOR, ACCESS
25........................41064 ................GUARD, GRILL, FRONT
26........................41029 ................SUPPORT, HEATING ELEMENT
27........................41030 ................FOOT, RUBBER
28........................41031 ................CLIP, SENSOR, CAPILLARY TUBE
29........................41067 ................MOTOR, FAN
30........................41094 ................BLOCK, TERMINAL, WIRING
31........................41070 ................CAPACITOR, MOTOR, STARTER
32........................41032 ................SWITCH, HIGH LIMIT, 77C
33........................41053 ................BOARD, CIRCUIT, HEAT ON,INDICATOR
34........................41095 ................HANDLE, CARRY
35........................41027 ................KNOB, THERMOSTAT, PLASTIC
36........................41034 ................THERMOSTAT, TEMPERATURE, AMBIENT
37........................41036 ................BUSHING, PLASTIC, WIRE
38........................41096 ................BUSHING, PLASTIC, WIRE
39........................41081 ................FRONT SCREEN ASSEMBLY
40........................41100 ................RADIATION SHIELD TUBE W/BRACKETS
WARNING:
Use only manufacturer’s replacement parts. Use of any other parts could cause injury or death.
Replacement parts are only available direct from the factory and must be installed by a qualified
service agency.
For Service
Please call Toll-Free 855-805-5745 www.dewalt.com
Our office hours are 8:00 AM – 5:00 PM, EST, Monday through Friday.
Please include the model number, date of purchase, and description of problem in all communication.

9
NEVER LEAVE THE HEATER UNATTENDED WHILE BURNING!NEVER LEAVE THE HEATER UNATTENDED WHILE BURNING!NEVER LEAVE THE HEATER UNATTENDED WHILE BURNING!
English
DXH2000

10
NEVER LEAVE THE HEATER UNATTENDED WHILE BURNING!NEVER LEAVE THE HEATER UNATTENDED WHILE BURNING!NEVER LEAVE THE HEATER UNATTENDED WHILE BURNING!
English
Parts List DXH2003
REF. #..................ITEM#............ DESCRIPTION
1..........................N/A.....................COVER, TOP, SHELL, OUTER
2..........................N/A.....................PANEL, FRONT
3..........................N/A.....................PANEL, REAR
4..........................N/A.....................SHIELD, RADIATION, TUBE
5..........................N/A.....................BASE, PLATE
6..........................N/A.....................PANEL, SIDE, LEFT
7..........................N/A.....................PANEL, SIDE, RIGHT
8..........................N/A.....................BRACKET, MOUNT, MOTOR
9..........................41080 ................BRACKET, SWITCH, HIGH LIMIT
10........................N/A ....................
BRACKET, CONTACTOR, ELEMENT, HEATING
11........................41082 ................GUARD, GRILL, REAR
12........................41083 ................BLADE, FAN
13........................41084 ................ELEMENT, HEATING
14........................41085 ................PANEL, CONTROL, PLASTIC
15........................41086 ................CONTACTOR, ELEMENT, HEATING
16........................41087 ................SWITCH, MAIN, 4, POSITION
17........................41088 ................SWITCH, FAN, COOLDOWN, 37C
18........................41089 ................INDICATOR, FAN ON
19........................41091 ................BUSHING, STRAIN, RELIEF
REF. #..................ITEM#............ DESCRIPTION
20........................41092 ................BRACKET, SWITCH, FAN, COOLDOWN
21........................N/A ....................BRACKET, WIRE MOUNT
22........................N/A ....................BRACKET, BLOCK, TERMINAL, WIRING
23........................41051 ................DOOR, ACCESS
24........................41064 ................GUARD, GRILL, FRONT
25........................41029 ................SUPPORT, HEATING ELEMENT
26........................41030 ................FOOT, RUBBER
27........................41031 ................CLIP, SENSOR, CAPILLARY TUBE
28........................41067 ................MOTOR, FAN
29........................41101 ................BLOCK, TERMINAL, WIRING
30........................41070 ................CAPACITOR, MOTOR, STARTER
31........................41032 ................SWITCH, HIGH LIMIT, 77C
32........................41053 ................BOARD, CIRCUIT, HEAT ON, INDICATOR
33........................41095 ................HANDLE, CARRY
34........................41027 ................KNOB, THERMOSTAT, PLASTIC
35........................41034 ................THERMOSTAT, TEMPERATURE, AMBIANT
36........................41036 ................BUSHING, PLASTIC, WIRE
37........................41096 ................BUSHING, PLASTIC, WIRE
38........................41081 ................FRONT SCREEN ASSEMBLY
39........................41100 ................RADIATION SHIELD TUBE W/BRACKETS
WARNING:
Use only manufacturer’s replacement parts. Use of any other parts could cause injury or death.
Replacement parts are only available direct from the factory and must be installed by a qualified
service agency.
For Service
Please call Toll-Free 855-805-5745 www.dewalt.com
Our office hours are 8:00 AM – 5:00 PM, EST, Monday through Friday.
Please include the model number, date of purchase, and description of problem in all communication.
11
NEVER LEAVE THE HEATER UNATTENDED WHILE BURNING!NEVER LEAVE THE HEATER UNATTENDED WHILE BURNING!NEVER LEAVE THE HEATER UNATTENDED WHILE BURNING!
English
DXH2003

12
NEVER LEAVE THE HEATER UNATTENDED WHILE BURNING!NEVER LEAVE THE HEATER UNATTENDED WHILE BURNING!NEVER LEAVE THE HEATER UNATTENDED WHILE BURNING!
English
INSTRUCTION MANUAL
Electric Forced-Air Heater DXH2000, DXH2003
PARTS ORDERING INFORMATION:
Use only manufacturer’s replacement parts. Use of any other parts could cause
injury or death. Replacement parts are only available direct from the factory and
must be installed by a qualified service agency.
Warning:
PURCHASING: Accessories may be purchased at any DeWALT®local dealer or direct
from the factory
FOR INFORMATION REGARDING SERVICE:
Please call Toll-Free 855-805-5745
www.DEWALT.com
Our office hours are 8:00 AM – 5:00 PM, EST, Monday through Friday.
Please include the model number, date of purchase, and description of problem in all
communication.
LIMITED WARRANTY:
DeWALT® warrants its heaters and accessories to be free from defects in
material and workmanship for a period of 1 year from date of purchase.
DeWALT® will repair or replace this product free of charge if it has been
proven to be defective within the 1-year period, and is returned at customer
expense with proof of purchase to DeWALT® within the warranty period.
DeWALT®, GUARANTEED TOUGH® and the
yellow and black color scheme are trademarks
of the DeWALT Industrial Tool Co., used under
license. ©2020 DeWALT. EGI/Enerco Group Inc.
Under license from DeWALT Industrial Tool Co.

41002
If you have questions or comments, contact us.
Si vous avez des questions ou commentaires, veuillez nous contacter. Llámenos si tiene alguna pregunta o comentario.
INSTRUCTION MANUAL
MANUEL D’INSTRUCTIONS
MANUAL DE INSTRUCCIONES
855-805-5745 • www.DEWALT.com
Electric Forced Air Heater DXH2000 and DXH2003
Appareil de chauffage à air forcé électrique modèles DXH2000 et DXH2003
Calentador eléctrico a aire forzado DXH2000 y DXH2003
NE JAMAIS LAISSER LE CHAUFFAGE SANS SURVEILLANCE PENDANT LE BRÛLAGE!NE JAMAIS LAISSER LE CHAUFFAGE SANS SURVEILLANCE PENDANT LE BRÛLAGE!NE JAMAIS LAISSER LE CHAUFFAGE SANS SURVEILLANCE PENDANT LE BRÛLAGE!
WARNING: READ INSTRUCTIONS
CAREFULLY: Read and follow all
instructions. Place instructions in a safe
place for future reference. Do not allow
anyone who has not read these instructions
to assemble, adjust or operate the heater.
AVERTISSEMENT:
VEUILLEZ LIRE ATTENTIVEMENT
LES INSTRUCTIONS :
Lisez et observez toutes les
instructions. Conservez ces instructions dans un endroit
sécuritaire pour vous y référer ultérieurement. Interdisez
à quiconque n’ayant pas lu les présentes directives
d’assembler, de régler ou de faire fonctionner cette
fournaise.
ADVERTENCIA:
LEA CUIDADOSAMENTE
LAS INSTRUCCIONES: Lea y siga todas las
instrucciones. Conserve estas instrucciones en un
lugar seguro para futura referencia. No permita
que nadie que no haya leído estas instrucciones
arme, ajuste o use el calentador.

2
NE JAMAIS LAISSER LE CHAUFFAGE SANS SURVEILLANCE PENDANT LE BRÛLAGE!NE JAMAIS LAISSER LE CHAUFFAGE SANS SURVEILLANCE PENDANT LE BRÛLAGE!NE JAMAIS LAISSER LE CHAUFFAGE SANS SURVEILLANCE PENDANT LE BRÛLAGE!
Français
AVERTISSEMENT : N’utilisez pas l’appareil de chauffage si celui-
ci, la fiche ou le cordon a des dommages visibles ou si l’appareil
a mal fonctionné. Avant d’utiliser de nouveau l’appareil, veuillez
communiquer avec un électricien qualifié.
AVERTISSEMENT :
N’exposez pas l’appareil à des conditions
d’humidité; cet appareil est conçu seulement pour une utilisation à l’intéri.
AVERTISSEMENT : L’appareil n’est pas conçu pour être utilisé
dans des zones à l’intérieur où il peut être exposé à de l’eau. Évitez
de l’utiliser dans les salles de bain, les buanderies, ou toute autre
zone où l’appareil peut entrer en contact avec de l’eau.
AVERTISSEMENT :
N’insérez ni ne permettez à aucun objet
étranger d’entrer dans l’appareil par le biais de l’entrée ou de la
sortie d’air de l’appareil. Un non-respect de cet avertissement peut
provoquer une décharge électrique, un incendie ou des dommages à
l’appareil.
AVERTISSEMENT : Pour empêcher tout incendie, ne bloquez ni
l’entrée ni la sortie d’air.
AVERTISSEMENT :
L’appareil est équipé avec des composants
électriques internes actifs qui produisent des étincelles lors de son
utilisation. Ne l’utilisez pas dans des zones où des émanations d’essence,
de peinture ou d’autres liquides inflammables peuvent s’y trouver.
AVERTISSEMENT : Une étroite surveillance est requise lorsque
tout appareil de chauffage est utilisé par ou près des enfants ou des
personnes handicapées et lorsque l’appareil est laissé en opération
et sans surveillance.
CONSERVEZ CES INSTRUCTIONS.
AVERTISSEMENT : NE FAITES PAS FONCTIONNER CET APPAREIL
DE CHAUFFAGE JUSQU’À CE QUE VOUS AYEZ LU ET COMPRIS CE
MANUEL D’INSTRUCTIONS POUR LES DIRECTIVES DE SÉCURITÉ,
DE FONCTIONNEMENT ET D’ENTRETIEN.
MISE EN GARDE : L’utilisation de cet appareil de chauffage de toute autre
façon que celle décrite dans ce manuel peut provoquer un incendie, une
décharge électrique, des blessures personnelles et/ou aux biens.
MISE EN GARDE : Cet appareil devient chaud lorsqu’utilisé. Pour éviter
les brûlures, évitez que la peau touche aux surfaces chaudes. Gardez les
produits combustibles, tels que les meubles, les oreillers, la literie, les papiers,
les vêtements et les rideaux, à au moins 1,8 m (6 pi) du devant de l’appareil
de chauffage et gardez-les à au moins 0,6 m (2 pi) des côtés et de l’arrière.
MISE EN GARDE :
Afin d’éviter tout cycle inattendu de l’appareil de
chauffage, toujours le débrancher ou le déconnecter de la source d’alimentation
lorsque vous ne l’utilisez pas.
MISE EN GARDE :
Ne recouvrez pas le câblage de l’alimentation ni ne le
faites courir sous tout tapis ou carpette. Placez le cordon d’alimentation et les
branchements loin des zones de circulation, de sorte qu’ils ne deviendront pas un
risque de trébuchement.
MISE EN GARDE : Branchez l’appareil à des prises de courant
correctement mises à la terre et de la bonne grandeur, ainsi qu’à des
systèmes électriques mis à la terre.
MISE EN GARDE : N’utilisez pas l’appareil avec des connexions ou des
câblages électriques non approuvés ou trop petits. Ils peuvent surchauffer et
provoquer un risque d’incendie.
Définitions : Directives de sécurité
Les définitions ci-dessous décrivent le niveau de sévérité pour chaque mot signalétique. Veuillez lire le manuel et faire attention à ces symboles.
DANGER : Indique « une situation à risque imminent, laquelle, si elle n’est pas évitée, entraînera des blessures sérieuses ou la mort ».
AVERTISSEMENT :
Indique « une situation à risque potentiel, laquelle si elle n’est pas évitée, pourrait entraîner des blessures sérieuses ou la mort ».
MISE EN GARDE : Indique une situation dangereuse potentielle, laquelle, si elle n’est pas évitée, peut causer des blessures mineures ou des blessures légères.
AVIS : Indique une pratique non reliée à une blessure personnelle, laquelle, si elle n’est pas évitée, peut entraîner des dommages aux biens.

3
NE JAMAIS LAISSER LE CHAUFFAGE SANS SURVEILLANCE PENDANT LE BRÛLAGE!NE JAMAIS LAISSER LE CHAUFFAGE SANS SURVEILLANCE PENDANT LE BRÛLAGE!NE JAMAIS LAISSER LE CHAUFFAGE SANS SURVEILLANCE PENDANT LE BRÛLAGE!
Français
TABLE DES MATIÈRES
AVERTISSEMENT................................................................... 2
ASSEMBLAGE .................................................................... 3-4
FONCTIONNEMENT............................................................ 5-6
SPÉCIFICATIONS ................................................................... 5
ESPACES LIBRES ................................................................ 5
ENTRETIEN............................................................................ 5
GUIDE DE DÉPANNAGE......................................................... 6
SCHÉMAS DU CÂBLAGE....................................................... 7
LISTES DES PIÈCES/VUES ÉCLATÉES............................. 8-11
GARANTIE............................................................................ 12
INSTRUCTIONS POUR COMMANDER DES PIÈCES............ 12
Assemblage
• Enlevez l’appareil de chauffage et tout le matériel d’emballage de la boîte.
• Vérifiez l’ensemble du matériel d’emballage pour toute pièce mobile et mettez-les de côté.
• Enlevez et mettez de côté les quatre vis de montage de la poignée qui sont filetées dans la
coque supérieure.
• Inspectez à fond l’appareil de chauffage pour en déceler tout dommage. Si vous en trouvez, ne
communiquez pas avec le lieu d’achat. Communiquez plutôt avec le fabricant au 855-805-
5745.
• Utilisez les quatre vis de montage de la poignée pour fixer cette dernière au haut de l’appareil
de chauffage.
Remarque : Ne pas trop serrer les vis car cela peut fissurer la poignée.
La poignée est située dans le matériel d’emballage de la boîte; assurez-vous de
ne pas la jeter.
Information sur le fonctionnement
Les appareils de chauffage à air forcé électriques DeWalt sont conçus pour être utilisés par des professionnels.
La chaleur est créée par un courant électrique passant à travers des éléments métalliques spiralés, les chauffant à de très fortes températures. Le ventilateur fait courir l’air de la pièce sur les éléments
chauds, échangeant ainsi l’air froid en de l’air chaud.
L’air se déplaçant sur les spirales les empêche d’atteindre des températures dangereuses pour le fonctionnement normal de l’appareil de chauffage. Cependant, il est important de garder tout matériel
combustible et tout objet qui peuvent être aspirés dans les pales du ventilateur à une distance sécuritaire (veuillez vous référer à la table à la page suivante pour les distances appropriées). Assurez-vous
que les pales du ventilateur demeurent dégagées en tout temps.
Gardez l’appareil propre et libre de poussières. Ne jamais bloquer l’entrée ou la sortie de l’appareil.
Révisez et comprenez l’ensemble des avertissements dans ce manuel. Suivez tous les codes locaux. Ces appareils de chauffage sont conçus pour utilisation avec une tension de 240 VCA uniquement.
Cet appareil de chauffage doit être câblé par un électricien qualifié.
Fonctionnement

4
NE JAMAIS LAISSER LE CHAUFFAGE SANS SURVEILLANCE PENDANT LE BRÛLAGE!NE JAMAIS LAISSER LE CHAUFFAGE SANS SURVEILLANCE PENDANT LE BRÛLAGE!NE JAMAIS LAISSER LE CHAUFFAGE SANS SURVEILLANCE PENDANT LE BRÛLAGE!
ENSEMBLE ROUE KIT
CONTENU
REF# ARTICLE# DESCRIPTION DE ARTICLES QTY
1 40857 Poignée Assemblée 1
2 21875 Carriage Assembly 1
3 21897 Assemblée Axle 1
4 40859 Assemblée Roues 2
5 41076 Plaque de Base 1
6 28787 Hardware Kit 1
Kit de Hardware
Comprend
Vis avec écrous
roue Spacer
Hub Cap
Grande Rondelle
Goupille
Boulons de plaque de base
4
2
2
2
2
4
Outils Requis -Tournevis cruciforme
-Clé à douille w / 9/16 douille ou une clé
Après kit de roue complètement déballage, inspecter les pièces
endommagées ou manquantes. S’il est endommagé ou pièces manquantes
s’il vous plaît contacter 1-800-805-5745
Step 1.
Retirer le panneau inférieur de
chauffage et de réutiliser mêmes vis
pour installer la plaque de base qui
est fourni dans le kit.
Installez l’essieu et les roues du chariot.
Step 2.
Step 3.
Réglez le chauffe au-dessus du chariot alignant les quatre
trous de boulons filetés avec les quatre trous sur le chariot.
Fixer le chauffage sur le chariot en utilisant les quatre boulons
fournis dans le kit de matériel.
Step 4.
Fixer la poignée du chariot en utilisant
les quatre écrous et boulons fournis
dans le kit de matériel.
POUR TOUTE QUESTION:
S’il vous plaît appelez sans frais 1-855-805-5745
S’il vous plaît inclure le numéro de modèle, la date d’achat et la description du problème dans toutes les
communications.
Français

5
NE JAMAIS LAISSER LE CHAUFFAGE SANS SURVEILLANCE PENDANT LE BRÛLAGE!NE JAMAIS LAISSER LE CHAUFFAGE SANS SURVEILLANCE PENDANT LE BRÛLAGE!NE JAMAIS LAISSER LE CHAUFFAGE SANS SURVEILLANCE PENDANT LE BRÛLAGE!
Français
MODE DE FONCTIONNEMENT INDICATEUR DU CHAUFFAGE EN MARCHE THERMOSTAT
AVERTISSEMENT :
N’essayez jamais de faire l’entretien de l’appareil de chauffage s’il est chaud, en utilisation ou branché. Seuls des
techniciens qualifiés devraient faire l’entretien de ces appareils.
• Veuillez toujours inspecter l’appareil avant de l’utiliser.
• Gardez l’appareil propre et libre de poussières et de débris.
•
Vous pouvez utiliser de l’air comprimé pour souffler la poussière du bâti de l’appareil de chauffage.
Assurez-vous de seulement utiliser une pression d’air modérée afin de ne pas endommager les composants
internes.
• Un doux chiffon sec devrait être utilisé pour nettoyer l’enceinte extérieure et la poignée.
• Le moteur du ventilateur est scellé et n’a pas besoin d’être lubrifié.
Instructions de démarrage, après que l’appareil de
chauffage ait été câblé professionnellement
1. Placez l’appareil sur une surface plane et à niveau. Assurez-vous que l’espace libre entre tout combustible
soit respecté (voir la table sur cette page).
2. Tournez le thermostat dans le sens contraire des aiguilles d’une montre à sa plus basse position.
3. Déplacez le commutateur du sélecteur à 4 voies de la position « fermée » à la position « ventilation » pour
tout fonctionnement seul du ventilateur.
4. Déplacez le commutateur du sélecteur à la position 13kW pour un fonctionnement avec une tension partielle.
Les exigences de l’entrée de tension partielle pour le modèle DXH2000 sont de 240 VCA/54 A, ce qui
demandent l’utilisation d’un disjoncteur bipolaire de 60 A. Les exigences de l’entrée de tension partielle pour le
modèle DXH2003 sont de 240 VCA/33A, ce qui demandent l’utilisation d’un disjoncteur tripolaire de 40A.
5. Tournez le bouton du thermostat vers le haut (dans le sens horaire) jusqu’à ce que la température désirée
soit atteinte.
6. Déplacez le commutateur du sélecteur à la position 20kW pour un fonctionnement avec une tension
complète. Les exigences de l’entrée de tension complète pour le modèle DXH2000 sont de 240 VCA/81A, ce
qui demandent l’utilisation d’un disjoncteur bipolaire de 100A. Les exigences de l’entrée de tension complète
pour le modèle DXH2003 sont de 240 VCA/50A, ce qui demandent l’utilisation d’un disjoncteur tripolaire de
60A.
7.
L’élément chauffant et le ventilateur demeureront allumés jusqu’à ce que la configuration pour la température soit
atteinte. L’élément de chauffage va effectuer un cycle de marche et d’arrêt si besoin est. Le ventilateur demeurera
allumé aussi longtemps que le commutateur de contrôle est en position « marche ».
Pour fermer le chauffage
Tournez le commutateur du sélecteur à 4 positions à la position « ventilation » pour refroidir. Lorsque l’appareil est
refroidi, déplacez le commutateur du sélecteur à la position « fermé »
REMARQUE : Cet appareil de chauffage est équipé avec un commutateur de limite de
surchauffe qui peut provoquer l’arrêt de l’appareil. C’est indiqué par une alarme visuelle
lorsque le commutateur de tension est en position « en marche » et que tous les indicateurs
soient éteints. (figure 1) Vérifiez et enlevez la cause de la surchauffe avant de redémarrer
l’appareil. L’appareil peut prendre jusqu’à 15 minutes à se refroidir avant de redémarrer.
Entretien
Modèle
: DXH2000 DXH2003
Sortie de la chaleur BTU/WATTS
44357/13kW - 68242/20kW 44357/13kW - 68242/20kW
Alimentation electrique
6/3 AWG 8/4 AWG
Flux d’air 725 pi
3
/mn 725 pi
3
/mn
Alimentation électrique 240 V CA 240 V CA
Disjoncteur min. requis
60A/Bipolaire/Bas - 100A/Bipolaire/Haut 40A/Tripolaire/Bas - 60A/Tripolaire/Haut
Courant
54/81 A
33/50 A
Thermostat -5 °C - 35 °C -5 °C - 35 °C
Dimensions : (LxlxH) 68,6 x 38,1 x 45,7 cm 68,6 x 38,1 x 45,7 cm
Poids 22,2 Kg 22,2 Kg
Espace libre entre tout matériel combustible
Sortie 1,8 m
Arrière 0,6 m
Haut 0,6 m
Bas Plancher non-combustible
FIG. 1
L’indicateur du ventilateur est « en marche » lorsque le ventilateur de circulation est en
fonctionnement.
Spécifications

6
NE JAMAIS LAISSER LE CHAUFFAGE SANS SURVEILLANCE PENDANT LE BRÛLAGE!NE JAMAIS LAISSER LE CHAUFFAGE SANS SURVEILLANCE PENDANT LE BRÛLAGE!NE JAMAIS LAISSER LE CHAUFFAGE SANS SURVEILLANCE PENDANT LE BRÛLAGE!
Français
Entreposage
Lorsque l’appareil de chauffage n’est pas utilisé, il doit être débranché de la source de tension,
épousseté et le cordon doit être grossièrement enroulé autour de la poignée.
Pour l’entretien :
Veuillez appeler sans frais le 855-805-5745 www.dewalt.com
Nos heures de bureau sont de 8 h 00 à 17 h, fuseau horaire de l’est, du lundi au vendredi.
Veuillez inclure le numéro du modèle, la date d’achat et la description du problème lors de toute
communication.
AVERTISSEMENT : N’UTILISEZ QUE LES PIÈCES DE REMPLACEMENT DU FABRICANT. L’UTILISATION D’AUTRES PIÈCES RISQUE DE
CAUSER DES BLESSURES ET LA MORT. LES PIÈCES DE RECHANGE SONT SEULEMENT DISPONIBLES DIRECTEMENT DE L’USINE ET
DOIVENT ÊTRE INSTALLÉES PAR UNE ENTREPRISE DE SERVICE SPÉCIALISÉE.
Guide de dépannage
Remarque : Votre appareil de chauffage est équipé avec des options de refroidissement et de
chauffage automatiques.
REFROIDISSEMENT AUTOMATIQUE.
Lorsque l’appareil est en fonctionnement et que le commutateur du sélecteur est tourné à
la position « fermé », l’appareil de chauffage va automatiquement garder le ventilateur en
marche jusqu’à refroidissement de l’appareil de chauffage. Le ventilateur va alors s’arrêter.
CHAUFFAGE AUTOMATIQUE.
Lorsque l’appareil de chauffage est entreposé ou démarré dans des conditions très froides
et qu’un mode de chauffage est sélectionné, l’élément chauffant s’allumera pour réchauffer
l’appareil avant que le ventilateur commencer à souffler de l’air chaud.
L’appareil ne fonctionne pas • Thermostat défectueux ou mauvaise configuration du thermostat
• Disjoncteur ou fusible ouvert
• Le commutateur de surcharge thermique s’est déclenché
• Branchement défectueux
• Prise ou fiche endommagée ou défectueuse
L’appareil fonctionne sans arrêt • Thermostat défectueux ou mauvaise configuration du thermostat
•
Pertes de chaleur plus élevées que la capacité de l’appareil (l’appareil est sous-dimensionné)
Les éléments sont allumés mais le moteur ne tourne pas • Moteur défectueux
• Pales du ventilateur bloquées
L’enceinte est extrêmement chaude • Protection thermique défectueuse
• Évents d’air bloqués
• Moteur défectueux
La température désirée de la pièce ne peut pas être atteinte • Un élément, ou plus, est défectueux
• Thermostat défectueux ou mauvaise configuration du thermostat
• Tension plus basse que ce qui est indiquée sur l’étiquette du taux de tension
•
Pertes de chaleur plus élevées que la capacité de l’appareil (l’appareil est sous-dimensionné)
Surchauffe • Thermostat défectueux ou mauvaise configuration du thermostat
• Moteur défectueux
L’appareil émet un bourdonnement • Moteur défectueux
• Pale du ventilateur bloquée

7
NE JAMAIS LAISSER LE CHAUFFAGE SANS SURVEILLANCE PENDANT LE BRÛLAGE!NE JAMAIS LAISSER LE CHAUFFAGE SANS SURVEILLANCE PENDANT LE BRÛLAGE!NE JAMAIS LAISSER LE CHAUFFAGE SANS SURVEILLANCE PENDANT LE BRÛLAGE!
Français
Schémas du câblage
SW1 = Interrupteur d’alimentation (4 positions)
C1 - C3 = Contacteur et bobines du contacteur
TC 1 = Interrupteur de haute limite normalement fermé 77°C
TC 2 = Interrupteur de haute limite normalement fermé 77°C
TO = Commut. de refroid./ventilation norm. ouvert 37°C
R1 - R9 = Éléments chauffants
PCB1 = Circuit imprimé avec indicateur DEL « en marche
»
M = Moteur de ventilateur
L = Lampe de l'indicateur du ventilateur « en marche
»
CB1 - CB6 = Disjoncteurs 1 à 6 (30 ampères
)
MC1 = Condensateur du moteu r
Position du
Commutateur
DXH2000
DXH2003
Protection maximale contre les surcharges...100A / 2-Pole
SCHÉMA DE CÂBLAGE MODÈLE
SW1 = Interrupteur d’alimentation (4 positions)
C1 - C3 = Contacteur et bobines du contacteur
TC 1 = Interrupteur de haute limite normalement fermé 77°C
TC 2 = Interrupteur de haute limite normalement fermé 77°C
TO = Commut. de refroid./ventilation norm. ouvert 37°C
R1 - R9 = Éléments chauffants
PCB1 = Circuit imprimé avec indicateur DEL « en marche »
?
L = Lampe de l'indicateur du ventilateur « en marche »?
M = Moteur de ventilateur
MC1 = Condensateur du moteur
SCHÉMA DE CÂBLAGE MODÈLE
Protection maximale contre les surcharge
Position du
Commutateur

8
NE JAMAIS LAISSER LE CHAUFFAGE SANS SURVEILLANCE PENDANT LE BRÛLAGE!NE JAMAIS LAISSER LE CHAUFFAGE SANS SURVEILLANCE PENDANT LE BRÛLAGE!NE JAMAIS LAISSER LE CHAUFFAGE SANS SURVEILLANCE PENDANT LE BRÛLAGE!
Français
Liste des pièces DXH2000
RÉF. #..................ITEM#...............DESCRIPTION
1..........................N/A.....................COUVERCLE, HAUT, COQUE, EXTÉRIEUR
2..........................N/A.....................PANNEAU, AVANT
3..........................N/A.....................PANNEAU, ARRIÈRE
4..........................N/A.....................ÉCRAN, RADIATION, TUBE
5..........................N/A.....................BASE, PLAQUE
6..........................N/A.....................PANNEAU, LATÉRAL, GAUCHE
7..........................N/A.....................PANNEAU, LATÉRAL, DROIT
8..........................N/A.....................SUPPORT, MONTAGE, MOTEUR
9..........................41080 ................
SUPPORT, COMMUTATEUR, LIMITE ÉLEVÉE
10........................N/A.....................
SUPPORT, CONTACTEUR, ÉLÉMENT, CHAUFFANT
11........................41082 ................GARDE, GRILLE, ARRIÈRE
12........................41083 ................PALE, VENTILATEUR
13........................41084 ................ÉLÉMENT, CHAUFFANT
14........................41085 ................PANNEAU, CONTRÔLE, PLASTIQUE
15........................41086 ................CONTACTEUR, ÉLÉMENT, CHAUFFANT
16........................41087 ................COMMUTATEUR, PRINCIPAL, 4, POSITION
17........................41088 ................
COMMUTATEUR, VENTILATEUR, REFROID., 37 ºC
18........................41089 ................INDICATEUR, VENTILATEUR EN MARCHE
19........................41090 ................DISJONCTEUR, CIRCUIT, 30 AMPÈRES
20........................41091 ................BAGUE, TENSION, RÉDUCTEUR
RÉF. #..................ITEM#...............DESCRIPTION
21........................41092 ................
SUPPORT, COMMUTATEUR, VENTILATEUR, REFROID.
22........................N/A.....................SUPPORT, MONTAGE SUR CÂBLE
23........................N/A.....................SUPPORT, BORNIER, CÂBLAGE
24........................41051 ................PORTE, ACCÈS
25........................41064 ................GARDE, GRILLE, AVANT
26........................41029 ................SUPPORT, ÉLÉMENT CHAUFFANT
27........................41030 ................PIED, CAOUTCHOUC
28........................41031 ................CLIP, SONDE, TUBE CAPILLAIRE
29........................41067 ................MOTEUR, VENTILATEUR
30........................41094 ................BORNIER, CÂBLAGE
31........................41070 ................CONDENSATEUR, MOTEUR, DÉMARREUR
32........................41032 ................COMMUTATEUR, LIMITE ÉLEVÉE, 77
ºC
33........................41053 ................
CIRCUIT IMPRIMÉ, CHALEUR ACTIVÉE, L’INDICATEUR
34........................41095 ................POIGNÉE, TRANSPORT
35........................41027 ................CONTROL, TERMOSTÁTICO, PLÁSTICO
36........................41034 ................BOUTON, THERMOSTAT, PLASTIQUE
37........................41036 ................BAGUE, PLASTIQUE, CÂBLE
38........................41096 ................BAGUE, PLASTIQUE, CÂBLE
39........................41081 ................ENSEMBLE ÉCRAN AVANT
40........................41100 ................
RAYONNEMENT TUBE DE PROTECTION AVEC SUPPORTS
AVERTISSEMENT :
N’utilisez que les pièces de remplacement du fabricant. L’utilisation d’autres pièces risque de causer
des blessures ou la mort. Les pièces de remplacement ne sont offertes que par le fabricant et doivent
être installées par une entreprise de service spécialisée..
Pour l’entretien
Veuillez appeler sans frais le 855-805-5745 www.dewalt.com
Nos heures de bureau sont de 8 h 00 à 17 h, fuseau horaire de l’est, du lundi au vendredi.
Veuillez inclure le numéro du modèle, la date d’achat et la description du problème lors de toute
communication.
This manual suits for next models
1
Table of contents
Languages:
Other DeWalt Heater manuals

DeWalt
DeWalt DXH40FA User manual

DeWalt
DeWalt DXH165 User manual

DeWalt
DeWalt DXH125FAVHC User manual

DeWalt
DeWalt DXH90CFAK User manual

DeWalt
DeWalt DXH210FAVT User manual

DeWalt
DeWalt DXH165 User manual

DeWalt
DeWalt DXH170FAVT User manual

DeWalt
DeWalt DXH12B User manual

DeWalt
DeWalt DXH1000TS User manual

DeWalt
DeWalt DXH330 User manual

DeWalt
DeWalt DXH85FAV User manual

DeWalt
DeWalt DXH65FAV User manual

DeWalt
DeWalt DXH50K User manual

DeWalt
DeWalt DXH190HD User manual

DeWalt
DeWalt DXH2003P User manual

DeWalt
DeWalt DXRH012E User manual

DeWalt
DeWalt DXH125FAV User manual

DeWalt
DeWalt DXH80KTHC User manual

DeWalt
DeWalt DXH50KTHC User manual

DeWalt
DeWalt DXPH060E User manual