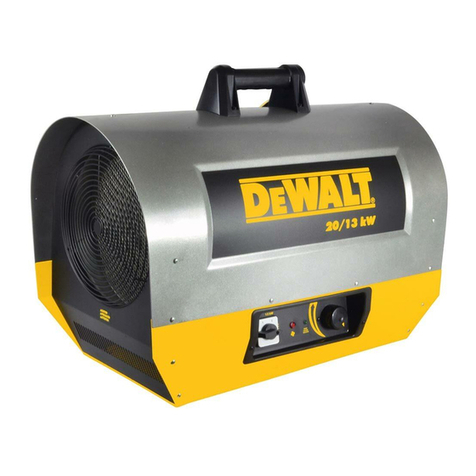
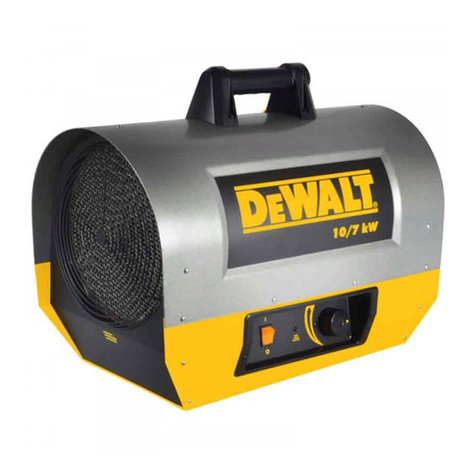
DeWalt DXH165 User manual

If you have questions or comments, contact us.
Pour toute question ou tout commentaire, nous contacter. Llámenos si tiene alguna pregunta o comentario.
855-805-5745 • www.dewalt.com
INSTRUCTION MANUAL
GUIDE DE’UTILISATION
MANUAL DE INSTRUCCIONES
Electric Forced Air Heater DXH165
Chauffage électrique à air forcé DXH165
Calentador eléctrico de aire forzado DXH165 2017 - 41000 - WO
READ INSTRUCTIONS CAREFULLY: Read
and follow all instructions. Place instructions in
a safe place for future reference. Do not allow
anyone who has not read these instructions to
assemble, adjust or operate the heater.
VEUILLEZ LIRE ATTENTIVEMENT LES INSTRUCTIONS :
Lisez et observez toutes les instructions. Conservez ces
instructions dans un endroit sécuritaire pour vous y référer
ultérieurement. Interdisez à quiconque n’ayant pas lu les
présentes directives d’assembler, de régler ou de faire
fonctionner cette fournaise.
LEA CUIDADOSAMENTE LAS INSTRUCCIONES:
Lea y siga todas las instrucciones. Conserve
estas instrucciones en un lugar seguro para futura
referencia. No permita que nadie que no haya leído
estas instrucciones arme, ajuste o use el calentador.

English
2
WARNING: DO NOT OPERATE THIS HEATER UNTIL YOU READ AND
UNDERSTAND THIS INSTRUCTION MANUAL FOR SAFETY, OPERATION,
AND MAINTENANCE INSTRUCTIONS.
CAUTION: Use of this heater in any means not described in this manual
may cause fire, electric shock, personal injury and/or property damage.
CAUTION: This heater is hot when in use. To avoid burns,
do not let bare skin touch hot surfaces. Keep combustible materials, such
as furniture, pillows, bedding, papers, clothes, and curtains at least 6 feet
( 1.8 m) from the front of the heater and keep them at least 2 feet (.6 m)
away from the sides and rear
CAUTION: In order to avoid unintended cycling of the heater, always
unplug or disconnect unit from power source when not in use.
CAUTION: Do not cover the power supply wiring or run the wiring under
any carpet or rugs. Arrange cord and connections away from traffic patterns
so it is not a tripping hazard.
CAUTION: Connect unit to only properly grounded outlets and
adequately sized and grounded electrical systems.
CAUTION: Do not use this unit with unapproved or under sized electrical
connections or wiring. They may overheat and cause a risk of fire.
Definitions: Safety Guidelines
The definitions below describe the level of severity for each signal word. Please read the manual and pay attention to these symbols.
DANGER: Indicates an imminently hazardous situation which, if not avoided, will result in death or serious injury.
WARNING: Indicates a potentially hazardous situation which, if not avoided, could result in death or serious injury.
CAUTION: Indicates a potentially hazardous situation which, if not avoided, may result in minor or moderate injury.
NOTICE: Indicates a practice not related to personal injury which, if not avoided, may result in property damage.
WARNING: Do not use the heater if the unit, plug or cord has
visible damage or the unit has malfunctioned. Contact a reputable
electrician before reusing.
WARNING: Do not expose to wet conditions; unit is intended
for indoor use only.
WARNING: Unit not intended for use in indoor areas where
heater may be exposed to water. Avoid use in bathrooms, laundry
rooms or any other areas where the unit may come in contact with
water.
WARNING: Do not insert or allow any foreign objects to enter
the unit via the intake or exhaust vents on the unit. Failure to
observe this warning may result in electric shock, fire or damage to
the unit.
WARNING: To prevent fire do not block either the air intake or
exhaust.
WARNING: Unit is equipped with internal active electrical
components that spark during use. Do not use in areas where
fumes from gasoline, paint or other flammable liquids may be
present.
WARNING: Extreme caution must be used when any heater is
used by or near children or invalids and whenever the heater is left
operating and unattended.
SAVE THESE INSTRUCTIONS.

English
3
CONTENTS
WARNINGS ............................................................................ 2
ASSEMBLY............................................................................. 3
OPERATION ........................................................................ 3-4
SPECIFICATIONS ................................................................... 4
CLEARANCES........................................................................ 4
MAINTENANCE...................................................................... 4
TROUBLESHOOTING ............................................................ 5
WIRING DIAGRAM ................................................................. 6
EXPLODED VIEW/PARTS LIST ............................................ 7-8
WARRANTY ........................................................................... 9
INSTRUCTIONS FOR ORDERING PARTS .............................. 9
Assembly
• Remove the heater and all of the packaging material from the box.
• Check all of the packing material for loose parts and set aside.
• Locate the hardware package containing four screws and the handle.
• Throughly inspect the heater for damage. If any is found do not contact the place
of purchase. Please call the Manufacturer at 855-805-5745.
• Use the screws to fasten the handle to the top of the unit. Note: Do not over
tighten the screws as they can crack the handle.
Handle and Hardware pack are located in the carton loose, be sure not to throw out.
Operational Information
The DeWalt Electric forced air heaters are designed to be used by professionals.
Heat is created by electric current passing through coiled metal elements bringing them up to very high temperatures. The fan then passes room air over the hot elements exchanging cold air for warm.
The air moving over the coils keeps them from reaching temperatures that are not safe for the normal operation of the heater. However it is important to keep all combustible materials and any objects that
may be sucked into the fan blades at a safe distance (please refer to the table on the next page for appropriate distances). Make sure that the fan blades remain unobstructed at all times.
Keep unit clean and dust free. Do not block unit intake or exhaust at any time.
Review and understand all warnings in this manual. Follow all local codes.
This unit is designed to be used with 115v ac only.
This unit is supplied with the appropriate (NEMA 5-15P) plug. Do not use any plug other than the one supplied by the manufacturer.
If damage has occurred please refer to the parts listing in this manual and contact the manufacturer for a replacement.
This unit is designed to be used with a properly grounded NEMA 5-15 outlet only (show on the right).
Operation
WARNING: Outlet must be properly grounded, failure to do so may result in electric shock.

English
4
ON/OFF FAULT/LED THERMOSTAT
WARNING:
Never attempt to service the heater while the unit is hot, In use, or plugged in. Only
qualified service technicians should service these units.
• Throughly inspect the unit prior to use.
• Keep heater clean and free of dust and debris.
• The use of an air compressor can be used to blow out the case. Be sure to only
use moderate air pressure as to not damage any internal components.
• A soft dry cloth should be used for cleaning of outer shell and handle.
• The fan motor is sealed and does not need to be lubricated.
Starting Instructions
1. Place the heater on a stable and level surface. Insure clearance to
combustibles are observed (see table on this page).
2. Turn thermostat counter-clockwise to lowest setting.
3. Plug the heater into a properly grounded outlet.
4. Depress the power switch into the on “I” position.
5. Turn thermostat knob up (clockwise) until desired temperature is reached.
6. The Heating element and fan will remain on until the temperature
setting is reached. The unit will cycle on and off as needed.
To Stop Heating
1. Rotate the thermostat knob to the lowest position.
2. Flip the power switch into the off “O” position.
3. Disconnect plug from power supply.
NOTE: This heater is equipped with an overheat limit switch which may cause the
heater to stop. This is indicated by a visual alarm when the power switch is in the
on position and the “fault” light comes on. (fig 1) Check and remove the cause of
the overheating before restarting. Preform steps 1 through 3 of the Stop Heating
procedure above. Once the unit is cool (may take up to 15 minutes) remove the
black cap near the handle base, using a flat head screw driver if necessary. Using
a non-metallic object, depress the reset switch inside the access hole. When the
heater is plugged back into power and turned on the “fault” light will dim and the
heater may be operated again. Replace the black cap into the access hole.
Maintenance
Specifications
0RGHO ';+
+HDW2XWSXW%78:$776
$LUIORZ&)0
(OHFWULFDO6XSSO\ 9$+]
3RZHU&RUGVXSSOLHG $:*
3OXJVXSSOLHG
1(0$S
0LQ([WHQVLRQ&RUG $:*
2SHUDWLQJ7HPSHUDWXUH
°
)
°
)
'LPHQVLRQV/´[:´[+´ ´[´[´
:HLJKWOEV OE
Clearance to Combustibles
2XWOHW)HHW P
5HDU)HHW P
7RP)HHW P
%RWWRP 1RQFRPEXVWLEOHIORRU
FIG. 1

English
5
Storage
When not in use, the heater must be disconnected from power source, dusted off and the cord
should be loosely wound around the handle.
For service :
Please call Toll-Free 855-805-5745 www.dewalt.com
Our office hours are 8:30 AM – 5:00 PM, EST, Monday through Friday.
Please include the model number, date of purchase, and description of problem in all
communication.
WARNING: USE ONLY MANUFACTURER’S REPLACEMENT
PARTS. USE OF ANY OTHER PARTS COULD CAUSE INJURY OR
DEATH. REPLACEMENT PARTS ARE ONLY AVAILABLE
DIRECT FROM THE FACTORY AND MUST BE INSTALLED BY A
QUALIFIED SERVICE AGENCY.
Troubleshooting
Symptoms Causes Solutions
Heater does not operate
Damaged or defective outlet Reset source circuit breaker or replace fuse.
Unit power switch not turned on Turn power switch on.
Heater does not operate (power switch illuminated)
Wrong thermostat setting Adjust thermostat knob to higher temperature.
Defective Thermostat, Heating Coil, or Power Switch Refer to page 8 for parts & services.
Heater does not operate (fault light illuminated) Thermal overload switch has been tripped Manual reset (see Stop Heating note on page 4).
Elements are on but motor does not rotate
Obstructed fan blade Unplug unit, verify fan blade spins freely.
Fan motor’s internal breaker tripped Unplug, let cool to room temperature.
Defective motor Refer to page 8 for parts & services.
Desired room temperature cannot be reached
Supply voltage lower than 120 Volts Verify the power supply voltage.
Unit undersize for application Refer to page 9 for information regarding service.
Overheating (repetitive heater faulting) Ambient temperatue too high Operate heater under 80°F ambient room temperature
(see Stop Heating note on page 4).

English
6
Wiring Diagram

English
7
DXH165

English
8
Parts List DXH165
REF. # .............ITEM#............ DESCRIPTION
1..........................41010 ................COVER, TOP, SHELL, OUTER
2..........................41011 ................PANEL, FRONT
3..........................41012 ................PANEL, REAR
4..........................41013 ................SHIELD, RADIATION, TUBE
5..........................41014 ................BASE, PLATE
6..........................41016 ................PANEL, SIDE, LEFT
7..........................41017 ................PANEL, SIDE, RIGHT
8..........................41018 ................BRACKET, MOUNT, MOTOR
9..........................41019 ................BLADE, FAN
10........................41020 ................GUARD, GRILL, FRONT
11........................41021 ................GUARD, GRILL, REAR
12........................41022 ................PANEL, CONTROL, PLASTIC
13........................41023 ................ELEMENT, HEATING
14........................41024 ................MOTOR, FAN
REF. # .............ITEM#............ DESCRIPTION
15........................41025 ................BUSHING, STRAIN, RELIEF
16........................40801 ................HANDLE, CARRY
17........................41027 ................KNOB, THERMOSTAT, PLASTIC
18........................N/A.....................BRACKET, WIRE MOUNT
19........................41029 ................SUPPORT, HEATING ELEMENT
20........................41030 ................FOOT, RUBBER
21........................41031 ................CLIP, SENSOR, CAPILLARY TUBE
22........................41032 ................SWITCH, HIGH LIMIT, 77C
23........................41015 ................
BOARD, CIRCUIT, HIGH LIMIT, INDICATOR
24........................41034 ................
THERMOSTAT, TEMPERATURE, AMBIENT
25........................41035 ................SWITCH, LIGHTED, ON/OFF
26........................41036 ................BUSHING, PLASTIC, WIRE
27........................41028 ................FRONT SCREEN ASSEMBLY
28........................41093 ................RADIATION SHIELD TUBE W/BRACKETS
* ..........................41097 ................Power Cord
*Not shown on drawing.
WARNING:
Use only manufacturer’s replacement parts. Use of any other parts could cause injury or death.
Replacement parts are only available direct from the factory and must be installed by a qualified
service agency.
For Service
Please call Toll-Free 855-805-5745 www.dewalt.com
Our office hours are 8:00 AM – 5:00 PM, EST, Monday through Friday.
Please include the model number, date of purchase, and description of problem in all communication.

9
English
INSTRUCTION MANUAL
Electric Forced-Air Heater DXH165
PARTS ORDERING INFORMATION:
Use only manufacturer’s replacement parts. Use of any other parts could cause
injury or death. Replacement parts are only available direct from the factory and
must be installed by a qualified service agency.
Warning:
PURCHASING: Accessories may be purchased at any DeWalt®local dealer or direct
from the factory
FOR INFORMATION REGARDING SERVICE:
Please call Toll-Free 855-805-5745
www.dewalt.com
Our office hours are 8:00 AM – 5:00 PM, EST, Monday through Friday.
Please include the model number, date of purchase, and description of problem in all
communication.
LIMITED WARRANTY:
DeWalt®ZDUUDQWVLWVKHDWHUVDQGDFFHVVRULHVWREHIUHHIURPGHIHFWVLQ
PDWHULDODQGZRUNPDQVKLSIRUDSHULRGRI\HDUIURPGDWHRISXUFKDVH
DeWalt®ZLOOUHSDLURUUHSODFHWKLVSURGXFWIUHHRIFKDUJHLILWKDVEHHQ
SURYHQWREHGHIHFWLYHZLWKLQWKH\HDUSHULRGDQGLVUHWXUQHGDWFXVWRPHU
H[SHQVHZLWKSURRIRISXUFKDVHWRDeWalt®ZLWKLQWKHZDUUDQW\SHULRG
CSA C22.2#46
'(:$/7*8$5$17(('728*+DQGWKH
\HOORZDQGEODFNFRORUVFKHPHDUHWUDGHPDUNV
RIWKH'(:$/7,QGXVWULDO7RRO&RXVHGXQGHU
OLFHQVH'(:$/7(*,(QHUFR*URXS,QF
8QGHUOLFHQVHIURP'HZDOW,QGXVWULDO7RRO&R
U.L. 1278
Other manuals for DXH165
1
Table of contents
Other DeWalt Heater manuals

DeWalt
DeWalt DXRH008E User manual

DeWalt
DeWalt DXH2000TS User manual

DeWalt
DeWalt DXH65FAV User manual
DeWalt
DeWalt DXH170FAVT User manual

DeWalt
DeWalt F332100 User manual

DeWalt
DeWalt DXH40FA User manual

DeWalt
DeWalt DXH135HD User manual

DeWalt
DeWalt DXH80KTHC User manual
DeWalt
DeWalt DXH1000TS User manual

DeWalt
DeWalt DXH190HD User manual

DeWalt
DeWalt DXRH012E User manual
DeWalt
DeWalt DXH45LP User manual

DeWalt
DeWalt DXH70KTFRHC User manual

DeWalt
DeWalt DXH70CFAV User manual

DeWalt
DeWalt DXH330 User manual

DeWalt
DeWalt DXH330 User manual

DeWalt
DeWalt DXH2003 User manual

DeWalt
DeWalt DXH125FAVHC User manual
DeWalt
DeWalt DXH135HD User manual

DeWalt
DeWalt DXH125FAV User manual