manuals.online logo
Brands
  1. Home
  2. •
  3. Brands
  4. •
  5. DeWalt
  6. •
  7. Measuring Instrument
  8. •
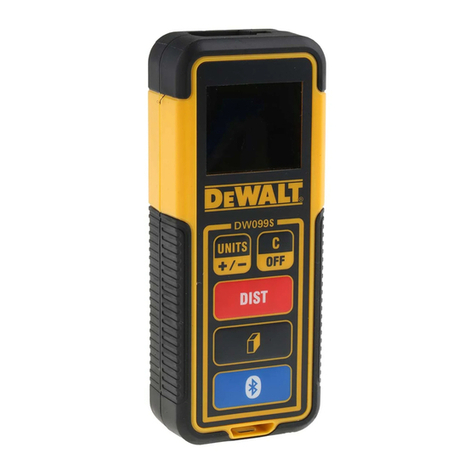
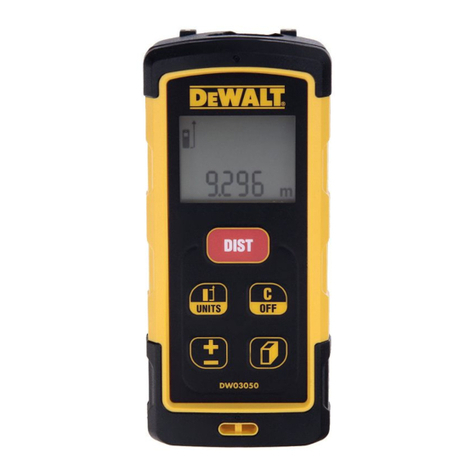
  9. DeWalt DW065E User manual

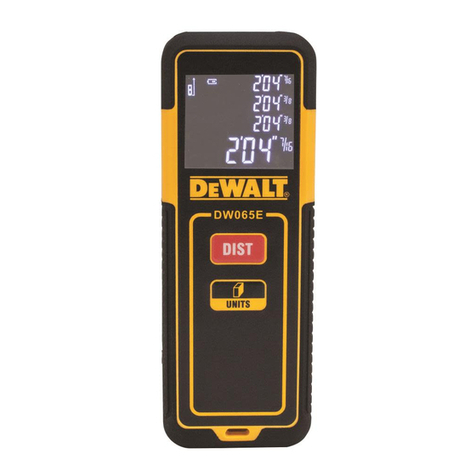
DeWalt DW065E User manual

Please read these instructions before operating the product.
오제품을 작동하기 전에 본 설명서를 읽으십시오.
www.dewalt.co.kr
NL
GR
PT
FIN
HU
BG
LV
ES
DK
CZ
E
NO
SK
RO
LT
F
SE
RU
PT
PL
SI
EE
TR
HR
DW065E
User Manual
사용 설명서
DeWALT Laser Safety, Maintenance, and Warranty
DeWALT 레이저 안전, 유지 보수 및 보증
DW065E
KR
E
User Manual 3
사용 설명서 8
Laser Safety, Maintenance, and Warranty 13
레이저 안전, 유지 보수 및보증 19
B1
2
D1
2
C
AAA
Figures/그림
3
A
1
2
3
4
E
6.21ft
6.17ft
1
2
3
6.21ft
6.17ft
4
F
G
4
EContents
• User Safety
• Battery Safety
• Setup (Load Batteries)
• Operation
• Warranty
• Specications
• Error Codes
Retain all sections of this manual for future
reference.
User Safety
WARNING:
Carefully read the Safety Instructions and
Product Manual before using this product.
The person responsible for the product must
ensure that all users understand and adhere to
these instructions.
WARNING:
The following label information is placed on
your laser tool to inform you of the laser class
for your convenience and safety.
The DW065E tool emits a visible laser beam, as shown
in Figure A.The laser beam emitted is Laser Class 2 per
IEC 60825-1 and complies with 21 CFR 1040.10 and
1040.11 except for deviations pursuant to Laser Notice
No. 50, dated June 24, 2007.
WARNING:
While the laser tool is in operation, be careful
not to expose your eyes to the emitting laser
beam (red light source). Exposure to a laser
beam for an extended time period may be
hazardous to your eyes. Do not look into the
beam with optical aids.
WARNING: To reduce the risk of injury, user
must read the Product User manual, Laser
Safety, and Battery Safety manuals.
FCC Compliance
This device complies with Part 15 of the FCC Rules.
Operation is subject to the following two conditions:
(1) This device may not cause harmful interference, and
(2) this device must accept any interference received,
including interference that may cause undesired
operation.
FCC Statement
This equipment has been tested and found to comply
with the limits for a Class B digital device, pursuant
to part 15 of the FCC rules.These limits are designed
to provide reasonable protection against harmful
interference in a residential installation. This equipment
generates, uses, and can radiate radio frequency energy
and, if not installed and used in accordance with the
instructions, may cause harmful interference to radio
communications. However, there is no guarantee that
interference will not occur in a particular installation.
If this equipment does cause harmful interference to
radio or television reception, which can be determined
by turning the equipment off and on, the user is
encouraged to try to correct the interference by one or
more of the following measures:
- Reorient or relocate the receiving antenna.
- Increase the separation between the equipment and
the receiver.
-
Connect the equipment into an outlet on a different
circuit (not the circuit to which the receiver is connected).
- Consult the dealer or an experienced radio/TV
technician for help.
Canada, Industry Canada (IC) Notices
Class B digital circuitry of this device complies with
Canadian ICES-003.This device complies with Industry
Canada license-exempt RSS standard(s). Operation is
subject to the following two conditions: (1) this device
may not cause interference, and (2) this device must
accept any interference, including interference that may
cause undesired operation of the device.
Under Industry Canada regulations, the radio
transmitter(s) in this device may only operate using
an antenna of a type and maximum (or lesser) gain
approved for the transmitter by Industry Canada. To
reduce potential radio interference to other users, the
antenna type and its gain should be so chosen that the
equivalent isotropically radiated power (e.i.r.p.) is not
more than that necessary for successful communication.
DeWalt, Slough, Bershire SL1 3YD, UK herewith
declares that the product DW065E is in compliance
with the essential requirements and all other provisions
of Directive 1999/S/EC. Please contact DeWalt for DoC.
5
E
E
Battery Safety
WARNING: Batteries can explode or leak and
cause serious injury or re. To reduce the risk:
ALWAYS follow all instructions and warnings
on the battery label and package.
DO NOT short any battery terminals.
DO NOT charge alkaline batteries.
DO NOT mix old and new batteries. Replace
all of them at the same time with new
batteries of the same brand and type.
DO NOT mix battery chemistries.
DO NOT dispose of batteries in re.
ALWAYS keep batteries out of reach of
children.
ALWAYS remove batteries if the device will
not be used for several months.
NOTE: Ensure that the recommended
batteries are used.
NOTE: Ensure the batteries are inserted in the
correct manner, with the correct polarity.
Setup (Load Batteries)
1. Locate the battery compartment latch on the back
of the DW065E tool (Figure B #2).
2. Using your finger, pull the latch up to unlock and
remove the battery door (Figure C #1 and #2).
3. Insert two AAA batteries, making sure to position
the -and +ends of each battery as noted inside
the battery compartment (Figure C #3).
4. Slide the pins at the bottom of the battery door
into the notches in the battery compartment (Figure
C #4).
5. Push the battery door down until it snaps in place
(Figure C #5).
When the tool is ON, the battery level appears in the
display window (Figure E #1).
Operation
Measuring the Distance to a Wall or Object
1. Click (Figure A #3) to turn on the tool.
2. Point the laser at the top of the tool (Figure A #1)
toward the wall or object whose distance you need
to measure (Figure D #1).
3. Click to measure the distance from the bottom
of the tool to the wall or object (Figure D #2).
4. At the bottom of the display window (Figure A #2),
view the current measurement (Figure E #3).
To take a new measurement, click to move the
current measurement up to the previous line on the
display window (Figure E #3).Then repeat steps 2-4.
Measuring Distances Continuously
To take a series of measurements as you move
around, change to Continuous Measure mode.
1. Click (Figure A #3) to turn on the tool.
2. Point the laser at the top of the tool (Figure A #1)
toward the wall or object whose distance you need
to measure (Figure D #1).
3. Click and hold for 4 seconds to turn on the
Continuous Measure mode.
4. At the bottom of the display window (Figure A #2),
view the current measurement (Figure E #3), which
will keep changing as you move the tool.
5. To take the current measurement (from the
bottom of the tool to the wall or object) and exit
Continuous Measure mode, click (Figure E #3).
To take a new measurement, click to move the
current measurement up to the previous line on the
display window. Then repeat steps 2-5.
Measuring Area
You can measure the area of a wall, floor, or object.
1. Click (Figure A #3) to turn on the tool.
2. Click to show on the display window
(Figure E #4).
3. Measure the width.
• Point the top of the tool at one side of the
target (wall, floor, or object).
• Position the bottom of the tool at one end of the
target and point the laser dot across the width
(Figure F #1).
• Click to display the width measurement at
the top of the display window.
4. Measure the length.
• Position the bottom of the tool at one end of the
target and point the laser dot across the length
(Figure F #2).
6
E• Click to display the length measurement on
the second line of the display window.
5. View the Area measurement at the bottom of the
display window (Figure E #3).
Measuring Volume
You can measure the volume of a room or object.
1. Click (Figure A #3) to turn on the tool.
2. Click twice to show on the display
window (Figure E #4).
3. Measure the width.
• Point the top of the tool at one side of the
target (room or object).
• Position the bottom of the tool at one end of the
target and point the laser dot across the width
(Figure F #1).
• Click to display the width measurement at
the top of the display window.
4. Measure the length.
• Position the bottom of the tool at one end of the
target and point the laser dot across the length
(Figure F #2).
• Click to display the length measurement on
the second line of the display window.
5. Measure the height.
• Positon the bottom of the tool at one end of the
target and point the laser dot across the height
(Figure F #3).
• Click to take the measurement.
6. View the Volume measurement at the bottom of
the display window (Figure E #3).
Changing the Unit of Measure
Once the current measurement is taken (the device is
not in Continuous Measure mode), you can change the
unit of measure from decimal ft (6.21 ft) to fractional ft
(6'02"9/16), fractional ft to meters (1.894 m), meters to
inches (74 9/16 in), or inches to decimal ft.
Press and hold until you see the measurement
change (2-3 seconds).
Turning Off the Tool
The tool can be turned off in either of these ways:
• Press and hold for several seconds (until the
display window clears).
• If you do not use the tool for 120 seconds, it will
automatically turn off.
Three Year Limited Warranty
DeWALT will repair, without charge, any defects due
to faulty materials or workmanship for three years
from the date of purchase.This warranty does not
cover part failure due to normal wear or tool abuse.
For further detail of warranty coverage and warranty
repair information, visit www.DeWALT.com or call
1–800–4-DeWALT (1–800–433–9258). This warranty
does not apply to accessories or damage caused
where repairs have been made or attempted by others.
This warranty gives you specific legal rights and you
may have other rights which vary in certain states or
provinces.
In addition to the warranty, DeWALT tools are covered
by our:
1 YEAR FREE SERVICE
DeWALT will maintain the tool and replace worn parts
caused by normal use, for free, any time during the first
year after purchase.
90 DAY MONEY BACK GUARANTEE
If you are not completely satisfied with the
performance of your DeWALT Power Tool, Laser, or
Nailer for any reason, you can return it within 90 days
from the date of purchase with a receipt for a full
refund - no questions asked.
RECONDITIONED PRODUCT: Reconditioned product
is covered under the 1 Year Free Service Warranty.
The 90 Day Money Back Guarantee and the Three
Year Limited Warranty do not apply to reconditioned
product.
FREE WARNING LABEL REPLACEMENT: If your
warning labels become illegible or are missing, call
1-800-4-DeWALT or visit your local service center for a
free replacement.
7
E
E
Specications
Range 6in to 65ft (15cm to 20m)
Measuring Accuracy* ± 1/8in (± 3mm)*
Smallest Unit Displayed ± 1/16in (± 1mm)
Laser Class Class 2 (IEC/EN60825-1: 2014)
Laser Type ≤ 1.0mW @ 620-690nm
Laser/Backlight Automatic Switch-off After 30s
Unit Automatic Switch-off After 90s
Continuous Measuring Yes
Area/Volume Yes
Battery Life (2 x AAA) Up to 3000 Measurements
Dimension (H x D x W) 4.64 x 1.69 x 1.02in (118 x 43 x 26mm)
Weight (without Batteries) 2.5oz (71g)
Storage Temperature Range -13° F ~ 158° F (-25° C ~ +70 C)
Operating Temperature Range 32° F ~ 104° F (0° C ~ +40° C)
*Measuring Accuracy depends on the current conditions:
• Under favorable conditions (good target surface and room temperature), up to 33ft (10m).
• Under unfavorable conditions (bright sunlight, a very weak reecting target surface, or large temperature
uctuations), the error can increase by to ± 0.003 in/ft (± 0.25mm/m) for distances over 33ft (10m).
Error Codes
If INFO appears on the display window with a Code number, perform the corresponding Corrective Action.
Code Description Corrective Action
101 Received Signal Too Weak,
Measuring Time Too Long
Use the target plate or change the target surface.
102 Received Signal Too High Target is too reective. Use the target plate or change the
target surface.
201 Too Much Background Light Reduce the background light on the target area.
202 Laser Beam Interrupted Remove the obstacle and repeat the measurement.
203 Insufcient Power Replace the batteries.
301 Temperature Too High Allow the device to cool down to a temperature within the
specied Operating Temperature Range.
302 Temperature Too Low Allow the device to warm up to a temperature within the
specied Operating Temperature Range.
401 Hardware Error Switch the device on/off several times. If the error still occurs,
return the defective device to the Service Center or distributor.
Refer to the Warranty.
402 Unknown Error
Contact the Service Center or distributor. Refer to the Warranty.
8
KR 목차
• 사용자 안전
• 배터리 안전
• 설치(배터리 장착)
• 조작
• 보증
• 오류 코드
• 사양
향후 참고할 수있도록 모든 설명서를 보관해
두십시오.
사용자 안전
경고:
본제품을 사용하기 전에 안전 지침과 제
품설명서를 주의 깊게 읽고 숙지하십시
오. 제품의 책임자는 모든 사용자가 이러
한설명서와 지침 사항을 이해하고 충실히
지키는지 확인 할의무가 있습니다.
경고:
사용자의 안전과 편의를 위해 레이저 등급
을알려 주기 위해 다음과 같은 라벨 정보
가레이저 공구에 부착되어 있습니다.
DW065E공구는 그림
A
#1와같이 가시 레이저
빔을 방출합니다. 방출되는 레이저 빔은 레이저
2등급(IEC 60825-1)이고 2007년6월24 일자의
레이저 고지 번호50에의한 예외 사항을 제외하고
21 CFR 1040.10및1040.11을준수합니다.
경고:
레이저 공구가 작동 중일 때는 방출되고 있
는레이저 빔(적색 광원)에눈이 노출되지
않도록 주의하십시오. 장기간 레이저 빔에
노출되면 눈에 유해할 수있습니다. 광학
보조 기구로 빔을 들여다보지 마십시오.
경고: 부상 위험을 줄이려면 사용자는 제품
사용 설명서, 레이저 안전 설명서와 배터리
안전 정보를 주의 깊게 읽어야
합니다.
FCC 규정 준수
이장치는 FCC규칙의 제15부를 준수합니다.
작동은 다음과 같은 두가지 조건을 따릅니다.
1)이장치는 전파장해를 야기하지 않으나, 2)전파
방해가 되는 외부 수신으로 인하여, 오작동이 발생
할수있습니다.
FCC 성명
이장비는 테스트를 통해 FCC규정 제15부에 따른
B등급 디지털 장치의 한도를 준수하는 것으로 확
인되었습니다. 이기준은 주거용 건물에서 유해 간
섭에 대한 적절한 보호를 제공하기 위한 기준입니
다. 이장비는 무선 주파수 에너지를 발생시키고,
사용하며 방출할 수있으므로, 지침에 따라 설치하
고사용하지 않을 경우 무선 통신에 유해한 전파방
해를 야기할 수있습니다. 이장치는 휴대용입니다.
제외 임계값은 0.887<3입니다.
그러나, 전파방해가 특정한 건물에서 발생되지 않
는다는 보장은 없습니다. 이장비가 라디오 또는 텔
레비전 수신에 전파방해를 야기하는 경우(장비를
껐다가 켜서 확인할 수있음), 사용자는 다음 조치
중하나 이상을 취해서 간섭을 바로잡도록 해야 합
니다.
- 수신 안테나의 방향을 바꾸거나 위치를 이동합
니다.
- 장비와 수신기 사이의 거리를 벌립니다.
- 장비를 다른 회로에 있는 콘센트에 연결합니다
(수신기가 연결되어 있는 회로가 아님).
-
판매업체나 숙련된 라디오/TV기술자에게 지원을
요청합니다.
캐나다, 캐나다 산업성 (IC)공고문
이장치의 B급디지털 회로는 캐나다의 ICES-003
을준수합니다. 이장치는 캐나다 산업성 허가 면제
RSS 표준을 준수합니다. 작동은 다음과 같은 두가
지조건을 따릅니다. 1)이장치는 전파방해를 야기
하지 않으나, 2)전파방해가 되는 외부 수신으로 인
하여, 오작동이 발생할 수있습니다.
캐나다 산업성 규정 하에, 이장치의 무선 송신기는
캐나다 산업성에서 송신기로 승인된 유형의 안테
나와 최대치 이하의 안테나 이득을 활용해야 합니
다. 잠재적인 전파방해를 줄이기 위해서, 송신에 필
요한 수준으로, 실효 등방성 복사 전력 (e.i.r.p)동등
수준의 안테나 유형과 이득을 선택하여 선택해야
합니다.
9
KR
목차
• 사용자 안전
• 배터리 안전
• 설치(배터리 장착)
• 조작
• 보증
• 오류 코드
• 사양
향후 참고할 수있도록 모든 설명서를 보관해
두십시오.
사용자 안전
경고:
본제품을 사용하기 전에 안전 지침과 제
품설명서를 주의 깊게 읽고 숙지하십시
오. 제품의 책임자는 모든 사용자가 이러
한설명서와 지침 사항을 이해하고 충실히
지키는지 확인 할의무가 있습니다.
경고:
사용자의 안전과 편의를 위해 레이저 등급
을알려 주기 위해 다음과 같은 라벨 정보
가레이저 공구에 부착되어 있습니다.
DW065E공구는 그림
A
#1와같이 가시 레이저
빔을 방출합니다. 방출되는 레이저 빔은 레이저
2등급(IEC 60825-1)이고 2007년6월24 일자의
레이저 고지 번호50에의한 예외 사항을 제외하고
21 CFR 1040.10및1040.11을준수합니다.
경고:
레이저 공구가 작동 중일 때는 방출되고 있
는레이저 빔(적색 광원)에눈이 노출되지
않도록 주의하십시오. 장기간 레이저 빔에
노출되면 눈에 유해할 수있습니다. 광학
보조 기구로 빔을 들여다보지 마십시오.
경고: 부상 위험을 줄이려면 사용자는 제품
사용 설명서, 레이저 안전 설명서와 배터리
안전 정보를 주의 깊게 읽어야
합니다.
FCC 규정 준수
이장치는 FCC규칙의 제15부를 준수합니다.
작동은 다음과 같은 두가지 조건을 따릅니다.
1)이장치는 전파장해를 야기하지 않으나, 2)전파
방해가 되는 외부 수신으로 인하여, 오작동이 발생
할수있습니다.
FCC 성명
이장비는 테스트를 통해 FCC규정 제15부에 따른
B등급 디지털 장치의 한도를 준수하는 것으로 확
인되었습니다. 이기준은 주거용 건물에서 유해 간
섭에 대한 적절한 보호를 제공하기 위한 기준입니
다. 이장비는 무선 주파수 에너지를 발생시키고,
사용하며 방출할 수있으므로, 지침에 따라 설치하
고사용하지 않을 경우 무선 통신에 유해한 전파방
해를 야기할 수있습니다. 이장치는 휴대용입니다.
제외 임계값은 0.887<3입니다.
그러나, 전파방해가 특정한 건물에서 발생되지 않
는다는 보장은 없습니다. 이장비가 라디오 또는 텔
레비전 수신에 전파방해를 야기하는 경우(장비를
껐다가 켜서 확인할 수있음), 사용자는 다음 조치
중하나 이상을 취해서 간섭을 바로잡도록 해야 합
니다.
- 수신 안테나의 방향을 바꾸거나 위치를 이동합
니다.
- 장비와 수신기 사이의 거리를 벌립니다.
- 장비를 다른 회로에 있는 콘센트에 연결합니다
(수신기가 연결되어 있는 회로가 아님).
-
판매업체나 숙련된 라디오/TV기술자에게 지원을
요청합니다.
캐나다, 캐나다 산업성 (IC)공고문
이장치의 B급디지털 회로는 캐나다의 ICES-003
을준수합니다. 이장치는 캐나다 산업성 허가 면제
RSS 표준을 준수합니다. 작동은 다음과 같은 두가
지조건을 따릅니다. 1)이장치는 전파방해를 야기
하지 않으나, 2)전파방해가 되는 외부 수신으로 인
하여, 오작동이 발생할 수있습니다.
캐나다 산업성 규정 하에, 이장치의 무선 송신기는
캐나다 산업성에서 송신기로 승인된 유형의 안테
나와 최대치 이하의 안테나 이득을 활용해야 합니
다. 잠재적인 전파방해를 줄이기 위해서, 송신에 필
요한 수준으로, 실효 등방성 복사 전력 (e.i.r.p)동등
수준의 안테나 유형과 이득을 선택하여 선택해야
합니다.
배터리 안전
경고:
배터리는 폭발하거나 누출될 수있
고, 심각한 부상 또는 화재를 야기할 수있
습니다. 이러한 위험을 줄이려면:
항상 배터리 라벨 및포장에 표시된 모든
지침 및경고를 주의하여 따르십시오.
배터리 단자를 단락시키지 마십시오.
알카라인 배터리를 충전하지 마십시오.
오래된 배터리와 새배터리를 함께 사용하
지마십시오. 동일한 상표 및유형의 새배
터리로 한번에 모두 교체하십시오.
배터리 화학 성질을 혼합하지 마십시오.
배터리를 불속에 버리지 마십시오.
항상 배터리는 어린이의 손이 닿지 않는
곳에 보관하십시오.
장치를 수개월 동안 사용하지 않을 경우
항상 배터리를 빼놓으십시오.
참고: 권장 배터리가 사용되고 있는지 확
인하십시오.
참고:
배터리가 정확한 극성에 따라 정확
한방식으로 끼워져 있는지 확인하십시오.
설치(배터리 장착)
1. 공구 뒤쪽에 있는 배터리 함래치의 위치를 찾
습니다(그림 B#2).
2. 손가락을 사용해서 래치를 위로 당겨 잠금을
풀고 배터리 도어를 제거합니다(그림 C)
3. 배터리 함안쪽에 표시된 것과 같이 각배터리
의-및+끝의 위치를 확인하면서 두개의 AA배
터리를 끼웁니다(그림 C#3).
4. 배터리 도어 하단에 있는 핀을 배터리 함의 노
치로 밉니다 (그림 C#4).
5. 제자리에 고정될 때까지 배터리 도어를 아래로
밉니다(그림 C#5).
공구가 켜지면, 배터리 용량이 디스플레이 창에
나타납니다(그림 E#1).
조작
벽또는 물체까지의 거리 측정
1. (그림 A#3)을클릭하여 공구를 켭니다.
2. 공구(그림 A#1)상단에서 레이저가 측정해야
하는 거리에 있는 벽이나 물체 쪽을 향하도록
합니다(그림 D).
3. 를클릭하여 공구 하단에서 벽이나
물체까지의 거리를 측정합니다. (그림 D#2)
4. 디스플레이 창하단에(그림 A#2),현재 측정
을표시합니다(그림 E#3).
새로운 측정을 하려면, 를클릭해서 현재 측
정을 디스플레이 창의 이전 라인으로 이동시킵니
다(그림
E
#2). 그런 다음 2-4 단계를 반복합니다.
연속해서 거리 측정하기
돌아다니면서 연속해서 측정을 하려면 연속 측정
모드로 변경합니다.
1. (그림 A#3)을클릭하여 공구를 켭니다.
2. 공구(그림 A#1)위쪽에서 레이저가 측정해야
하는 거리에 있는 벽이나 물체 쪽을 향하도록
합니다(그림 D#1).
3. 를클릭하고 4 초간 잡아서 연속 측정 모
드를 켭니다.
4. 디스플레이 창하단에서(그림 A#2), 현재 측
정을 보고(그림 E#3),공구를 이동함에 따라
계속해서 변경합니다.
5.
현재 측정을 하려면(공구에서 벽이나 물체까지)
연속 측정 모드를 종료하고 (그림
E
#3), 을클릭
합니다.
새로운 측정을 하려면, 를클릭해서 현재 측
정을 디스플레이 창의 이전 라인으로 이동시킵니
다. 그런 다음 2-5 단계를 반복합니다.
면적 측정하기
벽, 바닥 또는 물체의 면적을 측정할 수있습니다.
1. (그림 A#3)을클릭하여 공구를 켭니다.
2. 를클릭해서 디스플레이 창에 를표
시합니다(그림 E#4).
3. 너비를측정합니다.
• 표적의 한쪽에 공구의 상단이 향하도록 합
니다(벽, 바닥 또는 물체).
10
KR • 표적의 한쪽끝에 공구의 위치를 정하고 레
이저 점이 가로질러 향하게 합니다. (공구
하단에서 측정을 하고 있는 경우 그림 F#1
은공구의 배치 위치를 표시합니다).
• 를클릭해서 디스플레이 창의 상단에
너비 측정을 표시합니다.
4. 길이를측정합니다.
• 표적의 한쪽끝에 공구의 위치를 정하고 레
이저 점이 길이 전체에 향하도록 합니다. (공
구의 하단에서 측정을 하고 있는 경우 그림
F#2는공구의 배치 위치를 보여줍니다.)
• 를클릭해서 디스플레이 창의 두번째
라인에 길이 측정을 표시합니다.
5. 디스플레이 창하단에 면적 측정을 표시합니다
(그림 E#3).
부피 측정
공간이나 물체의 부피를 측정할 수있습니다.
1. (그림 A#3)을클릭하여 공구를 켭니다.
2. 를클릭해서 디스플레이 창에 을표
시합니다(그림 E#4).
3. 너비를측정합니다.
• 표적(공간 또는 물체)의한쪽에 공구의 상단
이향하도록 합니다.
• 표적의 한쪽끝에 공구의 위치를 정하고 레
이저 점이 가로질러 향하게 합니다. (공구
하단에서 측정을 하고 있는 경우 그림 F#1
은공구의 배치 위치를 표시합니다).
• 를클릭해서 디스플레이 창의 상단에
너비 측정을 표시합니다.
4. 길이를측정합니다.
• 표적의 한쪽끝에 공구의 위치를 정하고
레이저 점이 길이 전체에 향하도록 합니다.
(공구 하단에서 측정을 하고 있는 경우 그림
F#2 은공구의 배치 위치를 표시합니다).
• 를클릭해서 디스플레이 창의 두번째
라인에 길이 측정을 표시합니다.
5. 높이를측정합니다.
• 표적의 한쪽끝에 공구의 위치를 정하고 레
이저 점이 높이 전체에 향하도록 합니다.
(공구 하단에서 측정을 하고 있는 경우 그림
F#3은공구의 배치 위치를 표시합니다).
• 를클릭해서 디스플레이 창의 세번째
라인에 높이 측정을 표시합니다.
6. 디스플레이 창하단에 부피 측정을 표시합니다
(그림 E#3).
측정 단위 변경
현재 측정을 했으면(장치가 연속 측정 모드에
없음), 소수 ft (6.21 ft)에서분수 ft (6’02”9/16)로,
분수 ft 에서 미터(1.894 m)로, 미터에서 인치
(74 9/16 in)로또는 인치에서 소수 ft로측정
단위를 변경할 수있습니다.
전원 끄기
다음 방법 중하나로 공구를 끌수있습니다.
•
을몇초간 계속 누르고 있습니다(디스플레이
창이 사라질 때까지)
.
• 공구를 120초동안 사용하지 않을 경우 자동으로
꺼집니다.
환경 보호
분리 수거. 본제품을 일반 가정용 쓰레기로
처리하면 안됩니다.
DeWALT 제품을 교체해야 하거나 더이상 쓸모가
없어졌다고 판단될 때는 본제품을 가정용 쓰레
기와 함께 처리하지 마십시오. 이제품은 분리 수
거하십시오.
사용하던 제품과 포장을 분리 수거하면
자원을 재활용 및재사용할 수있습니다.
재활용 자원을 이용하면 환경 오염 이
방지되고 고철 자원에 대한 수요를 줄일 수있습
니다.
지역에 따라 가정용 가전제품을 분리 수거하는
규정이 마련되어 있거나 새로운 제품을 구입할
때판매점에서 폐기 방법을 알려줄 수있습니다.
DeWALT 는사용이 끝난 DeWALT 제품을 수집하
여재활용하기 위한 시설을 운영하고 있습니다
이서비스를 활용하려면 당사가 폐제품 수거를
위임한 공인 수리 대리점에 제품을 반환해 주십
시오.
본사용 설명서에 기재된 연락처로 가까운 DeWALT
영업소에 연락하면 가까운 공인 수리 대리점 위치를
확인할 수있습니다. 또는 다음 웹사이트를 방문하여
공인 DeWALT 수리 지정점 목록과 A/S 및연락처 등
자세한 정보를 찾아볼 수있습니다
www.dewalt.co.kr
11
KR
• 표적의 한쪽끝에 공구의 위치를 정하고 레
이저 점이 가로질러 향하게 합니다. (공구
하단에서 측정을 하고 있는 경우 그림 F#1
은공구의 배치 위치를 표시합니다).
• 를클릭해서 디스플레이 창의 상단에
너비 측정을 표시합니다.
4. 길이를측정합니다.
• 표적의 한쪽끝에 공구의 위치를 정하고 레
이저 점이 길이 전체에 향하도록 합니다. (공
구의 하단에서 측정을 하고 있는 경우 그림
F#2는공구의 배치 위치를 보여줍니다.)
• 를클릭해서 디스플레이 창의 두번째
라인에 길이 측정을 표시합니다.
5. 디스플레이 창하단에 면적 측정을 표시합니다
(그림 E#3).
부피 측정
공간이나 물체의 부피를 측정할 수있습니다.
1. (그림 A#3)을클릭하여 공구를 켭니다.
2. 를클릭해서 디스플레이 창에 을표
시합니다(그림 E#4).
3. 너비를측정합니다.
• 표적(공간 또는 물체)의한쪽에 공구의 상단
이향하도록 합니다.
• 표적의 한쪽끝에 공구의 위치를 정하고 레
이저 점이 가로질러 향하게 합니다. (공구
하단에서 측정을 하고 있는 경우 그림 F#1
은공구의 배치 위치를 표시합니다).
• 를클릭해서 디스플레이 창의 상단에
너비 측정을 표시합니다.
4. 길이를측정합니다.
• 표적의 한쪽끝에 공구의 위치를 정하고
레이저 점이 길이 전체에 향하도록 합니다.
(공구 하단에서 측정을 하고 있는 경우 그림
F#2 은공구의 배치 위치를 표시합니다).
• 를클릭해서 디스플레이 창의 두번째
라인에 길이 측정을 표시합니다.
5. 높이를측정합니다.
• 표적의 한쪽끝에 공구의 위치를 정하고 레
이저 점이 높이 전체에 향하도록 합니다.
(공구 하단에서 측정을 하고 있는 경우 그림
F#3은공구의 배치 위치를 표시합니다).
• 를클릭해서 디스플레이 창의 세번째
라인에 높이 측정을 표시합니다.
6. 디스플레이 창하단에 부피 측정을 표시합니다
(그림 E#3).
측정 단위 변경
현재 측정을 했으면(장치가 연속 측정 모드에
없음), 소수 ft (6.21 ft)에서분수 ft (6’02”9/16)로,
분수 ft 에서 미터(1.894 m)로, 미터에서 인치
(74 9/16 in)로또는 인치에서 소수 ft로측정
단위를 변경할 수있습니다.
전원 끄기
다음 방법 중하나로 공구를 끌수있습니다.
•
을몇초간 계속 누르고 있습니다(디스플레이
창이 사라질 때까지)
.
• 공구를 120초동안 사용하지 않을 경우 자동으로
꺼집니다.
환경 보호
분리 수거. 본제품을 일반 가정용 쓰레기로
처리하면 안됩니다.
DeWALT 제품을 교체해야 하거나 더이상 쓸모가
없어졌다고 판단될 때는 본제품을 가정용 쓰레
기와 함께 처리하지 마십시오. 이제품은 분리 수
거하십시오.
사용하던 제품과 포장을 분리 수거하면
자원을 재활용 및재사용할 수있습니다.
재활용 자원을 이용하면 환경 오염 이
방지되고 고철 자원에 대한 수요를 줄일 수있습
니다.
지역에 따라 가정용 가전제품을 분리 수거하는
규정이 마련되어 있거나 새로운 제품을 구입할
때판매점에서 폐기 방법을 알려줄 수있습니다.
DeWALT 는사용이 끝난 DeWALT 제품을 수집하
여재활용하기 위한 시설을 운영하고 있습니다
이서비스를 활용하려면 당사가 폐제품 수거를
위임한 공인 수리 대리점에 제품을 반환해 주십
시오.
본사용 설명서에 기재된 연락처로 가까운 DeWALT
영업소에 연락하면 가까운 공인 수리 대리점 위치를
확인할 수있습니다. 또는 다음 웹사이트를 방문하여
공인 DeWALT 수리 지정점 목록과 A/S 및연락처 등
자세한 정보를 찾아볼 수있습니다
www.dewalt.co.kr
오류 코드
코드 번호와 함께 정보가 디스플레이 창에 나타나면, 해당하는 시정 조치를 수행합니다.
코드 설명 시정 조치
101 수신한 신호가 너무 약함,
측정 시간이 너무 김
표적판을 사용하거나 표적 표면을 변경하십시오.
102 수신한 신호가 너무 높음 표적이 너무 많은 빛을 반사합니다. 표적판을 사용하거나
표적 표면을 변경하십시오.
201 배경 조명이 너무 많음 표적 면적에 비추는 배경 조명을 줄이십시오.
202 레이저 빔이 차단됨 장애물을 제거하고 측정을 반복하십시오.
203 전원이 부족함 공구의 배터리를 재충전하십시오.
301 주변 온도가 지나치게 높음 장치를 지정된 작동 온도 범위 내의 온도로 식혀 주십시오.
302 주변 온도가 지나치게 낮음 장치를 지정된 작동 온도 범위 내의 온도로 예열하십시오.
401 하드웨어 오류 장치를 여러 번켰다가/끄십시오. 오류가 계속 나타나는
경우, 결함이 있는 장치를 서비스 센터 또는 판매점으로
반환하십시오. 보증을참조하십시오.
402 알수없는 오류
서비스 센터 또는 판매점에 문의하십시오. 보증을참조하십
시오.
12
KR 사양
범위 1m ~ 20m (6in ~ 65ft)
측정 정확도* ± 3mm (± 1/8in)*
최소 측정 단위** 1mm (1/16in)**
레이저 등급 2등급 (IEC/EN60825-1: 2014)
레이저 종류 ≤ 1.0mW @ 620-690nm
레이저/배경 자동 스위치-꺼짐 30초후
기기 자동 스위치-꺼짐 90초후
연속 측정 예
면적/부피 예
배터리 수명(2 x AAA) 최대 측정 3000번
크기(H x D x W) 118 x 43 x 26mm (4.64 x 1.69 x 1.02 in)
무게(배터리 포함) 2.5oz (71g)
보관 온도 범위 -25° C ~ +60 C (14° F ~ 140° F)
작동 온도 범위 0° C ~ +40° C (32° F ~ 104° F)
*측정 정확도는현재 조건에 따라 달라집니다 .
• 좋은 상황(양호한 표적 표면 및실내 온도) 하에서는 최대 10m (33ft).
• 좋지 않은 상황(밝은 빛, 아주 약하게 반사하는 표적 표면 또는 큰온도 변동) 하에서는, 10m (33ft) 거리에서
오류가 ±0.003 in/ft (±0.25mm/m)까지 증가할 수있습니다.
공산품명 :건전지
모델 :EXCELL ALKALINE
인증번호 :B052R1017-18001
종류 :LR03
공칭전압 :
1.5V
극성 :건전지에 표시
제조자명 :
Shanghai Nateng Electromechanical Co., Ltd
수입자명 :블랙앤드데커아시아퍼시픽피티이리미티드
사용권장 기한 :별도표기
제조국 :중국
소비자 상담실 :서울 강남구 역삼로
218
재승빌딩
1
층
1577-0933
경고 :누액, 파열의 우려가 있으므로 +, - 를바르게 넣을 것
충전, 분해, 단락, 가열하지 말것
다른 전지와 혼용하여 사용하지 말것
13
E
E
2
Congratulations!
You have chosen a D
E
WALT tool. Years of experience, thorough product
development and innovation make D
E
WALT one of the most reliable partners for
professional tool users.
Definitions: Safety Guidelines
The definitions below describe the level of severity for each signal word.
Please read the manual and pay attention to these symbols.
DANGER: Indicates an imminently hazardous situation which, if not
avoided, will result in death or serious injury.
WARNING:Indicates a potentially hazardous situation which, if not
avoided, could result in death or serious injury.
CAUTION:Indicates a potentially hazardous situation which, if not
avoided, may result in minor or moderate injury.
CAUTION:Used without the safety alert symbol indicates a potentially
hazardous situation which, if not avoided, may result in property dam-
age.
IF YOU HAVE ANY QUESTIONS OR COMMENTS ABOUT THIS OR ANY
D
E
WALT TOOL, CALL US AT: Tel: 01753-56 70 55 Fax: 01753-57 21 12
OR VISIT OUR WEBSITE: www.DEWALT.co.kr
Laser Safety, Maintenance, and Warranty
ENGLISH
사양
범위 1m ~ 20m (6in ~ 65ft)
측정 정확도* ± 3mm (± 1/8in)*
최소 측정 단위** 1mm (1/16in)**
레이저 등급 2등급 (IEC/EN60825-1: 2014)
레이저 종류 ≤ 1.0mW @ 620-690nm
레이저/배경 자동 스위치-꺼짐 30초후
기기 자동 스위치-꺼짐 90초후
연속 측정 예
면적/부피 예
배터리 수명(2 x AAA) 최대 측정 3000번
크기(H x D x W) 118 x 43 x 26mm (4.64 x 1.69 x 1.02 in)
무게(배터리 포함) 2.5oz (71g)
보관 온도 범위 -25° C ~ +60 C (14° F ~ 140° F)
작동 온도 범위 0° C ~ +40° C (32° F ~ 104° F)
*측정 정확도는현재 조건에 따라 달라집니다 .
• 좋은 상황(양호한 표적 표면 및실내 온도) 하에서는 최대 10m (33ft).
• 좋지 않은 상황(밝은 빛, 아주 약하게 반사하는 표적 표면 또는 큰온도 변동) 하에서는, 10m (33ft) 거리에서
오류가 ±0.003 in/ft (±0.25mm/m)까지 증가할 수있습니다.
공산품명 :건전지
모델 :EXCELL ALKALINE
인증번호 :B052R1017-18001
종류 :LR03
공칭전압 :
1.5V
극성 :건전지에 표시
제조자명 :
Shanghai Nateng Electromechanical Co., Ltd
수입자명 :블랙앤드데커아시아퍼시픽피티이리미티드
사용권장 기한 :별도표기
제조국 :중국
소비자 상담실 :서울 강남구 역삼로
218
재승빌딩
1
층
1577-0933
경고 :누액, 파열의 우려가 있으므로 +, - 를바르게 넣을 것
충전, 분해, 단락, 가열하지 말것
다른 전지와 혼용하여 사용하지 말것
14
E
3
WARNING:To reduce the risk of injury, read this Safety Manual as
well as the Operator Instruction Manual.
SAVE ALL WARNINGS AND INSTRUCTIONS
FOR FUTURE REFERENCE
Definitions: Safety Guidelines
The definitions below describe the level of severity for each signal word. Please read
the manual and pay attention to these symbols.
DANGER: Indicates an imminently hazardous situation which, if not
avoided, will result in death or serious injury.
WARNING: Indicates a potentially hazardous situation which, if not
avoided, could result in death or serious injury.
CAUTION: Indicates a potentially hazardous situation which, if not
avoided, may result in minor or moderate injury.
NOTICE: Indicates a practice not related to personal injury which, if
not avoided, may result in property damage.
Denotes risk of electric shock.
Denotes risk of fire.
Safety Instructions for Lasers
WARNING! Read and understand all instructions. Failure to follow all
instructions listed below may result in electric shock, fire and/or serious
personal injury.
WARNING! Laser Radiation Exposure. Do not disassemble or modify the laser
level. There are no user serviceable parts inside. Serious eye injury could result.
ENGLISH
15
E
E
4
WARNING:Hazardous Radiation. Use of controls or adjustments or perfor-
mance of procedures other than those specified herein may result in hazardous
radiation exposure.
• Use the laser only with the specifically designated batteries. Use of any
other batteries may create a risk of fire.
• Store idle laser out of reach of children and other untrained persons.
Lasers can be dangerous in the hands of untrained users.
• Use only accessories that are recommended by the manufacturer for
your model. Accessories that may be suitable for one laser, may create a risk
of injury when used on another laser.
• Tool service must be performed only by qualified repair personnel.
Service or maintenance performed by unqualified personnel may result in injury.
To locate your nearest D
E
WALT service center Tel: 01753-56 70 55 or go to
www.DEWALT.eu
• Do not stare into the beam or use optical tools such as a telescope or
transit to view the laser beam. Serious eye injury could result.
• Do not place the laser in a position which may cause anyone to inten-
tionally or unintentionally stare into the laser beam. Serious eye injury
could result.
• Turn the laser off when it is not in use. Leaving the laser on increases the
risk of staring into the laser beam.
• Do not disassemble the laser tool. There are no user serviceable parts
inside.
• Do not modify the laser in any way. Modifying the tool may result in
Hazardous Laser Radiation Exposure.
• Do not operate the laser around children or allow children to operate
the laser.Serious eye injury may result.
• Position the laser securely on a level surface. Damage to the laser or serious
injury could result if the laser falls.
• This tool comes fully assembled. This tool has been designed with features
that allow for quick and easy set-up. Please read and understand all instructions
within the instruction manual prior to use.
ENGLISH
3
WARNING:To reduce the risk of injury, read this Safety Manual as
well as the Operator Instruction Manual.
SAVE ALL WARNINGS AND INSTRUCTIONS
FOR FUTURE REFERENCE
Definitions: Safety Guidelines
The definitions below describe the level of severity for each signal word. Please read
the manual and pay attention to these symbols.
DANGER: Indicates an imminently hazardous situation which, if not
avoided, will result in death or serious injury.
WARNING: Indicates a potentially hazardous situation which, if not
avoided, could result in death or serious injury.
CAUTION: Indicates a potentially hazardous situation which, if not
avoided, may result in minor or moderate injury.
NOTICE: Indicates a practice not related to personal injury which, if
not avoided, may result in property damage.
Denotes risk of electric shock.
Denotes risk of fire.
Safety Instructions for Lasers
WARNING! Read and understand all instructions. Failure to follow all
instructions listed below may result in electric shock, fire and/or serious
personal injury.
WARNING! Laser Radiation Exposure. Do not disassemble or modify the laser
level. There are no user serviceable parts inside. Serious eye injury could result.
ENGLISH
16
E
5
• An exposure to the beam of a Class 2 laser is considered safe for a maximum of
0.25 seconds. Eyelid reflexes will normally provide adequate protection.
Residual Risks
The following risks are inherent to the use of this device:
– injuries caused by staring into laser beam.
LABELING
• Do not remove or deface warning labels. If labels are removed, user or others
may inadvertently expose themselves to radiation.
• The label on your tool may include the following symbols.
V............................ volts
mW......................... milliwatts
........................ laser warning symbol
nm .......................... wavelength in nanometers
The following pictographs are shown on the tool:
Read the instruction manual before use
Laser warning
Do not stare into the laser beam.
ENGLISH
17
E
E
6
ENGLISH
MAINTENANCE
• To maintain the accuracy of your work, check the laser often to make sure it is
properly calibrated. See Field Calibration Check instructions in your Operators
Manual.
• Calibration checks and other maintenance repairs may be performed by
D
E
WALT service centers.
• When not in use, store the laser in the kit box provided. Do not store your laser
at temperatures below -20˚C (-5˚F) or above 60˚C (140˚F).
• Do not store your laser in the kit box if the laser is wet. The laser should be
dried first with a soft dry cloth.
CLEANING
Exterior plastic parts may be cleaned with a damp cloth. Although these parts are
solvent resistant, NEVER use solvents. Use a soft, dry cloth to remove moisture
from the tool before storage.
SERVICE
NOTE: Disassembling the laser level will void all warranties on the product.
To assure product SAFETY and RELIABILITY, repairs, maintenance and adjust-
ment should be performed by authorized service centers. Have your tool serviced
by a qualified repair person using only identical replacement parts. This will ensure
that the safety of the tool is maintained.
Service or maintenance performed by unqualified personnel may result in a risk
ofinjury. To locate your nearest D
E
WALT service center go to www.DEWALT.eu
ACCESSORIES
WARNING: Since accessories, other than those offered by D
E
WALT, have
not been tested with this product, use of such accessories with this tool
could be hazardous. To reduce the risk of injury, only D
E
WALT recommended
accessories should be used with this product. Accessories that may be
suitable for one tool, may become hazardous when used on another tool.
18
E
7
GUARANTEE
D
E
WALT is confident of the quality of its products and offers an outstanding
guarantee for professional users of the product. This guarantee statement is in
addition to and in no way prejudices your contractual rights as a professional user or
your statutory rights as a private non-professional user. The guarantee is valid within
the territories of the Member States of the European Union and the European Free
Trade Area.
•36 MONTHS WARRANTY •
If your
DEWALT
product becomes defective due to faulty materials or workmanship
within 36 months from the date of purchase,
DEWALT
guarantees to replace all
defective parts free of charge or – at our discretion – replace the unit free of charge
provided that:
• The product has not been misused;
• The product has been subject to fair wear and tear;
• Repairs have not been attempted by unauthorised persons;
• Proof of purchase is produced.
• The product is returned complete with all original components
• Battery & Charger’s warranty is 12months
If you wish to make a claim, contact your seller or check the location of your nearest
authorised D
E
WALT repair agent in the D
E
WALT catalogue or contact your D
E
WALT
office at the address indicated in this manual. A list of authorised D
E
WALT repair
agents and full details of our after-sales service is available on the Internet at:
www.DEWALT.eu
ENGLISH
19
KR
8
축하합니다!
D
E
WALT 공구를 선택해 주셔서 감사합니다. 제품 개발과 혁신을 통한 다년간의 경험은
D
E
WALT를전문 전동 공구 사용자들이 가장 믿을 수있는 제품으로 만들어 왔습니다.
정의: 안전 지침
다음 정의는 각경고 문구의 심각도를 설명합니다. 사용 설명서를 읽고 다음
기호들에 유의하십시오.
위험:
절박한 위험 상태를 나타내며, 방지하지 않으면 사망 또는 심각한 부
상을 초래합니다.
경고
: 잠재적 위험 상태를 나타내며, 방지하지 않으면 사망 또는 심각한 부
상을 초래할 수있습니다.
주의
: 잠재적으로 위험한 상태를 나타내며, 방지하지 않으면 경미하거나
가벼운 부상을 초래할 수있습니다.
주의
: 안전 경고 기호 없이 사용될 경우 잠재적으로 위험한 상태를 나타내며,
방지하지 않으면 재산상의 손해가 발생할 수있습니다.
이공구 또는 D
E
WALT 공구에 대해 궁금한 사항이나 의견이 있을 경우, 아래
번호로 전화하십시오. 전화: 1577-0933 www.DEWALT.co.kr
레이저 안전, 유지 보수 및 보증
한국어
7
GUARANTEE
DEWALT is confident of the quality of its products and offers an outstanding
guarantee for professional users of the product. This guarantee statement is in
addition to and in no way prejudices your contractual rights as a professional user or
your statutory rights as a private non-professional user. The guarantee is valid within
the territories of the Member States of the European Union and the European Free
Trade Area.
•36 MONTHS WARRANTY •
If your DEWALT product becomes defective due to faulty materials or workmanship
within 36 months from the date of purchase, DEWALT guarantees to replace all
defective parts free of charge or – at our discretion – replace the unit free of charge
provided that:
• The product has not been misused;
• The product has been subject to fair wear and tear;
• Repairs have not been attempted by unauthorised persons;
• Proof of purchase is produced.
• The product is returned complete with all original components
• Battery & Charger’s warranty is 12months
If you wish to make a claim, contact your seller or check the location of your nearest
authorised DEWALT repair agent in the DEWALT catalogue or contact your DEWALT
office at the address indicated in this manual. A list of authorised DEWALT repair
agents and full details of our after-sales service is available on the Internet at:
www.DEWALT.eu
ENGLISH
20
KR
9
경고
: 부상 위험을 줄이려면, 안전 설명서와 사용자 설명서를 숙지하
십시오.
향후 참고할 수 있도록 모든 경고 및 지시 사항을
보관해두십시오.
정의: 안전 지침
다음 정의는 각경고 문구의 심각도를 설명합니다. 사용 설명서를 읽고 다음 기호들에
유의하십시오.
위험: 절박한 위험 상태를 나타내며, 방지하지 않으면 사망 또는 심각한
부상을초래합니다.
경고: 잠재적 위험 상태를 나타내며, 방지하지 않으면 사망 또는 심각한
부상을초래할 수있습니다.
주의: 잠재적으로 위험한 상태를 나타내며, 방지하지 않으면 경미하거나
가벼운 부상을초래할 수있습니다.
참고: 신체 부상을 초래하지 않는 행위를나타내며, 방지하지 않으면
재산상의 손해가발생할 수있습니다.
감전 위험을 나타냅니다.
화재 위험을 나타냅니다.
레이저에 대한 안전 지시 사항
경고! 모든 지시사항을 읽고 숙지하십시오. 아래 설명한 모든 지시 사항을
따르지 않으면 감전, 화재 및/또는 심각한 부상을 초래할 수있습니다.
경고
! 레이저 방사선에 노출. 레이저 레벨을 분해하거나 개조하지 마십시오. 내부에
사용자가 수리할 수있는 부품이 없습니다. 심각한 눈부상을 당할 수있습니다.
한국어

Other manuals for DW065E

1

Other DeWalt Measuring Instrument manuals

DeWalt DW0822-XJ User manual

DeWalt

DeWalt DW0822-XJ User manual

DeWalt DW099E User manual

DeWalt

DeWalt DW099E User manual

DeWalt DCE0825R User manual

DeWalt

DeWalt DCE0825R User manual

DeWalt DW077 User manual

DeWalt

DeWalt DW077 User manual

DeWalt DW03050-XJ User manual

DeWalt

DeWalt DW03050-XJ User manual

DeWalt DWHT77100-XJ User manual

DeWalt

DeWalt DWHT77100-XJ User manual

DeWalt DW040 User manual

DeWalt

DeWalt DW040 User manual

DeWalt DCE089G User manual

DeWalt

DeWalt DCE089G User manual

DeWalt DW080LGS User manual

DeWalt

DeWalt DW080LGS User manual

DeWalt DCLE34020 User manual

DeWalt

DeWalt DCLE34020 User manual

DeWalt DW078 User manual

DeWalt

DeWalt DW078 User manual

DeWalt DW030PL-KR User manual

DeWalt

DeWalt DW030PL-KR User manual

DeWalt DW099E User manual

DeWalt

DeWalt DW099E User manual

DeWalt DCLE34021 User manual

DeWalt

DeWalt DCLE34021 User manual

DeWalt DW0802 User manual

DeWalt

DeWalt DW0802 User manual

DeWalt DW0822 User manual

DeWalt

DeWalt DW0822 User manual

DeWalt DW079KI User manual

DeWalt

DeWalt DW079KI User manual

DeWalt DW073 User manual

DeWalt

DeWalt DW073 User manual

DeWalt DW0822LG User manual

DeWalt

DeWalt DW0822LG User manual

DeWalt DW030 User manual

DeWalt

DeWalt DW030 User manual

DeWalt DCE822G18 User manual

DeWalt

DeWalt DCE822G18 User manual

DeWalt D271059 User manual

DeWalt

DeWalt D271059 User manual

DeWalt DW074LR User manual

DeWalt

DeWalt DW074LR User manual

DeWalt DCE089G User manual

DeWalt

DeWalt DCE089G User manual

Popular Measuring Instrument manuals by other brands

Powell EcoVisor 01.41B.48080 Instruction bulletin

Powell

Powell EcoVisor 01.41B.48080 Instruction bulletin

OHAUS CKW Series Installation and operation instructions

OHAUS

OHAUS CKW Series Installation and operation instructions

Sierra SmartTrak C100 instruction manual

Sierra

Sierra SmartTrak C100 instruction manual

Electro-Metrics PCL-30 instruction manual

Electro-Metrics

Electro-Metrics PCL-30 instruction manual

HP HP 1650A Setting up

HP

HP HP 1650A Setting up

MFJ MFJ-834 instruction manual

MFJ

MFJ MFJ-834 instruction manual

Welch Allyn Audioscope 3 operating instructions

Welch Allyn

Welch Allyn Audioscope 3 operating instructions

Mecmesin Compact Force Gauge operating manual

Mecmesin

Mecmesin Compact Force Gauge operating manual

RKI Instruments GX-6000 Operator's manual

RKI Instruments

RKI Instruments GX-6000 Operator's manual

PCB Piezotronics IMI SENSORS 645B01 Installation and operating manual

PCB Piezotronics

PCB Piezotronics IMI SENSORS 645B01 Installation and operating manual

WYLER Clinotronic S quick reference

WYLER

WYLER Clinotronic S quick reference

DAKOTA ULTRASONICS PZX-7 Operation manual

DAKOTA ULTRASONICS

DAKOTA ULTRASONICS PZX-7 Operation manual

meibes Rossweiner Logoplus installation guide

meibes

meibes Rossweiner Logoplus installation guide

Kobold MAN-SD series operating instructions

Kobold

Kobold MAN-SD series operating instructions

Dynalink W3-01 user manual

Dynalink

Dynalink W3-01 user manual

MICRO-EPSILON optoNCDT 1900 Series Assembly instructions

MICRO-EPSILON

MICRO-EPSILON optoNCDT 1900 Series Assembly instructions

Air TEc Expert CYPRES 2 user guide

Air TEc

Air TEc Expert CYPRES 2 user guide

Smaxtec SX.1 quick start guide

Smaxtec

Smaxtec SX.1 quick start guide

manuals.online logo
manuals.online logoBrands
  • About & Mission
  • Contact us
  • Privacy Policy
  • Terms and Conditions

Copyright 2025 Manuals.Online. All Rights Reserved.