manuals.online logo
Brands
  1. Home
  2. •
  3. Brands
  4. •
  5. Dexter Laundry
  6. •
  7. Dryer
  8. •
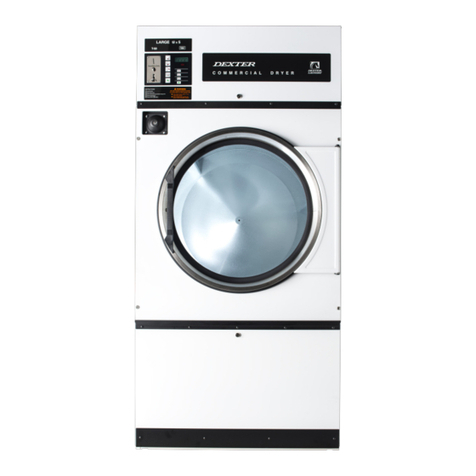
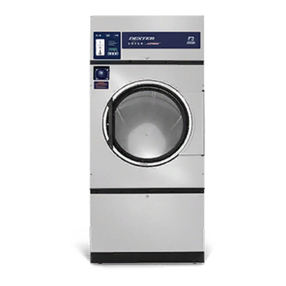
  9. Dexter Laundry T-30 SWD User manual

Dexter Laundry T-30 SWD User manual

Other Dexter Laundry Dryer manuals

Dexter Laundry DCBD 30 Series User manual

Dexter Laundry

Dexter Laundry DCBD 30 Series User manual

Dexter Laundry DCT30KC Series User manual

Dexter Laundry

Dexter Laundry DCT30KC Series User manual

Dexter Laundry T-30 User manual

Dexter Laundry

Dexter Laundry T-30 User manual

Dexter Laundry T-30 User manual

Dexter Laundry

Dexter Laundry T-30 User manual

Dexter Laundry O Series Quick start guide

Dexter Laundry

Dexter Laundry O Series Quick start guide

Dexter Laundry T-30SWD User manual

Dexter Laundry

Dexter Laundry T-30SWD User manual

Dexter Laundry DDBD T-50-2 Series Building instructions

Dexter Laundry

Dexter Laundry DDBD T-50-2 Series Building instructions

Dexter Laundry DDAD30KC Series User manual

Dexter Laundry

Dexter Laundry DDAD30KC Series User manual

Dexter Laundry DTCH 80 V Manual

Dexter Laundry

Dexter Laundry DTCH 80 V Manual

Dexter Laundry DDAD T-30 2 Series Administrator guide

Dexter Laundry

Dexter Laundry DDAD T-30 2 Series Administrator guide

Dexter Laundry STACK DRYER User manual

Dexter Laundry

Dexter Laundry STACK DRYER User manual

Dexter Laundry DDAD30HC-59 Series Dryers User manual

Dexter Laundry

Dexter Laundry DDAD30HC-59 Series Dryers User manual

Dexter Laundry T-30 Administrator guide

Dexter Laundry

Dexter Laundry T-30 Administrator guide

Dexter Laundry DTCH30 series User manual

Dexter Laundry

Dexter Laundry DTCH30 series User manual

Dexter Laundry B-Series User manual

Dexter Laundry

Dexter Laundry B-Series User manual

Dexter Laundry T-20 SWD User manual

Dexter Laundry

Dexter Laundry T-20 SWD User manual

Dexter Laundry T-30X2 Installation instructions

Dexter Laundry

Dexter Laundry T-30X2 Installation instructions

Dexter Laundry DL2X30Q Manual

Dexter Laundry

Dexter Laundry DL2X30Q Manual

Dexter Laundry DDAD30HC-11 Series User manual

Dexter Laundry

Dexter Laundry DDAD30HC-11 Series User manual

Dexter Laundry T-30 User manual

Dexter Laundry

Dexter Laundry T-30 User manual

Dexter Laundry C Series Quick start guide

Dexter Laundry

Dexter Laundry C Series Quick start guide

Dexter Laundry T-50X2 Administrator guide

Dexter Laundry

Dexter Laundry T-50X2 Administrator guide

Dexter Laundry T-50X2 Guide

Dexter Laundry

Dexter Laundry T-50X2 Guide

Dexter Laundry DDAD50KC Series User manual

Dexter Laundry

Dexter Laundry DDAD50KC Series User manual

Popular Dryer manuals by other brands

Whirlpool WED9270XL2 parts list

Whirlpool

Whirlpool WED9270XL2 parts list

Kleenmaid KED2000 Repair instructions

Kleenmaid

Kleenmaid KED2000 Repair instructions

SPI Supplies SPI-DRY Operation manual

SPI Supplies

SPI Supplies SPI-DRY Operation manual

Amana NGD5800DW Use & care guide

Amana

Amana NGD5800DW Use & care guide

Bosch WTG86402GB Installation and operating instructions

Bosch

Bosch WTG86402GB Installation and operating instructions

Maytag MED4200BW0 installation instructions

Maytag

Maytag MED4200BW0 installation instructions

ffuuss eos user manual

ffuuss

ffuuss eos user manual

KitchenAid 53-3498 installation instructions

KitchenAid

KitchenAid 53-3498 installation instructions

Schulthess Spirit topLine TW 8340 operating instructions

Schulthess

Schulthess Spirit topLine TW 8340 operating instructions

Whirlpool LGR4624BW0 parts list

Whirlpool

Whirlpool LGR4624BW0 parts list

World Dryer AirMax D M5-972A manual

World Dryer

World Dryer AirMax D M5-972A manual

Alliance Laundry Systems ADEE9BSS user guide

Alliance Laundry Systems

Alliance Laundry Systems ADEE9BSS user guide

Miele PDR 910 EL Operating and installation instructions

Miele

Miele PDR 910 EL Operating and installation instructions

Amana NGD5800TQ0 parts list

Amana

Amana NGD5800TQ0 parts list

Bosch WTA79200GB Installation and operating instructions

Bosch

Bosch WTA79200GB Installation and operating instructions

AEG TR838P4OB user manual

AEG

AEG TR838P4OB user manual

Asko T760 user guide

Asko

Asko T760 user guide

Electrolux EW2H328R2 user manual

Electrolux

Electrolux EW2H328R2 user manual

manuals.online logo
manuals.online logoBrands
  • About & Mission
  • Contact us
  • Privacy Policy
  • Terms and Conditions

Copyright 2025 Manuals.Online. All Rights Reserved.

8514-293-001 REV C PAGE 1
COMMERCIAL DRYER Original Instructions
MODEL T-30 SWD VENDED For GB & IE
C-SERIES CONTROL, ELECTRC-HEATED
OPERATOR’S MANUAL
INSTALLATION & OPERATION INSTRUCTIONS
The dryer will operate correctly in ambient temperatures of +5°C to +45°C, in relative humidity up to
50% at +40°C and above 50% when below +40°C, and at altitudes up to 1000m above sea level,
must be transported and stored from -40°C to +140°C, and has been packaged to prevent damage
from humidity, vibration, and shock. Take measures to avoid harmful effects of occasional
condensation.
Post the following “For Your Safety” caution in a prominent location:
FOR YOUR SAFETY
Do not store or use petrol or other flammable vapours and liquids or dry cleaning solvents in the
vicinity of this or any other appliance.
FOR YOUR SAFETY
THIS MACHINE IS FOR DRYING ONLY FABRICS WASHED IN WATER.
To avoid possibility of fire, including spontaneous combustion, do not dry oiled floor mops, items
containing foam rubber or similarly textured rubberlike materials or any material on which you have
used a cleaning solvent or which contains flammable liquids or solids (such as petrol, kerosene, waxes,
etc.) Fabric softeners, or similar products, should be used per the fabric softener instructions. Remove
all objects from pockets such as lighters and matches.
WARNING – Risk of Fire
Clothes dryer installation must be performed by a qualified installer.
Install the clothes dryer according to the manufacturer’s instructions and local codes.
Do not install a clothes dryer with flexible plastic venting materials. If flexible metal (foil type) duct is
installed, use duct that has been investigated and found acceptable for use with clothes dryers.
Flexible venting materials are known to collapse, be easily crushed, and trap lint. These conditions will
obstruct clothes dryer airflow and increase the risk of fire.
To reduce the risk of severe injury or death, follow all installation instructions.
This appliance can be used by children aged from 8 years and above and persons with reduced
physical, sensory or mental capabilities or lack of experience and knowledge if they have been
given supervision or instruction concerning use of the appliance in a safe way and understand the
hazards involved. Children shall not play with the appliance. Cleaning and user maintenance shall
not be made by children without supervision. Children of less than 3 years should be kept away
unless continuously supervised.
It is important that you read this Manual and retain it for future reference. For service or
replacement parts, contact the distributor in your area or manufacturer:
Dexter Laundry, Inc.
2211 West Grimes Avenue
Fairfield, Iowa 52556, USA
8514-293-001 REV C PAGE 2
TABLE OF CONTENTS
Page No.
Warnings about use and operation 2
Dryer Specifications 4
Dryer Dimensions 5
Installation Instructions 6 – 11
Dryer Shutdown 11
Operating Instructions 12
Programming the Dryer Control 13 – 21
Servicing and Troubleshooting 23
Preventative Maintenance Instructions 23
WARNINGS ABOUT USE AND OPERATION
Caution! There are sharp edges on various sheet metal parts internal
to the enclosure. Use safety consciousness when placing or moving
your hands while working in the interior of this equipment.
Meaning: Do Not Enter This
Equipment (or Space).
Meaning: Do Not Step, Stand, or Sit
on This Equipment.
Meaning: Do Not Operate with
Guards or Covers Removed.
Meaning: High Voltage. Disconnect
power before servicing.
Meaning: Lock Out and Tag Out
before servicing.
Meaning: Burn Hazard. Do Not Touch
Heater Housing or Heating Elements.
Allow these parts to cool before servicing.
Meaning: Do Not Dry Items
Containing Explosive Material.
Meaning: Do Not Dry Items
Containing Flammable Material.
Meaning: Read Operators
Manual.
Meaning: Center of Gravity.
Meaning: Left Point for Forklift
or Hand Pallet Truck or Jack.
Meaning: Right Point for Forklift or
Hand Pallet Truck or Jack.
It is ABSOLUTELY ESSENTIAL that the dryer be earthed to a known earth. This is not only for
personal safety, but is necessary for proper operation of the controller. Failure to do so will void
the warranty of the controller.
DO NOT MODIFY THIS APPLIANCE. KEEP SHIELDS, GUARDS AND COVERS IN PLACE.
These safety devices are provided to protect everyone from injury.
WARNING: Do not stop dryer before end of cycle time unless all items are quickly removed and
spread out to dissipate heat.
8514-293-001 REV C PAGE 3
WARNINGS ABOUT USE AND OPERATION continued
THIS DRYER IS EQUIPPED WITH A MANUALLY RESETTABLE OVER-TEMPERATURE
THERMOSTAT located above the motor on the rear of the cabinet. Should the dryer cease to
heat, refer to your “Service Procedure and Parts Data” book for instructions.
CHECK THIS THERMOSTAT WHEN INSTALLING DRYER to assure it is not tripped.
Impacts, such as rough handling in shipment, may trip the thermostat. It may be reset by
pushing the red tipped rod located above the control box at the rear of the dryer.
DO NOT SPRAY AEROSOLS IN THE VICINITY OF THIS APPLIANCE while in operation.
THIS APPLIANCE SHALL NOT BE USED TO DRY OFF CLOTHES CONTAINING SOLVENTS
OR DRY-CLEANING FLUIDS.
Misuse of Dryer
Do not use this Equipment for any purpose not described in this Manual.
Do not operate this equipment without all guards and covers in place.
Do not operate this dryer from any power source not matching the
operational requirements on the back of the dryer.
Do not place your body inside the dryer cylinder or allow others to do so.
Death or serious injury can result from this!
Other Examples May Be Applicable
Caution – Replace Fuses With Same Type and Rating
Fuse No. Voltage Amperage SC I/R Type Size
F1 250V 2.5A 100A@250VAC F ¼ x 1¼ in. (6.35 x 31.75 mm)
8514-293-001 REV C PAGE 4
SPECIFICATIONS
30 lb. Commercial Dryer: T-30 SWD DCS030E_-79 (50Hz)
Cabinet Height (As a stand-alone dryer) 38 7/8” 987 mm.
(Assumes minimum leveling leg adjustment)
Cabinet Height (Combo washer/dryer) 78 3/4” 2000 mm.
Cabinet Width 31 1/2” 800 mm.
Overall Depth 49 7/16 1256 mm.
Floor to Door Center (Stand-alone) 7” 178 mm.
Floor to Door Center (Combo) 47” 1194 mm.
Door Opening 22 5/8” 575 mm.
Dry Wt. Capacity 30 lbs. 13.6 kg.
Cylinder Diameter 30” 762 mm.
Cylinder Depth 27 1/2” 699 mm.
Cylinder Volume 11.25 cu. ft. 319 liters
Lint Screen Area 453 sq. in. 2923 sq. cm.
Exhaust Size 6” 152 mm.
Make-up Air 1.0 sq. ft. 929 sq. cm.
Example: 1.0 sq. ft = 1 ft. long X 1 ft. wide
Motor Size 1/2 H.P. .373 kW
Airflow (50 hz) 450 CFM 12.7 m^3/min
Electrical Specifications – Model -79
Voltage/Hz/Phase 400V/50Hz/3Phase/24kW Heat
Running Amps 45
Minimum Dual Element Time Delay Fuse 50 Amp
Wire Size #6 (13.3 mm^2)
Electrical Service 4 wire + ground
Stand-alone Dryer
Shipping Weight 420 lbs. 191 kg.
Net Weight 380 lbs. 172 kg.
Clearance Behind Machines (min.) 18” 457 mm.
Combo Stack Washer/Dryer
Shipping Weight 1101 lbs. 499 kg.
Net Weight 1051 lbs. 477 kg.
Clearance Behind Machines (min.) 24” 611 mm.
8514-293-001 REV C PAGE 5
FIGURE 1 – DRYER DIMENSIONS inches [mm]
8514-293-001 REV C PAGE 6
INSTALLATION INSTRUCTIONS
This dryer may have been supplied as part of a washer/dryer stacked appliance. If
so, refer to the washer instructions for uncrating and hard mounting the stacked
unit to a concrete floor and observe the dryer clearances listed below.
Note: A forklift, or a hand pallet truck or jack, must lift the washer/dryer and only
from the front or rear of the washer/dryer with the washer bolted to the pallet and
supported the full length of the washer/dryer.
STACK WASHER / DRYER INSTALLATION (when necessary):
1. Place dryer on top of washer and align (4) mounting holes. The front (2) mounting holes
are located inside the lint compartment 5 ¾” from the front of the machine. The back (2)
mounting holes are located on the right/left side of the machine, at the base of the back
panel. Removing the rear guard is necessary to access the back mounting hole located
opposite the duct work.
2. Use (4) supplied 5/16” x 1-1/4 dog tip bolts to secure the dryer on top of the washer.
Note: If the washer/dryer is ever moved again, the washer/dryer should be re-
mounted on its pallet and its crating bolts re-inserted and tightened, in the reverse
order as shown in washer instructions.
DRYER INSTALLATION
1. CODE CONFORMITY: All commercial dryer installations must conform to the local and
national codes for the location of installation.
The appliance must not be installed behind a lockable door, a sliding door or a door with a
hinge on the opposite side to that of the tumble dryer, in such a way that a full opening of the
tumble dryer door is restricted.
2. INSTALLATION CLEARANCES: This unit may be installed at the following alcove
clearances.
I. Left Side 0”
II. Right Side 0” *
III. Back 18” (457 mm) (Certified for 1” (25 mm) clearance; however, 18”
(457 mm) clearance is necessary behind the belt guard to allow servicing
and maintenance.)
IV. Front 48” (1220 mm) (to allow use of dryer)
V. Top Refer to figure labeled on the next page “Vertical Clearance Dimensions”.
Certification allows 0” clearance at the top 4” (100 mm) back from the
front. However, a 1/4" (6 mm) clearance should be allowed in case the
dryer needs to be moved.
A 10” (254 mm) clearance is required from the top at all other points.
VI. Floor This unit may be installed upon a combustible floor.
Do not obstruct the flow of combustion and ventilation air.
Maintain minimum of 25 mm (1 in.) clearance between duct and combustible material.
Refer to installation label attached to rear guard for other installation information.
8514-293-001 REV C PAGE 7
VERTICAL CLEARANCE DIMENSIONS
3. MAKE-UP AIR. Adequate make-up air must be supplied to replace air exhausted by
dryers on all types of installations. Provide a minimum air opening to the outside for each
dryer as follows:
Dryer Model Make-up Air Volume/Time Make-up Air Opening Size (minimum)
DC
S
030
E
450 CF
M (12.7
m
3
/minute)
1 ft² (0.10 m
2
)
This is a net requirement of effective area. Screens, grills or louvers, which will restrict the
flow of air, must be considered. Consult the supplier to determine the free area equivalent for
the grill being used.
The source of make-up air should be located sufficiently away from the dryers to allow an
even airflow to the air intakes of all dryers. Multiple openings should be provided.
The operation of this appliance may affect the operation of gas appliances, which take their
air for safe combustion from the same room. Adequate ventilation must be provided to avoid
back flow of gasses from other appliances in the same room. All gas appliances should be
tested with the Dexter dryer in operation and all the windows and doors closed. If in doubt,
consult the appliance manufacturer(s).
8514-293-001 REV C PAGE 8
4. ELECTRICAL REQUIREMENTS:
The electrical installation must be performed by a qualified electrical technician.
The electrical power requirements necessary to operate the unit satisfactorily are listed on
the serial plate located on the back panel of each dryer. The electrical connection should be
made at the terminal blocks in the control box on the rear of the unit using conductors rated
at 75 C (167 F) and a wire size adequate to handle the amperage and voltage listed on the
serial plate (see table below for recommended minimum sizes). It is absolutely necessary that
the dryer be earthed to a known earth (No. 8 AWG copper conductor recommended).
Knockouts are provided for the connection of 1-inch (25 mm) conduit for the power supply
conductors and 3/8-inch (10 mm) conduit for the external earthing conductor. It is absolutely
necessary that the dryer be connected to a good earth connection. The earth connection
resistance should be checked prior to operation. Introduction of supply wiring must not
increase the Ingress Protection (IP) rating.
HEATING ELEMENT
SIZE (kW)
SUPPLY VOLTAGE
(PHASE / V.)
MINIMUM DUAL ELEMENT
TIME DELAY FUSE SIZE AT
FUSED DISCONNECT (A.)
MINIMUM WIRE SIZE FROM FUSED
DISCONNECT TO DRYER TERMINAL
BLOCK (75OC COPPER WIRE)
2
4
3 / 400
50
# 6
(13.3 mm^2)
The installation must meet the electrical requirements of the country, state, and locality of
installation. Individual circuit breakers for each dryer are required. The installer must provide
a disconnect switch, which will interrupt all lines. It may be a local or national requirement to
provide an electrical interruption switch visible and accessible from the room in which the
dryer is installed. The wiring diagram is located in the belt guard on the back of the dryer.
For destination countries where CE requirements must be met, individual 400V supply
disconnecting devices for each dryer are required and must be one of the following types:
a. switch-disconnector with fuses per IEC 60947-3 utilization category AC-23B;
b. disconnector with fuses per IEC 60947-3 having an auxiliary contact that in all cases causes
switching devices to break the load circuit before the opening of the main contacts of the
disconnector;
c. a circuit-breaker suitable for isolation per IEC 60947-2;
d. any other switching device in accordance with an IEC product standard for that device and
which meets the isolation requirements of IEC 60947-1 as well as a utilization category defined
in the product standard as appropriate for on-load switching of motors or other inductive loads;
The supply disconnecting devices must
a. provide a means allowing the supply disconnecting devices to be locked in the OFF position;
b. be mounted 0.7 m to 1.7 m above the floor, within 2 m from the dryer, and within 8 m from
the operator position;
c. have a red actuator to indicate that it serves a dual Emergency Stop function;
d. be rated for branch circuit operation;
e. be approved for use in the country where installed;
8514-293-001 REV C PAGE 9
CONTROL TRANSFORMER CONNECTIONS Adjustment for different voltages of supply mains.
FOR -79C MODELS:
FOR -79X MODELS:
IMPORTANT: TRANSIENT VOLTAGE SURGE SUPPRESSORS
Like most electrical equipment your new machine can be damaged or have its life shortened
by voltage surges due to lightning strikes which are not covered by factory warranty. Local
power distribution problems also can be detrimental to the life of electrical components. We
recommend the installation of transient voltage surge suppressors for your new equipment.
These devices may be placed at the power supply panel for the complete installation and don’t
require an individual device for each machine.
These surge protectors help to protect equipment from large spikes and also from small
ongoing spikes in the power that occur on a day to day basis. These smaller surges can
shorten overall life of electrical components of all types and cause their failure at a later date.
Although they can’t protect against all events, these protective devices have a good reputation
for significantly lengthening the useful life of electronic components. Electronic components
8514-293-001 REV C PAGE 10
are helped to have a longer useful life when they are supplied with the clean stable electrical
power they like.
6. EXHAUST INSTALLATION. (Refer to Figure 3 at the end of section 6.) The exhaust duct
connection near the top of the dryer will accept a 152 mm (6 in.) round duct. Exhausting of
the dryer(s) should be planned and constructed so that no air restrictions occur. Any
restriction due to pipe size or type of installation can cause slow drying time, excessive heat,
and lint in the room.
From an operational standpoint, incorrect or inadequate exhausting can cause a cycling of
the high limit thermostat, which shuts off the heating elements and results in inefficient
drying.
Individual exhausting of the dryers is recommended. All heat, moisture, and lint should be
exhaust outside by attaching a pipe of the proper diameter to the dryer adapter collar and
extending it out through an outside wall. This pipe must be very smooth on the inside, as
rough surfaces tend to collect lint, which will eventually clog the duct and prevent the dryer
from exhausting properly. All elbows must be smooth on the inside. All joints must be made
so the exhaust end of one pipe is inside the next one downstream. The addition of an exhaust
pipe tends to reduce the amount of air the blower can exhaust. This does not affect the dryer
operation if held within practical limits. For the most efficient operation, it is recommended
that no more than 14’ (4.25 m) of straight 6” (152 mm) diameter pipe with two right angle
elbows is used. The design of the vent system shall be such that any condensate formed
when operating the dryer from cold shall either be retained and re-evaporated or discharged.
Maintain a minimum of 25 mm (1 in.) clearance between duct and combustible material.
If the exhaust pipe passes through a wall, a metal sleeve of slightly larger diameter should
be set in the wall and the exhaust pipe passed through this sleeve. This practice is required
by some local codes and is recommended in all cases to protect the wall. This type of
installation should have a means provided to prevent rain and high winds from entering the
exhaust when the dryer is not in use. A hood with a hinged damper can be used for this
purpose. Another method would be to point the outlet end of the pipe downward to prevent
entrance of wind and rain. In either case, the outlet should be kept clear, by at least 24”
(600 mm), of any objects, which would cause air restriction.
Never install a protective screen over the exhaust outlet.
When exhausting a dryer straight up through a roof, the overall length of the duct has the
same limits as exhausting through a wall. A rain cap must be placed on top of the exhaust
and must be of such a type as to be free from clogging. The type using a cone shaped “roof”
over the pipe is suitable for this application.
Exhausting the dryer into a chimney or under a building is not permitted. The exhaust air
should not be vented into a wall, a ceiling, or a concealed space of building. In these cases,
there is a danger of lint buildup, which can be highly combustible.
Installation of several dryers, where a main discharge duct is necessary, will need the
following considerations for installation (see Figure 3). Individual ducts from the dryers into
the main discharge duct should be at a 45-degree angle in the direction of discharge airflow.