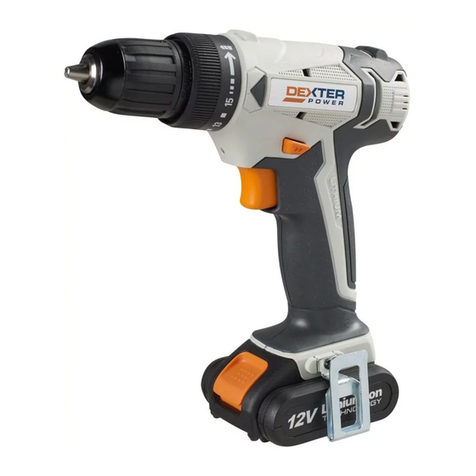
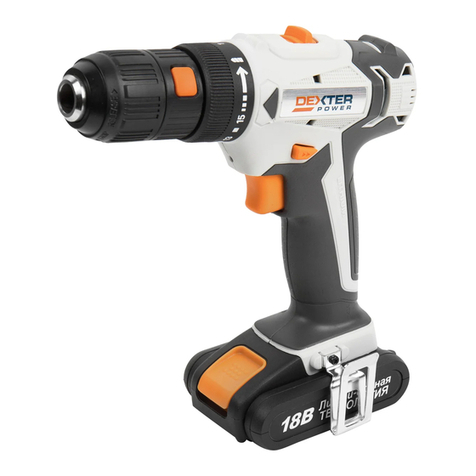
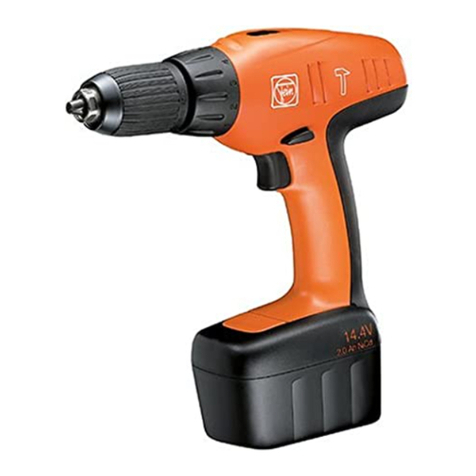
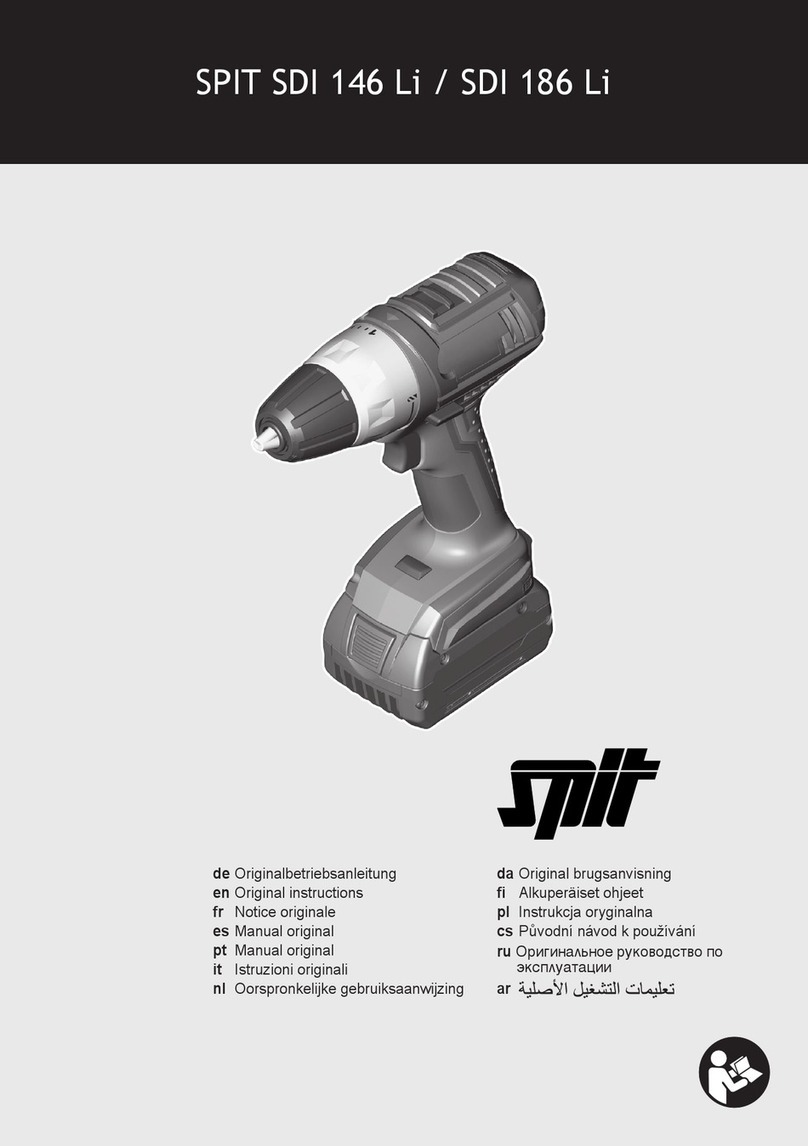
Dexter Power CDT214LD.U User manual

1
CDT214LD.U
14.4V Cordless drill 2 speeds
Furadeira sem o 14,4V de 2
velocidades
EN
PT
USERS MANUAL 4
MANUAL DO USUÁRIO 19
LEROY MERLIN CIA BRASILEIRA DE BRICOLAGEM - CNPJ
01.438.784/0001-05
MADE IN CHINA 20XX

2
A1 A2 A3
1 2 3
4
5
6
7
9
8
10

3
B1 B2 C
D1 D2
F1 F2
1
2
G
E
H

4
EN
GENERAL POWER TOOL SAFETY WARNINGS
WARNING Read all safety warnings, instructions, illustrations and specications
provided with this power tool. Failure to follow all instructions listed below may result in
electric shock, re and/or serious injury.
Save all warnings and instructions for future reference.
The term “power tool” in the warnings refers to your mains-operated (corded) power tool or battery-
operated (cordless) power tool.
1) Work area safety
a) Keep work area clean and well lit. Cluttered or dark areas invite accidents.
b) Do not operate power tools in explosive atmospheres, such as in the presence of ammable
liquids, gases or dust. Power tools create sparks which may ignite the dust or fumes.
c) Keep children and bystanders away while operating a power tool. Distractions can cause you
to lose control.
2) Electrical safety
a) Power tool plugs must match the outlet. Never modify the plug in any way. Do not use any
adapter plugs with earthed (grounded) power tools. Unmodied plugs and matching outlets will
reduce risk of electric shock.
b) Avoid body contact with earthed or grounded surfaces, such as pipes, radiators, ranges and
refrigerators. There is an increased risk of electric shock if your body is earthed or grounded.
c) Do not expose power tools to rain or wet conditions. Water entering a power tool will increase
the risk of electric shock.
d) Do not abuse the cord. Never use the cord for carrying, pulling or unplugging the power tool.
Keep cord away from heat, oil, sharp edges or moving parts. Damaged or entangled cords
increase the risk of electric shock.
e) When operating a power tool outdoors, use an extension cord suitable for outdoor use. Use
of a cord suitable for outdoor use reduces the risk of electric shock.
f) If operating a power tool in a damp location is unavoidable, use a residual current device
(RCD) protected supply. Use of an RCD reduces the risk of electric shock.
3) Personal safety
a) Stay alert, watch what you are doing and use common sense when operating a power
tool. Do not use a power tool while you are tired or under the inuence of drugs, alcohol or
medication. A moment of inattention while operating power tools may result in serious personal
injury.
b) Use personal protective equipment. Always wear eye protection. Protective equipment such as
dust mask, non-skid safety shoes, hard hat, or hearing protection used for appropriate conditions will
reduce personal injuries.
c) Prevent unintentional starting. Ensure the switch is in the off-position before connecting to
power source and/or battery pack, picking up or carrying the tool. Carrying power tools with
your nger on the switch or energising power tools that have the switch on invites accidents.
d) Remove any adjusting key or wrench before turning the power tool on. A wrench or a key left
attached to a rotating part of the power tool may result in personal injury.
e) Do not overreach. Keep proper footing and balance at all times. This enables better control of
the power tool in unexpected situations.
f) Dress properly. Do not wear loose clothing or jewellery. Keep your hair and clothing away
from moving parts. Loose clothes, jewellery or long hair can be caught in moving parts.
g) If devices are provided for the connection of dust extraction and collection facilities, ensure
these are connected and properly used. Use of dust collection can reduce dust-related hazards.
h)
Do not let familiarity gained from frequent use of tools allow you to become complacent and
ignore tool safety principles. A careless action can cause severe injury within a fraction of a second.
Original Instructions

5
EN
4) Power tool use and care
a) Do not force the power tool. Use the correct power tool for your application. The correct
power tool will do the job better and safer at the rate for which it was designed.
b) Do not use the power tool if the switch does not turn it on and off. Any power tool that cannot
be controlled with the switch is dangerous and must be repaired.
c) Disconnect the plug from the power source and/or remove the battery pack, if detachable,
from the power tool before making any adjustments, changing accessories, or storing
power tools. Such preventive safety measures reduce the risk of starting the power tool
accidentally.
d) Store idle power tools out of the reach of children and do not allow persons unfamiliar with
the power tool or these instructions to operate the power tool. Power tools are dangerous in
the hands of untrained users.
e) Maintain power tools and accessories. Check for misalignment or binding of moving parts,
breakage of parts and any other condition that may affect the power tool’s operation. If
damaged, have the power tool repaired before use. Many accidents are caused by poorly
maintained power tools.
f) Keep cutting tools sharp and clean. Properly maintained cutting tools with sharp cutting edges are
less likely to bind and are easier to control.
g) Use the power tool, accessories and tool bits etc. in accordance with these instructions,
taking into account the working conditions and the work to be performed. Use of the power
tool for operations different from those intended could result in a hazardous situation.
h) Keep handles and grasping surfaces dry, clean and free from oil and grease. Slippery handles
and grasping surfaces do not allow for safe handling and control of the tool in unexpected situations.
5) Battery tool use and care
a) Recharge only with the charger specied by the manufacturer. A charger that is suitable for one
type of battery pack may create a risk of re when used with another battery pack.
b) Use power tools only with specically designated battery packs. Use of any other battery
packs may create a risk of injury and re.
c) When battery pack is not in use, keep it away from other metal objects, like paper clips,
coins, keys, nails, screws or other small metal objects, that can make a connection from one
terminal to another. Shorting the battery terminals together may cause burns or a re.
d) Under abusive conditions, liquid may be ejected from the battery; avoid contact. If contact
accidentally occurs, ush with water. If liquid contacts eyes, additionally seek medical help.
Liquid ejected from the battery may cause irritation or burns.
e) Do not use a battery pack or tool that is damaged or modied. Damaged or modied batteries
may exhibit unpredictable behaviour resulting in re, explosion or risk of injury.
f) Do not expose a battery pack or tool to re or excessive temperature. Exposure to re or
temperature above 130 °C may cause explosion.
g) Follow all charging instructions and do not charge the battery pack or tool outside the
temperature range specied in the instructions. Charging improperly or at temperatures outside
the specied range may damage the battery and increase the risk of re.
6) Service
a) Have your power tool serviced by a qualied repair person using only identical replacement
parts. This will ensure that the safety of the power tool is maintained.
b) Never service damaged battery packs. Service of battery packs should only be performed by the
manufacturer or authorized service providers.

6
EN
DRILL SAFETY WARNINGS
1 ) Safety instructions for all operations
a) Hold the power tool by insulated gripping surfaces, when performing an operation where
the cutting accessory or fasteners may contact hidden wiring. Cutting accessory or fasteners
contacting a “live” wire may make exposed metal parts of the power tool “live” and could give the
operator an electric shock.
2) Safety instructions when using long drill bits
a) Never operate at higher speed than the maximum speed rating of the drill bit. At higher
speeds, the bit is likely to bend if allowed to rotate freely without contacting the workpiece, resulting
in personal injury.
b) Always start drilling at low speed and with the bit tip in contact with the workpiece. At higher
speeds, the bit is likely to bend if allowed to rotate freely without contacting the workpiece, resulting
in personal injury.
c) Apply pressure only in direct line with the bit and do not apply excessive pressure. Bits can
bend causing breakage or loss of control, resulting in personal injury.
SAFETY WARNINGS FOR BATTERY PACK
a) Do not dismantle, open or shred cells or battery pack.
b) Do not short-circuit a battery pack. Do not store battery packs haphazardly in a box or drawer where
they may short-circuit each other or be short-circuited by conductive materials. When battery pack is
not in use, keep it away from other metal objects, like paper clips, coins, keys, nails, screws or other
small metal objects, that can make a connection from one terminal to another. Shorting the battery
terminals together may cause burns or a re.
c) Do not expose battery pack to heat or re. Avoid storage in direct sunlight.
d) Do not subject battery pack to mechanical shock.
e) In the event of battery leaking, do not allow the liquid to come into contact with the skin or eyes. If
contact has been made, wash the affected area with copious amounts of water and seek medical
advice.
f) Seek medical advice immediately if a cell or battery pack has been swallowed.
g) Keep battery pack clean and dry.
h) Wipe the battery pack terminals with a clean dry cloth if they become dirty.
i) Battery pack needs to be charged before use. Always refer to this instruction and use the correct
charging procedure.
j) Do not maintain battery pack on charge when not in use.
k) After extended periods of storage, it may be necessary to charge and discharge the battery pack
several times to obtain maximum performance.
l)
Battery pack gives its best performance when it is operated at normal room temperature (20 °C ± 5 °C).
m) When disposing of battery packs, keep battery packs of different electrochemical systems separate
from each other.
n) Recharge only with the charger specied by the manufacturer. Do not use any charger other than
that specically provided for use with the equipment. A charger that is suitable for one type of battery
pack may create a risk of re when used with another battery pack.
o) Do not use any battery pack which is not designed for use with the equipment.
p) Keep battery pack out of the reach of children.
q) Retain the original product literature for future reference.
r) Remove the battery from the equipment when not in use.
s) Dispose of properly.
t) Do not mix cells of different manufacture, capacity, size or type within a device.
u) Do not remove battery pack from its original packaging until required for use.
v) Observe the plus (+) and minus (–) marks on the battery and ensure correct use.

7
EN
GENERAL SAFETY WARNINGS FOR BATTERY
CHARGER
WARNING Read all safety warnings and all instructions.
Failure to follow the warnings and instructions may result in
electric shock, re and/or serious injury.
Save all warnings and instructions for future reference.
This appliance can be used by children aged from 8 years and above
and persons with reduced physical, sensory or mental capabilities or
lack of experience and knowledge if they have been given supervision
or instruction concerning use of the appliance in a safe way and
understand the hazards involved. Children shall not play with the
appliance. Cleaning and user maintenance shall not be made by
children without supervision.
If the supply cord is damaged, it must be replaced by the manufacturer,
its service agent or similarly qualied persons in order to avoid a
hazard.
ADDITIONAL SAFETY INSTRUCTIONS FOR YOUR
BATTERY CHARGER
1. Before charging, read the instructions.
2. Do not charge a leaking battery.
3. Do not use chargers for works other than those for which they are
designed.
4. Before charging, ensure your charger is matching the local AC
supply.
5. For indoor use, or do not expose to rain.
6. The charging device must be protected from moisture.
7. Do not use the charging device in the open.
8. Do not short out the contacts of battery or charger.
9. Respect the polarity “+/-“ when charging.
10. Do not open the unit and keep out of the reach of children.
11. Do not charge the batteries of other manufactures or ill-suited
models.
12. Ensure that the connection between the battery charger and battery
is correctly positioned and is not obstructed by foreign bodies.
13. Keep battery charger’s slots are free of foreign objects and protect
against dirt and humidity. Store in a dry and frost-free place.
14. When charging batteries, ensure that the battery charger is in a
well-ventilated area and away from inammable materials. Batteries

8
EN
can get hot during charging. Do not overcharge any batteries.
Ensure that batteries and chargers are not left unsupervised during
charging.
15. Do not recharge non-rechargeable batteries, as they can overheat
and break.
16. Longer life and better performance can be obtained if the battery
pack is charged when the air temperature is between 18ºC and
24ºC. Do not charge the battery pack in air temperatures below
0ºC, or above 40ºC. This is important as it can prevent serious
damage to the battery pack.
17. Charge only battery pack of the same model provided by The
manufacturer and of models recommended by The manufacturer
18. After charging, disconnect the battery charger from the supply
mains. Then remove the chassis connection and then the battery
connection.

9
EN
TECHNICAL DATA
Type CDT214LD.U(CDT -designation of machinery, representative of Cordless Drill)
NOISE AND VIBRATION DATA
A weighted sound pressure LpA 78dB(A)
KpA 3dB(A)
A weighted sound power LwA 89dB(A)
KwA 3dB(A)
Wear ear protection when sound pressure is over 80dB(A)
VIBRATION INFORMATION
The declared vibration total value and the declared noise emission value have been measured in
accordance with a standard test method and may be used for comparing one tool with another.
The declared vibration total value and the declared noise emission value may also be used in a
preliminary assessment of exposure.
WARNING: The vibration and noise emissions during actual use of the power tool can differ
from the declared value depending on the ways in which the tool is used especially what kind of
workpiece is processed dependant on the following examples and other variations on how the tool is
used:
How the tool is used and the materials being cut or drilled.
The tool being in good condition and well maintained.
The use of the correct accessory for the tool and ensuring it is sharp and in good condition.
Vibration total values (triax vector sum) determined according to EN 62841:
Drilling into metal Vibration emission value ah, D =1.909m/s²
Uncertainty K = 1.5m/s²
Voltage 14.4V
Charger input 100-240V~50/60Hz, 42W
Charger output 10.8-20V 1500mA
Charger Model ACG1815D
Battery pack model ABP1415SD
Battery capacity 1.5Ah Li-Ion
No. Of Battery cells 4
Charging time 1h
No load speed 0-350/0-1350/min
Number of clutch positions 18+1
Max torque 30 Nm
Chuck capacity 10 mm
Max. drilling capacity
Steel 10 mm
Wood 28mm
Machine weight 1.81 kg

10
EN
The tightness of the grip on the handles and if any anti vibration and noise accessories are used.
And the tool is being used as intended by its design and these instructions.
To reduce vibration and noise risk:
-Wear anti-vibration gloves
-Shorten trigger time
-Wear hearing protection
This tool may cause hand-arm vibration syndrome if its use is not adequately managed.
WARNING: To be accurate, an estimation of exposure level in the actual conditions of use
should also take account of all parts of the operating cycle such as the times when the tool is
switched off and when it is running idle but not actually doing the job. This may signicantly reduce the
exposure level over the total working period.
Helping to minimise your vibration and noise exposure risk.
Always use sharp chisels, drills and blades.
Maintain this tool in accordance with these instructions and keep well lubricated (where appropriate).
If the tool is to be used regularly then invest in anti vibration and noise accessories.
Plan your work schedule to spread any high vibration tool use across a number of days.
ACCESSORIES
Li-Ion battery pack 2
Charger 1
Belt clip 1
Plastic Rawlplug: 5mm*8/6mm*8/8mm*8/10mm*3 27
Screw:3mm*8/4mm*8/5mm*8/6mm*3 27
25mm Screwdriver bits: PHILLIPS(PH0x3/PH1x6/ PH2x6/PH3x3) 18
25mm Screwdriver bits: POZI(PZ0x3/PZ1x6/ PZ2x6/PZ3x3) 18
25mm Screwdriver bits: T10/T15*2/T20*4/T25*3/T30*3/T40*2 15
25mm Screwdriver bits: HEX(2/2.5/3*2/4*2/5*2/6*2/7) 11
HSS drill bit: 1.5/2.0/2.5/3.0/3.5/4.0/4.5/5.0/6.0 9
50mm Screwdriver bits: PHILLIPS(PH1*2/PH2*4/PH3*2) 8
25mm screwdirver bits:SLOTTED (SL3/SL4x2/SL5/SL6x2/SL7x2) 8
Wood working drills bit: 3.0/4.0/5.0/6.0/7.0/8.0 6
50mm Screwdriver bits: SLOTTED(SL4.5/SL5.5*2/SL6.5) 4
power nut drive: 5.0/6 .0/8.0mm 3
Allen key: 3/4/5 3
50mm Magnetic bits holder 1
We recommend that you purchase your accessories from the same store that sold you the tool. Use
good quality accessories marked with a well-known brand name. Choose the type according to the
work you intend to undertake. Refer to the accessory packaging for further details. Store personnel
can assist you and offer advice.

11
EN
COMPONENT LIST
1. Keyless chuck
2. Torque adjustment ring
3. Two-speed gear control
4. Forward/Reverse rotation control
5. Soft grip handle
6. Belt Clip
7. Battery pack
8. Battery pack release button
9. On/off switch
10. Sight light

12
EN SYMBOLS
To reduce the risk of injury, user must read instruction manual
Warning
This product is recyclable. If it cannot be used anymore, please take it to waste recycling
centre.
Wear ear protection
Wear eye protection
Wear dust mask
Indoor use only
Batteries may enter water cycle if disposed improperly, which can be hazardous for
ecosystem. Do not dispose of waste batteries as unsorted municipal waste.
Do not burn
Waste electrical products must not be disposed of with household waste. Please recycle
where facilities exist. Check with your local authorities or retailer for recycling advice..
Always charge the battery pack between temperatures 0°C to 40°C
Li-Ion battery This product has been marked with a symbol relating to ‘separate
collection’ for all battery packs and battery pack. It will then be recycled or
dismantled in order to reduce the impact on the environment. Battery packs can be
hazardous for the environment and for human health since they contain hazardous
substances.
For indoor use only Read the operator’s manual.
Double insulation Fuse
Positive terminal Negative terminal
T 2A
Type designation CDT214LD.U (CDT-designation of machinery, representative of Battery-powered Drill)
We recommend that you purchase your accessories listed in the above list from the same store that
sold you the battery charger. Refer to the accessory packaging for further details. Store personnel
can assist you and offer advice.

13
EN
OPERATING INSTRUCTIONS
NOTE: Before using the tool, read the instruction book carefully.
INTENDED USE
The machine is intended for driving in and loosening screws as well as for drilling in wood, metal
and plastic.
BEFORE PUTTING INTO OPERATION
A) CHARGING THE BATTERY
The battery charger supplied is matched to the Li-Ion battery installed in the machine. Do not use
another battery charger.
The Li-Ion battery is protected against deep discharging. When the battery is empty, the machine is
switched off by means of a protective circuit: The tool holder no longer rotates.
In a warm environment or after heavy use, the battery pack may become too hot to permit charging.
Allow time for the battery to cool down before recharging.
When the battery pack is charged for the rst time and after prolonged storage, the battery pack will
accept a 100% charge after several charge and discharge cycles.
B) TO REMOVE THE BATTERY PACK (SEE FIG A1)
Depress the Battery Pack Release Button (8) rmly rst and then slide the Battery Pack out from
your tool.
C) TO INSTALL THE BATTERY PACK (SEE FIG A2)
Slide the fully charged Battery Pack onto the tool with sufcient force until it clicks into position.
D) HOW TO CHARGE YOUR BATTERY PACK (SEE FIG A3)
CHARGING PROCEDURE
1) Plug the charger into an appropriate outlet. The light will be green.
2) Slide the battery pack into the charger, the light will turn to red to indicate the charging process
has started.
3) When charging is completed, the light will turn to green. The pack is now fully charged, unplug
the charger and remove the battery pack.
WARNING: When battery charge runs out after continuously use or exposure to direct
sunlight or heat, allow time for the tool to cool down before re-charging to achieve the full
charge.
CHARGING INDICATOR
This charger is designed to detect some problems that can arise with battery packs. Indicator lights
indicate problems (see table below). If this occurs, insert a new battery pack to determine if the
charger is OK. If the new battery charges correctly, then the original pack is defective and should be
returned to a service center or recycling service center. If the new battery pack displays the same
problem as the original Battery Pack, have the charger tested at an authorized service center.

14
EN
Light ON/OFF ash Status
Red on ________ Charging
Red ash _ _ _ _ Defective Battery
Green on ________ Fully Charged
Green ash _ _ _ _ Hot/Cold Delay
OPERATING INSTRUCTIONS
1. HOW TO USE THE BELT CLIP (SEE FIG.B1, B2)
Screw the Belt clip (6) on the tool with the screw provided in the plastic bag. The Belt clip can be
hooked on your belt or pocket, etc.
2. ON / OFF SWITCH (SEE FIG. C)
Depress the On/Off switch to start and release it to stop your drill. The on/off switch is tted with a
brake function which stops your chuck immediately when you quickly release the switch.
It is also a variable speed switch that delivers higher speed and torque with increased trigger
pressure. Speed is controlled by the amount of switch trigger depression.
WARNING: Do not operate for long periods at low speed because excess heat will be
produced internally.
3. SWITCH LOCK
The switch trigger can be locked in the OFF position. This helps to reduce the possibility of accidental
starting when not in use. To lock the switch trigger, place the rotation control in the center position.
4. REVERSIBLE (SEE FIG. D1, D2)
For drilling and screw driving use forward rotation marked “ ” (lever is moved to the left). Only
use reverse rotation marked “ ” (lever is moved to the right) to remove screws or release a
jammed drill bit.
WARNING: Never change the direction of rotation when the chuck is rotating, wait until it has
stopped!
5. TWO-SPEED GEAR CONTROL (SEE FIG. E)
The drill has a two-speed gear control designed for drilling or driving at LO (mark is 1) or HI (mark
is 2) speeds. A slide switch is located on top of the drill to select either LO or HI speed. When using
the drill in the LO speed range, the speed will decrease and the drill will have greater power and
torque. When using the drill in the HI speed range, the speed will increase and the drill will have less
power and torque.
Gear I
Low speed range: for screwdriving or working with large drilling diameter
Gear II
High speed range: for working with small drilling diameter
WARNING: To prevent gear damage, always allow the chuck to come to a complete
stop before changing the direction of rotation or the two-speed gear control.
6. CHUCK ADJUSTMENT (SEE FIG. F1, F2)
To open the chuck jaws rotate the front section of the chuck in direction 1. Insert the drill bit between
the chuck jaws and rotate the front section in the direction 2. Ensure the drill bit is in the center of
the chuck jaws. Finally, rmly rotate the front chuck section in the directions 2. Your drill bit is now
clamped in the chuck.

15
EN
7. TORQUE ADJUSTMENT (SEE FIG. G)
(Screw driving force of your drill driver)
The torque is adjusted by rotating the torque adjustment ring. The torque is greater when the torque
adjustment ring is set on a higher setting. The torque is less when the torque adjustment ring is set
on a lower setting.
Make the setting as follows:
1 - 4 for driving small screws
5 - 9 for driving screws into soft material
10 - 18 for driving screws into soft and hard material
for heavy drilling
8. AUTOMATIC SPINDLE LOCK (SEE FIG. H)
The automatic spindle lock allows you to use it as a regular screwdriver. You can give an extra twist
to rmly tighten a screw, loosen a very tight screw or continue working when the battery energy has
expired. For manual screwdriver purposes, the chuck is automatically locked when the tool is off.
9. USING THE SIGHT LIGHT
To turn on the light simply press the on/off switch. When you release the on/off switch, the light will be off.
LED lighting increases visibility-great for dark or enclosed area. LED is also a battery capacity
indicator. It will ash when power gets low.
10. DRILLING
When drilling into a hard smooth surface, use a center punch to mark the desired hole location. This
will prevent the drill bit from slipping off center as the hole is started. Hold the tool rmly and place
the tip of the bit at the point to be drilled. Depress the switch trigger to start the tool. Move the drill
bit into the workpiece, applying only enough pressure to keep the bit cutting. Do not force or apply
side pressure to elongate a hole.
Tungsten carbide drill bits should always be used for concrete and masonry. When drilling
in metal, only use HSS drill bits in good condition. Always use a magnetic bit holder (not
included) when using short screwdriver bits. When screw-driving, apply a small quantity of liquid
soap or similar to the screw threads to ease insertion.
11. DISPOSAL OF AN EXHAUSTED BATTERY PACK
To preserve natural resources, please recycle or dispose of the battery pack properly. This
battery pack contains Lithium batteries. Consult your local waste authority for information
regarding available recycling and/or disposal options. Discharge your battery pack by
operating your drill, then remove the battery pack from the drill housing and cover the battery pack
connections with heavy-duty adhesive tape to prevent short circuit and energy discharge. Do not
attempt to open or remove any of the components.
12. OVERLOAD PROTECTION
When overloaded, the motor comes to a stop. Relieve the load on the machine immediately and
allow cooling for approx. 30 seconds at the highest no-load speed.
13. TEMPERATURE DEPENDENT OVERLOAD PROTECTION
When using as intended for the power tool cannot be subject to overload. When the load is too high
or the allowable battery temperature of 75°C is exceeded, the electronic control switches off the
power tool until the temperature is in the optimum temperature range again.
14. PROTECTION AGAINST DEEP DISCHARGING
The Li-Ion battery is protected against deep discharging by the “Discharging Protection System”.

16
EN
When the battery is empty, the machine is switched off by means of a protective circuit: The inserted
tool no longer rotates.
PROBLEM SOLUTION
1. WHY DOES THE DRILL NOT TURN ON WHEN YOU PRESS THE SWITCH?
The forward/reverse rotation control, which is on top of the trigger, is positioned in the lock function.
Unlock the forward/reverse rotation control by putting it into the required rotation position. Push the
trigger and the drill will start to rotate.
2. THE DRILL STOPS BEFORE THE SCREW IS COMPLETELY TIGHTENED. WHY?
Verify the torque position of the torque adjusting ring, you can nd the torque-adjusting ring between
the chuck and the drill body. Position 1 is the lowest torque (screw driving force) and position 18
is the highest torque (screw driving force). Position is for drill operation. Regulate the torque
adjusting ring to a higher position to reach the best result.
3. REASONS FOR DIFFERENT BATTERY PACK WORKING TIMES
Charging time problems, as following: having not used a battery pack for a long time will reduce the
battery pack working time. This can be corrected after several charge and discharge operations by
charging & working with your drill. Heavy working conditions such as large screws into hard wood
will use up the battery pack energy faster than lighter working conditions. Do not re-charge your
battery pack below 0ºC and above 45ºC as this will affect performance.
MAINTENANCE
Your tool requires no additional lubrication or maintenance.
There are no user serviceable parts in your power tool. Never use water or chemical cleaners to
clean your power tool. Wipe clean with a dry cloth. Always store your power tool in a dry place.
Keep the motor ventilation slots clean. Keep all working controls free of dust. Occasionally you may
see sparks through the ventilation slots. This is normal and will not damage your power tool.
For battery tools
The ambient temperature range for tool and battery use and storage is 0°C-45°C.
The recommended ambient temperature range for the charging system during charging is 0°C-40°C.
ENVIRONMENTAL PROTECTION
Waste electrical products must not be disposed of with household waste. Please recycle
where facilities exist. Check with your local authorities or retailer for recycling advice.
DISPOSAL OF AN EXHAUSTED BATTERY PACK
To preserve natural resources, please recycle or dispose of the battery pack properly. This
battery pack contains Li-ion batteries. Consult your local waste authority for information
regarding available recycling and/or disposal options. Discharge your battery pack by
operating your drill, then remove the battery pack from the drill housing and cover the battery pack
connections with heavy-duty adhesive tape to prevent short circuit and energy discharge. Do not
attempt to open or remove any of the components.

17
EN
WARRANTY
1. Dexter products are designed to highest DIY quality standards. Dexter provides a 24-months
warranty for its products, from the date of purchase. This warranty applies to all material and
manufacturing defects which may arise. No further claims are possible, of whatever nature, direct or
indirect, relating to people and /or materials. Dexter products are not directed to professional use.
2. In the event of a problem or defect, you should rst always consult your Dexter dealer. In most cases,
the Dexter dealer will be able to solve the problem or correct the defect.
3. Repairs or the replacement of parts will not extend the original warranty period.
4. Defects which have arisen as a result of improper use or wear are not covered by the warranty.
Amongst other things, this relates to switches, protective circuit switches and motors, in the event of
wear.
5. Your claim upon the warranty can only be processed if:
● Proof of the purchase date can be provided in the form of a receipt.
● No repairs and/or replacements have been carried out by third parties.
● The tool has not been subjected to improper use (overloading of the machine or tting non-
approved accessories).
● There is no damage caused by external inuences or foreign bodies such as send or stones.
● There is no damage caused by non-observance of the safety instructions and the instructions for
use.
● There is no force majeure on our part.
● A description of the complaint is enclosed.
6. The warranty stipulations apply in combination with our terms of sale and delivery.
7. Fault tools to be returned to Dexter via Dexter dealer will be collected by Dexter as long as the
product is properly packaged. If faulty goods are sent directly to Dexter by the consumer, Dexter will
only be able to process these goods if the consumer pays the shipping costs.
8. Products which are delivered in a poorly packaged condition will not be accepted by Dexter.
Batch No.:

18
EN

19
PT
AVISOS DE SEGURANÇA GERAIS DA FERRAMENTA
ELÉTRICA
AVISO Leia todos os avisos, instruções, ilustrações e especicações de segurança
fornecidos com esta ferramenta. O não cumprimento de todas as instruções listadas abaixo
pode resultar em choque elétrico, incêndio e/ou lesão grave.
Guarde todos os avisos e instruções para consulta futura.
O termo «ferramenta elétrica» contido nos avisos refere-se à ferramenta elétrica operada por
tomada elétrica (com o) ou à ferramenta elétrica operada por bateria (sem o).
1) Segurança na Área de trabalho
a) mantenha a área de trabalho limpa e bem iluminada. Áreas de trabalho desorganizadas ou
escuras são um convite aos acidentes.
b) Não opere ferramentas elétricas em atmosferas explosivas, como na presença de líquidos,
gases ou poeiras inamáveis. As ferramentas elétricas criam faíscas que podem incendiar pó
ou vapores.
c) Mantenha crianças e terceiros afastados enquanto opera a ferramenta elétrica. As distrações
podem fazer com que você perca o controle do equipamento.
2) Segurança elétrica
a) Os plugues de ferramentas elétricas devem corresponder à tomada. Nunca modique o
plugue de maneira alguma. Não utilize nenhum plugue adaptador com ferramentas elétricas
aterradas. Plugues sem modicações e tomadas correspondentes reduzirão o risco de
choque elétrico.
b) Evite o contato do corpo com superfícies aterradas ou ligadas à terra, tais como tubos,
radiadores, fornos e refrigeradores. Existe um risco maior de choque elétrico se seu corpo
estiver aterrado ou ligado à terra.
c) Não exponha as ferramentas elétricas a chuva ou condições de umidade. A entrada de água
numa ferramenta elétrica aumenta o risco de choque elétrico.
d) Não use o o de maneira negligente. Nunca use o o para carregar, puxar ou desconectar a
ferramenta elétrica. Mantenha o cabo longe do calor, de óleo, bordas aadas ou partes que se
movem. Cabos danicados ou emaranhados aumentam o risco de choque elétrico.
e) Ao operar uma ferramenta elétrica em ambiente externo, use uma extensão apropriada para
uso externo. O uso de um o apropriado para uso externo reduz o risco de choque elétrico.
f) Se não for possível evitar operar uma ferramenta elétrica em um ambiente úmido, utilize a
alimentação protegida por um dispositivo de corrente residual (DCR). O uso de um DCR
reduz o risco de choque elétrico.
3) Segurança pessoal
a) Fique alerta, preste atenção no que está fazendo e use o bom senso ao operar a ferramenta
elétrica. Não utilize uma ferramenta elétrica quando estiver cansado ou sob inuência de
drogas, álcool ou medicação. Um momento de falta de atenção ao operar ferramentas
elétricas pode resultar em grave lesão pessoal.
b) Utilize equipamento de proteção pessoal. Use sempre proteção para os olhos. Equipamentos
de proteção tais como máscara de proteção contra poeira, calçados antiderrapantes de
segurança, capacete de segurança ou proteção para os ouvidos, usados em condições
apropriadas, reduzirão as lesões pessoais.
c) Previna-se contra a inicialização acidental. Verique se o interruptor está desligado antes
de conectar a ferramenta à fonte de alimentação e/ou pacote de bateria, antes de levantá-la
ou carregá-la. Transportar a ferramenta elétrica com os dedos no interruptor ou energizar
ferramentas elétricas com o interruptor ligado são convites a acidentes.
d) Remova qualquer chaveta ou chave de ajuste antes de ligar a ferramenta elétrica. Uma chave
Instruções Originais

20
PT
inglesa ou uma chave que permaneça conectada a uma parte giratória da ferramenta elétrica
pode provocar lesões pessoais.
e) Não se debruce. Mantenha os pés no chão e o equilíbrio o tempo todo. Isso permite um
melhor controle da ferramenta elétrica em situações inesperadas.
f) Use roupas adequadas. Não use roupas largas ou joias. Mantenha seus cabelos e roupas
afastados de peças em movimento. Roupas largas, joias ou cabelos compridos podem
enganchar-se nas partes móveis.
g) Se forem fornecidos dispositivos para a conexão de instalações de extração e coleta de
poeira, verique se as mesmas estão conectadas e sendo usadas adequadamente. O uso de
coletor de poeira pode reduzir os perigos relacionados com a poeira.
h) Não deixe a familiaridade adquirida com o uso frequente das ferramentas permitir que você
se torne complacente e ignore princípios de segurança da ferramenta. Uma ação descuidada
pode causar lesões graves numa fração de segundo.
4) Uso e cuidado com a ferramenta elétrica
a) Não force a ferramenta elétrica. Use a ferramenta elétrica adequada para sua aplicação. A
ferramenta elétrica correta fará o trabalho melhor e de modo mais seguro na velocidade para
a qual foi projetada.
b) Não use a ferramenta elétrica se o interruptor não ligar e desligar. Qualquer ferramenta
elétrica que não puder ser controlada com o interruptor é perigosa e deve ser consertada.
c) Desconecte o plugue da fonte de alimentação e/ou remova o pacote de bateria, se o mesmo
for removível, antes de fazer quaisquer ajustes, trocar acessórios ou guardar as ferramentas
elétricas. Tais medidas de segurança preventivas reduzem o risco de dar a partida na
ferramenta elétrica acidentalmente.
d) Guarde as ferramentas elétricas que não estão sendo usadas fora do alcance de crianças
e não permita que pessoas que não tenham familiaridade com as mesmas ou com estas
instruções operem a ferramenta elétrica. As ferramentas elétricas são perigosas nas mãos de
usuários não habilitados.
e) Manutenção de ferramentas elétricas e acessórios. Verique o desalinhamento ou
engripamento de peças em movimento, a ruptura de peças e qualquer outra condição que
possa afetar a operação da ferramenta elétrica. Se estiver danicada, conserte a ferramenta
elétrica antes de seu uso. Muitos acidentes são causados pela má manutenção de ferramentas
elétricas.
f) Mantenha as ferramentas cortantes aadas e limpas. Ferramentas de corte apropriadamente
mantidas, com pontas de corte aadas, têm menor probabilidade de engripar e são mais fáceis de
controlar.
g) Use a ferramenta elétrica, acessórios e pontas etc. em conformidade com estas instruções,
levando em consideração as condições de trabalho e a tarefa a ser realizada. O uso da
ferramenta elétrica para operações com ns diferentes daqueles a que se destina podem resultar em
situações perigosas.
h) Mantenha a pega seca, limpa e livre de óleo e graxa. Alças escorregadias e superfícies que
prendem não permitem um manuseamento e controle seguros da ferramenta em situações
inesperadas.
5) 5) Uso e cuidado com a ferramenta a bateria
a) Recarregue somente com o carregador especicado pelo fabricante. Um carregador adequado
a certo tipo de conjunto de bateria pode criar um risco de incêndio quando usado com outro tipo de
conjunto de baterias.
b) Use ferramentas elétricas somente com conjuntos de bateria especicamente indicados. O
uso de qualquer outro conjunto de bateria pode criar riscos de lesão e incêndio.
c) Quando o jogo de baterias não estiver sendo usado, mantenha-o afastado de outros objetos
de metal como clipes de papel, moedas, chaves, pregos, parafusos ou outros pequenos
Table of contents
Languages:
Other Dexter Power Power Screwdriver manuals
