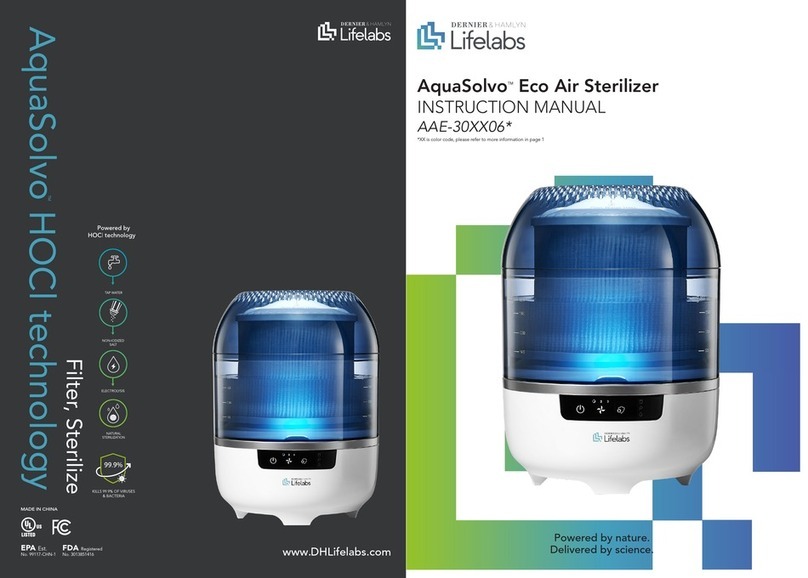
DH Lifelabs AquaSolvo AAHE-120WH03Pro User manual

AquaSolvoTM Commercial Eco Air Sterilizer
INSTRUCTION MANUAL
AAHE-120WH03Pro
www.DHLifelabs.com
AquaSolvo HOCl technology
TM
EPA Est.
No. 99117-CHN-1
FDA
Registered
No. 3013851416
MADE IN CHINA
Filter, Sterilize

Table of Contents
Introduction .......................................1
Safety Instructions ..................................1
Product Overview ..................................3
How It Works ......................................3
Product Specications ...............................4
Unpacking and Setup................................5
Operation Instructions ...............................6
Filter Replacement..................................8
Troubleshooting ..................................10
Customer Service..................................11
Product Warranty..................................11

Introduction
Thank you for purchasing the AquaSolvo
Commercial Eco Air Sterilizer. This device uses
a three-stage process to clean and purify the
air. There is a 2-in-1 HEPA Filter to eliminate
particulate matter as small as 0.3 microns, a
HOCl generator system that can generate
HOCl to eliminate odors and kill a wide variety
of microbial contaminants, including bacteria
and viruses.
AquaSolvo Connercial Eco Air Sterilizer: AAHE-
120XX03Pro
Note: XX is the color code. The unit is available
in a variety of colors.
This is for model AAHE-120WH03Pro
instruction manual.
1 2
Safety Instructions
READ THESE SAFETY INSTRUCTIONS BEFORE USE
When using electrical appliances, basic precautions should always be followed to reduce the risk of
re, electric shock, and injury to persons, including the following:
WARNING: to reduce the risk of re or electric shock, do not use this device with any solid-
state speed control device.
!Read all the instructions before operating the
unit.
!Place the unit on the oor/ground where it is
unlikely to be bumped or overturned to avoid
potential spills.
!DO NOT sit, stand, or place heavy objects on
the unit.
!The unit must only be used in the upright
position.
!Do not move the unit when operating.
!When moving the machine, it must be powered
off and moved carefully to avoid spilling the
water inside. If water is accidentally spilled,
please wipe it dry. If the machine is accidentally
tipped over or falls, water in the tray will spill
inside the machine. It is recommended to
unplug the power cord and allow the water to
completely dry before use. The recommended
storage time is 7 days.
!NEVER place liquid containers, including drinks
on top of the unit. Spilling liquids into the unit
can damage the machine and potentially cause
a shock or re hazard.
!Children should not use this equipment alone.
Keep the unit away from small children and
pets.
!Ventilate the room with fresh air regularly after
using the machine.
!Do not use the unit outdoors.
!NEVER use the unit unless it is fully assembled.
!This product can only be used with the
supplied accessories.
!DO NOT allow foreign objects to enter
ventilation or exhaust opening as this may
cause electric shock or damage to the unit. DO
NOT block air outlets or intakes.
!Locate the unit near a outlet and avoid using
an extension cord or power strip.
!This appliance has a three-pronged polarized
plug. To reduce the risk of electric shock,
this plug is intended to t only one way in
a polarized outlet. If the plug does not t
fully in the outlet, reverse the plug. If it still
does not t, contact a qualied electrician.
DO NOT attempt to defeat this safety feature.
Safety Instructions (Cont.)
!Ensure the electrical outlet used with the
Sterilizer is not loose or damaged. A poor
electrical connection can result in overheating
and damage to the power cord. If the outlet
needs to be serviced contact a licensed
electrician for repairs.
!ALWAYS turn the unit OFF and unplug from
the wall outlet when not in use.
!To disconnect the unit, make sure it is powered
OFF then grip the plug and pull it from the wall
outlet. NEVER pull the cord to unplug it.
!Do not use any electrical appliance that has a
damaged power cord or plug.
!Do not use any electrical product that you
believe may be faulty product, or that has been
dropped or damaged in any way.
!Keep the power cord away from hot surfaces.
!Do not route the power cord under carpet or
cover it with carpet. Route the power cord to
minimize the possibility that someone could
trip over it.
!Do not expose the unit to excessive moisture.
Avoid operating it where it might come in
contact with water, such as bathrooms, laundry
rooms or other damp places.
!Disconnect the power before cleaning or
servicing the unit.
!The unit is not user serviceable. Do not attempt
to repair the product yourself. In the event of
a failure, contact customer service for repair or
replacement.
!The inside of the tray must be cleaned
frequently, and relled with clean tap water
daily. Leaving dirty water inside the unit will
cause dirt/scale to form. This can produce bad
odors and cause a potential health hazard.
!The water in the tray is non-potable. Do not
allow animals to drink the water and do not
use it to water plants to avoid damaging their
health.
!If at any time during use of this product if you
feel unwell turn off the unit and seek medical
attention.
!Do not add any mineral waters, chemicals,
aromatics or other liquids besides clean tap
water to the water tray. This can damage the
unit and potentially cause a health hazard.
!Only add tap water below 86° F (30° C) and
cannot be replaced by mineral water and other
solutions.
!Home appliances/furniture/oor exposed to
HOCl water may be discolored due to the
bleaching effect of hypochlorous acid. Clean
up any spills quickly.

3 4
Figure 1. Major Components
Product Overview
Pls refer to Figure 1 for the product overview.
•Main Body: The salt bottle is located in the
top part of the interior. The electrolysis water
tray, dual water containers, and lters are in
the lower part of the interior chamber. There
are four casters on the bottom of the chassis
allowing for easy movement.
•Water Tray: The Water Tray is located at
the bottom of the chamber. It holds the
salt water that is used in the electrolysis
process. The tray has molded mounting
surfaces for the two 2-in-1 HEPA Filters, two
Cold Evaporation Filters, and two Water
Containers.
•2-in-1 HEPA Filters: The two 2-IN-1 HEPA
Filters capture particulate matter as small as
0.3 microns, including dust, pollen, hair. They
mount in slots on the left and right sides out
of the water tray.
•Cold Evaporation Filters: The two Cold
Evaporation Filters mount in slots on the left
and right sides of the Water Tray.
•Salt Bottle with Scoop: For convenience,
a salt bottle with an integrated measuring
scoop is provided and can be stored inside
the main body.
•Control Panel: At the top of the unit is
a control panel with a number of touch-
sensitive buttons. These buttons are used to
control operation of the unit and the display
shows humidity level and different operating
status.
•Electrolysis Panel: The electrolysis panel is
located in the bottom chamber and houses
the electrodes that generate the HOCl. The
panel must be raised up to remove the water
tray, and lowered back down for the unit to
operate.
•Power Cord: (Not shown) AC power cord
with a 3-prong grounded plug that is used to
connect the AquaSolvo Commercial Eco Air
Sterilizer to AC power.
•Key & Hook: A key and a hook with taping
are provided. The key is used to open the
side panel. You can attach the hook to any
positions on the machine chassis or other
places for the key hanging.
How It Works
The AquaSolvo Commercial Eco Air Sterilizer
incorporates a three-stage cleaning system
to help clean the air. A fan forces air through
the unit from bottom to top.
•Stage 1: Pre-Filter. The pre-lter captures
large particulate matters including dust,
pollen,and hair.
•Stage 2: True HEPA Filter. The true High
Efciency Particulate Air (HEPA) lter
captures up to 99.97% of particles down
to 0.3 microns in diameter.
•Stage 3: HOCl Generator System.
Hypochlorous acid (HOCl) is generated
inside the machine, and absorbed by
a Cold Evaporation Filter. The liquid is
evaporated as air passes through the
Cold Evaporation Filter. This disperses the
HOCl throughout the airspace in the room
allowing it to destroy a variety of bacteria
and viruses.
Power Consumption 60 Watts
Input Voltage 120 VAC 60 Hz
Fan Speed 3 levels (1/2/3)
Noise Max. 63 dB(A)
CADR (clean air delivery rate) 300 CFM
Timer 4H/8H/12H
Water Container Capacity 118.35 oz. (3500ml) x2pcs
HOCl Recipe 2 scoops non-iodized salt: 3500ml/118.35 oz. tap water to
each of the water containers
Material & Finish Stainless Steel, Glossy White
Recommended Room Size 1300 square feet
Reminder - Filter Replacement Reminder: 2-in-1 HEPA lter & Cold
evaporation lter
- Salt Level Reminder
- Water Level Reminder
Dimension (Machine) 22.5 X 13.8 X 34.6 inches (571*350*880mm)
Net Weight 59.75lbs (27.1kg)
Product Specications

5 6
Initial Startup
When the Sterilizer is rst powered up, you
will hear the startup chime (do-re-mi) and
the Room Size Selection button will ash,
prompting you to select the appropriate room
size. To select a room size, press the button
repeatedly to cycle through the available
options (500, 700, 900, 1100, and 1300 square
feet). If no selection is made within 30 seconds
the Sterilizer will default to 900 square feet.
After a size is chosen, the Sterilizer will remain
in that room size mode whenever it is powered
on, until it is changed by the user.
Preparation for Operation
1. Using the key, unlock and open the side
panel. The machine will shut down.
2. Remove the two water containers from the
water tray.
NOTE: Avoid touching the cold evaporation
units to minimize possible contamination.
Do not use puried water or distilled water.
Operation Instructions
The Control Panel
Operation of the unit is controlled by buttons on the Control Panel as shown in Figure 2.
Figure 2. Control Panel
Icon Description
Digital Display.
Indicates the current humidity level in the room. On either side of the display
are the Salt Level indicator, the Cold Evaporation Filter Replacement indicator,
the Water Level indicator, the HEPA Filter Replacement indicator.
Power ON/OFF Button.
Controls operation of the unit. Pressing the button turns the unit ON or OFF.
Any time the unit is turned on in the future it will start up the same operating
mode it was in when last operated. The HOCl function is turned on by default.
Filter Reset Button.
After changing either the Cold Evaporation Filter or the 2-in-1 HEPA Filter,
press and hold this button for 3 seconds to reset the lter life countdown.
Fan Speed Button.
Use this button to adjust the fan speed, toggling through the 1-2-3 fan speeds.
An indicator corresponding to the selected fan speed will illuminate.
Timer Button.
The Timer Button allows you to select how long the machine will run before it
automatically shuts off. There are three pre-set times: 4, 8 and 12 hours. Press
the icon toggle through the options (4H-8H-12H-None). Once selected, an
internal timer controls operation of the unit for the selected duration. Once
the timer expires, the unit shuts down and enters the standby mode.
Sterilize Button.
The light remains on when the machine is on and ash when electrolysis is
working to process HOCl.
You can turn the sterilization function off, then it will work as a purier.
Rooom Size Selection Button.
Press this button to select the appropriate room size for the Sterilizer
operation. The generating concentration of HOCl will be adjusted to match
the room size selected. The available options are 500, 700, 900, 1100, and 1300
square feet. If no size is selected within 30 seconds of power on, the Sterilizer
will default to 900 square feet.
Moving the Sterilizer
The Sterilizer is equipped with four swivel
casters to make it easier to move around. To
avoid any problems when moving the Sterilizer,
observe these precautions:
1.
Unplug the Air Sterilizer before moving it.
2. Make sure that the side panel on the Space
Sterilizer is securely closed.
3. Move the machine by holding onto the
handle on the front of the machine with
hands for assistance.
4. To avoid spilling any water, move the
Sterilizer carefully. Immediately clean up
any spills.
5. The two front casters have a safety lock
that will prevent unwanted movement.
3. Fill each of the water container with tap
water in full (3500 ml/118.35oz. of water).
Add 2 scoops of non-iodized salt to each
of the water containers.
4. Place the water containers back into the
water tray.
5. Close and lock the side panel.
6. Plug the AC power cord into an outlet.
Unpacking and Setup
1. Remove the unit from the box and check
that all the items shown in Figure 1 are
included. It is a good idea to retain the
packaging for storing the unit or in the
event it must be shipped back for service.
2. Locate the unit on a at, solid surface in
proximity to an AC electrical outlet.
3. Using the key, unlock and open the side
panel.
4. Remove poly foams packed inside the
machine.
CAUTION: The AC adapter must be plugged
in using the 3-prong grounded plug.
5. Connect the AC adapter to the unit, and
route the power cord to the outlet, but do
not plug it in yet. Make sure that the power
cord is out of the way and does not pose
a tripping hazard, and is out of reach of
children and pets.
Congratulations! You are now ready to
enjoy clean safe air using the AquaSolvo
Commercial Eco Air Sterilizer.

7 8
The Digital Display
Indicator and Reminder as Figure 3 shown.
Figure 3. Digital Display
Icon Description
Salt Level Indicator.
When the salt level is too high, the Indicator will ash green with sound alert, pls
follow the operating alerts in page 8 for the operation action.
When the salt level is too low, the indicator will display green with sound alert, pls
follow the operating alerts in page 8 for the operation action.
Cold Evaporation Filter Replacement Indicator.
Display when the Cold Evaporation Filter should be replaced, based on typical 6
months of operation. See Cold Evaporation Filter Replacing on Page 8.
Water Level Indicator.
When the water level is too low, the indicator will display blue with sound alert, pls
follow the operating alerts in page 8 for the operation action.
HEPA Filter Replacement Indicator.
Display when the 2-in-1 HEPA Filter should be replaced, based on typical 12 months
of operation. See 2-in-1 HEPA Filter Replacing on Page 8.
E1 E1 Indicator
If the Electrolysis Panel is not lowered into position, the unit will beep and an error
code of E1 will be displayed.
Operating Alerts
As the Sterilizer operates, the following alerts
may be displayed. Smart AquaSolvo creats a
perfect experience each time!
Salt Level Indicator
•Flashing blue + sound alarm: High Salt
Alert.
•Operation Action:
1. Power off the device.
2. Empty the Water Tray
3. Wash the CEF
4. Fill with fresh tap water to FULL line + 2
scoops of non-iodized salt to each of
the water containers
•Steady blue + sound alarm: Low Salt Alert.
•Operation action:
1. Power off the device.
2. Fill with fresh tap water to FULL line + 2
scoops of non-iodized salt to each of
the water containers.
Water Level Indicator
•Steady blue + sound alarm: Low Water
Alert.
•Operation action:
1. Power off the device.
2. Fill with fresh tap water to FULL line + 2
scoops of non-iodized salt to each of
the water containers.
E1 Indicator
If the inner Electrolysis Panel is not lowered
into the water tray, the display will show E1 to
remind you.
CEF Replacement Indicator
After 6 months of operation the CEF indicator
will display and an audible alarm will sound.
Refer to CEF replacing actions.
HEPA Filter Replacement Indicator
Will display after 12 months of operation.
Refer to 2-in-1 HEPA Filter replacing actions.
Filter Replacement
2-in-1 HEPA Filter Replacing
It's recommented to replace the 2-in-1 HEPA
lters every 12 months. Or when the 2-in-1
HEPA Filter Indicator is displayed you should
remove and replace the two 2-in-1 HEPA Filters.
1. Using the key, unlock and open the side
panel. The machine will shut down.
2. Remove the two 2-in-1 HEPA lter out of
the left and right side.
NOTE: Handle the old 2-in-1 HEPA lters by
the edges to avoid touching it directly and
preventing possible contamination of the filter
element.
3. Remove 2-in-1 HEPA lters from packaging
and install in the left and right side.
4. Close and lock the side panel.
5. Refer to Preparation for Operation on Page
9 and prepare the salt water solution for
the Sterilizer before resuming operation.
6. Turn on the Sterilizer. After replacing
the lter, press and hold the Filter Reset
Button for 3 seconds to reset the lter life
countdown.
CEF Replacing
The Cold Evaporation Filters should be
replaced every six months, as indicated by the
Cold Evaporation Filters Replacement indicator
on the Control Panel.
1. Using the key, unlock and open the side
panel. The machine will shut down.
2. Remove the two water containers from the
water tray.
CAUTION! Always raise the Electrolysis Panel
up to avoid damaging it when you pull the
Water Tray out.
3. Lift the Electrolysis Panel up so it is clear of
the Water Tray.

9 10
Only use genuine D&HLifelabs
CleVaFilter&AquaSoFilter with your
AquaSolvo Eco Ambient Air Sterilizer.
Use of any other lters may compromise
the proper operation of your unit and
potentially void your warranty.
•4-in-1 HEPA Filter: Part Number AS04FT-2
•Cold Evaporation Filter: Part Number
AS04FT-1
To purchase replacement lters or accessories
visit www.D&HLifelabs.com
Troubleshooting
Symptom Probable Cause/Solution
Sterilizer does not operate. Power cord not securely plugged into outlet. Make sure plug is
securely inserted.
No AC power. Check fuse or circuit breaker. Replace fuse with a
time delay type or reset the circuit breaker.
Sterilizer air ow is low. Make sure air inlet is clear of obstructions. Check air inlet and
clean as necessary.
Air coming from Sterilizer has
a bad odor.
Water tray is dirty or has contaminated water in it. Discard any
water that is in the tray and thoroughly clean it, then rell with
clean fresh water and salt.
NOTE: The rst time you use the Sterilizer, you might perceive
a plastic or paint smell. This is normal, but it should disappear
quickly. If the smell persists or if you sense a burning smell,
please disconnect the Sterilizer and contact Customer
Assistance.
Hypochlorous acid concentration is too high. Make sure the
room size setting is not too large. If the odor is still too strong,
you can disable the HOCl function using the HOCl Disinfection
button on the control panel
Windows or doors are open. Constant introduction of dirty
air from outside the room can reduce the effectiveness of the
Sterilizer. Close all exterior doors and windows.
Check Water Tray and the CEF and clean or replace as
necessary.
Water added to Sterilizer but
Water Level indicator still
ashing displayed.
Check that Water Tray is properly seated in the Sterilzer.
Salt Level indicator displayed
even after salt has been
added.
It takes some time to dissolve the salt and monitor the actual
concentration. If necessary discard salt water solution and mix a
new batch.
Salt Level indicator ashing
after salt has been added.
Make sure amount of salt added is correct. If necessary discard
salt water solution and mix a new batch.
Sterilizer has been tipped
over.
Immediately unplug the power cord. Return Sterilizer to upright
position. Open side panel and wipe dry any water you see.
Allow the Sterilizer to completely dry before restarting it.
4. Pull the Water Tray out and remove the
two Cold Evaporation Filters.
NOTE: Handle the Cold Evaporation Filters
by the edges to avoid touching it directly
and preventing possible contamination of
the lter element.
5. Remove the replacement Cold Evaporation
Filters from packaging and install in Water
Tray.
6. Replace Cold Evaporation Filters in Water
Tray.
7. Slide Water Tray back into place.
8. Press and lower Electrolysis Panel then
close and lock the side panel.
9. Refer to Preparation for Operation on
Page 9 and prepare the salt water
solution for the Sterilizer before resuming
operation.
10. Turn on the Sterilizer. After replacing
the lter, press and hold the Filter Reset
Button for 3 seconds to reset the lter life
countdown.

11 12
Customer Service
For assistance with your AquaSolvo Commercial Eco Air Sterilizer, call our Customer Service Line:
1-855-384-7754
8 a.m. - 5 p.m., CST, Monday – Friday
Dernier&Hamlyn Inc.
720 Northgate Parkway
Wheeling, IL 60090
Product Warranty
This 2 year limited warranty applies to repair or replacement of product found to be defective in material or
workmanship. This warranty does not apply to damage resulting from commercial, abusive, unreasonable
use or supplemental damage. Defects that are the result of normal wear and tear will not be considered
manufacturing defects under this warranty. D&H IS NOT LIABLE FOR INCIDENTAL OR CONSEQUENTIAL
DAMAGES OF ANY NATURE, ANY IMPLIED WARRANTY OF MERCHANTABILITY OR FITNESS FOR A
PARTICULAR PURPOSE ON THIS PRODUCT IS LIMITED IN DURATION TO THE DURATION OF THIS
WARRANTY. Some jurisdictions do not allow the exclusion or limitation of incidental or consequential
damages or limitations on how long an implied warranty lasts, so the above limitations or exclusions may
not apply to you. This warranty gives you specic legal rights, and you also may have other rights which vary
from jurisdiction to jurisdiction. This warranty applies only to the original purchaser of this product from the
original date of purchase.
At its option, D&H will repair or replace this product if it is found to be defective in material or
workmanship.
This warranty does not cover damage resulting from any unauthorized attempts to repair or from any use
not in accordance with the instruction manual.
This warranty does not cover the lter except for material or workmanship defects.
FCC STATEMENT
This device complies with related rules, operation is subject to the following two conditions.
(1) This device may not cause harmful interference and,
(2) This device must accept any interference received, including interference that may cause undesired operation.
Copyright © 2021 Dernier&Hamlyn Inc. All rights reserved. Revised 2021/12/29
This product earned the ENERGY STAR by meeting strict energy efciency guidelines
set by the US EPA. US EPA does not endorse any manufacturer claims of healthier
indoor air from the use of this product. The energy efciency of this ENERGY STAR
qualied model is measured based on a ratio between the model’s CADR for Dust
and the electrical energy it consumes, or CADR/Watt.
Product Name: Commercial Eco Air Sterilizer
Model No.: AAHE-120XX03Pro
Note: XX is the color code.
Trade Mark: Dernier&HamlynLifelabs
Table of contents
Other DH Lifelabs Laboratory Equipment manuals

DH Lifelabs
DH Lifelabs Aaira Surface User manual

DH Lifelabs
DH Lifelabs Aaira Surface ASE-00WH07 User manual

DH Lifelabs
DH Lifelabs AQUASOLVO AAE-30 06 Series User manual

DH Lifelabs
DH Lifelabs Aaira Mini User manual

DH Lifelabs
DH Lifelabs AquaSolvo AAHE-50WC04 User manual

DH Lifelabs
DH Lifelabs Aaira Mini User manual

DH Lifelabs
DH Lifelabs Aaira Surface ASE-00WH07 User manual

DH Lifelabs
DH Lifelabs AquaSolvo AAE-30 06 Series User manual