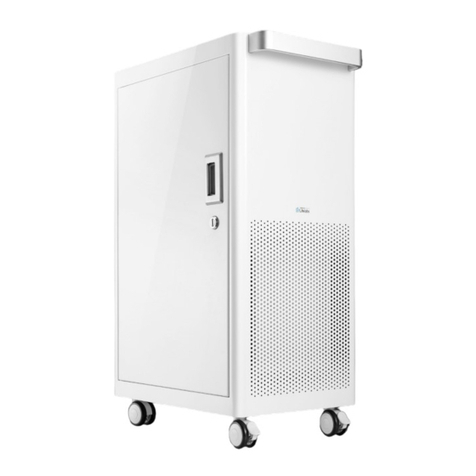
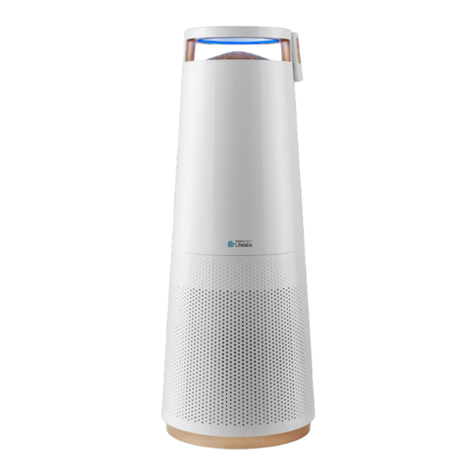
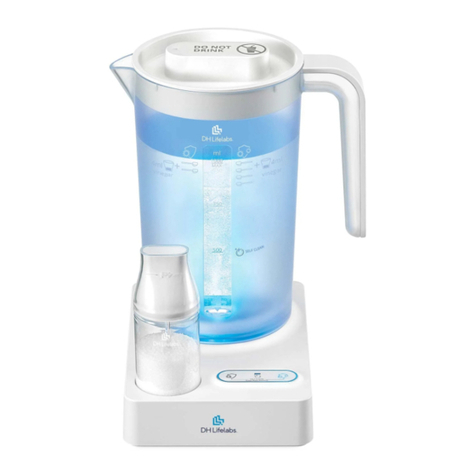
DH Lifelabs Aaira Surface User manual

Created by nature*
.
Engineered by science.
Aaira Surface
INSTRUCTION MANUAL

All the things you
need to know are here.
Safety Instructions ...................1
Product Overview ...................3
How It Works.......................4
Unpacking and Setup ................4
Getting Started .....................5
Operating Procedures................7
Control Panel.......................8
Where To Use ......................8
Troubleshooting ....................9
Product Specications................9
Cleaning & Maintenance.............10
Product Warranty ..................11
FCC Statement ....................11
Thank you for your purchase.
Now you can clean easy.
The Aaira Surface starts with a solution
of tap water, salt (non- iodized), and 5%
white vinegar and through the use of
electrolysis to generates hypochlorous
acid (HOCl).

!Use only as described in the
Instruction Manual. Do not carry out
any maintenance other than that
shown in this guide or as advised by
customer support. Any other use not
recommended by the manufacturer may
cause re, electric shock or injury.
!When moving the machine, hold it
by the base. DO NOT MOVE THE
MACHINE WITH WATER IN THE
PITCHER.
!THIS MACHINE IS NOT INTENDED
FOR USE BY CHILDREN. Children shall
not play with the appliance. Cleaning
and user maintenance shall not be made
by children. This appliance can be used
by children 8 years and above
if supervised.
!This machine is not intended for use
by persons with reduced physical,
sensory or reasoning capabilities or
lack of experience or knowledge unless
they have been given supervision or
instruction concerning the use of the
machine by a person responsible for
their safety.
!Do not use it on wet surfaces or
outdoors. Do not use in bathrooms.
Never operate the machine where it may
fall in the bath or other water container.
Do not use or store it where it may get
wet or in the immediate surroundings of
a bath, shower or swimming pool.
!Do not pour water into any openings
except for the pitcher. When relling,
only do so as described in this guide.
DO NOT USE HOT WATER.
!This machine may have hot parts inside.
Do not use in areas where fuel, paint
or ammable liquids are present. Keep
combustible materials away from the
machine. DO NOT USE NEAR FURNACES,
FIREPLACES, STOVES OR OTHER HIGH-
TEMPERATURE HEAT SURFACES.
!DO NOT LOCATE DIRECTLY BELOW A
MAIN ELECTRICITY SUPPLY SOCKET.
!To Reduce the Risk of Electric Shock, this
appliance has a polarized plug (one blade
is wider than the other). This plug will t
in a polarized outlet only one way. If the
plug does not t fully in the outlet, reverse
the plug. If it still does not t, contact a
qualied electrician to install the proper
outlet. Do not change the plug in any way.
(Not applicable in UK).
!Do not unplug by pulling the cord from
the socket. To unplug, grasp the plug, not
the cord.
!Do not handle any part of the plug with
wet hands.
!Do not use the machine with a damaged
cord or plug. If the cord is damaged it
must be replaced.
!If the machine is not working properly, has
received a sharp blow, has been dropped
or damaged, do not use the machine and
contact customer support for repair.
!ALWAYS PLACE MACHINE ON A FIRM,
FLAT, LEVEL SURFACE.
!Turn off all controls before unplugging.
Always unplug machine when not in use.
!READ AND SAVE THESE INSTRUCTIONS.
!THIS MACHINE IS INTENDED FOR
HOUSEHOLD AND INDOOR USE ONLY.
WARNING! TO REDUCE THE RISK OF FIRE, ELECTRIC
SHOCK OR INJURY PLEASE ADHERE TO THE
FOLLOWING:
Your safety is important to us.
Read all safety instructions before
you use the device.
Read all safety instructions in the quick start
guide, instuction manual, and on the device.
!
!
Copyright © 2022 Dernier & Hamlyn Inc. All rights reserved.1 2

34Copyright © 2022 Dernier & Hamlyn Inc. All rights reserved.
1
7
356
8
4
2
Product Overview
1. Pitcher
2. Cap/Vinegar
Measuring Cup
3. Salt Bottle with
1 Gram Scoop
4. Base
5. Power Supply
6. Stirring Stick
7. Green Spray Bottle
(Used to ll with low
concentration disinfectant)
8. Blue Spray Bottle
(Used to ll with high
concentration disinfectant)
1. Remove the unit from the box and check that all the items shown in the product
overview are included. It is a good idea to keep the packaging for storage or in the
event it must be shipped back for service.
2. Locate the unit on a at, stable surface in proximity to an AC electrical outlet.
3. Connect the power supply to the unit and route the power cord to the outlet, but
do not plug it in yet. Make sure that the power supply is out of the way and does not
pose a tripping hazard. Keep it out of reach of children and pets.
4. To begin using the unit you will need non-iodized salt.
5. You will need 5% white vinegar.
6. Finally, you will need ordinary water.
Aaira Surface can produce two different concentrations of HOCl disinfectant:
High Concentration
The high-concentration HOCl disinfectant has 200 mg/L (200 PPM) of free effective
chlorine.
Low Concentration
The low-concentration HOCl disinfectant has 100 mg/L (100 PPM) of free effective chlorine.
Aaira Surface starts with a solution of water, salt (non-iodized), and 5% white vinegar.
Through the use of electrolysis it generates hypochlorous acid (HOCl). This acidic water
can be used for cleaning and disinfecting a wide range of surfaces. It neutralizes 99.9% of
germs on surfaces.
How It Works
Unpacking and Setup

5
4
Use the green bottle for low
concentration disinfectant
(100 PPM).
Use the blue bottle for high
concentration disinfectant
(200 PPM).
When the disinfectant is ready.
Pour into coordinating spray bottle.
Remove safety clip before use.
Getting Started
Fill to max water line with tap
water and add non-iodized salt:
• 2 scoops (2 grams) for low
concentration (100 PPM).
• 4 scoops (4 grams) for high
concentration (200 PPM).
Stir the salt for 10 seconds
with the provided stirring
stick. Use the vinegar
measuring cup to add
4ml/0.14oz. of 5% white
vinegar.
Press the right button to make
high concentration (200 PPM)
HOCl disinfectant. Wait 12
minutes until process is complete.
Press the left button to make low
concentration (100 PPM) HOCl
disinfectant. Wait 9 minutes until
process is complete.
1 2
3B
3A
6

Control Panel
Low Concentration
HOCl Disinfectant (100 PPM)
High Concentration
HOCl Disinfectant (200 PPM)
7 8Copyright © 2022 Dernier & Hamlyn Inc. All rights reserved.
Operating Procedures
1. Place the pitcher on the base.
2. Add 1000ml/33.81 oz. of tap water.
3. Add salt:
• 2 scoops of non-iodized salt for low concentration HOCl disinfectant
• 4 scoops of non-iodized salt for high concentration HOCl disinfectant
4. Add 4ml/0.14oz. of 5% white vinegar. Use the cap of the salt bottle as a
measuring cup.
5. Using the stirring stick, vigorously stir the water for 10 seconds to fully dissolve
the salt. NOTE: If you do not adequately stir the water, salt may accumulate on
the electrolysis pad.
6. Place the lid on the pitcher.
7. Plug the power supply into the unit. You will hear a power up chime sound
and the LED in the base will light up. After three seconds, the LED will go out
indicating that the unit is in standby mode.
8. Press the Function Button on either the low concentration (left) side or the high
concentration (right) side to begin the HOCl generation process.
9. The LED in the base will illuminate (green for low concentration or blue for
high concentration) and then slowly pulse, indicating that the HOCl generation
process is underway.
NOTE: If you wish to cancel the process at any time, press and hold any part of
the function button for two seconds and the unit will return to standby mode.
10. The electrolysis process will take 9 minutes for low concentration HOCl and 12
minutes for high concentration HOCl. When the process is complete, you will
hear the shutdown chime sound and the base LED will go out.
11. Your HOCl disinfectant is now ready for use. You can ll the spray bottle with
the HOCl disinfectant, remove the safety clip and begin using it for cleaning,
deodorizing, or disinfecting. Do not overll or underll the spray bottle for best
effectiveness.
NOTE: The HOCl disinfectant will lose effectiveness over time. You should
discard it after 1-2 days and process a new batch.
Where to Use
Remove heavy deposits from
surfaces before using the HOCl
disinfectant. Be sure to test
HOCl in a small, inconspicuous
area before using to ensure
discoloration does not occur.
Everyday Use
Low Concentration (100 PPM)
Clean high-touch areas and
surfaces including but not limited to
countertops, tabletops, appliances,
cabinets, doors and windows.
Disinfectant
High Concentration (200 PPM)
Heavy duty cleaning areas
including but not limited to
bathtubs, showers, toilets, oors,
sinks and drains.

9
Troubleshooting
Symptom Probable Cause/Solution
Base LED does not
illuminate Power problem. Check power cord and circuit breaker.
Base LED illuminated,
but no bubbles in pitcher
during electrolysis
Pitcher is not securely mounted in base; make sure it is seated
properly.
Base LED illuminated,
but bubbles are sparse Possibly using puried or distilled water; use ordinary tap water.
Unit does not operate Make sure the amounts of salt and vinegar are correct for the
concentration being produced.
For any issues not covered here, contact Customer Assistance.
We recommend not leaving disinfectant in
pitcher or bottles for more than 48 hours.
How to clean:
1. Fill the pitcher with 500ml/16.91oz. of water.
Do not add any salt or vinegar.
2. Press both buttons on
the control panel.
3. Wait 3 minutes.
4. Empty pitcher.
•Do not leave disinfectant in the bottle for an extended period of time (no more than
48 hours is recommended).
•When the device won’t be used for an extended period of time store it in a cool dry
place. Do not store the device where it might be exposed to excessive moisture or
direct sunlight. The device may not operate effectively in very low temperatures. The
device can be damaged when exposed to sub-freezing temperatures.
•Use a dry cloth to clean the exterior of the device. Do not use any chemicals or cleaners
•Do not allow water to accumulate between the pitcher and the base. If the matting
surface of the base is wet, immediately wipe dry with a clean, dry cloth and allow to
thoroughly dry before use.
•Do not remove the electrode from the bottom of the pitcher. Avoid any vigorous
rubbing or cleaning of the electrodes. If you see white, scaly mineral deposits collecting
on the electrode, add a small amount of vinegar to the pitcher and gently clean it to
remove the scaling.
Cleaning & Maintenance
+
Device Specifications
Model Number ASE-00WH07
Power Consumption 18 Watts
Input Voltage 120 VAC, 60Hz
Pitcher Capacity 1000ml/33.81 oz.
Spray Bottle Capacity 150ml/5.07oz. *2
HOCl Recipe
(Low concentration 100ppm)
2 scoops ( 2 grams) of non-iodized salt:
1000ml/33.81 oz. of tap water: 4ml/0.14oz. of
5% white vinegar
HOCl Recipe
(High concentration 200ppm)
4 scoops (4 grams) of non-iodized salt:
1000ml/33.81 oz. of tap water: 4ml/0.14oz. of
5% white vinegar
Material & Finish ABS, White
Dimensions 6.6x 6.8x 9 inches (167.4 x 171.7 x 229.7 mm)
Net Weight (without water) 1.87lbs (0.85kg)
910

Product Warranty
FCC Statement
This device complies with Part 15 of the FCC Rules. Operation is subject to the following two
conditions: (1) this device may not cause harmful interference, and (2) this device must accept
any interference received, including interference that may cause undesired operation.
Caution: The user is cautioned that changes or modications not expressly approved by the
party responsible for compliance could void the user’s authority to operate the equipment.
Note: This equipment has been tested and found to comply with the limits for a Class B
digital device, pursuant to part 15 of the FCC Rules. These limits are designed to provide
reasonable protection against harmful interference in a residential installation.
This equipment generates uses and can radiate radio frequency energy and, if not installed
and used in accordance with the instructions, may cause harmful interference to radio
communications. However, there is no guarantee that interference will not occur in a
particular installation. If this equipment does cause harmful interference to radio or television
This 2 year limited warranty applies to repair or replacement of product found to be
defective in material or workmanship. This warranty does not apply to damage resulting
from commercial, abusive, unreasonable use or supplemental damage. Defects that are
the result of normal wear and tear will not be considered manufacturing defects under this
warranty. DH Lifelabs IS NOT LIABLE FOR INCIDENTAL OR CONSEQUENTIAL DAMAGES
OF ANY NATURE, ANY IMPLIED WARRANTY OF MERCHANTABILITY OR FITNESS FOR A
PARTICULAR PURPOSE.
Some jurisdictions do not allow the exclusion or limitation of incidental or consequential
damages or limitations on how long an implied warranty lasts, so the above limitations or
exclusions may not apply to you. This warranty gives you specic legal rights, and you also
may have other rights which vary from jurisdiction to jurisdiction. This warranty applies only
to the original purchaser of this product from the original date of purchase.
At its option, D&HLifelabs will repair or replace this product if it is found to be defective in
material or workmanship.
This warranty does not cover damage resulting from any unauthorized attempts to repair or
from any use not in accordance with the instruction manual.
reception, which can be determined by turning the equipment off and on, the user is
encouraged to try to correct the interference by one or more of the following measures:
• Reorient or relocate the receiving antenna.
• Increase the separation between the equipment and receiver.
• Connect the equipment into an outlet on a circuit different from that to which the
receiver is connected.
• Consult the dealer or an experienced radio/TV technician for help.
11 12

EPA EST NO. 99117-CHN-1
MADE IN CHINA
*The Aaira Mini uses HOCl Technology that takes ingredients found in nature (water
and non-iodized salt) and uses science (electrolysis) to create a powerful disinfectant.
This manual suits for next models
1
Table of contents
Other DH Lifelabs Laboratory Equipment manuals

DH Lifelabs
DH Lifelabs AquaSolvo AAHE-50WC04 User manual

DH Lifelabs
DH Lifelabs AQUASOLVO AAE-30 06 Series User manual

DH Lifelabs
DH Lifelabs Aaira Surface ASE-00WH07 User manual

DH Lifelabs
DH Lifelabs AquaSolvo AAE-30 06 Series User manual

DH Lifelabs
DH Lifelabs Aaira Mini User manual

DH Lifelabs
DH Lifelabs Aaira Mini User manual

DH Lifelabs
DH Lifelabs Aaira Surface ASE-00WH07 User manual

DH Lifelabs
DH Lifelabs AquaSolvo AAHE-120WH03Pro User manual