manuals.online logo
Brands
  1. Home
  2. •
  3. Brands
  4. •
  5. DHK Hobby
  6. •
  7. Motorized Toy Car
  8. •
  9. DHK Hobby Optimus XL Operator's manual

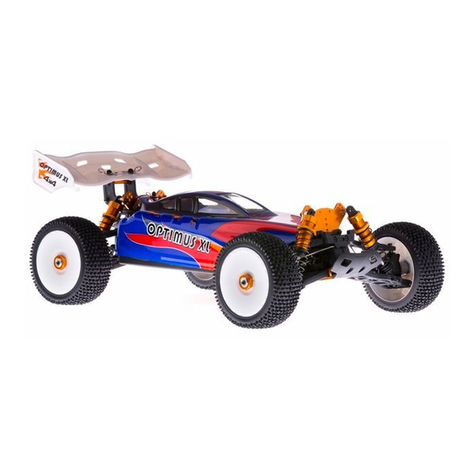
DHK Hobby Optimus XL Operator's manual

V3 5
10
8381-735
8381-735
8381-710
8381-711
8381-728
8381-728
Assembly of the
front sus.arm system
8381-708
8381-708
8381-722
8381-726
8381-723
8381-400
8381-726
8381-100
8381-722
8381-300
8381-300
8381-50L
8381-50R
8381-719
8381-719
8381-726
8381-721
8381-119
8381-715
8381-715
8381-720T
8381-720T
8381-703
8381-306
8381-717
8381-726
8381-716
8381-716
8381-725
8381-725
8381-723
8381-723
8381-723
8381-724
8381-714
8381-714
8381-724
8381-710
8381-703
8381-702
8381-119
8381-119
8381-711
8381-711
8381-729
8381-709 8381-110
8381-103
8381-708
8381-707
8381-729
8381-711
8381-722
8381-711
8381-710
8381-709
8381-110
8381-707
8381-103
8381-707
8381-706
8381-706
8381-701T
8381-701 T
8381-313
8381-609
8381-703
8381-703
8381-703
8381-600 Assembly of the
servo saver
8381-206
8381-206
8381-200 Assembly of the
center diff gear box
8381-208
8381-110
8381-111
8381-108
8381-107
8381-108
8381-109
8381-110
8381-201
8381-109
8381-103
8381-106
8381-107
8381-108
8381-107
8381-108
8381-107
8381-120
8381-203T
8381-104
8381-103
8381-208
8381-201
8381-50L Assembly of upper sus.arm-Left
8381-50R Assembly of upper sus.arm-Right
8381-300 Assembly of the
shocks
8381-400 Assembly of the
sway bar
8381-100 Assembly of the
diff gear box
8381-601
8381-405
8381-404
8381-403
8381-403
8381-401
8381-403
8381-401
8381-303
8381-308
8381-311
8381-304
8381-311
8381-311
8381-309
8381-306
8381-302
8381-301
8381-50R
8381-50L
8381-501
8381-501
8381-502
8381-503
8381-502
8381-502
8381-503
8381-502
8381-117
8381-805
8381-601
8381-608
8381-608
8381-601
8381-604
8381-607
8381-805
8381-609
8381-601
8381-602
8381-604
8381-604
8381-603
8381-602
8381-310
8381-305
8381-302
8381-101
8381-112
8381-118
8381-118
8381-119
8381-110
8381-110
8381-112
8381-115
8381-105 8381-116
8381-107
8381-114
8381-113
8381-107
8381-108
8381-102
8381-111
8381-103
8381-106
8381-108
8381-107
8381-108
8381-109
8381-107
8381-101
8381-108
8381-107
8381-106
8381-105
8381-103
8381-109
8381-102
8381-104
8381-710
8381-711
8381-728
8381-735
8381-728
8381-735
Assembly of the
rear sus.arm system
Assembly of the motor gear
8381-729
8381-803
H115
8381-9M1
8381-9M1
8381-808
8381-702
8381-808
8381-804
8381-807
8381-804
8381-805
8381-715
8381-806
8381-805
8381-306
8381-703
8381-805 8381-605
8381-702
8381-804T
8381605
8381-803
8381-803
8381-605
8381-804T
8381-703
8381-306
8381-726
8381-721
8381-717
8381-726
8381-300
8381-715
8381-300
8381-103
8381-103
8381-708
8381-708
8381-400
8381-110
8381-802
8381-711
8381-722
8381-100
8381-707
8381-707
8381-716
8381-119
8381-719
8381-50R
8381-726
8381-729
8381-50L
8381-726
8381-802
8381-702
8381-702
8381-119
8381-801
8381-110
8381-711
8381-710
8381-711
8381-722
8381-726
8381-716
8381-719
8381-701T
8381-701T
8381-204
8381-9M2
8381-004
8381-600
8381-012
8381-011
8381-012
8381-012
8381-012
8381-013
8381-012
8381-012
8381-015
8381-012
8381-015
8381-012
8381-014
8381-012
8381-013
8381-012
8381-011
8381-011
8381-010
8381-008
8381-009
8381-007
8381-007
D302R
8381-005
8381-006
8381-002
8381-004
8381-004
8381-003
8381-002
8381-001
8381-9S3
8381-9S2
8381-703
8381-703
D301
8381-9S1
8381-9Z0
8381-6Z0
8381-6Z0
8381-9Z0
8381-6Z0
8381-6Z0
P101 Motor cooling fan-Optional
8381-020
8381-021
8381-803
8381-702
8381-713
8381-713
8381-803
8381-703
8381-009
8381-703
8381-805
8381-805
8381-702
8381-703
8381-703
8381-703
8381-009
8381-009
8381-009
8381-019
8381-703
8381-019
8381-018
8381-018
8381-018
8381-017
8381-016
H103
8381-9Z0
8381-9Z1
8381-6Z3
8381-6Z3
8381-6Z2
8381-6Z2 8381-6Z3
8381-6Z3 8381-6Z2
8381-6Z2
8381-6Z1
8381-6Z0
1-Antenna: pull up the antenna straight before use.
2-Power switch: slide the switch to turn on or off.
3-Power LED: shows the power strength. Green LED shows full power, Yellow LED flashes
when the power is running short.
4-Charging port: charges Ni-Mh or Ni-Cd batteries only. Alkaline batteries are not
rechargeable. NEVER charge your alkaline batteries.
5-Throttle trigger: Please refer to the transmitter diagram.
6-Steering wheel: Please refer to the transmitter diagram.
7-ST-D/R trim: adjust the steering servo angle ranging from 0% to 120%.
8-TH-D/R trim: adjust the throttle servo angle ranging from 0% to 120%.
9-ST-TRIM: adjust the steering neutral position, from 0% to 20%.
10-TH-TRIM: adjust the throttle neutral position, from 0% to 20%.
11-ST-NOR/REV: slide to left or right to choose steering mode.
12-TH-NOR/REV: push the trigger or pull it back to choose the throttle mode.
13-Throttle trigger trim screws: use a hex driver to tighten or loosen the screw to a comfortable
level.
14-Battery compartment cover: to open the compartment, slide the cover to OPEN direction as
indicated, snap it to close the compartment.
15-Battery case: open the battery cover, install 4 pcs AA 1.5V alkaline or rechargeable
batteries based on the "+" & "-" poles. If the status LED flashes red, the transmitter batteries
may be weak, discharged or possibly installed incorrectly. Replace with new or freshly charged
batteries. The power indicator light does not indicate the charge level of the battery pack
installed in the model.
Parts Diagrams
3
Frequency range
2.4GHz m odulation
Sensitivity
Working voltage
Working current
Size
Weight
: 2.4GHz
: AFHDS
: -100dbm
: DC4.8 -6.0V
: 5.7*26*15.2mm
: 11.2g
Receiver Functions
1. Antenna: Pull out the antenna completely
2. Connecting ports: receiver power port and channel signal connecting ports
> ST/1: Channel 1, steering signal port
> TH/2: Channel 2, throttle servo or ESC signal port
> AUX/3: Auxiliary signal port
> BATT/4: Receiver power port, can be auxiliary signal port
3. Set keys & LED indicators
>Bind setup. Switch on the receiver, indicators flash slowly, press the setup key for 2 seconds
and release it, LED indicator flash in faster motion, binding starts. When the LED indicator is
on in stable status, the binding is complete. Note: To bind it quickly and effectively, please put
the receiver 40-50cm away from the transmitter.
>Failsafe. Switch on the transmitter and receiver, then you can see the LED indicator on
receiver is on. Adjust the throttle servo or ESC to brake or stop status, and keep it that way.
Press the setup key, then receiver LED indicator flashes, keep this for 3 seconds. After this,
release the setup key. Failsafe setup is complete.
>Disabling failsafe function. Switch on transmitter and receiver, once the signal is
connected, LED indicator is on. Press the setup key for 2 seconds, LED indicator flashes
quickly, at this point, keep pressing the setup key without release, press it for 2 more seconds,
LED indicator flashes slowly. Release the setup key, LED indicator is on. The setup is
complete.
Safety Precautions
Please refer to Safety Precautions in PART I
Transmitter Specifications
2.4GHz LCD Transmitter Parts and Functions
1. 2.4G transmitter antenna: before use, please pull the antenna straight up.
2. Power switch: Press down to turn on the transmitter, press the switch again to turn it off.
3. LCD display: shows transmitter menus, parameters and operation instructions.
4. Charging port: charging area is positive inside and negative outside. When Ni-Mh or Ni-Cd
rechargeable batteries are to be charged, right charger should be selected for re-charging the
batteries.
5. Throttle trigger: drag, push or make the throttle trigger to a neutral position to forward,
reverse or brake your RC model.
6. Steering wheel: turn the steering wheel counterclockwise to turn the model to left. Turn the
steering wheel clockwise to turn the model to right. Release it to neutral for straight driving.
7. Menu keys: Press Left key (<) or Right key (>), move the cursor to LCD display options.
8. DATA change keys: press Left key (+) or Right key (-) to change, adjust and save current
parameters.
9. Throttle trigger set screw: use a 2.5mm hex screw driver to move forward or backward to
adjust the throttle trigger to a comfortable hand feeling.
10. Battery compartment cover: Press the door to OPEN indicated direction to open the
battery compartment cover. Snap the compartment door into the slot to close the battery
compartment.
11. Installing batteries: open the battery compartment cover, install 4 pcs ?AA? batteries (same
type) according to the indicated ?+? ?-? orientations. Turn on the transmitter and check the
indicator status for a solid green light. Please take out the batteries when the transmitter is not
in use. If the status LED flashs red, the transmitter batteries may be weak, discharged or
possibly installed incorrectly. Replace with new or freshly charged batteries. The power
indicator light does not indicate the charge level of the battery pack installed in the model.
34
23 24
Parts Diagrams
LCD Functions and Operations
Key Operations
Menu keys:
Press Left key (<) to main command, and Right key (>) for secondary
command.
DATA keys:
Press Left key (+) or Right key (-) to adjust, set up and auto save the
current chosen function.
Display Interface
Switch on the transmitter, you will hear ?beep? sound (beeps once), and
the LCD display mode will read the default parameters pre-set at the
factory and BATT status mode (main menu).
BATT: battery status, function reset settings
Battery level display. Battery voltage appears on LCD display. When the voltage is 4.4V, the
value flashes and you can hear warning sound. This means the battery voltage is deficient.
When battery voltage value shows 4.0V, the value blinks fast and warning sound keeps strong.
This indicates battery voltage is too low and batteries cannot be used. Please turn off the
transmitter and replace batteries. If rechargeable Ni-Mh or Ni-Cd batteries are used, please
charge the batteries with proper charger.
Function reposition. In case the parameters are messed up or if you don't know how to set
up, please turn off the power, press and hold MENU Left key (<). Then turn on the power and
you will hear ?beep? sound after two seconds. Release all keys and all parameters will go back
to factory default values.
Frequency duplication setting. When two transmitters are used at the same time, a
frequency might be duplicated. In this case, you may choose the auto frequency function. First
turn off the power, then press and hold MENU Right key (<), and turn on the power. The display
will show hopping data. Release the key and the hopping data will stop. The digit shown on the
display is your frequency. Bind the transmitter with the receiver through binding keys.

This manual suits for next models

1

Other DHK Hobby Motorized Toy Car manuals

DHK Hobby HUNTER BL 8331 Operator's manual

DHK Hobby

DHK Hobby HUNTER BL 8331 Operator's manual

DHK Hobby HUNTER 4x4 SC TRUCK 1/10 READY TO RUN Operator's manual

DHK Hobby

DHK Hobby HUNTER 4x4 SC TRUCK 1/10 READY TO RUN Operator's manual

DHK Hobby Maximus GP 9382 Operator's manual

DHK Hobby

DHK Hobby Maximus GP 9382 Operator's manual

DHK Hobby OPTIMUS 8383 Operator's manual

DHK Hobby

DHK Hobby OPTIMUS 8383 Operator's manual

DHK Hobby HUNTER 8135 Operator's manual

DHK Hobby

DHK Hobby HUNTER 8135 Operator's manual

DHK Hobby Wolf Operator's manual

DHK Hobby

DHK Hobby Wolf Operator's manual

DHK Hobby Optimus Operator's manual

DHK Hobby

DHK Hobby Optimus Operator's manual

DHK Hobby RAZ-R BL Operator's manual

DHK Hobby

DHK Hobby RAZ-R BL Operator's manual

Popular Motorized Toy Car manuals by other brands

Jamara Skull Monstertruck EP Instruction

Jamara

Jamara Skull Monstertruck EP Instruction

Traxxas 36084-1 owner's manual

Traxxas

Traxxas 36084-1 owner's manual

FOREVER Rocker RC-100 user guide

FOREVER

FOREVER Rocker RC-100 user guide

RC4WD Trail Finder 2 LWB manual

RC4WD

RC4WD Trail Finder 2 LWB manual

Carrera RC RC Power FoldNRoll Racer Assembly and operating instructions

Carrera RC

Carrera RC RC Power FoldNRoll Racer Assembly and operating instructions

MUGEN Super Sport instruction manual

MUGEN

MUGEN Super Sport instruction manual

Alitrak DTRAK 300 User and maintenance manual

Alitrak

Alitrak DTRAK 300 User and maintenance manual

ENOZE 8600E product manual

ENOZE

ENOZE 8600E product manual

Javelin 4wd off-road racer user guide

Javelin

Javelin 4wd off-road racer user guide

jakar Mr BUGGY Operator's manual

jakar

jakar Mr BUGGY Operator's manual

Associated Electrics RC12LS Graphite manual

Associated Electrics

Associated Electrics RC12LS Graphite manual

REVELL Ferrari F2003-GA Assembly instructions

REVELL

REVELL Ferrari F2003-GA Assembly instructions

S-IDEE 144010 user manual

S-IDEE

S-IDEE 144010 user manual

RC4WD VV-JD00036 manual

RC4WD

RC4WD VV-JD00036 manual

Tamiya DANCING RIDER TRIPLE WHEEL manual

Tamiya

Tamiya DANCING RIDER TRIPLE WHEEL manual

MFH IK002 instructions

MFH

MFH IK002 instructions

Carson 500907425 manual

Carson

Carson 500907425 manual

REVELL DAF XF 105 Space Cab Assembly manual

REVELL

REVELL DAF XF 105 Space Cab Assembly manual

manuals.online logo
manuals.online logoBrands
  • About & Mission
  • Contact us
  • Privacy Policy
  • Terms and Conditions

Copyright 2025 Manuals.Online. All Rights Reserved.