DiamaPro Systems SVX2+A User manual

OWNER’S MANUAL
SVX2+A
INDUSTRIAL VACUUM
USER & MAINTENANCE BOOK
SAVE THESE INSTRUCTIONS FOR FUTURE REFERENCE

WARRANTY REGISTRATION CARD
Form must be completed and submitted within 30 days from the date of purchase.
Customer Information
First and Last Name
Company Name
Address City State Zip Code
Phone Number Email
Machine Information
Machine Type Machine Model
Serial # Purchase Date (dd/mm/yy)
DiamaPro Systems®
3343 Peachtree Road NE
Suite 145 #24
Atlanta, GA 30326
470-977-2323 nwww.diamaprosystems.com ninfo@diamaprosystems.com

3. UNINTENDED USE
• Do not use the machine for sucking up liquid material
• Do not use the machine or expose the machine to water, rain, or rain-like
environments
• Do not use the machine with improper extension cords or extension cords
of improper length
4. MACHINE DATA
4.1 TECHNICAL DATA PLATE
Every DiamaPro machine carries a registration plate showing essential
details that are necessary when contacting the supplier/manufacturer for
advice, suggestions or information on spare parts. The following details are
included on the plate:
• Manufacturer
• Model
• Supply voltage
• Installed rated power
• CE symbol (built in compliance with Machinery Directive 2006/42/EEC)
4.2 SAFETY DEVICE
The vacuum cleaner has been manufactured in compliance with all legal
standards for the operator’s safety.
• All metal components are grounded to eliminate shock or electrostatic
discharge, including the exible suction hose that is properly grounded.
Also in this regard the choice of a suitable exible suction hose allows to
eliminate this risk on the hose length that goes from the use area to the
vacuum cleaner.
• The brakes tted onto the anterior pivoting casters safely x the machine
in its place of use where there may be a risk of movement due to uneven
oor surfaces or other particular working conditions.
BEFORE USING THE MACHINE CHECK THAT THE
MACHINE HAS NOT SUFFERED ANY SHOCKS OR
DAMAGES DURING THE TRANSPORT THAT CAN
AFFECT THE OPERATION OF THE ABOVE DEVICES
5. PERFORMANCE TOLERANCES
The performance of the machine may vary based upon environmental
factors such as temperature, air pressure, humidity, etc.
1. INTRODUCTION
IT IS NECESSARY THAT THE AUTHORIZED
PERSONNEL AND MACHINE OPERATOR HAVE READ
AND UNDERSTOOD THE MANUAL BEFORE USING
THE MACHINE.
2. WARRANTY
DiamaPro®SVX model vacuums are warranted to be free from
manufacturing defects in normal service for a period of one or two years
from the date of purchase by the original consumer purchaser. Component
manufacturers oer separate warranty periods. Call 470-977-2323 for
complete information.
DiamaPro®System’s obligation under this warranty is expressly limited to
the replacement of such part or parts as inspection shall disclose to have
been defective.
This warranty does not apply to defects caused by damage, unreasonable
use, faulty repairs made by others or defects caused by failure to provide
reasonable maintenance.
Further, the warranty is void if the product, or any of its components, is
altered or modied by the consumer or if the product is used in an inappro-
priate manner or with equipment not recommended by the manufacturer.
Wear items are not covered under warranty: examples include: belts,
wheels, casters, bearings, cart wheels, lters, wear pads, spark plugs,
hoses, wands and squeegees, motors, etc.
To qualify for warranty coverage, DiamaPro®SVX vacuums must be regis-
tered within 30 days of purchase. Registration can be completed online at
www.DiamaProSystems.com.
To request your warranty service you MUST send a written request to:
DiamaPro®Systems
P.O. Box 19946
Charlotte, NC, 28219
including the manufacturing details that can be found on a plate tted
inside your machine together with a copy of the invoice.
The warranty is invalid under the following conditions:
• Improper use of the machine or total or partial failure to comply with the
contents of this manual
• Any part of the vacuum cleaner is altered or modied in any way
• Incorrect electrical installation
• If the laws in the country of use are not respected
• Inadequate maintenance
• The machine has not undergone routine maintenance as specied in this
manual
• Use of spare parts that are not produced by DiamaPro® or not specically
indicated for the model in use
• Partial or total failure to comply with the instructions given in this manual
Thank you for purchasing a DIAMAPRO®SYSTEMS product. This manual
provides information and procedures to safely operate and maintain the
DiamaPro®SVX2+A. For your own safety and protection from injury, care-
fully read, understand, and observe the safety instructions described in this
manual. Keep this manual or a copy of it with the machine. If you lose this
manual or need an additional copy, please contact DiamaPro®Systems.
This machine is designed and built with user safety in mind; however, it
can present hazards if improperly operated and serviced.
Please follow the operating instructions carefully. If there are any questions
regarding operating or servicing of this machine, please contact
DiamaPro®Systems.
Disclaimer: DiamaPro® Systems and its aliates take no responsibility
for any damage, injury or death resulting from the incorrect or unsafe use
of this product. Use of this product should be undertaken by competent
persons only. It is the operator’s responsibility to ensure that the following
safety procedures are followed. If you are unsure, do not operate this
product.

CALIFORNIA PROP 65 WARNING
Thank you for purchasing a DIAMAPRO®SYSTEMS product. This manual
provides information and procedures to safely operate and maintain the
DiamaPro®SVX2+A. For your own safety and protection from injury,
carefully read, understand, and observe the safety instructions described
in this manual. Keep this manual or a copy of it with the machine. If you
lose this manual or need an additional copy, please contact DiamaPro®
Systems. This machine is designed and built with user safety in mind;
however, it can present hazards if improperly operated and serviced.
Please follow the operating instructions carefully. If there are any ques-
tions regarding operating or servicing of this machine, please contact
DiamaPro®Systems.
Use of this product can cause exposure to materials known to the
State of California to cause
cancer and/or birth defects or other reproductive harm.
CALIFORNIA PROP 65 WARNING
DUST WARNING
Cutting, especially when DRY cutting, generates dust that
comes from the material being cut, which frequently contains
silica.
When dry cutting, be sure to use a HEPA ltered dust collector.
Silica is a basic component of sand, quartz, brick clay, granite and
numerous other minerals and rocks. Exposure to excessive amount
of such dust can cause:
n Respiratory diseases (aecting your ability to breath), including
chronic bronchitis, silicosis and pulmonary brosis from exposure
to silica. These diseases may be fatal;
nSkin irritation and rash; and
nCancer according to NTP* and IARC*
*National Toxicology Program, International Agency for Research
on Cancer
Take precautionary steps
nAvoid inhalation of and skin contact with dust, mist and fumes;
nWet cut when feasible, to minimize dust;
nWear and ensure that all bystanders wear appropriate respiratory
protection such as dust masks designed to lter out microscopic
particles. (See OSHA 29 CFR Part 1910.1200)
6. SAFETY PROVISIONS
• Carefully read the instructions in this manual before starting, using,
servicing or operating the vacuum cleaner
• Check that the vacuum cleaner hasn’t been damaged in any way
• Never turn on the machine if it is faulty or if you suspect it is faulty
• Check that the switch isn’t worn or damaged
• Do not approach the suction intake of the machine with unfastened or
broken garments that could easily be sucked into the machine
• Check that the lters are present and ecient
• Make sure that the lters are installed correctly and in full working order,
always observing the regulations in force in the workplace
• Do not carry out repairs without the manufacturer’s authorization
• Never use gasoline, solvents or other ammable liquids for cleaning;
only proper detergents should be used for cleaning
• Never move the machine by pulling the power cable or exible hose
• Never direct the opening of the machine or the exible tube towards
people or animals
• Protect the machine from the rain
• Check that the machine is connected to a power source with the correct
voltage indicated on the registration plate
• Make sure that the power cable has no wear or damage. If replacing
the cable, always replace it with another of the same specications as
the original one: cables that are not approved or of inferior quality may
overheat and cause serious injury to the user
• Make sure that the machine is connected to an appropriate power
source in full working order (check the presence of a fully functional
grounding socket)
• Repairs must only be carried out by authorized personnel and only
when the machine is turned o and disconnected from the power source
• Never allow unauthorized personnel to use the machine
• Make sure that all safety devices are in full working order before turning
on the machine
• Never cover the vacuum cleaner during use
7. INSTALLATION
7.1 DELIVERY AND HANDLING
All machines are carefully tested and checked by DiamaPro before deliv-
ery. The machine is transported inside a protective box or wrapped in a
protective lm that allows the courier to see the item during transport and
is securely xed to a pallet. If any part of the machine is not intact or has
been damaged during transport, le an immediate complaint with the cou-
rier. Parts that have been damaged or broken due to incorrect transport
or handling of the machine will not be recognized by the manufacturer’s
warranty. The machine must be lifted and moved using a forklift truck in
accordance with the relevant safety regulations in force in the workplace
7.2 CHECK THE PROPER ELECTRICAL
CONNECTION
Connect the industrial plug to the power cable and connect the plug to a
socket that has the same amp rating and is protected by a line-isolating
switch.

8. PERIODICAL MAINTENANCE
Maintenance and cleaning operations must ALWAYS be carried out when
the vacuum is turned o and disconnected from the power source. No
particular measures must be taken for the maintenance, cleaning or lubri-
cation of the suction unit. However, it is important to remember that correct
use and servicing are essential if the safety and eciency of the vacuum
are to be guaranteed.
To ensure regular and constant operation and to prevent the warranty from
becoming void, always use genuine DiamaPro spare parts when repairs
are needed.
8.1 BEFORE TURNING ON AND TURNING OFF
EVERY DAY
• Visually check that the suction hose has not been damaged in any way (it
must not be damaged, torn, crushed)
• Check that the electrical switches are in full working order and are not
damaged in any way
• Check the level of waste inside the main barrel N.B. Empty the main
barrel if you are using an DiamaPro model empty the main barrel
• Check that the suction hose has not been damaged in any way
• Check that the motor head is correctly positioned on the lter chamber
and that the latter is correctly placed on the main barrel
• If the vacuum cleaner is moved, ensure that the power voltage of the play
in this new location corresponds to the one on the technical data plate
8.2 AT EVERY 50 HOURS OF OPERATION
• Check the condition of the primary lter: it must not have tears, holes or
other damage: in this case replace it (see 14.)
• Check that the technical data plate is legible and not damaged in any
way: contact the manufacturer for a replacement if necessary
9. PRODUCT DISPOSAL
Dispose of the machine and any accessories according to the legislation
of the state/country. To avoid aecting the environment or your health or
the health of others it is recommended to separate the machine from other
waste, and if necessary properly recycle it.
10. DESCRIPTION
1. SUCTION UNIT
2. ON-OFF SWITCH
3. AUTO FILTER PURGE FREQUENCY DIAL
4. CHECK FILTER INDICATOR LIGHT
5. FORCED FILTER PURGE BUTTON
6. ACCESSORIES CONNECTION
7. WHEELS WITH BRAKE
8. INFINITY BAG

I
0
1
12. USING THE VACUUM CLEANER
I - 3 Motors switch ON
O - Switch OFF
13. FILTER REPLACEMENT
Before switching ON the vacuum be sure the
container is empty
2
Push for forced lters cleaning
1. Disconnect and lift the head.
2. Remove the lter’s cylindrical
steel protection
(unscrewing the screws on the
edge)
3. Unscrew the wing nut and
remove the spring and washer
4. Replace the lter with a proper
one for the vacuum cleaner
in use
5. Install the new lter according to
the label on the bottom of the lter
• Washer with rubber part facing
the base of the
lter
• Spring
• Plastic wing nut
6. Mount the cylindrical protection,
then reconnect the head on the
ltering chamber
1 - Close the bag with two
distanced bands.
2 - Cut the strip between the
two bands.
3 - Pull the Innity Bag end to
make a new bag.
15. COLLECTION BAG USE
The dust and the particles are collected in a bag placed in the container
under the hopper.
The Innity Bag system consists in a plastic tubular from which are ob-
tained 20/30 bags of dierent weights and dimensions.
Once nished or damaged, the tubular must be replaced by a new rell.
The operations below described must be carried out when machine is
turned o.
14. MOUNTING OF PARTS
Connect one end of the exible hose to desired accessory and the other
with the camlock mounted on the lter chamber. (Sew accessories pg.)
Adjust Dial for Filter
Purge Interval
Check Filter Indicator Light
1
12 3
2
4
4
3

16. BAG REPLACEMENT
1- Cut the Innity Bag in order
to let it open.
2- Pull and rotate the retaining pins
of the Innity bag container in order
to unfasten them.
3- Remove the Innity Bag container and
any waste.
4- Insert the new Innity Bag with the inner
part facing upwards.
5- Cut and remove the Innity Bag closing bands.
7- Pull the outer part of the bag to
create a new one.
8- Insert the container with the
Innity Bag.
9- Pull and rotate the retaining pins
and insert them into their seats.
10- Pull the bag and place at the
edge the band to create a new
one. If necessary use two bands.
6- Keep the inner part of the bag
inside the container and pull it up to
the lower edge.
17. TROUBLESHOOTING
To help solve any problem that may occur
Motors do not start.
uNo electrical voltage.
uCheck cables, plugs and socket.
Suction capacity decreases slowly.
uFilter, nozzle, suction hose or suction pipe may be blocked.
uCheck, clean accessories. Clean lter.
Dust comes out during the vacuuming.
uFilter has not been fastened correctly or is defective.
uCheck to see if lter is sitting properly; replace if required.

17. ELECTRIC DIAGRAM
No.
1
2
3
4
5
6
7
8
9
10
11
Part No.
SVX-TERMINAL
SVX-LED+
SVX-SWITCH ON/OFF
SVX-SWITCH-PURGE
SVX-BOARD+
SVX-MOTOR
SVX-SHAKER
SVX-DIODE
SVX-DIAL+
SVX-HOURMETER+
SVX-POTENTIOMETER+

18. TOP ASSEMBLY

19. TOP ASSEMBLY
No.
2
3
4
5
6
7
8
9
10
11
12
13
14
15
16
17
18
19
20
21
22
23
24
25
26
27
28
29
30
31
32
33
34
36
37
38
39
40
41
43
44
45
46
48
50
51
Part No.
SVX-UHC2A
SVX-SEGER-2A
SVX-COOLINGCAP
SVX-HC2A
SVX-SWITCH-ON/OFF
SVX-SWITCH-PURGE
SVX-MR2A
SVX-MOTOR-110V
SVX-RINGFITTING-A
SVX-VAL-SPRING
SVX-FIL-PROTECTION
SVX-GASKET
SVX-CABLE-BUSHING
SVX-MOTORSUPPORTDISC
SVX-SM-FLANGE
SVX-HEADGASKET-2A
SVX-BASECOVER-2A
SVX-CABLEGLAND-PG7
SVX-M5X86
SVX-SPS-2A
SVX-MHOLDER-AUTO
SVX-M8X86
SVX-MVH
SVX-VM-BY-PASS
SVX-WASHER-6HA2
SVX-SPG
SVX-RTBSK
SVX-FILMCAPACITOR-A
SVX-BOARD-110
SVX-SPR
SVX-CABLESTOPPER
SVX-CABLEGLAND-PG16
SVX-CABLE-3GX6
SVX-SHAKER-120V
SVX-WASHER-6HA1
SVX-SUCT-MANI-GASKET
SVX-SUCT-MANI-CLEAN
SVX-2A-HEPA
SVX-FILTERHOLDERSHAFT-2A
SVX-ZPSRS-A
SVX--FIL-PRESS-SPRING
SVX-KNOB-STOPPER
SVX-FILTERHOUSING-2A
SVX-S14K250
SVX-HANDLE-RED-A
SVX-HFB-A
Description
TOP COVER FOR SVX2A
SEGER FOR EXTERNAL SHAFT FOR SVX2A
COOLING BY PASS OPENING CAP FOR SVX2A
MIDDLE COVER FOR SVX2A
16 AMP SWITCH WITH CUFFS (1 FOR AUTOMATIC UNIT / 2 FOR SVX2M / 3 FOR SVX3M)
PUSH BUTTON SWITCH WITH CUFF (FOR SVX3A & SVX2A, 1 PER UNIT)
MOTOR RETAINER 2 MOTOR MODELS
MOTOR
RING FITTING (AUTOMATIC MODELS ONLY)
VALVE SPRING
FILTER PROTECTION 150 H 285
GASKET L
CABLE BUSHING 60
MOTOR SUPPORT DISC AND FOAM 2 MOTORS RED
SUCTION MANIFOLD FLANGE (AUTOMATIC MODELS ONLY)
SUCTION HEAD GASKET SVX2A
BASE COVER SVX2A
CABLE GLAND WITH TIGHTENING NUT (AUTOMATIC ONLY)
SPACER M5X86
SOUND PROOFING SPONGE FOR SVX2A
MOTOR HOLDER (AUTOMATIC MODELS)
CENTRAL SPACER M8X86
MOTOR VALVE HOLDER
VALVE MOTOR BY-PASS
WASHER (AUTOMATIC MODELS ONLY)
SOUND PROOFING GASKET FOR BY PASS MOTORS
RED TERMINAL BLOCK SCREW
FILM CAPACITOR (AUTOMATIC MODELS)
PCB 4187-1/110V (FOR SVX3A & SVX2A ONLY, 1 PER UNIT)
SOUND PROOFING RING 60 D.100X10 (FOR AUTOMATIC MODELS ONLY)
CABLE STOPPER ALL MODELS
CABLE GLAND
CABLE
SHAKER 120V 60HZ
WASHER (AUTOMATIC MODELS ONLY)
SUCTION MANIFOLD GASKET
SUCTION MANIFOLD
HEPA FILTER (FOR SVX2A ONLY, 2 PER UNIT)
FILTER HOLDER SHAFT FOR SVX2A
ZINC PLATED SEALING RING STRUT
FILTER PRESSURE SPRING
PLASTIC KNOB FILTER STOPPER
FILTER HOUSING FOR SVX2A
VARISTOR (AUTOMATIC MODELS ONLY)
RED HANDLE (AUTOMATIC MODELS ONLY)
HANDLE FIXING BRACKET (AUTOMATIC MODELS ONLY)
Qty.
1
2
2
1
1
1
1
2
2
2
2
4
4
1
2
1
1
4
6
1
2
1
2
2
4
4
1
1
1
2
1
1
1
4
4
2
2
2
2
2
2
2
2
2
2
4

20. FRAME ASSEMBLY
No.
1
2
3
4
6
7
8
9
10
11
13
Part No.
SVX-LF2A
SVX-SIDEFRAME-A
SVX-MOVING-HANDLES
SVX-SLIDESUPPORT-A
SVX-BASE-2A
SVX-FRAMEGRIP-A
SVX-CASTER-A
SVX-RRING-A
SVX-TIRE
SVX-CAP-40X40
SVX-TROLLEY-2A
Description
LOWER FRAME (FOR SVX2A)
SIDE FRAME (FOR AUTOMATIC MODELS)
MOVING HANDLES (FOR SVX2A)
SLIDING CHAMBER SUPPORT (FOR AUTOMATIC MODELS)
INFINITY BAG BASE (FOR SVX2A)
RED FRAME HANDLE GRIP (FOR SVX2A)
FRONT CASTER (FOR SVX3A & SVX2A ONLY, 2 PER UNIT)
RETAINING RING (FOR AUTOMATIC MODELS ONLY)
REAR WHEEL (ALL AUTOMATIC MODELS)
CAP 40x40 (FOR AUTOMATIC MODELS)
TROLLEY (FOR SVX2A)
Qty.
1
2
1
2
1
2
2
2
2
2
1

21. HOPPER ASSEMBLY
No.
1
2
3
4
5
6
7
8
9
10
11
12
14
16
17
Part No.
SVX-HOPPER-2
SVX-HOOK-SMALL
SVX-INLETGASKET
SVX-INLET
SVX-HOPPERGASKET-A
SVX-UPPERPLATE-FLAP
SVX-OVAL-GASKET
SVX-LOWERPLATE-FLAP
SVX-LOCKSPRING
SVX-CONTAINERLOCK
SVX-CJOINTFLAP
SVX-DSRFD
SVX-FLAPARM
SVX-IBAGCONTAINER
I-1376013
Description
HOPPER (FOR SVX2A)
SMALL HOPPER HOOK
INLET GASKET
INLET
HOPPER GASKET (FOR SVXA)
UPPER PLATE FLAP
OVAL SPONGE RUBBER FLAP GASKET
LOWER PLATE FLAP
INFINITY BAG LOCK SPRING
INFINITY BAG CONTAINER LOCK
C JOINT FLAP
DOUBLE SPRING RETURN FLAP DISK
FLAP ARM
INFINITY BAG CONTAINER
DIAMAPRO INFINITY BAG
Qty.
1
3
1
1
1
1
1
1
3
3
1
1
1
1
1

22. ACCESSORIES
No.
1
2
3
4
5
Part No.
SVX-WAND-2
SVX-FLOORTOOL-2
SVX-BLACKHOSE-CUFF
SVX-HOSE-STANDARD-2-NC
SVX-SQUEEGEE-BLADES
Description
STEEL WAND FOR FLOOR TOOL
WET/DRY PLASTIC FLOOR TOOL
CUFFS FOR 2” BLACK HOSE
2” STANDARD BLACK HOSE
BLADE SET FOR FLOOR TOOL 15-1/2 X 17-1/4
Qty.
1
1
2
1
1

DiamaPro Systems®
3343 Peachtree Road NE
Suite 145 #24
Atlanta, GA 30326
470-977-2323
Table of contents
Other DiamaPro Systems Vacuum Cleaner manuals
DiamaPro Systems
DiamaPro Systems SVX3-A User manual
DiamaPro Systems
DiamaPro Systems WVX-P User manual
DiamaPro Systems
DiamaPro Systems SVX2-M User manual
DiamaPro Systems
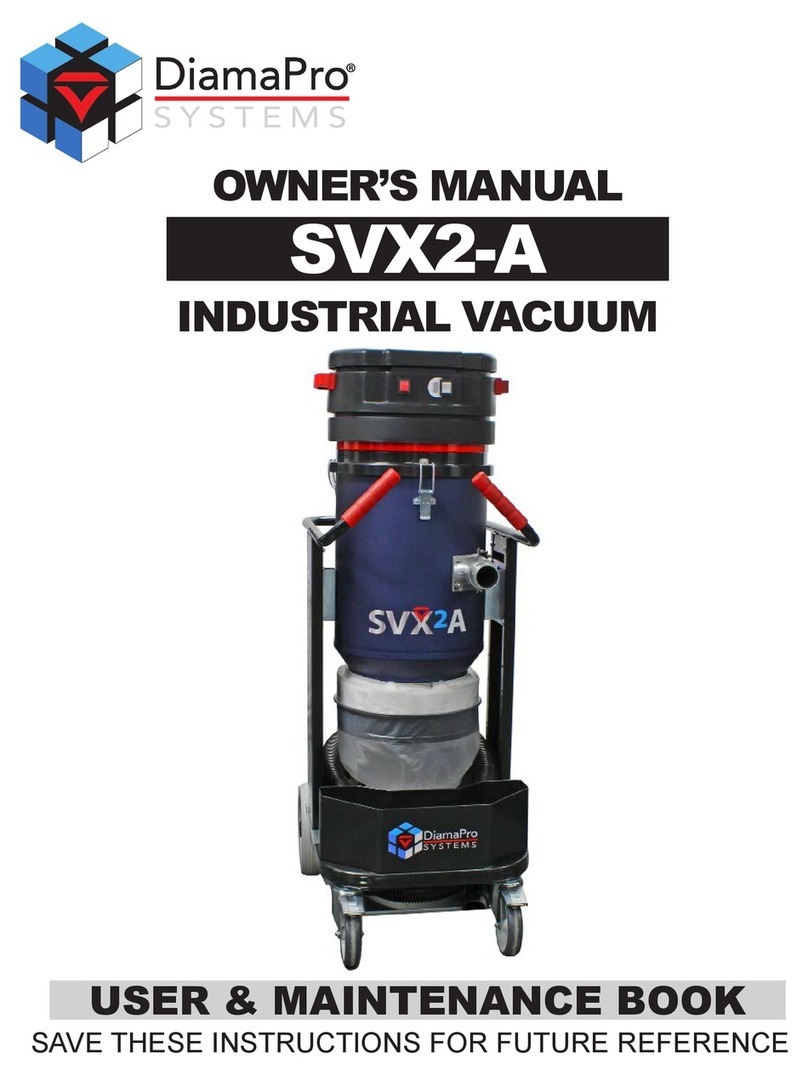
DiamaPro Systems SVX2-A User manual
DiamaPro Systems
DiamaPro Systems WVX User manual
DiamaPro Systems
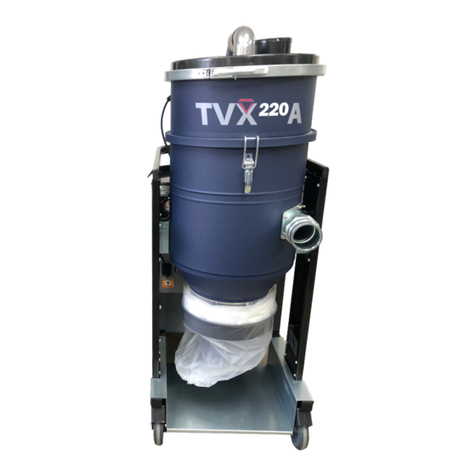
DiamaPro Systems TVX-A User manual

DiamaPro Systems
DiamaPro Systems SVX3-A User manual

