diamond mowers Drum Mulcher OD Pro X User manual

DIAMONDMOWERS.COM
OPERATOR’S MANUAL

PRODUCT INFORMATION
Record the model and serial number of your unit here. When calling for
warranty, service or parts, you may be asked to provide this information,
in order to ensure fast, accurate service.
MODEL: Drum Mulcher OD Pro X SIZE: 60”(1524mm) 72”(1829mm)
SERIAL NUMBER:___________________________________________________
© Diamond Mowers®, LLC
All rights reserved.
Any failure to read, understand and follow the instructions found in this operator’s
manual could lead to serious injury. Operators who choose to operate this equipment
without following instructions, or who choose to operate this equipment in a manner
inconsistent with the recommendations set forth in this manual, do so at their own
risk and assume the risk of injury. Diamond Mowers will not be liable for an owner
or operator’s loss, damage, or injury due to the misuse of the equipment, failure to
understand the inherent risks, or inability to properly operate the equipment.
(circle one)
2

WELCOME!
Thank you for choosing Diamond Mowers®, and welcome to your Drum
Mulcher OD Pro X. Before you begin operating, we encourage you to look
through this manual to review the proper maintenance and operating
techniques that will keep you, and your equipment, safe — while ensuring you
the most productive Drum Mulcher in the market.
We have nothing but respect and admiration for you. Our job at Diamond® is
to provide you with the toughest, most reliable and safest equipment that
will allow you to do your job better. That also means being there when you
need us.
CONTACT US:
Parts: 888.960.0361 | [email protected]
Main Office:800.658.5561 | 605.977.3300
Website: www.diamondmowers.com |Email: inf[email protected]
Your time is important to us.
We guarantee that Genuine Diamond Parts will ship within 72-hours of the
order being placed or the parts and shipping are free.
Thanks again for choosing Diamond.
If at any time your needs are not being met, please feel free to contact
anyone in our executive team.

OWNER REGISTRATION
In your welcome packet you should have received a warranty registration
form. Complete and return this form to our main office. It’s a self-mailer,
so no postage is required.
If you’d rather complete this info online, go to:
http://info.diamondmowers.com/register-my-product
Returning your registration information to Diamond will help us process any
warranty claims quickly and efficiently – so you can get back to work, fast.
TRANSFERRED OWNERSHIP
If you have acquired this Drum Mulcher OD Pro X from a previous owner,
we encourage you to register your equipment online. By registering your
Diamond Mowers unit, you’ll stay informed on product advancements,
offers and service alerts.
Register by going to: http://info.diamondmowers.com/register-my-product
We honor our equipment’s warranty from the date it was put into service,
no matter who’s in charge of running it.
For any questions, contact our Warranty / Service team at:
888.960.0364 or 605.977.3300
warran[email protected]
PRODUCT REGISTRATION
4

INTENDED USE 6
TAKE A LOOK AROUND 7
GETTING STARTED 8
OPERATING YOUR DRUM MULCHER 12
MAINTENANCE 19
TROUBLESHOOTING 37
INDEX 41
TABLE OF CONTENTS

INTENDED USE
This attachment is designed to be used for mowing and brush
management applications.
This includes:
•Mulching brush.
•Cutting small trees up to 9" (229mm) in diameter to ground level.
This attachment should only be used in an area free of obstructions and
bystanders. Any use on non-vegetative material, or in an area that is not
clear of persons and property, is strictly prohibited. Any use outside of the
aforementioned application is considered contrary to its intended use. Any
damage that may occur as a result of misuse will void warranty as stated in
Diamond Mowers’ warranty policy.
Do not operate this unit without first reading the safety precautions
and operating instructions in this manual.
Do not operate this unit without first reading the safety precautions
and operating instructions in this manual.
6
v
TAKE A LOOK AROUNDTAKE A LOOK AROUND
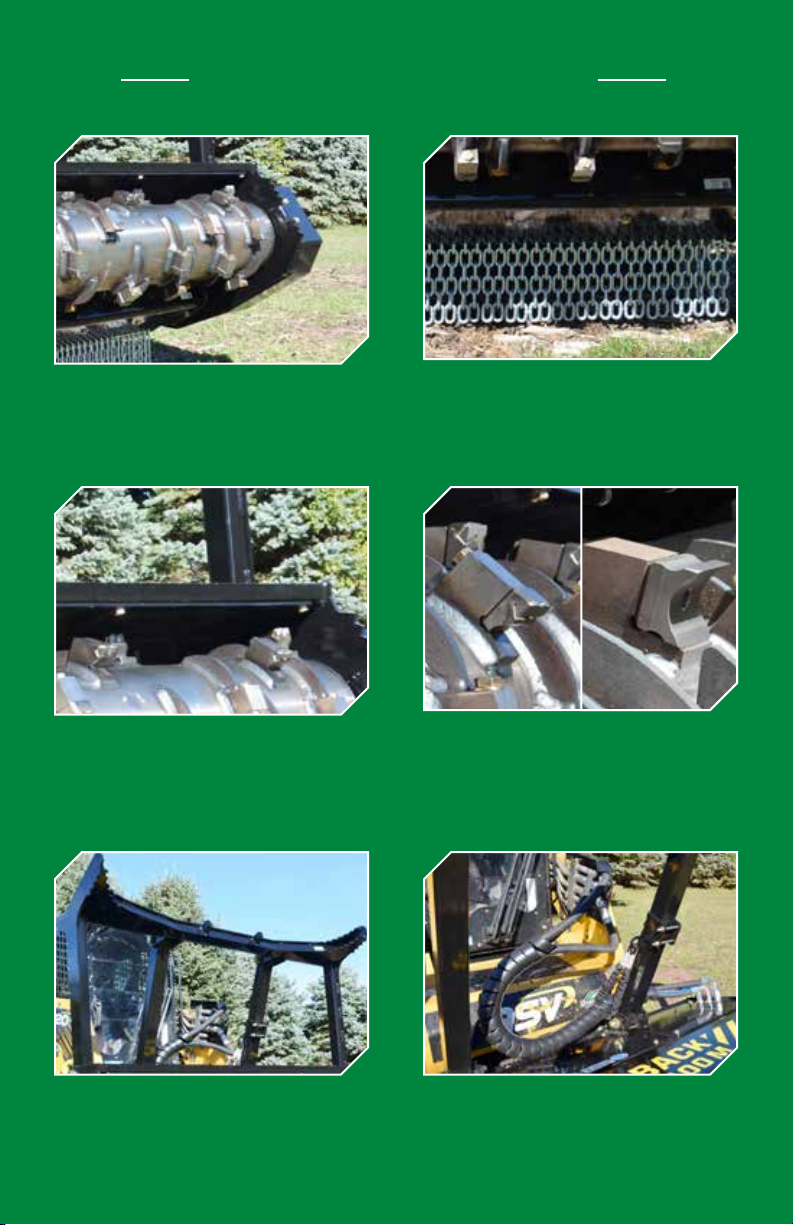
TEETH
Multiple tooth options are offered,
allowing the operator to tailor the
attachment for optimum cutting
efficiency and tooth life.
CHAIN GUARD
A chain curtain is provided to catch
debris and assist in protection of
the carrier vehicle.
PUSH BAR
The two-position push bar helps to
guide material away from
the loader.
DRUM LINER
Replaceable drum liner to protect
the frame from premature wear,
extending the life of the machine.
HOSES
Shipped with quick couplers and a
case drain line with both male and
female ends.
SKID SHOES
Skid shoes provide extra frame
protection, and are easily replaced.
77

© Diamond Mowers®, LLC
INSTALLATION
The Drum Mulcher OD Pro X will mount(1)
onto the front of the skid-steer /
compact track loader quick attach
plate in place of a bucket or other
implements.
QUICK ATTACH
PUSH BAR
The push bar has two positions(2)
to allow the operator to adjust the
attachment to the conditions.
•Loosen the hardware(4) on the push
bar front and rear supports(1)(3).
•Unbolt the push bar rear supports(1)
and reposition them in the adjacent
mounting location(2) on the rear
support brackets and secure them
in place.
•Tighten down all hardware(4) on
the rear and front / outer push bar
supports(1)(3).
A minimum ⁄” (13mm) safety door is
REQUIRED! This product must not be
used without a minimum ⁄” (13mm)
safety door. Debris can fly back at the
cab and cause injury.
SAFETY POLYCARBONATE
(1)
(1)
(3)
(2)
(4)
8

© Diamond Mowers®, LLC
The case drain line must be properly
connected or you will damage your
hydraulic motor. The case drain line
will come equipped with both male and
female QD couplers.
•Install the QD coupler(s) that
matches the machine.
◦NOTE: The pressure hose will
have a red ID band attached.
•Attachment is shipped with ⁄”
flat face connectors, which are a
common size for most skid-steer /
compact track loaders.
◦Larger couplers are available to
purchase at
DiamondMowers.com.
•Clean connections before
attaching(1) to prevent
contamination.
◦NOTE: The pressure(1) hose will
have a red ID band attached.
•Make sure hoses are positioned
so they do not pinch between the
mulcher and the carrier.
•Start machine at low idle and verify
that the drum is spinning in the
correct direction - teeth are cutting.
◦If the pressure and return hoses
are reversed, the drum will
NOT spin.
•If this reversal occurs, either
inverse the flow from your machine,
or switch the QD couplers on the
pressure and return hoses.
QD COUPLERS
(1)
9

© Diamond Mowers®, LLC
The carrier must be equipped with a
case drain and be rated for the hydraulic
flow and lift capacity listed below.
The motor has been factory tuned to
match the GPM and PSI settings on the
tag (#10) at left. To maintain warranty
coverage, your Diamond Dealer can
fine-tune or adjust these settings
and update the GPM and PSI tag. For
attachments that are outside of the
warranty period, follow the Motor
Calibration instructions below:
Motor Calibration:
•Remove the motor side top
access cover(1).
•Temporarily remove the plug(2)
marked “G” from the motor and
install the adapter(3), hose(4), and
5000PSI (345Bar) rated gauge(5).
◦Use teflon tape on pipe threads.
◦Adapter(3), hose(4), and 5000PSI
(345Bar) rated gauge(5) are from
Diamond kit part #44-0949.
•Place the gauge(5) in a location so
the dial and markings are clearly
visible to the operator.
INSTALLATION
MACHINE REQUIREMENTS
DECK GPM (LPM) LBS (KG)
60” (1524mm) 27-31 (102-118) 2300 (1044)
60” (1524mm) 32-45 (122-171) 2300 (1044)
72” (1829mm) 32-45 (122-171) 3190 (1447)
CONTINUED ON NEXT PAGE
Keep away from the spinning drum
when operating the unit; serious
injury or death can result from
contact with the drum.
(1)
(2)
(3)
(4)
(5) (6)
(7)
10

© Diamond Mowers®, LLC
•Start the carrier and set the throttle to full speed.
◦DO NOT stand near the rotating drum when it is running.
•While observing the gauge(5), start the drum mulcher (engage the
carrier’s auxiliary hydraulics); The gauge(5) will spike to a high pressure
reading then drop with readings oscillating slightly up and down. The
gauge(5) will eventually STEADY for a short periord of time (This is the
motor SHIFT POINT), after which the pressure readings will drop off.
◦Note the pressure reading when the gauge is STEADY with minimal
oscillation (the motor SHIFT POINT).
◦NOTE: If the test must be repeated, the drum mulcher must be shut
down and come to a complete stop before repeating the test.
◦NOTE: If the pressure setting is too high, the motor displacement will
not change, resulting in low torque and slow recovery; if too low, it will
shift into high displacement too early, resulting in slow drum speed
and low pressure / performance.
•The pressure reading (motor SHIFT POINT) noted when the gauge(5) was
STEADY should be between 6-700PSI (42-48Bar) BELOW the carrier’s
auxiliary hydraulic relief setting (refer to the carrier’s operators manual).
◦If Adjustment Is Needed:
-Confirm the machine and drum mulcher are shut down and not
in motion.
-Loosen the locknut(6) on the adjustment screw(7) with a 10mm
combination wrench.
-Use a 3mm Allen wrench to turn the adjustment screw(7) clockwise
to lower the SHIFT POINT, or counter-clockwise to raise it (adjust
in ⁄ turn increments).
-Repeat these steps until the desired SHIFT POINT is reached, then
tighten the locknut(6) to retain the adjustment screw(7) position.
•Remove the adapter(3), hose(4), and gauge(5) and replace the plug(2) into
the motor port marked “G”, and replace the top access cover(1).
11

© Diamond Mowers®, LLC
OPERATING YOUR DRUM MULCHER
CONTINUED ON NEXT PAGE
Before you operate, note that the primary responsibility for safety on this
equipment falls to the operator. Only trained individuals who have read and
understood this manual should operate this unit.
If any portion of this manual is not understood, contact:
Diamond Mowers’ Service/Warranty at 888.960.0364 or 605.977.3300.
Be sure to read all warnings carefully. They are included for your safety,
and for the safety of others working with you.
SAFETY TIPS
Indicates where SERIOUS injury or death WILL result if instructions
are not followed.
Indicates where SERIOUS injury or death COULD result if instructions
are not followed.
Indicates where MINOR injury COULD result if instructions are
not followed.
Indicates a property damage hazard ONLY, no PERSONAL injury.
•Always wear personal protective equipment (safety glasses, goggles,
etc.), when operating.
•DO NOT operate this unit without a shatter resistant cab enclosure
installed on your skid-steer / compact track loader; this unit will cause
flying debris.
•Block off work area from bystanders, livestock, etc.
•Bystanders must keep a distance of 300ft/100m from the unit
when operating.
•Mulcher teeth are always sharp and can cause injury, even when not
in motion.
12

© Diamond Mowers®, LLC
•DO NOT use extremities to dislodge debris from teeth or disc.
•Operate only from the operator’s station.
•Hydraulic fluid is hot and will heat any exposed steel, hoses, or motor in
its proximity.
•Route hoses correctly to ensure a full range of motion.
•Make certain hoses are out of the way of tires, tracks or the ground.
•Be certain the drum has come to a complete stop before exiting the cab.
•Stop the drum rotation prior to using the push bar to push or drag
material with the front of the machine pointing downward and exposing
the cutting drum to the operator.
When transporting Diamond’s Drum
Mulcher OD Pro X between operations,
make sure to protect it from collisions
and accidental damages by placing it in
the stowed position.
Failure to place the head in its stowed
position could result in
structural damage.
STOWED POSITION
Contact with the drum and teeth while the drum is in motion will
cause serious injury or death. The drum spins at a very high speed and
can take several minutes to stop. Be sure all personnel are clear of
the machine before engaging the Drum Mulcher.
START-UP PROCEDURES
•Start the carrier (reference the carrier’s operator manual for starting
recommendations and procedures) and allow the carrier to warm up and
instruments to stabilize.
•Prior to operation, ensure both engine and hydraulic oil temperature
reaches the carrier’s recommended operational temperature range.
13

© Diamond Mowers®, LLC
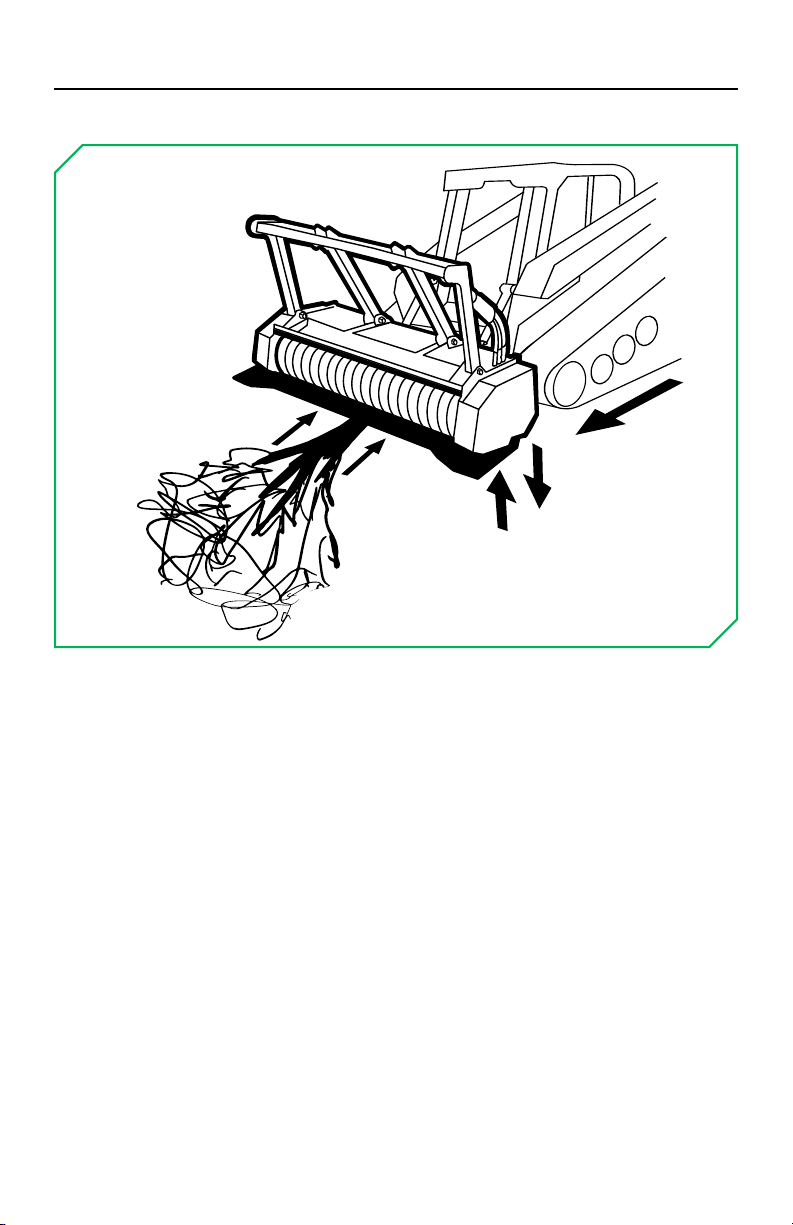
VERTICAL MULCH - TREES 2”-9” (51mm-229mm)
Be aware when cutting standing trees as there is a potential for
treetops to fall onto the operator’s cab.
Use to mulch trees from the top down.
•To top the tree - Reach as high as possible. Cut the top of the tree and
push it away from the cutter head to mulch it later.
◦Make certain to allow enough recovery time for the drum to
rebuild momentum.
•Mulch the tree - Angle the head back 45oand move the attachment
quickly but smoothly through the tree, raising the head slightly to allow
the drum to recover speed as necessary.
OPERATING YOUR DRUM MULCHER
1
2
1
2
14
© Diamond Mowers®, LLC
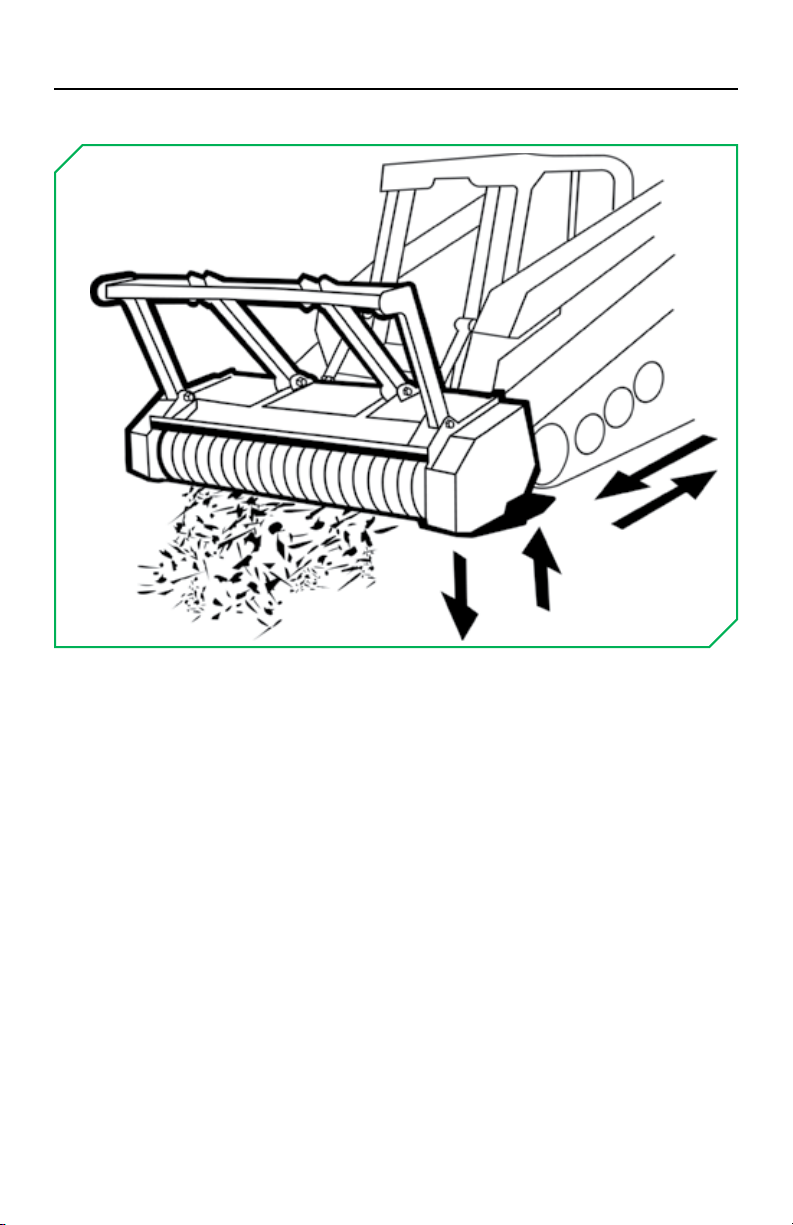
Use to pull in and mulch debris laying on the ground.
•Lift the front of the head slightly to pull in branches or tree tops
underneath the drum for mulching.
•Tip the drum’s nose down to re-process material on the ground for a
finer finish.
GROUND MULCH
15

© Diamond Mowers®, LLC
Be aware when cutting standing trees as there is a potential for
treetops to fall onto the operator’s cab.
BASE CUT
OPERATING YOUR DRUM MULCHER
Use to cut trees at their base, push over, and process on the ground.
•Pitch the mulcher back slightly to engage the drum into the tree.
•Drive forward to engage the tree with the drum.
•Tip forward using the push bar to guide the tree away from the carrier.
•Tree tops should fall forward away from the carrier, ready for mulching.
•For very large trees, notch it (similar to using a chainsaw), and approach
them from the other side to cut and drop the tree.
1
2
3
4
16

© Diamond Mowers®, LLC
Use to cut stumps at, or below ground level.
•With the drum angled slightly down, cut the stump low to the ground.
◦Rebuild speed before proceeding with a stump cut.
•Angle the drum’s nose down, cutting the stump flush to the ground.
◦NOTE: The more you use the stump cut application, the more wear your
teeth will incur.
STUMP CUT
17
© Diamond Mowers®, LLC
For more tips, visit us online at www.DiamondMowers.com
Use to clean up branches and large debris. Re-processing the debris
will provide a groomed finish.
•Raise lift arms about 6” (152mm) and drop the front of the drum toward
the ground.
•Back over the remaining debris for a more finished look.
CLEANING & RE-PROCESSING
OPERATING YOUR DRUM MULCHER
18

© Diamond Mowers®, LLC
MAINTENANCE
Regular maintenance will make certain your unit stays productive and retains
a long operating life. The following chart represents the minimum intervals
recommended for inspection and maintenance.
MAINTENANCE INTERVALS
PROCEDURE
10
HOURS/
DAILY
50
HOURS/
WEEKLY
150
HOURS
AS
NEEDED
ANTI-WRAP GUARDS Inspect
BEARINGS Grease Inspect
BELT & PULLEYS Inspect
CHAIN GUARD Inspect
DRUM Inspect
DRUM LINER Inspect Replace
HOSE CARRIER Inspect
HYDRAULIC HOSES & FITTINGS Inspect
MOTOR BOLTS Inspect
PUSH BAR Inspect
QD COUPLERS Inspect
SAFETY POLYCARBONATE Inspect Clean
SKID SHOES Inspect Replace
TEETH Inspect Replace
TOOTH HOLDERS Inspect Replace
When replacing parts, use Genuine Diamond Parts. Guaranteed to ship within
72-hours of your order being placed, or the parts and shipping are free.
Call: 888-960-0361 or 605.977.3300 | Email: [email protected]
Order online: www.diamondmowers.com
19

© Diamond Mowers®, LLC
MAINTENANCE
ANTI-WRAP GUARDS
•Anti-wrap guards(1) should be
inspected every 150 hours
or monthly.
◦Anti-wrap guards(1) are located
behind the drum in the interior of
the machine.
•Replace the anti-wrap guards(1) as
needed.
◦Remove the side access covers(2).
-Anti-wrap guard(1) hardware is
accessed from inside the side
access covers(2).
◦Mounting bolts(3) are located in
the low center of the frame for
each anti-wrap guard(1).
-Use Loctite 262.
-Torque the mounting bolts(3)
to 212ft-lbs (287Nm).
(3)
(1)
(2)
20
Table of contents
Other diamond mowers Farm Equipment manuals


Popular Farm Equipment manuals by other brands

Schaffert
Schaffert Rebounder Mounting instructions

Stocks AG
Stocks AG Fan Jet Pro Plus 65 Original Operating Manual and parts list

Cumberland
Cumberland Integra Feed-Link Installation and operation manual

BROWN
BROWN BDHP-1250 Owner's/operator's manual

Molon
Molon BCS operating instructions

Vaderstad
Vaderstad Rapid Series instructions


