manuals.online logo
Brands
  1. Home
  2. •
  3. Brands
  4. •
  5. Diamondback
  6. •
  7. Automobile Accessories
  8. •
  9. Diamondback HD User manual

Diamondback HD User manual

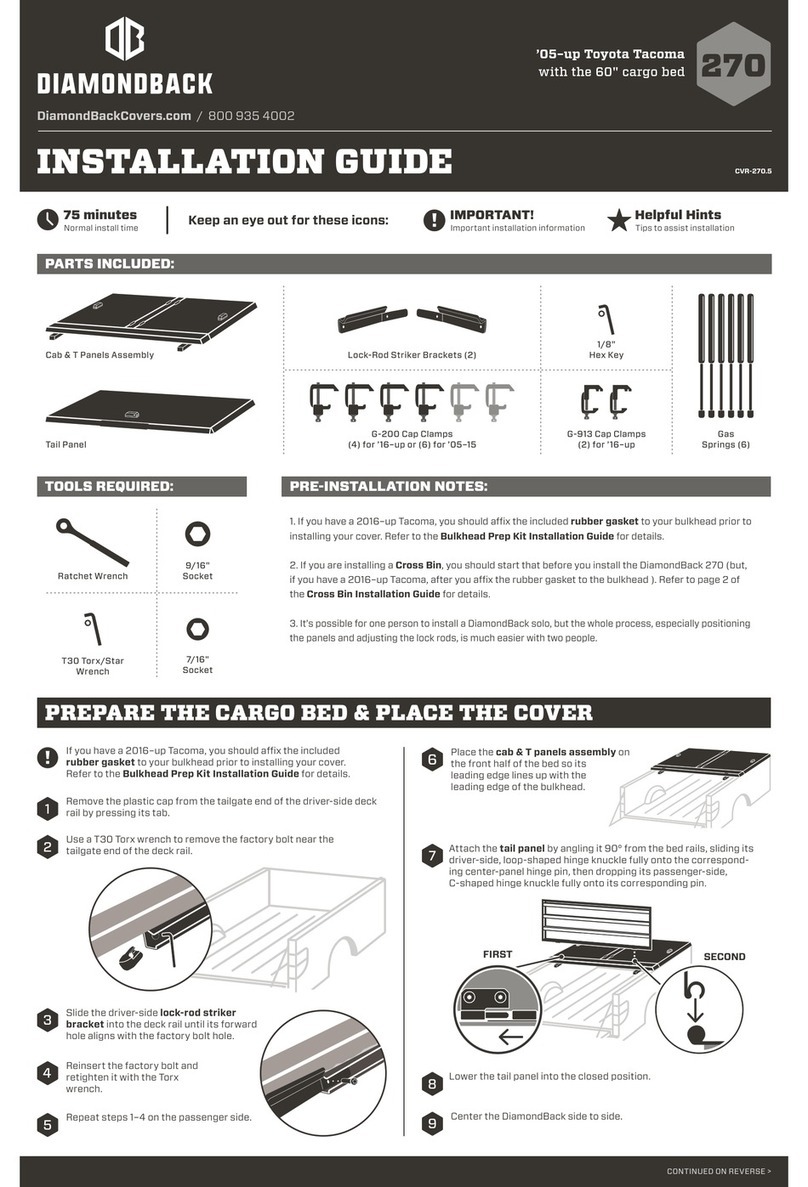
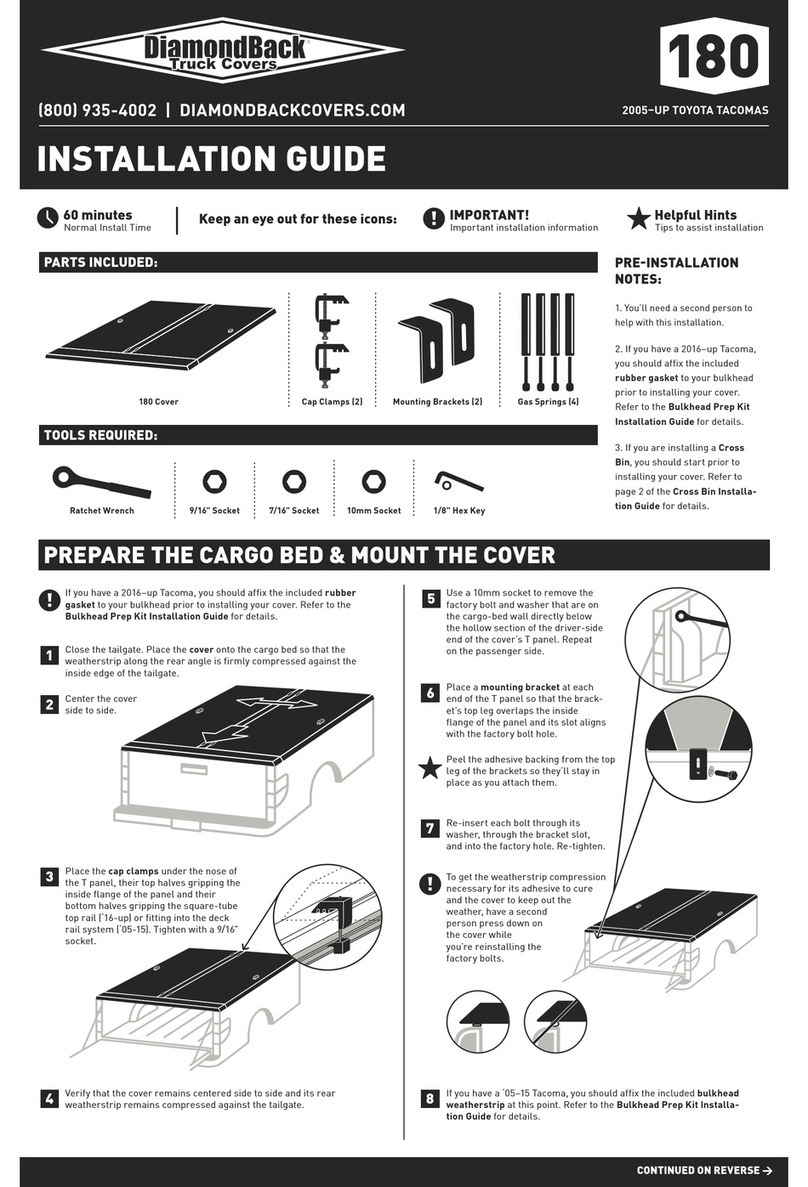
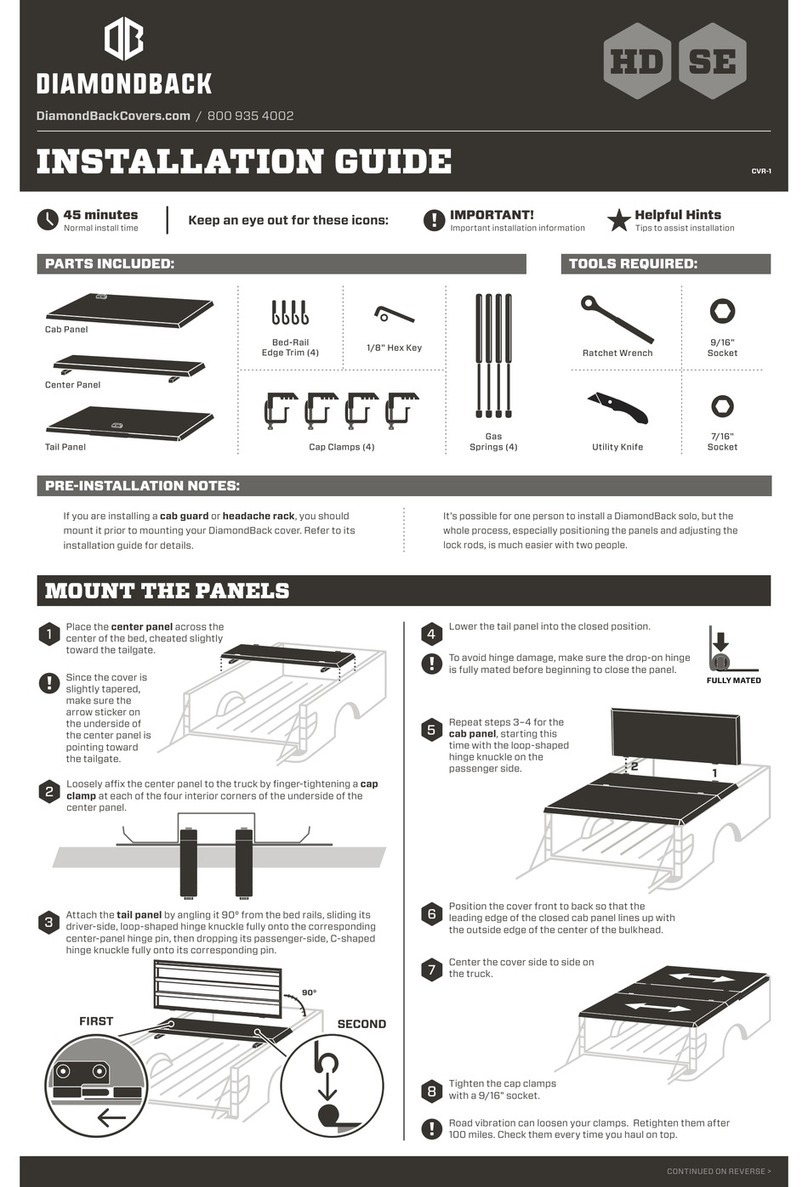
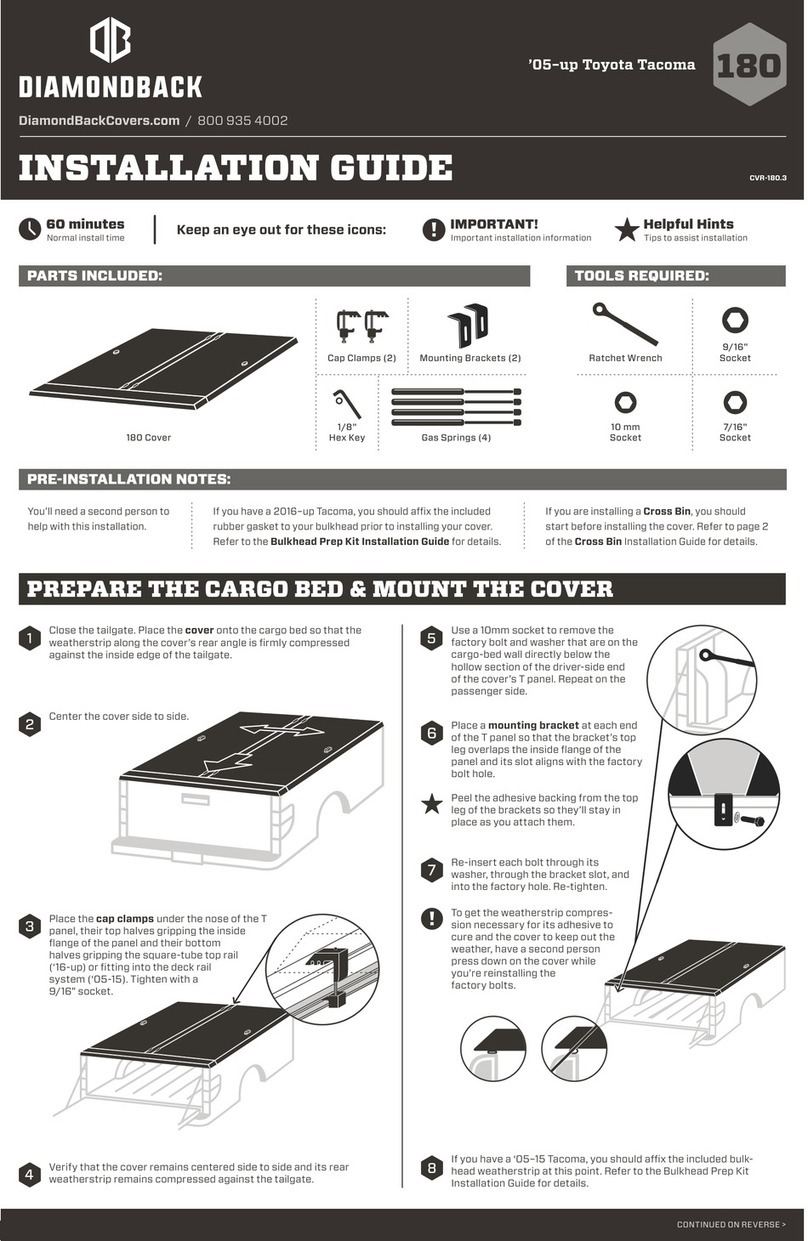
MOUNT THE PANELS
INSTALLATION GUIDE CVR-3
DiamondBackCovers.com / 800 935 4002
HD SE
’15–up Colorado & Canyon
with the 61.7" Cargo Box
Important installation information
IMPORTANT!
Keep an eye out for these icons:
Normal install time
45 minutes
Tips to assist installation
Helpful Hints
9/16" Socket
7/ 16" S oc ke t
Ratchet
Wrench
PARTS INCLUDED: TOOLS REQUIRED:
Cap Clamps (4)
Cab Panel
Tail Panel
Center Panel
1/8" Hex Key
Gas
Springs (4)
Plastic Bushings (4)
PRE-INSTALLATION NOTES:
It’s possible for one person to install a DiamondBack solo, but the
whole process, especially positioning the panels, adjusting the lock
rods, and connecting the cab-panel tethers, is easier with two people.
If you are installing a cab guard or headache rack, you should
mount it prior to mounting your DiamondBack cover. Refer to its
installation guide for details.
Position the cover front to back so that the leading edge of
the closed cab panel lines up with the outside edge of the
center of the bulkhead.
5
Center the cover side to side on
the truck.
6
Repeat steps 2–3 for the
cab panel, starting this
time with the loop-shaped
hinge knuckle on the
passenger side.
4
1
2
Since the cover is
slightly tapered,
make sure the
arrow sticker on
the underside of
the center panel is
pointing toward
the tailgate.
Place the center panel across the
center of the bed, cheated slightly
toward the tailgate.
1
Road vibration can loosen your clamps. Retighten them after
100 miles. Check them every time you haul on top.
Ax the center panel to the truck by placing a cap clamp at each of
the four interior corners of the underside of the center panel and
tightening them with a 9/16" socket.
7
Attach the tail panel by angling it 90° from the bed rails, sliding its
driver-side, loop-shaped hinge knuckle fully onto the corresponding
center-panel hinge pin, then dropping its passenger-side, C-shaped
hinge knuckle fully onto its corresponding pin.
2
FIRST SECOND
90°
To avoid hinge damage, make sure the C-shaped
hinge knuckle is fully engaged with its pin before
tilting the panel.
Lower the tail panel into the closed position.
3
FULLY MATED
CONTINUED ON REVERSE >
ADJUST THE LOCK RODS
Press the plastic bushings until they snap
into place in each of the factory holes in
the bed walls under the panel. (See
step 10 illustration for location.)
With the lock handle in the closed
position, position the lock rods
tight against the top rims of the
factory holes in the bed wall so that
they’ll draw the panels down and
compress the weatherstrip. Tight-
en the rod guide brackets with a
7/16" socket.
There may be plastic plugs in the
factory holes. Remove them.
9
8
DiamondBackCovers.com MARCH 2022
ADJUST THE LOCK RODS
ATTACH THE SAFETY CATCH & GAS SPRINGS
10 With the lock handle in the open position, adjust the length of the lock
rods so that their tips stop about 1/4" short of the factory holes.
11
For best weather
protection, have a
second person press
down on the cover while
you adjust the lock rods.
Using the access panels is easiest when you
press down as you open or close them.
12 Repeat steps 8 through 11 for
the cab panel.
Your panels should be hard to operate
at first. After finishing install below,
leave the panels closed as much as possible for 3–4 days
to break in the weatherstrip. After that period, you should
find that the panels open and close without diculty.
If you are also installing a Cross Bin, do so now. Refer to
the Cross Bin Installation Guide for details.
If the lock rods are still dicult to operate after the break-in
period, rub a small amount of petroleum jelly on the top of their
rubber end caps.
1/8"hex key
Attach the two remaining gas springs—barrel up, shaft
down—to the ball studs on the tail panel.
17
If your truck has bed rail caps, ax the included bulkhead
weatherstrip if you haven’t already. Refer to the Bulkhead
Prep Kit Installation Guide for details.
18
Adhesive cure time
24 hours
Leave the cover closed and locked for 24
hours to allow the weatherstrip adhesive,
which is pressure-sensitive, to fully cure.
19
Slip the looped ends
of the cable tethers
attached to the
underside of the cab
panel around the
center-panel ball stud
arms, well past the
ball studs and nuts.
Attach a gas spring—barrel up, shaft down—to each of
the pairs of ball studs on the cab panel.
15
14
Open the cab panel. Have a second person support it
in the open position.
13
THIS END
UP
Push the keyhole at the bottom of the
safety catch hanging from the cab
panel’s driver side around the nut
protruding from the outboard side
of the ball stud arm, flexing the
spring clip so the nut can pass
through, then allowing the panel
to open fully so the nut can slide
into the narrower part
of the keyhole and
spring clip come
back into place
behind the nut.
16
If two of your gas springs have heavier poundage printed on the
side of their barrels than the others, use them here. If just one of
the springs is stronger, use it on the driver side.
Loosen the set screws on the
tail-panel lock-rod linkages.
7/16" socket
This manual suits for next models

2

Other Diamondback Automobile Accessories manuals

Diamondback 270 User manual

Diamondback

Diamondback 270 User manual

Diamondback 270 User manual

Diamondback

Diamondback 270 User manual

Diamondback 270 User manual

Diamondback

Diamondback 270 User manual

Diamondback HD User manual

Diamondback

Diamondback HD User manual

Diamondback 180 User manual

Diamondback

Diamondback 180 User manual

Diamondback 180 User manual

Diamondback

Diamondback 180 User manual

Diamondback HD User manual

Diamondback

Diamondback HD User manual

Diamondback 270 User manual

Diamondback

Diamondback 270 User manual

Diamondback HD User manual

Diamondback

Diamondback HD User manual

Diamondback 180 User manual

Diamondback

Diamondback 180 User manual

Diamondback 270 User manual

Diamondback

Diamondback 270 User manual

Diamondback 270 User manual

Diamondback

Diamondback 270 User manual

Diamondback 270 User manual

Diamondback

Diamondback 270 User manual

Diamondback HD User manual

Diamondback

Diamondback HD User manual

Diamondback 180 User manual

Diamondback

Diamondback 180 User manual

Diamondback 270 User manual

Diamondback

Diamondback 270 User manual

Popular Automobile Accessories manuals by other brands

Whelen Engineering Company Edge 9000 Retrofit Guide

Whelen Engineering Company

Whelen Engineering Company Edge 9000 Retrofit Guide

Cruz N+ Series Assembly instructions

Cruz

Cruz N+ Series Assembly instructions

PullRite OE Series owner's manual

PullRite

PullRite OE Series owner's manual

bosal 034601 Fitting instructions

bosal

bosal 034601 Fitting instructions

AVS Ventvisor installation instructions

AVS

AVS Ventvisor installation instructions

JEHNERT SOUND DESIGN 65400 Assembly instruction

JEHNERT SOUND DESIGN

JEHNERT SOUND DESIGN 65400 Assembly instruction

Simplicity 202 parts list

Simplicity

Simplicity 202 parts list

Hyundai BlueConnect user guide

Hyundai

Hyundai BlueConnect user guide

Whispbar K113W Fitting Instructions for Basic Carrier

Whispbar

Whispbar K113W Fitting Instructions for Basic Carrier

DEFA Warm Up 411156 Fitting instructions

DEFA

DEFA Warm Up 411156 Fitting instructions

eFlexFuel E85 Quick guide, installation and user guide

eFlexFuel

eFlexFuel E85 Quick guide, installation and user guide

Thule Kit 1001 Fitting instructions

Thule

Thule Kit 1001 Fitting instructions

Cruz Evo Rack E32-140 Assembly instructions

Cruz

Cruz Evo Rack E32-140 Assembly instructions

Lectron EVCharge6-20 user manual

Lectron

Lectron EVCharge6-20 user manual

TrailFX A7060S/B manual

TrailFX

TrailFX A7060S/B manual

Thule 196 parts list

Thule

Thule 196 parts list

Airxcel MAXXFAN MINI DELUXE 3805 Installation instructions, Information and Operating guide

Airxcel

Airxcel MAXXFAN MINI DELUXE 3805 Installation instructions, Information and Operating guide

Linear Logic ScanGauge III quick start guide

Linear Logic

Linear Logic ScanGauge III quick start guide

manuals.online logo
manuals.online logoBrands
  • About & Mission
  • Contact us
  • Privacy Policy
  • Terms and Conditions

Copyright 2025 Manuals.Online. All Rights Reserved.