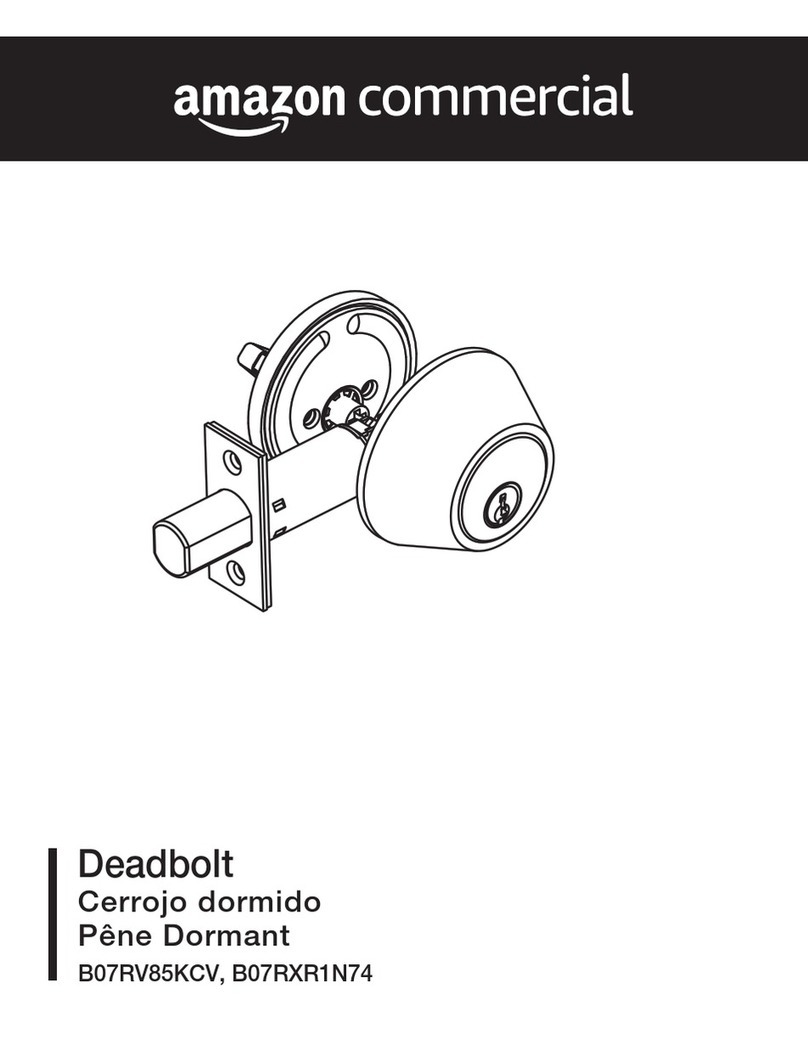
Assembly Instructions Model Targa
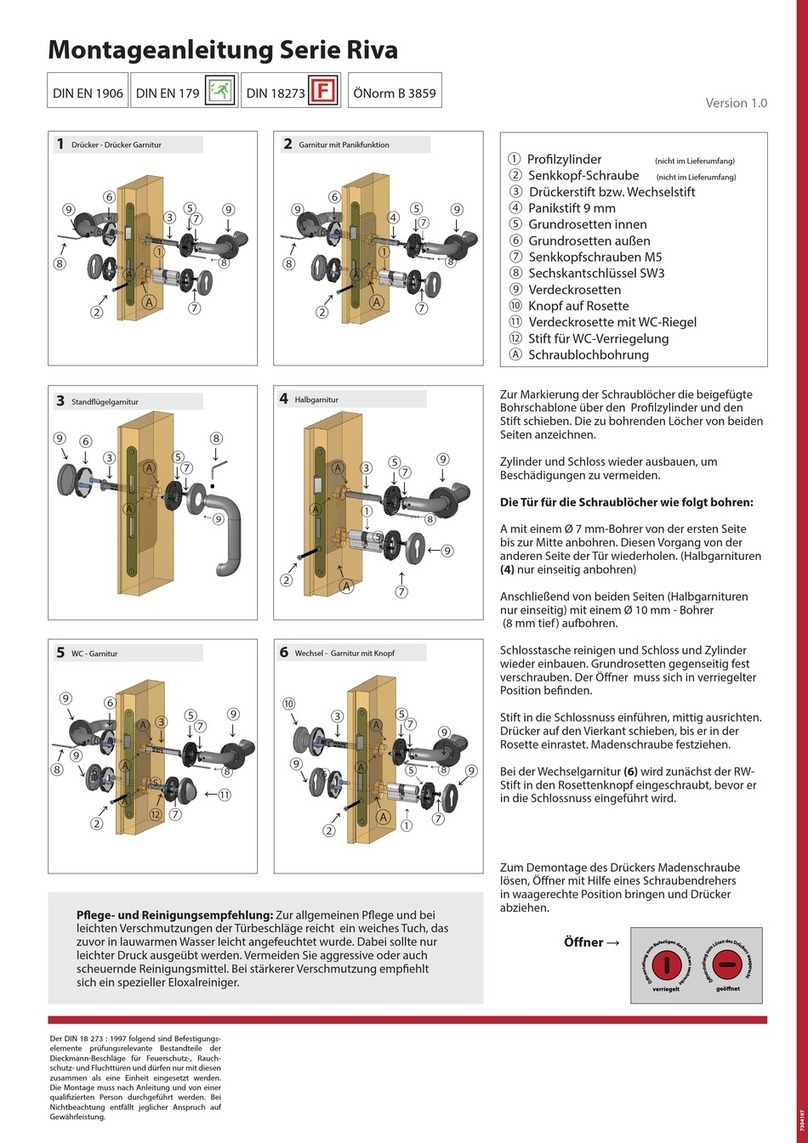
5knob - lever set
3inactive leaf set
4half-set
1lever - lever - set
Place the inner xing plate over the prole cylinder
and spindle to mark the position of the screw holes
on the door.
Drill small starter holes using a 5 mm drill bit.
Repeat this procedure on the other side of the door.
(Important: drill holes for half-sets from one side of
the door only!)
Remove the lock to avoid damage.
Then drill from both sides of the door all the way
through using a 7 mm drill bit. Enlarge with a
10 mm drill bit from both sides to 8mm deep.
(Reminder: for half sets (g. 4), drill from one side
only!)
Remove any drilling residue from the lock pocket
and install the lock. Assemble the handle set and x
with bolts provided.
To install the handle for entrance door ttings: x
the spindle in the knob before assembling.
①prole cylinder (not included)
②cylinder retaining screw (not included)
③ square spindle
④spindle for locks with split follower
⑤steel base plate interior
⑥steel base plate exterior
⑦ M5 hexagon head bolts
⑧# 3 allen key
⑨cover plate
⑩fixed knob on plate
Ⓐscrew holes
2set with anti-panic function
The assembly instructions for model Targa are
suitable for short plate sets with 2 screws and
long plate sets with 3 screws (no illustration).
The testing of door hardware for escape doors,
re and smoke protection is carried out as a
complete assembly therefore the components
may only be used together, not separately. The
installation must be in accordance with the ins-
tructions and carried out by a qualied person.
Failure to comply with the above voids any claim
under warranty.
DIN EN 1906 DIN 18273
DIN EN 179
↑
②
↑
②
↑
②
↑
⑧
↑
⑧
↑
⑦
↑
⑦
↑
⑦
↑
⑦
Ⓐ
↑
Ⓐ
↑
Ⓐ
↑
Ⓐ
↑
Ⓐ
←
Ⓐ
←
Ⓐ
←
Ⓐ
←
①
↓
①
↓
①
↓
①
↓
⑧
↑
⑧
↑
⑧
↑
⑧
↑
⑤
↓
⑤
↓
⑥
↓
⑤
↓
⑤
↓
⑨
↓
⑧
↓
⑨
↓
⑨
↓
⑥
↓
⑥
↓
⑨
↓
⑨
↓
⑨
↓
④
↓
③
↓
③
↓
③
↓
⑦
↓
⑦
↓
⑦
↓
⑦
↓
Der DIN 18 273 : 1997 folgend sind Befestigungs-
elemente prüfungsrelevante Bestandteile der
Dieckmann-Beschläge für Feuerschutz-, Rauch-
schutz- und Fluchttüren und dürfen nur mit diesen
zusammen als eine Einheit eingesetzt werden.
Die Montage muss nach Anleitung und von einer
qualizierten Person durchgeführt werden. Bei
Nichtbeachtung entfällt jeglicher Anspruch auf
Gewährleistung.
↑
②
↑
⑦
Ⓐ
↑
Ⓐ
←
⑧
↑
⑤
↓
⑨
↓
⑩
↓
③
↓
⑦
↓
⑨
↓
Version 1.0
ÖNorm B 3859
7304196
General maintenance and cleaning instructions:
To remove light soiling, gently clean with a soft cloth slightly moistened
with warm water. For heavier soiling, use of a specialist metal cleaner
is recommended. Abois using harsh abrasives or general household
cleaning agents.
