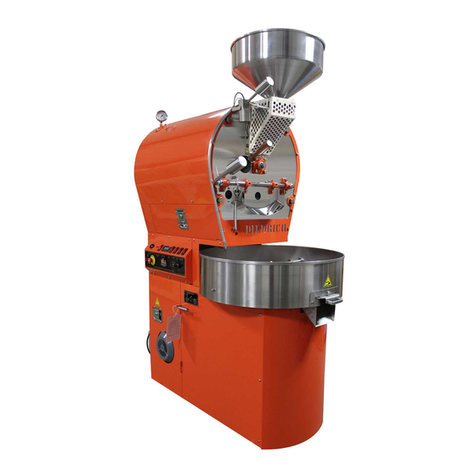
Diedrich Roasters Zenyth 2.5 User manual

Zenyth 2.5 Automation Manual
Rev. A06
2021
DIEDRICH ROASTERS, LLC
31564 Hwy 200
Ponderay, Idaho 83852
Toll Free: (844) 343 3742 Fax: (208) 417 3742
Technical Support Email: support@diedrichroasters.com / Toll Free# (888) 519-0069
PROPRIETARY RIGHTS NOTICE: All rights reserved. No part of this material may be reproduced or transmitted in any form or by
means, electronic, mechanical or otherwise, including photocopy and recording or in connection with any information storage or
retrieval system, without the written permission of Diedrich Roasters, LLC.

Contents
INTRODUCTION.............................................................................................................1
1. INSTALLING HMI (IR ONLY)....................................................................................2
2. MAIN SCREEN..........................................................................................................3
3. LOGIN .......................................................................................................................3
4. SYSTEM.....................................................................................................................4
START STOP SYSTEM..........................................................................................................................5
HIGH LIMIT RESET................................................................................................................................6
HOPPER LOADED RESET....................................................................................................................6
CHAFF BARREL FULL RESET..............................................................................................................6
AGITATOR..............................................................................................................................................6
DESTONER MOTOR (Optional, Coffee Roasters only).........................................................................6
BLOWER (Roast Air Motor for CR) ........................................................................................................6
LOADER (Optional, CR / Coffee Roasters only) ....................................................................................6
HOPPER GATE (CR only)......................................................................................................................6
DRUM .....................................................................................................................................................7
DRUM DOOR .........................................................................................................................................7
COOLING BIN DOOR 1 (CR only) .........................................................................................................7
COOLER MOTOR (CR only)..................................................................................................................7
QUENCH (CR only) ................................................................................................................................7
CHAFF GATE 1 & 2 (CR only if equipped).............................................................................................7
5. SET-UP......................................................................................................................7
CROPSTER REPLAY.............................................................................................................................8
SEMIAUTO –USE PROFILE VIEW (CR-Only)......................................................................................8
COOLDOWN SET POINT (CR-Only).....................................................................................................8
RESET HOUR METER...........................................................................................................................9
FEED FORWARD...................................................................................................................................9
AUTO ROAST BY TEMP........................................................................................................................9
CELSIUS.................................................................................................................................................9
APPROACHING FIRST CRACK AUDIO................................................................................................9
TEMPERATURE AUDIO ........................................................................................................................9
AGITATOR RUN TIME...........................................................................................................................9
DRUM DOOR OPEN TIME.....................................................................................................................9
AUTO LOGOUT TIME............................................................................................................................9
APPROACHING FIRST CRACK TEMP .................................................................................................9
8 & 40 HOUR ALARM OPTION............................................................................................................10
CHAFF BARREL ROAST CAPACITY..................................................................................................10
HOPPER OPEN TIME (CR only)..........................................................................................................10
COOLER HIGH-SPEED TIME (CR only) .............................................................................................10

COOLING BIN WITH 2ND DOOR OPTION (CR only, Optional)...........................................................10
ENABLE AUTO QUENCH (CR only)....................................................................................................10
QUENCH OPTION (CR only) ...............................................................................................................10
QUENCH TIME (CR only).....................................................................................................................11
LOADER OPTION ................................................................................................................................11
LOADER TIME......................................................................................................................................11
DESTONER OPTION (CR / Coffee Roasters Only).............................................................................11
DESTONER TIME (CR / Coffee Roasters Only)..................................................................................11
DESTONER LOCATED AT COOLING BIN DOOR #1 (CR / Coffee Roasters Only) ..........................11
DESTONER LOCATED AT COOLING BIN DOOR #2 (CR / Coffee Roasters Only) ..........................11
OXIDIZER OPTION (OX-1 and OX-2 for retrofit needs) (Only available on Coffee Roasters)............11
OXIDIZER START TEMP (Oxidizer Temperature on IR screen) .........................................................11
OXIDIZER SET POINT (May not be used for 3rd party Oxidizers) .......................................................12
OXIDIZER RUN TIME...........................................................................................................................12
MAINTENANCE SCHEDULE...............................................................................................................12
MAINTENANCE LOG...........................................................................................................................12
DMI SETUP ..........................................................................................................................................13
DATA LOGS .........................................................................................................................................13
INFO BUTTON (TOP RIGHT) ..............................................................................................................14
HMI/PLC VERSION.................................................................................................................................14
SET DATE & TIME...................................................................................................................................14
LANGUAGE ............................................................................................................................................14
6. MENU.......................................................................................................................15
MAIN.....................................................................................................................................................15
SELECT ROAST...................................................................................................................................15
ROAST DATA.......................................................................................................................................15
SAVE ROAST.......................................................................................................................................15
PROFILE EDIT .....................................................................................................................................15
MAINTENANCE LOGS.........................................................................................................................15
PASSWORD SETUP............................................................................................................................16
EMAIL CONTACTS ..............................................................................................................................16
ALARMS ...............................................................................................................................................16
MANUAL...............................................................................................................................................16
AUTO....................................................................................................................................................16
EXIT......................................................................................................................................................16
START STOP SYSTEM........................................................................................................................16
7. SELECT ROAST......................................................................................................16
8. ROAST DATA..........................................................................................................17
9. SAVE ROAST..........................................................................................................17

10. PROFILE EDIT.......................................................................................................18
11. MAINTENANCE LOGS..........................................................................................19
12. PASSWORD SETUP .............................................................................................19
13. ALARMS................................................................................................................20
14. MANUAL................................................................................................................20
ADJ. CHARGE TEMP...........................................................................................................................21
FLAME VERIFICATION........................................................................................................................21
MANUAL ROAST FINISH TEMP..........................................................................................................21
TREND GRAPH....................................................................................................................................22
PROFILE & R/Min LINE........................................................................................................................22
RoR, ET In & ET Out (CR only)............................................................................................................22
FUEL ADJUSTMENTS .........................................................................................................................22
AIR ADJUSTMENTS ............................................................................................................................22
IR ROASTERS..........................................................................................................................................22
CR Roasters ...........................................................................................................................................22
HI LIM RESET ......................................................................................................................................23
END ROAST.........................................................................................................................................23
END ROAST CYCLE BUTTON (IR only) .............................................................................................23
AGIT......................................................................................................................................................23
DRUM DOOR .......................................................................................................................................23
LOADER (Only available on Coffee Roasters).....................................................................................23
QUENCH (CR only) ..............................................................................................................................23
DESTONER (Only available on Coffee Roasters)................................................................................23
SAVE ROAST.......................................................................................................................................24
EOR By Time........................................................................................................................................24
15. AUTO.....................................................................................................................24
AUTO CHARGE/ADJ. CHARGE ..........................................................................................................25
TREND GRAPH....................................................................................................................................25
SCATTER GRAPH ...............................................................................................................................26
FEED FORWARD ADJUST..................................................................................................................26
PROFILE INFORMATION ....................................................................................................................26
ADJUST END TEMP ............................................................................................................................27
16. REMOTE ACCESS................................................................................................27
TP LINK ROUTER................................................................................................................................27
CMT VIEWER APP...............................................................................................................................28
DIEDRICH REMOTE ACCESS ............................................................................................................28
CONNECTING TO A NETWORK..............................................................................................................28
TP LINK ROUTER (AC 750 TRAVEL ROUTER)..........................................................................................29

CHECKING CONNECTION STATUS .........................................................................................................29
17. BACKING UP PROFILES......................................................................................29
18. TIPS FOR EFFICIENT AUTOMATED ROASTING................................................30
FUEL PERCENTAGE...........................................................................................................................30
BEAN TEMPERATURE........................................................................................................................30
CHARGE TEMPERATURE ..................................................................................................................31
BOTTOM OUT TEMPERATURE..........................................................................................................31
19. ALARMS................................................................................................................31
Appendix A ..................................................................................................................33
CONFIGURING TP-LINK FOR INTERNET ACCESS TO HMI ............................................................33
Smart Device (iPhone, iPad, Android, etc.) or Computer with Wi-Fi card............................................33
Computer with Hardwired Ethernet Port .............................................................................................33
Revision
Purpose
Effective Date
Authorized By
(Initials)
A00
Validated publication.
01/25/2018
SR
A01
Updated to include new pictures and
procedures to install screen.
10/31/2018
LF
A02
Updated to include CR
6/13/2019
LF
A03
Fahrenheit/Celsius improvement + various
CR Chaff-Barrel-Full-Warning + CR Alarms
A04
Changed/added text for Setup page Oxidizer +
various cleanup + added USB for 9” screen
9/15/2020
SK
A05
Cropster Replay BETA
1/27/2021
SK
A06
Removed wording “The profile can be viewed
…… which allows the user to change profiles.”
on page 17. Edited image to remove coinciding
graphics.
5/25/2021
EM

Page 1of 36
INTRODUCTION
The Zenyth 2.5 Automation allows the operator to roast manually and save roasting profiles
for duplication in auto mode. It isdesigned to give the operator predictable consistency and
the ability to accurately repeat roast profiles.
This manual is NOT intended to teach how to roast. It is intended to explain the features
and the functions of the roast system buttons only.
The roast system uses a touch screen to control the roasting system. Buttons are
activated with slight pressure (finger or plastic stylus) directly on the screen.
To achieve the most versatility with Zenyth 2.5 Automation, please read the entire
manual before operating the equipment.
A UPS (battery backup) system is recommended.
Please review all safety and installation requirements listed in the appropriate roaster
operation manual.
Operators must understand how to start and stop the motors using the control system. In
particular, the operator should be aware of the emergency stop button on the control
panel. This button disconnects the outputs of the PLC which will end all functions of the
roaster.
Screen calibration can be accessed upon cycling power to the screen. On powerup, a
calibration screen will be displayed. After 10 seconds of inactivity, the screen with boot
up to the Main Screen.

Zenyth 2.5 Automation Manual-Rev. A06
Page 2of 36
1. INSTALLING HMI (IR ONLY)
1. Remove the monitor box from the cooling bin.
2. Remove the monitor from the box.
3. Using a Phillips screwdriver, remove the black circular mounting disc from the monitor.
4. Insert the monitor into the monitor arm.
5. Using the screwdriver, re-install the mounting disc in the
post of the monitor post and fasten the screw.
6. Route and plug in the ethernet (LAN2 only) and power cable in to
the monitor –ready for use.

Zenyth 2.5 Automation Manual-Rev. A06
Page 3of 36
2. MAIN SCREEN
The MAIN screen is the first screen when powering on the automation.
3. LOGIN
To log on, press the “Login” button located in the top left of the “MAIN”
screen.
Press the drop-down arrow and select from the default user accounts. Once the user
account is selected, select the “Password” box and enter the password for that user

Zenyth 2.5 Automation Manual-Rev. A06
Page 4of 36
account. Hit enter on the keyboard and select “Login”. This will bring the user to the
“SYSTEM” screen.
The “Owner” has access to all the features. The “Roaster” cannot edit, rename or delete
profiles. The “User” can only load a profile and roast in auto.
Default passwords:
Login Name
Password
Login Name
Password
Login Name
Password
Owner1
1
Roaster1
1
User1
1
Owner2
2
Roaster2
2
User2
2
Owner3
3
Roaster3
3
User3
3
4. SYSTEM
IR Series Roaster System Screen

Zenyth 2.5 Automation Manual-Rev. A06
Page 5of 36
CR Series Roaster System Screen
The hour meter is located on this screen and shows the number of hours the roaster has
been in operation. This timer can be used to schedule cleaning/maintenance. On the
setup screen, the hour meter can be reset.
The 8-hour, 40-hour, & Semi-annual lamps will light up when those maintenance
intervals are due. There is a built-in maintenance schedule based on roasting time for
the 8 hour and 40-hour cleanings. The Semi-annual is based on every 6 months. Refer
to the “Maintenance Manual”, which covers the 8-hour, 40-hour, & Semi-annual
cleanings.
The “MENU”, “SET-UP” screen, and “DATA LOGS” screen can be viewed by pressing
the buttons along the bottom.
Click on the arrow at the top left of the screen for the pop-out menu to access the below
system functions. Here the roaster system or individual motors/functions can be started.
If equipped, the buttons for a loader will appear on this screen if the option is enabled on
the “SET-UP” screen. Other options work the same.
START STOP SYSTEM
Pull out the emergency stop button located on the side of the electrical panel. Press the
START STOP SYSTEM button to start the appropriate motors and the pilot. This button
starts everything needed to ignite the roaster’s pilot. While the roaster is operating the
START STOP SYSTEM will be green in color.

Zenyth 2.5 Automation Manual-Rev. A06
Page 6of 36
Press the green START STOP SYSTEM button to shut the roaster off. This button turns
off the gas immediately; however, the drum and roast air blower will continue to run until
the roaster temperature drops below 250°F (121°C). A yellow pop-up will appear and
indicate “Roaster is in Automatic Cool-down Mode” if that is the case. The temperature
where the roaster will stop can be adjusted in the Setup screen with the COOLDOWN SET
POINT for the CR-only. Please note that if the bean temperature probe has registered
temperatures above the allowed high-limit (475°F / 252°C) then the operator is in full
control and cool-down is not automatically initiated! Also, an E-Stop reset after E-Stop
will always bring the roaster into a state where it is fully controllable by the operator.
HIGH LIMIT RESET
If the roaster temperature rises above 485°F (246°C) a safety mechanism will shut down
the gas flow to the burners. Once the temperature drops back down to normal operating
range the HI LIM RESET button must be pressed in order to reignite the gas system. (On
some roasters another reset is performed with a physical manual reset button).
HOPPER LOADED RESET (CR only)
Selecting this button will override the interlock and warning that the green-bean-hopper is
already loaded, allowing the operator to run the loader again. After the loader has run for 20
seconds or more (OR if the hopper has a green-bean-sensor mounted in the hopper) the
hopper is considered to have green beans present and additional loading is prohibited. Any
time the hopper gate is opened the warning is also reset.
CHAFF BARREL FULL RESET (CR only)
Press this button after the chaff barrel is emptied to override the interlock and the warning that
the chaff-barrel-is-full in order to start a new roast.
AGITATOR
Select this button to manually turn agitator motor on or off.
DESTONER MOTOR (Optional, Coffee Roasters only)
This button will run the destoner motor for the amount of time set in the SET UP screen. Not
all roasters have this option. The button will not be visible if this option is not available.
BLOWER (Roast Air Motor for CR)
Select this button to manually turn the blower motor on or off.
LOADER (Optional, CR / Coffee Roasters only)
This button will run the loader motor for the amount of time set in the SET UP screen. Not
all roasters have this option. The button will not be visible if this option is not available.
HOPPER GATE (CR only)
This button will open or close the hopper slide gate.

Zenyth 2.5 Automation Manual-Rev. A06
Page 7of 36
DRUM
Select this button to manually turn the drum motor on or off.
DRUM DOOR
This button will open or close the drum door.
COOLING BIN DOOR 1 (CR only)
This button will open or close cooling bin door #1. This is the default cooling bin door option
and is always visible. If the roaster is equipped with a second cooling bin door, it will also be
shown as COOLING BIN DOOR 2.
COOLER MOTOR (CR only)
Select this button to manually turn the cooler motor on or off.
QUENCH (CR only)
Select this button to turn on the water quench for the predetermined amount of time
that was set on the owner setup screen. Not all roasters have this option. A button
will not be visible if this option is turned off.
CHAFF GATE 1 & 2 (CR only if equipped)
The buttons show up here if the options are selected in the Setup screen and can then be used
to open or close the Chaff-Gates.
5. SET-UP
The SET-UP screen is accessed from the SYSTEM screen.
IR Series Roaster Setup Screen

Zenyth 2.5 Automation Manual-Rev. A06
Page 8of 36
CR Series Roaster Setup Screen
CROPSTER REPLAY
The values for logging within Cropster are always available, whether the option is on or off.
Values are provided over Ethernet IP with direct access to the PLC. Fuel and Air values will
be available. To use the feature in Cropster to Replay profiles, the option first needs to be
selected. The option is on the Setup Screen and is called Cropster Replay. This option can
only be turned on when the roaster is in Manual mode (Auto mode will reset the option).
Once turned on, it will be indicated on the manual screen that it is turned on.
Z2.5 Automated roasters will need additional hardware, an Ethernet switch with a minimum
of three (3) ports, to allow another device to access data. It is to be noted that a roast must
be ended on the roaster HMI with the "End Roast" button, or by setting the end temperature
and activating the use of the End Temperature. Please refer to Cropster directly on how to
set up and use this option. Cropster ™ is a trademarked name, visit the company’s website
at www.Cropster.com.
SEMIAUTO –USE PROFILE VIEW (CR-Only)
When this feature is turned on, the same fuel values that are in the loaded profile will be
used in the auto roast. The automation will not change any fuel values as long as the boxes
with a “-“ & “+” are set to zero (0). If the values in the boxes are other than zero (0) the
automation is allowed to modulate slightly around the saved fuel value to bring the bean-
temperature closer to the loaded profile. A value in the boxes of 1+ and 6- will allow the
automation to use 31% or 24% fuel for a 30% fuel value in the profile pending if the actual
bean-temperature is behind or ahead of the profile. The fuel values will be used by time or
by temperature pending the setting of the “AUTO ROAST BY TEMP” button.
COOLDOWN SET POINT (CR-Only)
This is the temperature where the roaster will shut-down when in cool-down-mode.

Zenyth 2.5 Automation Manual-Rev. A06
Page 9of 36
RESET HOUR METER
Use this feature to “zero”the hour meter displayed on the System screen.
FEED FORWARD
The feed forward feature will assist with the proper tracking of profiles while in
automated mode. Although it is not recommended, this option may be turned off if a
profile was originally roasted with extremely varied fuel settings, or if a profile has been
edited, to provide for better profile tracking.
AUTO ROAST BY TEMP
This feature can be selected to change the AUTO roasting to make all air and fuel
changes based on the profile temperature instead of the profile time.
CELSIUS
This can be turned on to display temperatures in Celsius instead of Fahrenheit on the
main screens.
APPROACHING FIRST CRACK AUDIO
This bit turns on the audible indicator that “You’re approaching first crack”. The
temperature at which this audio occurs is determined by the user, based on personal
preferences. This audible only happens during a roast.
TEMPERATURE AUDIO
This bit turns the audible on for the following temperatures: 200°F, 300°F, 375°F, &
425°F. If the Celsius option is selected, the following centigrade callouts are used:
93°C, 149°C, 191°C, & 218°C. They are only called out during a roast.
AGITATOR RUN TIME
The agitator will run for this amount of time after a roast completes. The agitator will shut
off once the timer has expired. Press on the number to get a pop-up keypad to change
the value.
DRUM DOOR OPEN TIME
The drum door will remain open after a roast for the amount of time set. The timer can
be set for a longer period of time to help cool the roaster between roasts. Press on the
number to get a pop-up keypad to change the value.
AUTO LOGOUT TIME
The value entered into the Auto Logout section will set the duration of inactivity
before the HMI goes into screensaver mode.
APPROACHING FIRST CRACK TEMP
The value entered in this field will establish the temperature that triggers the
“You’re approaching first crack” audio.

Zenyth 2.5 Automation Manual-Rev. A06
Page 10 of 36
8 & 40 HOUR ALARM OPTION
Enable this button to receive a warning when 8 hours of roast time and 40 hours
of runtime (roaster is turned on) has been recorded.
CHAFF BARREL ROAST CAPACITY
If a value greater than 0 is entered the system will count and display the number
of roasts completed and when equal will give a warning on the screen “Chaff
Barrel is FULL!”. A new roast can’t be started when this warning is present. After
emptying the chaff barrel, reset the warning by pressing the “Chaff Barrel Full
Reset” button on the System screen.
HOPPER OPEN TIME (CR only)
This timer is the number of seconds the hopper gate stays open. Press on the
number to get a pop-up keypad to change the value.
COOLER HIGH-SPEED TIME (CR only)
This timer is the number of seconds the cooling blower will remain on high after
the end of a roast cycle. Press on the number to get a pop-up keypad to change
the value.
COOLING BIN WITH 2ND DOOR OPTION (CR only, Optional)
Enable this button if the cooling bin has the optional 2nd door. This will make a
second door button available for setting the destoner location to the 2nd door.
ENABLE AUTO QUENCH (CR only)
Although the user can quench multiple times, this feature will only repeat the last
quench done in the manual roast while roasting in auto mode. The quench is
recorded based on bean temperature not time of roast. Press the ‘Quench’ button
to activate. Once activated, it will become bright green and turn off after the set
quench time.
QUENCH OPTION (CR only)
Select this button to manually turn the quench feature on or off. Press the
‘Quench’ button to activate. Once activated, it will become bright green and turn
off after the set quench time.
If the EMERGENCY STOP button is pressed, all output power is removed from the
roasters. The quench feature will shut off if the emergency stop button is
pushed. Turn the manual bypass lever if quenching is needed. The manual bypass
does not use a timer and must be turned off for water to stop flowing.

Zenyth 2.5 Automation Manual-Rev. A06
Page 11 of 36
QUENCH TIME (CR only)
Set this number for the number of seconds the water quench will operate each time the
button is pressed. Time is not accumulative. Press on the number to get a pop-up
keypad to change the value.
LOADER OPTION
Enable this feature if a loader is controlled by the roaster. Press the dark green button to
activate. Once activated, it will become bright green. Press again to deactivate.
LOADER TIME
Set this timer for the amount of time the loader will run in automatic mode. Press on the
number to get a pop-up keypad to change the value.
DESTONER OPTION (CR / Coffee Roasters Only)
Enable this feature if a destoner is controlled by the roaster. Press the dark green
button to activate. Once activated, it will become bright green. Press again to
deactivate.
DESTONER TIME (CR / Coffee Roasters Only)
This is the timer for how long the destoner will run automatically. Press on the number to
get a pop-up keypad to change the value.
DESTONER LOCATED AT COOLING BIN DOOR #1 (CR / Coffee Roasters
Only)
Activate this button if the roaster has a destoner and it is located at cooling bin drop
gate #1. Press the dark green button to activate. Once activated, it will become bright
green. Press again to deactivate.
DESTONER LOCATED AT COOLING BIN DOOR #2 (CR / Coffee Roasters
Only)
Activate this button if the roaster has a destoner and it is located at cooling bin drop gate
#2. Press the dark green button to activate. Once activated, it will become bright green.
Press again to deactivate.
OXIDIZER OPTION (OX-1 and OX-2 for retrofit needs) (Only available on
Coffee Roasters)
Enable this feature if an oxidizer is controlled by the roaster.
OXIDIZER START TEMP (Oxidizer Temperature on IR screen)
This is the temperature the roaster is at when the oxidizer will go to high fire. Press on
the number to get a pop-up keypad to change the value. Note: For CR’s if set to 0 (zero)
then go to High-Fire at the start of the roast.

Zenyth 2.5 Automation Manual-Rev. A06
Page 12 of 36
OXIDIZER SET POINT (May not be used for 3rd party Oxidizers)
This sets the maximum temperature the afterburner will cycle to. Press on the number to
get a pop-up keypad to change the value.
OXIDIZER RUN TIME
This timer is the number of seconds an oxidizer will operate after the roast ends. This
feature helps to burn the smoke and smell from the cooling bin air. Press on the number
to get a pop-up keypad to change the value.
MAINTENANCE SCHEDULE
This feature gives the user a countdown until maintenance is due. Once maintenance is
due, the lamps light up on the System screen.
MAINTENANCE LOG
As soon as one of the maintenance lights comes on, the user will need to go to
the Maintenance Log screen and make an entry. The entry will consist of the
person doing the maintenance, and a description of the maintenance being
performed. Select “LOG” and then clear the maintenance lamp. This resets the
maintenance for that particular scheduling.

Zenyth 2.5 Automation Manual-Rev. A06
Page 13 of 36
ATTENTION
Formatting the SD card (USB-stick for 9” screen) will erase all stored data and
profiles on the roaster!
DMI SETUP
This button provides access to back end features mainly used by DIEDRICH
ROASTERS technicians for set up. The DIEDRICH ROASTERS password is required.
DATA LOGS
The DATA LOGS screen is accessed from the SYSTEM screen. This screen shows
data for the last 30 roast days. Roast days are any day a roast cycle was started and
then the roaster was shut down. It is not based on calendar dates.
Each row has the date, time, bean temperature, auto mode target temperature, air
setting, fuel setting, rate of rise, roast minute and roast second. It also indicates each
time a roast cycle is started. Temperature values are saved in Celsius or Fahrenheit
based on if the Celsius Bit is turned on or off in the setup screen. The Data Logs should
be cleared if the Celsius Bit is changed since the data will not show correct. Further data
values are stored for the CR-roasters.
Temperature values are saved and indicated based on the Celsius option in the setup
screen.

Zenyth 2.5 Automation Manual-Rev. A06
Page 14 of 36
INFO BUTTON (TOP RIGHT)
HMI/PLC VERSION
Located on the info page, which is obtained by selecting the “Info” button at the top right.
From the Info page, the user can select between 8 different languages.
SET DATE & TIME
To set the date and time, press on the box with the date and time to make a popup
appear. The correct date and time can be achieved via keypad input.
LANGUAGE
The language is user selected from the info screen. The following languages are
available: English, Chinese Simplified, French, German, Japanese, Korean, Spanish, &
Russian

Zenyth 2.5 Automation Manual-Rev. A06
Page 15 of 36
6. MENU
The MENU button on the SYSTEM, AUTO, and MANUAL screens will provide access to
all the other screens in the system.
MAIN
This button will take the user to the MAIN screen to log out or change users. See Page
2 for more information.
SELECT ROAST
This button will display a popup window. From here, delete, rename, or load a roast
profile.
ROAST DATA
This button allows the user to view the saved attributes of all saved roast profiles.
SAVE ROAST
This button allows the user to save a roast after roasting it in manual mode.
PROFILE EDIT
This button will bring up an edit screen where changes can be made to previously saved
profiles.
MAINTENANCE LOGS
This button takes the user to the screen that keeps record of the maintenance alarms
and the time stamp for each.
Table of contents
Other Diedrich Roasters Kitchen Appliance manuals
