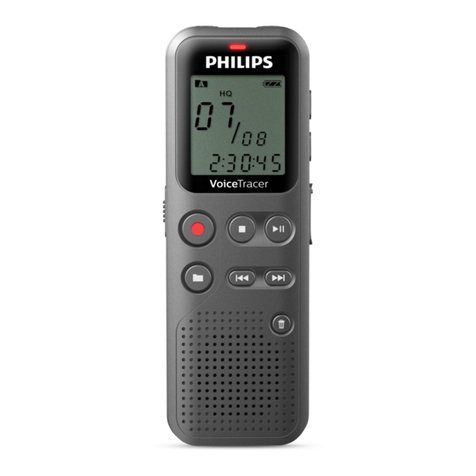
digi-tech XC-0387 User manual

Model:XC-0387
Digital Voice Recorder
Digital Voice RecorderDigital Voice Recorder
Digital Voice Recorder
User Manual
User ManualUser Manual
User Manual
1
Feature List
Feature ListFeature List
Feature List
Recording modes : HQ / SP / LP
Hig quality recording format : HQ-64Kbps , SP-32Kbps , LP-16Kbps
Built-in memory 8GB , recording time up to 1088Hrs
4 message folders store up to 396 messages (eac folder contains 99 messages)
Voice activated recording
Support telep one recording
Built-in speaker and microp one
External earp one and microp one jack (3.5mm)
LCD and LED recording indicator
T-MARK and auto divide function
File editing
Date & time stamp for recorded message
USB2.0 for ig speed sync ronization wit PC
Operate by external USB DC5.0V AC/DC adaptor
Battery life up to 48 ours (2 x AAA battery)
PC Connection
PC ConnectionPC Connection
PC Connection
1. Link t e unit to a computer by micro USB cable.
2. Drag and drop files / records to removable disk or
your computer.
3. N
NN
Note
oteote
ote: W en you are finis ed transferring files, use
t e safely remove ardware procedure before
disconnecting your recorder.

2
3
Location of Indicators
Location of IndicatorsLocation of Indicators
Location of Indicators
1 Recording / Elapsing time
2 Remain recording time
indicator
3 Message number
4 Record quality : LP / SP / HQ
Recording sensitivity : H / L
5 Current folder : A / B / C / D
6 Lock indicator
7 Battery indicator
8 “T-MARK” indicator
9 Operation status :
Play / Pause
10 Operation status :
Record
11 Total message number
12 Voice activate system
13 Repeat mode
14 A - B repeat
Location of
Location of Location of
Location of Keys
KeysKeys
Keys
1 Built-in speaker 10 Microp one input jack / Line in
2 Menu 11 Microp one
3 Record 12 Earp one jack
4 LCD display 13 Battery compartment
er ON / OFF
6 Stop 15 Micro USB jack
7 Play / Pause 16 T-MARK
8 Forward 17 Folder
9 Backward 18 Volume up / down ( / )

4 5
Basic Operation
Basic OperationBasic Operation
Basic Operation
To Turn Unit
To Turn Unit To Turn Unit
To Turn Unit ON
ONON
ON
1. Slide and old POWER
POWERPOWER
POWER button more t an 2 seconds,
“ON” will display on t e screen.
2. S
SS
St
tt
tandby
andby andby
andby M
MM
Mode
odeode
ode is ON.
To Turn Unit
To Turn Unit To Turn Unit
To Turn Unit O
OO
OFF / Standby
FF / StandbyFF / Standby
FF / Standby
1. Slide and old POWER
POWER POWER
POWER button more t an 2 seconds
to turn OFF t e recorder.
2. In case of no operations for 10 seconds, it will turn
into S
SS
Standby
tandby tandby
tandby M
MM
Mode
odeode
ode automatically.
Basic Operation
Basic OperationBasic Operation
Basic Operation
Record
RecordRecord
Recording
inging
ing
1. In S
SS
St
tt
tandby M
andby Mandby M
andby Mode
odeode
ode, press FOLDER
FOLDERFOLDER
FOLDER button to select
t e desired file folder for recording. T e following
symbols will display on screen, depending on t e
selected folder: / / / .
2. Press button, t e record indicator will lig t and
t e elapsed time will appear.
3. Speak into t e built-in microp one. For normal
voice levels, a distance of 5-9 inc es is appropriate.
4. Press button to pause recording.
5. Press button again to resume recording.
6. Press button to stop recording.
Display t e remaining record
Display t e remaining recordDisplay t e remaining record
Display t e remaining record
time
timetime
time
In S
SS
St
tt
tandby M
andby Mandby M
andby Mode
odeode
ode, press button to s ow t e
remaining record time in t e memory in terms of ours
and minutes.

6 7
Basic Operation
Basic OperationBasic Operation
Basic Operation
Playback of Messages
Playback of MessagesPlayback of Messages
Playback of Messages
Play a
Play a Play a
Play a message
messagemessage
message
1. In S
SS
St
tt
tandby M
andby Mandby M
andby Mode
odeode
ode, press FO
FOFO
FOLDER
LDERLDER
LDER button to select
t e desired folder. T e following symbols will
display on screen, depending on t e selected folder:
/ / / .
2. Press or button to select t e desired file
3. Press button to play t e currently selected
message. During playback, t e play indicator and
t e elapsed time of t e message will appear in t e
display.
4. Press or button to adjust t e volume, t en
press MENU
MENUMENU
MENU button to return to P
PP
Play
lay lay
lay M
MM
Mode
odeode
ode.
5. Press key to pause playback, press it again to
resume playback.
6. Press button to stop playback.
Adjust
AdjustAdjust
Adjust
playback speed
playback speedplayback speed
playback speed
1. During playback of a message, press and old
button more t an 3 seconds to adjust t e play
speed.
2. Press or button to adjust figure from 0 to 8.
3. Press button to confirm and back to P
PP
Play
lay lay
lay M
MM
Mode
odeode
ode.
T-MARK is used to mark long time record into some sections
Basic Operation
Basic OperationBasic Operation
Basic Operation
Repeat playback
Repeat playbackRepeat playback
Repeat playback
During playback of a message, press MENU
MENUMENU
MENU button. Press or button to
select “Normal Playback”, “Repeat One” or “Repeat All”. Press button to confirm.
- Normal Playback
- Repeat One, t e message playback will repeat over and over.
- Repeat All, all messages in t e selected folder will be played.
A
AA
A-
--
-B repeat playing
B repeat playingB repeat playing
B repeat playing
1. During playback of a message, press FOLDER
FOLDERFOLDER
FOLDER button to set t e repeat start point,
“ ” will display on screen and flas .
2. Press FOLDER
FOLDERFOLDER
FOLDER button again, t e end point as been selected and “ ” stop flas ing.
T e unit will play between start and end point.
3. Press FOLDER
FOLDERFOLDER
FOLDER button to cancel A-B repeat and back to normal playing.
T
TT
T-
--
-MARK
MARKMARK
MARK
1. During playback of a message, press T
TT
T-
--
-MARK
MARKMARK
MARK button to set t e first index mark, press
it again to set t e second index mark. You can set 10 index marks at most in a file.
2. Press and old T
TT
T-
--
-MARK
MARKMARK
MARK button for few seconds to c eck all marks and current mark.
3. Press or button to select t e desired mark, t en:
- press button to start playing, or
- press FOLDER
FOLDERFOLDER
FOLDER button to delete t e mark.
you want(10 sections at max), easier to find the start point when want to playback.
Just like bookmark function.

8 9
Basic Operation
Basic OperationBasic Operation
Basic Operation
Protect
ProtectProtect
Protect
/
/ /
/ L
LL
Lock
ock ock
ock a message
a messagea message
a message
You can protect a message to avoid deleting by mistake.
1. Press FOLDER
FOLDERFOLDER
FOLDER button to select t e desired folder, press or button to select
t e desired file number.
2. Press MENU
MENUMENU
MENU button, “LOCK” will display on screen. Press or button to
select “LOCK” and “UNLOCK”.
3. Press button to confirm.
Delete
DeleteDelete
Delete
1. In S
SS
St
tt
tandby
andby andby
andby M
MM
Mode
odeode
ode, press FOLDER
FOLDERFOLDER
FOLDER button to select t e desired folder.
2. Press or button to select t e desired file to delete.
3. Press and old T
TT
T-
--
-MARK
MARKMARK
MARK button to enter into D
DD
Delet
eletelet
eleting
inging
ing
M
MM
Menu
enuenu
enu.
4. “dELONE” will display on screen, press or button to select “Delete One” or
“Delete All”.
5. Press button to confirm.
In standby mode, press "T-MARK" to turn on the hearing aid function,
connect headphones will enhance the voice volume from surrounding voice.
Hearing Aid function:

press “ ”to choose the channel you want to record,
FM recording:
Press“ "continously to switch all radio channels one by one.
Press red “REC” button to confirm,
Now FM radio program can be listened from earphone,
auto-search radio stations:
Press “ ” to playback.
Press “ ” to stop and save recording.
1st radio station as right image:
After choose “ON”, press and hold “ ” to start
FM radio and FM recording:
. Press
. Press
“VA” function.
. Press
. Press
All settings can be chosen by pressing
Press
10 11
Settings
SettingsSettings
Settings
In Standby Mode, press and old MENUMENU button for few seconds to enter Setting Menu Menu
Setting recording quality
Setting recording qualitySetting recording quality
Setting recording quality
or button to select t e recording
quality. T e selected quality setting symbol is
s own one by one:
HQ - Hig Quality Format: MP3, 64 Kbit/s
SP - Standard Quality Format: MP3, 32 Kbit/s
LP - Longtime Record Format: MP3, 16 Kbit/s
Turn ON / OFF t e recording indicator
Turn ON / OFF t e recording indicatorTurn ON / OFF t e recording indicator
Turn ON / OFF t e recording indicator
or button to select LED ON or
OFF.
Setting microp one sensitivitSetting microp one sensitivityy
y
T is setting can adjust t e sensitivity, to reduce
background noises.
or button to select t e
microp one sensitivity and t e symbol will be s own
on display:
H - Hig Sensitivity
L - Low Sensitivity
button to confirm.
button to exit t e menu.
Enable / Disable voice
Enable / Disable voiceEnable / Disable voice
Enable / Disable voice-
--
-activated recording
activated recordingactivated recording
activated recording
Voice activated recording will activate recording only
w en you speak. W en t e unit detects a pause of a
few seconds, it will temporarily stop recording until it
detects sound again.
or button to select t e voice
activation ON or OFF.
button to confirm. Once t e voice
activation is ON, “ ” will display on screen.
Press MENU again continously, below settings will display one by one.
or
button to confirm.
button to exit t e menu.
Setting Setting
FM radio and FM recording: FM radio and FM recording:
FM radio and FM recording: FM radio and FM recording: FM radio and FM recording:
or
to choose“ON" or “OFF”to switch FM on or off,
Press
After search finish, the screen will display the
Search Image
Radio Channel
FM radio will be available after connect the unit to earphone.
FM recording: FM recording:
Press red “REC”button to record while listening to FM.

. Press
. Press
. Press
. Press
Press
“bEEP” function.
12 13
Turn ON / OFF keypad tone
Turn ON / OFF keypad toneTurn ON / OFF keypad tone
Turn ON / OFF keypad tone
or button to select t e keypad
tones ON or OFF.
Recording monitor (listen in)
Recording monitor (listen in)Recording monitor (listen in)
Recording monitor (listen in)
If t e recording monitor is ON, please connect t e
recorder wit earp one, and you can monitor t e
recording quality t roug t e earp one w ile
recording.
Setting date & time
Setting date & timeSetting date & time
Setting date & time
T e date and time will be used for setting t e
recording time.
or button to select year / mont /
day / our / minute / second.
or button to set t e numbers.
button to confirm.
button to exit t e menu.
. Press
Auto
AutoAuto
Auto-
--
-OFF
OFFOFF
OFF
T e device will power OFF automatically if no any
operation wit in a period of time.
or button to select 5, 15, 30 or 60
minutes.
Setting
. Press
“REMAIN” function.
. Press
. Press
. Press
“dIVIdE” function.
. Press
. Press
. Press
“RESTOR” function.
“FMT” function.
14
15
Memory formatting
Memory formattingMemory formatting
Memory formatting
T is feature will delete all data and files once enabled.
or button to select YES / NO.
button to confirm.
button to exit t e menu.
Device reset
Device resetDevice reset
Device reset
T is function is used to return all default settings ex
factory, but will not delete any messages recorded in
memory.
Setting auto divide
Setting auto divideSetting auto divide
Setting auto divide
T is function can divide a long recording into small
parts, for example w en recording is done in a very
long meeting. T e user can set time to stop and start
a new recording. Preset times are 30mins or 60mins.
or button to select 30 / 60
minutes or switc OFF t is feature.
button to confirm.
button to exit t e menu.
Display t e remain
Display t e remainDisplay t e remain
Display t e remaining memory for
ing memory for ing memory for
ing memory for recording
recordingrecording
recording
T e remaining memory space display in megabytes.
button to exit t e menu.
. Press
. Press
. Press or button to select YES / NO.
button to confirm.
button to exit t e menu.
Setting

. Press
“REMAIN” function.
. Press
. Press
. Press
“dIVIdE” function.
. Press
. Press
. Press
“RESTOR” function.
“FMT” function.
14
15
Memory formatting
Memory formattingMemory formatting
Memory formatting
T is feature will delete all data and files once enabled.
or button to select YES / NO.
button to confirm.
button to exit t e menu.
Device reset
Device resetDevice reset
Device reset
T is function is used to return all default settings ex
factory, but will not delete any messages recorded in
memory.
Setting auto divide
Setting auto divideSetting auto divide
Setting auto divide
T is function can divide a long recording into small
parts, for example w en recording is done in a very
long meeting. T e user can set time to stop and start
a new recording. Preset times are 30mins or 60mins.
or button to select 30 / 60
minutes or switc OFF t is feature.
button to confirm.
button to exit t e menu.
Display t e remain
Display t e remainDisplay t e remain
Display t e remaining memory for
ing memory for ing memory for
ing memory for recording
recordingrecording
recording
T e remaining memory space display in megabytes.
button to exit t e menu.
. Press
. Press
. Press or button to select YES / NO.
button to confirm.
button to exit t e menu.
Setting


Table of contents
Other digi-tech Voice Recorder manuals
