Operation
Neon
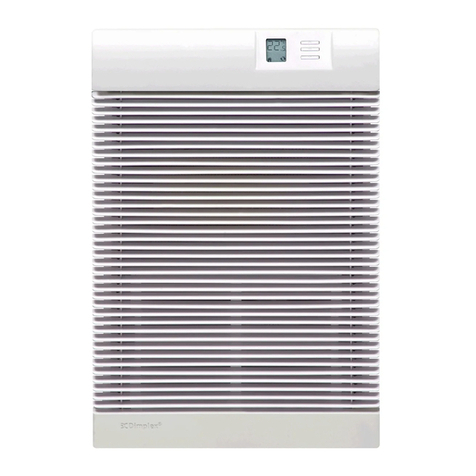
The WFE3TN has a total
loading of 3KW . It
incorporates a sensitive
electronic thermostat, and
a programmable 24 hour
timer. To switch the
appliance ON, it should be
connected to the electricity
supply and switched on at
the ON/OFF double pole
switch – see Fig. 4.
Fig. 4 - Controls &
Control Panel Layout
Fig. 6
Thermostat
Setting Current Time
1. Press the S(Set) button and keep pressed while pressing the
D(Day) button until the actual day is displayed. Continue by
pressing H(Hour) or M(Minute) button until the current hour
or minute is displayed. When resetting, the buttons D, Hor M
can be held down for rapid forward counting.
The thermostat scale is
calibrated in 1°C divisions
with a temperature range
from 5°C to 30°C.
2. Release both buttons. The week and time will be set.
3. To reset incorrect time, repeat previous steps.
Fig. 5 Thermostat Knob
Setting Programs
1. Press the PROG (Program) button and release. The first ON
setting can be made now.
2. Press the D(Day) button to set the day or blocks of days. Set
the time by pressing the H(Hour) button and then M(Minute)
button.
To control the room temperature, set the mark on the thermostat
knob to the required temperature on the scale. The electronic
sensor will monitor continuously the temperature of the air returning
to the inlet grille, and the appropriate heater element(s) will be
selected automatically to achieve or maintain the chosen level. Two
pilot lights indicate when one or both heating elements are in
operation. An additional pilot light on the digital timer will illuminate
when the timer is in ‘Manual On’ mode or in ‘Auto’ mode with a
program running. The extra sensitivity of the electronic thermostat
ensures that the room temperature is maintained within close
tolerances efficiently and economically.
3. Press the PROG (Program) button again to finish the first ON
setting and enter into the first OFF setting. By repeating ‘2’
this will make the first OFF setting.
4. Press the PROG (Program) button again to finish the first
OFF setting and enter into the 2nd ON setting . Repeat ‘2’ and
‘3’ to program remaining settings.
Digital Timer Operation
IMPORTANT
5. After completing settings, press the S(Set) button and the
Timer is ready to operate.
EXAMPLE : To set Timer ON at 6:15PM (18:15) and Timer
OFF at 10:15PM (22:15) everyday
DO NOT plug in the appliance where the load exceeds 16 Amp.
The timer has a total of 8 ON/OFF programs.
a) Press PROG and LCD displays ‘1_ON’
b) Press Duntil LCD displays ‘MO, TU, WE, TH, FR,
SA, SU’
c) Press Huntil LCD displays ‘6:00PM’ or ’18:00’
MANUAL ON/AUTO/MANUAL OFF can make settings as required
very easily.
Either 12 or 24 hour modes can be used.
Summertime function is very useful for areas with summertime
system.
d) Press Muntil LCD displays ‘6:15PM’ or ’18:15’
e) Press PROG and LCD displays ‘1_OFF’
f) Repeat c) and d) until LCD displays ‘10:15PM or 22:15’
16 combinations of days or blocks of days are available for this
Timer.
For details on different combinations see below :
TIP : W hen verifying your programs ensure that the settings do not
overlap, especially when using the block option.
1) Mo
2) Tu
3) We
TIP : To clear a section in a Program, press the C(Clear) button.
To reactivate this section press the Cbutton again.
Manual ON/Auto/Manual OFF Setting
4) Th
5) Fr
6) Sa
2. In Manual ON or Manual OFF mode, the Timer doesn’t
operate as the settings are in the Auto mode.
7) Su
8) Mo, Tu, We, Th, Fr, Sa, Su
9) Mo, Tu, We, Th, Fr
10) Sa, Su
3. To return from Manual ON to Auto, press MODE three times
(i.e. - Auto/Manual Off/Auto) .
Note: If MODE is pressed once from Manual On to Auto the timer
will keep the setting of Manual until the next timer setting.
12/24 Hour Mode
11) Mo, Tu, We, Th, Fr, Sa
12) Mo, We Fri
13) Tu, Th, Sa
14) Mo, Tu, We
Press the S(Set) and PROG (Program) buttons simultaneously to
switch between 12 and 24 Hour mode.
Summertime Function
15) Th, Fri, Sa
16) Mo, We Fr, Su
1. Press the S(Set) and MODE (Input/Output) buttons
simultaneously. The LCD will show SUMMER. The clock will
keep ahead one hour.
Press them again and it will revert.
Initial Operation
1. On initial operation the timer display may appear faint or
blank- this is not a fault. The timer’s back up battery has
discharged. Leave the appliance powered on for 15
minutes to initially charge the battery.
2. Press the Rbutton with a sharp object such as a pencil
(pressing the Rwill also clear all current information).
The timer is now ready to be set up for use.
1. Press MODE (Input/Output) button to change between
Manual ON / Auto / Manual OFF.
