manuals.online logo
Brands
  1. Home
  2. •
  3. Brands
  4. •
  5. Dimplex
  6. •
  7. Indoor Fireplace
  8. •
  9. Dimplex LEE 20RC User manual

Dimplex LEE 20RC User manual

Using the Thermostat (T)
Plug in and set the fire to 1kW or 2kW heat output.
•To select 1kW heat output press switch 1,2 & 3 once in this order.
•To select 2kW heat output press switch 3 twice.
Turn the thermostat knob to MAX to warm the room rapidly. When the
room temperature has reached the desired level, turn the thermostat
knob back slowly until the thermostat just clicks off. The heater will
then maintain the room temperature at the chosen level.
NOTE – Should your heater fail to come on when the thermostat is at
a low setting, this may be due to the room temperature being higher
than the thermostat setting.
Using the Flame control (F)
This unique effect may be enjoyed whether or not the heating elements
are in operation.
Brightness and flame effect control gives a choice of light and flame
setting. At minimum setting, the flame effect and the fuel brightness
will be lowest, indicated by a small bulb symbol on the control panel.
Clockwise rotation of knob will increase the intensity of the effect
(indicated by bulb symbols increasing in size) – see Fig 2.
The heater can be controlled using manual controls located behind
the flap on the front of the heater (see Fig 1) or by using the remote
control provided - see ‘Remote control operation’.
Four switches provide manual control of the fire giving a choice of
flame effect, heat settings and timer function - see Fig. 2.
Operation
Fig. 2
Controls the electricity supply to the heater and
flame effect.
Note: This switch must be pressed before the
heater will operate with or without heat.
Provides Cold Blow function.
Note: This switch must be pressed before Switch
3 operates.
Provides 1kW & 2kW heat output thermostatically
controlled. Press button once for 1kW output &
twice for 2kW output. If button is pressed a third
time the heater reverts to ‘Cold Blow’ function.
Switch 1
Switch 2
Switch 3
Runback timer function. Provides 15 individual time
settings. Each time the button is pressed the heater
is programmed to run for 30 minutes e.g. 1 press =
0.5hr, 2 presses = 1hour - see ‘Using the Timer’.
Switch 4
Using the Timer
Each time the button is pressed the heater is programmed to run for
30 minutes, which means it can be set to run from half an hour up to
7.5 hours - see chart below for settings.
Press switch 4 once = 0.5 hour
Press switch 4 twice = 1 hour
Press switch 4 three times = 1.5 hours
Press switch 4 four times = 2 hours
Press switch 4 five times = 2.5 hours
Press switch 4 six times = 3 hours
Press switch 4 seven times = 3.5 hours
Press switch 4 eight times = 4 hours
Press switch 4 nine times = 4.5 hours
Press switch 4 ten times = 5 hours
Press switch 4 eleven times = 5.5 hours
Press switch 4 twelve times = 6 hours
Press switch 4 thirteen times = 6.5 hours
Press switch 4 fourteen times = 7 hours
Press switch 4 fifteen times = 7.5 hours
LED Indicators
During manual or remote operation red indicating LED’s (neons) will be
visible on the right hand side of the heater - see Fig. 3
2 kW heat
1 kW heat
Cold Blow Function
On/Off
4 hours
2 hours }
1 hour
0.5 hour
Timer
Indicators
only
LED's (neon's)
for indicating
operation level
see Fig. 4 below
Fig. 3
Fig. 4 -
LED’s indicating Operation level
The red indicating
LED’s (neons) will be
visible on the right hand
side of the heater
indicating the selected
function i.e. when 1kW
heat is selected, you will
see that LED and the
On/Off LED illuminated.
max
F T
min
2
314
S
see Fig. 6
for details
on settings
To gain access to the lamps, the four screws which secure the back
panel, must be removed. Remove and slide out panel as indicated on
Fig. 8
Two lamps are located behind the back panel as indicated in Fig.7
Fig. 7
Fig. 8
Remove the defective
lamp by unscrewing it as
shown in Fig. 9.
Replace with a 60W E14
SES Clear Candle lamp.
Take care not to over-
tighten the lamp.
Refit the back panel and
secure with the four
screws.
Fig. 9
Lamp Replacement
Using the Remote control
Important Battery information.
Discard leaky batteries.
Dispose of batteries in the proper manner according to
Provincial and local regulations. Any battery may leak
electrolyte if mixed with a different battery type, if inserted
incorrectly, if all the batteries are not replaced at the same
time, if disposed of in a fire or if an attempt is made to
charge a battery not intended to be recharged.
•Heat output can be increased or
decreased according to your
particular requirements.
•The heater can be turned On or Off.
•Programmable timer.
Fig. 6
On/Off button - see Switch 1 on ‘Operation’.
Provides 1 kW & 2kW heat - see Switch 3
on ‘Operation’.
Runback timer - see Switch 4 on
‘Operation’.
Cold Blow function - see Switch 2 on
‘Operation’.
The remote control consists of 4 buttons (see
Fig. 6). To initialize the remote control, slide
open the battery cover on the back of the
remote. Install 2 AAA type batteries (not incl.),
and replace the cover. Your remote control
is now ready for use. The maximum range of
use is 15metres.
The remote control’s general features are:
Maintenance
WARNING – BEFORE UNDERTAKING ANY MAINTENANCE OR
CLEANING REMOVE PLUG OR DISCONNECT FROM THE
ELECTRICITY SUPPLY.
Fig. 5
The product complies with the European Safety Standards EN60335-2-30 and the European Standard Electromagnetic Compatibility
(EMC) EN55014, EN60555-2 and EN60555-3 which cover the essential requirements of EEC Directives 73/23 and 89/336
After Sales Service
Your appliance is guaranteed for one year from the date of purchase.
We undertake to repair or exchange free of charge within this period,
any part with the exception of a lamp found to be defective due to a
manufacturing fault.
Your rights under this guarantee are additional to your statutory rights,
which in turn are not affected by this guarantee.
Please retain your receipt as proof of purchase.
Safety cut-out
An automatic cut-out will switch off the heater if for any reason it
overheats. This could occur for instance, if the air inlet or outlet were
restricted in any way. If the cut-out operates, the heater will switch off.
The heater will switch on once the obstruction has been removed and
the heater has cooled. If the cut-out continues to operate intermittently,
the heater should be switched off and Customer Services contacted.
Cleaning
For general cleaning use a soft clean duster – never use abrasive
cleaners. The viewing screen should be cleaned carefully with a soft
cloth. DO NOT use proprietary glass cleaners.

This manual suits for next models

1

Other Dimplex Indoor Fireplace manuals
Dimplex DWF1203B User manual

Dimplex

Dimplex DWF1203B User manual

Dimplex BF33STP/DXP User manual

Dimplex

Dimplex BF33STP/DXP User manual

Dimplex ENG56-400 User manual

Dimplex

Dimplex ENG56-400 User manual

Dimplex Obsidian OBS20 User manual

Dimplex

Dimplex Obsidian OBS20 User manual

Dimplex CDFI500-PRO User manual

Dimplex

Dimplex CDFI500-PRO User manual

Dimplex Pro Series User manual

Dimplex

Dimplex Pro Series User manual

Dimplex DFG2562 User manual

Dimplex

Dimplex DFG2562 User manual

Dimplex CAS500R User manual

Dimplex

Dimplex CAS500R User manual

Dimplex 314 CHE User manual

Dimplex

Dimplex 314 CHE User manual

Dimplex Navara Nav15 Log User manual

Dimplex

Dimplex Navara Nav15 Log User manual

Dimplex CAS500R User manual

Dimplex

Dimplex CAS500R User manual

Dimplex Cavendish CSH20 User manual

Dimplex

Dimplex Cavendish CSH20 User manual
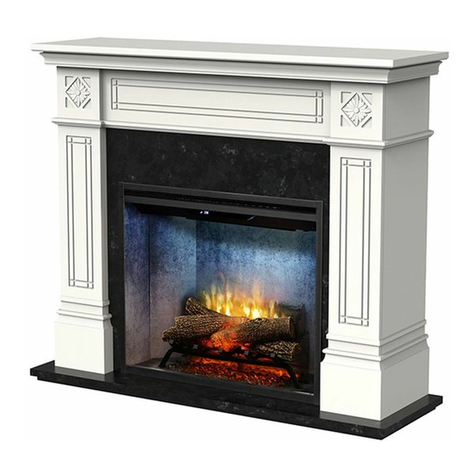
Dimplex Prism BLF5051 User manual

Dimplex

Dimplex Prism BLF5051 User manual

Dimplex RLG25FC User manual

Dimplex

Dimplex RLG25FC User manual

Dimplex DF3033-EU User manual

Dimplex

Dimplex DF3033-EU User manual

Dimplex OLF46-AM User manual

Dimplex

Dimplex OLF46-AM User manual

Dimplex SAHARA FIREPLACE 6903950000 User manual

Dimplex

Dimplex SAHARA FIREPLACE 6903950000 User manual

Dimplex LEE DE LUXE User manual

Dimplex

Dimplex LEE DE LUXE User manual

Dimplex SP16 User manual

Dimplex

Dimplex SP16 User manual

Dimplex VFA2927 User manual

Dimplex

Dimplex VFA2927 User manual

Dimplex DF2500 User manual

Dimplex

Dimplex DF2500 User manual

Dimplex DFI2309 User manual

Dimplex

Dimplex DFI2309 User manual

Dimplex DCF44GS User manual

Dimplex

Dimplex DCF44GS User manual

Dimplex VERDI VER20 User manual

Dimplex

Dimplex VERDI VER20 User manual

Popular Indoor Fireplace manuals by other brands

superior fires F500452 Installation and user instructions

superior fires

superior fires F500452 Installation and user instructions

Global Fires Arana RC Installation and maintenance instructions

Global Fires

Global Fires Arana RC Installation and maintenance instructions

Amantii WM-FM-26-3623-BG Installation and operation instructions

Amantii

Amantii WM-FM-26-3623-BG Installation and operation instructions

Vermont Castings D232 Installation instructions & homeowner's manual

Vermont Castings

Vermont Castings D232 Installation instructions & homeowner's manual

Golden Blount LFP7218 Installation and operating instructions

Golden Blount

Golden Blount LFP7218 Installation and operating instructions

Canvas Abbotsford 064-4015-0 Assembly instructions

Canvas

Canvas Abbotsford 064-4015-0 Assembly instructions

barbas Cuatro-2 60 installation instructions

barbas

barbas Cuatro-2 60 installation instructions

Napoleon NEFE27-1116B Installation and operating instructions

Napoleon

Napoleon NEFE27-1116B Installation and operating instructions

Stellar Hearth Products GALAXY Series Installation and operating manual

Stellar Hearth Products

Stellar Hearth Products GALAXY Series Installation and operating manual

Nordpeis Dublin installation manual

Nordpeis

Nordpeis Dublin installation manual

Nordpeis N-21A Exclusive user manual

Nordpeis

Nordpeis N-21A Exclusive user manual

Empire Comfort Systems DVCT30CBN95N-1 Homeowner's manual

Empire Comfort Systems

Empire Comfort Systems DVCT30CBN95N-1 Homeowner's manual

Superior SDVPF-N-B installation instructions

Superior

Superior SDVPF-N-B installation instructions

FireplaceXtrordinair 564 GSR2 owner's manual

FireplaceXtrordinair

FireplaceXtrordinair 564 GSR2 owner's manual

Quadra-Fire DISCOVERY-I installation manual

Quadra-Fire

Quadra-Fire DISCOVERY-I installation manual

Nordpeis Salzburg M installation manual

Nordpeis

Nordpeis Salzburg M installation manual

Superior Fireplaces DRT2033TMN Installation and operation instractions

Superior Fireplaces

Superior Fireplaces DRT2033TMN Installation and operation instractions

Napoleon Oakville Series installation manual

Napoleon

Napoleon Oakville Series installation manual

manuals.online logo
manuals.online logoBrands
  • About & Mission
  • Contact us
  • Privacy Policy
  • Terms and Conditions

Copyright 2025 Manuals.Online. All Rights Reserved.