manuals.online logo
Brands
  1. Home
  2. •
  3. Brands
  4. •
  5. Dimplex
  6. •
  7. Indoor Fireplace
  8. •
  9. Dimplex Michigan Fire MCN20 User manual

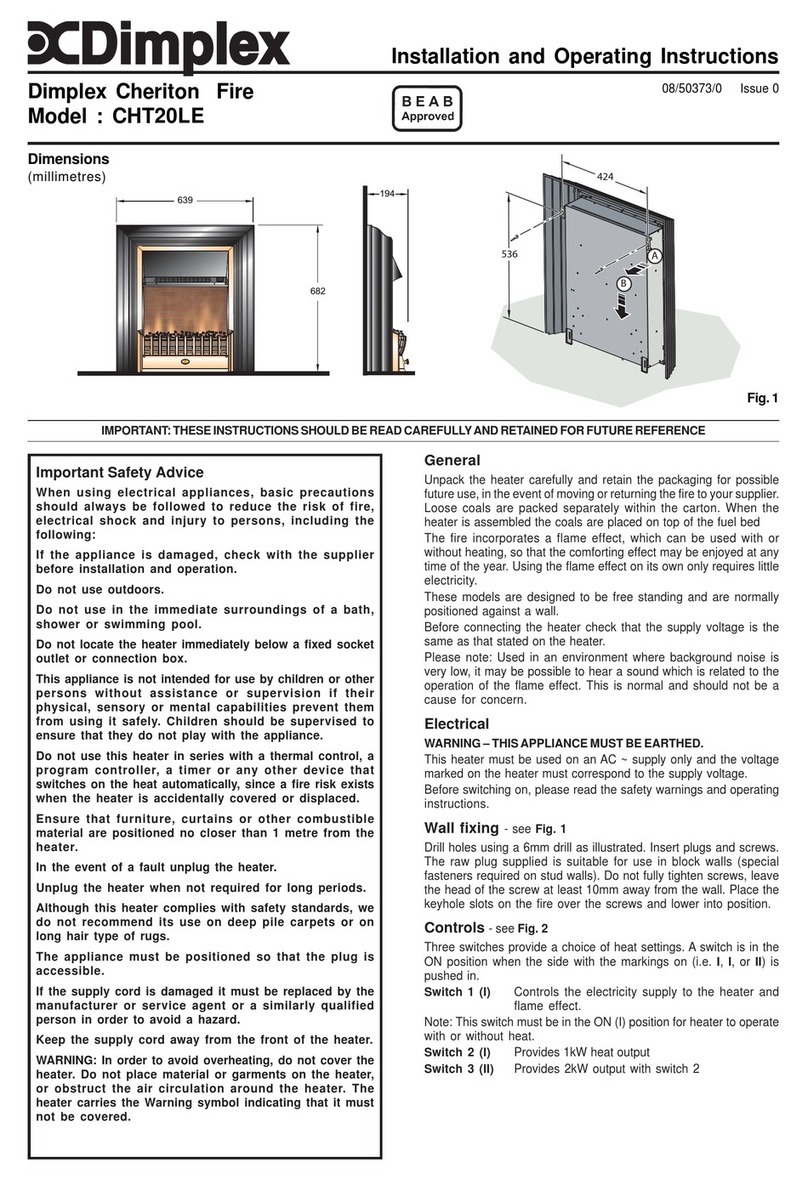
Dimplex Michigan Fire MCN20 User manual

3 screws
controls thermostat
knob
500
min.
517
616
250
76
52
glass shelf
THESE INSTRUCTIONS SHOULD BE READ CAREFULLY AND RETAINED FOR FUTURE REFERENCE.
Dimensions
(millimetres)
Installation and Operating Instructions
Dimplex Michigan Fire
Model : MCN20
08/19118/3 Issue 3
General
Unpack the heater carefully and retain the packaging for
possible future use, in the event of moving or returning the
fire to your supplier. Loose coals and pebbles are packed
separately within the carton.
The heater is designed for use inset into a 407mm (16") or
457mm (18") wide by 559mm (22") high fireplace opening
see also section “Installation in a fire place opening”.
A 2kw fan heater discreetly positioned in the canopy of the
fire provides heating in cold weather. Switching allows half
or full heat. The manual controls are located in the canopy
(see Fig. 1) and the remote control is packed separately in
the carton.
Before connecting the heater check that the supply voltage
is the same as that stated on the heater.
Please note: Used in an environment where background
noise is very low, it may be possible to hear the motor
which operates the flame effect. This is normal and
should not be a cause for concern.
Electrical
WARNING – THIS APPLIANCE MUST BE EARTHED.
This heater must be used on an AC ~ supply only and the
voltage marked on the heater must correspond to the supply
voltage.
Before switching on, please read the safety warnings and
operating instructions.
For your convenience, the heater is fitted with a rewireable
plug incorporating a 13 amp fuse. In the event of replacing
the fuse in the plug supplied, a 13 amp fuse approved by
ASTA to BS1362 must be used.
Installation in a Fireplace Opening
At the rear of the fire, two adjustable supports are provided
for levelling the fire where the base of the fireplace opening is
raised above the level of the hearth.
Adjust by removing the two screws holding each bracket in
position, then refit the bracket and the two screws in the
required position.
The metal surround may be removed to allow the fire to be
fully inset.
Note: The fire must be positioned a minimum distance of
500mm from a wall as indicated in Fig. 1.
Important Safety Advice:
When using electrical appliances, Basic precautions
should always be followed to reduce the risk of fire,
electrical shock, and injury to persons, including the
following:
••
••
•If the appliance is damaged, check with the
supplier before installation and operation.
••
••
•Do not use outdoors.
••
••
•Do not use in the immediate surroundings of a
bath, shower or swimming pool.
••
••
•Do not locate the heater immediately below a fixed
socket outlet or connection box.
••
••
•Do not cover the heater. Do not place material or
garments on the heater, or obstruct the air
circulation around the heater, for instance by
curtains or furniture, as this could cause
overheating and a fire risk.
••
••
•This appliance is not intended for use by children
or other persons without assistance or
supervision if their physical, sensory or mental
capabilities prevent them from using it safely.
Children should be supervised to ensure that they
do not play with the appliance.
••
••
•In order to avoid a hazard due to inadvertent
resetting of the thermal cut-out, this appliance
must not be supplied through an external
switching device, such as a timer, or connected
to a circuit that is regularly switched on and off
by the utility.
••
••
•Ensure that furniture, curtains or other
combustible material are positioned no closer
than 1 metre from the heater.
••
••
•In the event of a fault unplug the heater.
••
••
•Unplug the heater when not required for long
periods.
••
••
•Although this heater complies with safety
standards, we do not recommend its use on deep
pile carpets or on long hair type of rugs.
••
••
•The appliance must be positioned so that the plug
is accessible.
••
••
•If the supply cord is damaged it must be replaced
by the manufacturer or service agent or a similarly
qualified person in order to avoid a hazard.
Fig. 1
Operation
The unique flame effect may be enjoyed whether or not the
heating elements are in operation.
Controls
The heater controls are located on the left hand side of the
canopy heat outlet - see Fig. 1.
A switch is in the ON position when the red indicator mark on
the switch is visible.
Setting the Thermostat
Plug in and set all switches to ON. Turn the thermostat knob
to MAX to warm the room rapidly. When the room temperature
has reached the desired level, turn the thermostat knob back
slowly until the thermostat just clicks off. The heater will then
maintain the room temperature at the chosen level.
NOTE – Should your heater fail to come on when the
thermostat is at a low setting, this may be due to the room
temperature being higher than the thermostat setting.
Maintenance
WARNING – BEFORE UNDERTAKING ANY
MAINTENANCE OR CLEANING, REMOVE PLUG OR
DISCONNECT FROM THE ELECTRICITY SUPPLY.
Remote Control
Warning: it takes time for the
receiver to respond to the
transmitter. Do not press the
buttons more than once within
two seconds for correct
operation.
Manual Controls
Note : The Standby
Switch must first be
turned on to operate
either the manual or
the remote controls.
Manual or Remote Operation
To turn off any of the
settings
Press the ‘OFF’ button once
To increase or decrease the brightness of the fuel effect use the
buttons as shown in Fig. 2
Flame effect & 1kW heat Press the ‘ON’ button again Top & Middle
Neon
Flame effect & 2kW heat Press the ‘ON’ button again All 3 Neon’s
Setting Operation Indication
Flame effect Press the ‘ON’ button once Top Neon
Note: When either the remote control or the manual controls
are used, the neon’s will come on for 3 seconds indicating the
relevant setting (see Fig. 3).
neon’s for
indicating the
operation level
1. Slide open the battery cover on the back of the remote
control
2. Install two AAA batteries into the remote control (see
Fig. 4)
3. Replace the battery cover.
Battery information
Fig. 4
Batteries
Discard leaky batteries
Dispose of batteries in the proper manner according to
Provincial and local regulations. Any battery may leak
electrolyte if mixed with a different battery type, if inserted
incorrectly, if all the batteries are not replaced at the same
time, if disposed of in a fire or if an attempt is made to charge
a battery not intended to be recharged.
ON
OFF
Increase
Brightness
Off
Button
Standby
Switch
Decrease
Brightness
On
Button
Fig. 2
Fig. 3
Lamp Replacement
There are two lamps located beneath the fuel effect.
To gain access to the lamp, the fuel effect which is secured
by three screws, must be removed (see Fig.1).
Remove the coal/pebbles and carefully lift the fuel effect/fuel
effect trim clear and set aside.
Remove the glass shelf and carefully set aside.
Replace the defective lamp with a 240V 60 Watt E14 SES
clear candle lamp.
Replace the glass shelf then the fuel effect assy and secure
with screws.
Safety cut-out
For your safety, this appliance has been fitted with thermal
cut-out. In the event that the product overheats, the cut-out
switches the heat off automatically.
To bring the heat back into operation, remove the cause of
the overheating, then unplug or turn off the electrical supply
to the heater for up to 10 minutes.
When the heater has cooled sufficiently, re-connect and switch
on the heater.
Caution: Inorder to avoid a hazard due to inadvertent
resetting of the thermal cutout, this appliance must not be
supplied through an external switching device, such as a
timer, or connected to a circuit that is regularly switched on
and off by the utility.
Cleaning
Before commencing cleaning, unplug the heater and allow it
to cool. The surfaces of the heater should be given an
occasional wipe over with a dry soft cloth.
Do not use detergents, abrasive cleaning powder or polish on
the metal body of the heater.
The glass screen should be cleaned carefully with a chamois
leather. DO NOT use proprietary cleaners.
To remove any accumulation of dust or fluff the soft brush
attachment of a vacuum cleaner should occasionally be used
to clean the outlet grille of the fan heater located under the
canopy.
To clean the fuel effect, remove the coal pieces or pebbles
and wash in warm water. The plastic tray should be wiped
clean with a damp cloth. When dry replace the coal pieces or
pebbles and arrange for best effect.
After Sales Service
Your product is guaranteed for one year from the date of
purchase.
Within this period, we undertake to repair or exchange this
product free of charge (excluding lamps & subject to
availability) provided it has been installed and operated in
accordance with these instructions.
Your rights under this guarantee are additional to your
statutory rights, which in turn are not affected by this
guarantee.
Should you require after sales service you should contact
our customer services help desk on 0870 727 0101. It would
assist us if you can quote the model number, series, date of
purchase, and nature of the fault at the time of your call. The
customer services help desk will also be able to advise you
should you need to purchase any spares.
Please do not return a faulty product to us in the first instance
as this may result in loss or damage and delay in providing
you with a satisfactory service.
Please retain your receipt as proof of purchase.
Glen Dimplex UK Limited
Millbrook House
Grange Drive
Hedge End
Southampton
Hampshire. SO30 2DF
UK customer help line (8.00AM – 6.00PM Mon-Fri; 8.30AM-1.00PM Sat)
Customer Services: Tel. 0870 7270101
Fax. 0870 7270102
e-mail customer.servi[email protected]
Republic of Ireland Tel. 01 8424833
The product complies with the European Safety Standards EN60335-2-30 and the European Standard Electromagnetic Compatibility
(EMC) EN55014, EN60555-2 and EN60555-3 which cover the essential requirements of EEC Directives 73/23 and 89/336
[c] Glen Dimplex UK Limited
All rights reserved. Material contained in this publication may not be reproduced in whole or in part, without prior permission in writing of Glen Dimplex UK Limited.

Other Dimplex Indoor Fireplace manuals
Dimplex Revillusion RBF24DLX User manual

Dimplex

Dimplex Revillusion RBF24DLX User manual

Dimplex ELTHAM ETM20-AU User manual

Dimplex

Dimplex ELTHAM ETM20-AU User manual

Dimplex DCF44GS User manual

Dimplex

Dimplex DCF44GS User manual

Dimplex WINSLOW SWM3520 User manual

Dimplex

Dimplex WINSLOW SWM3520 User manual

Dimplex BFSL33 User manual

Dimplex

Dimplex BFSL33 User manual

Dimplex Pro Series User manual

Dimplex

Dimplex Pro Series User manual

Dimplex Revillusion RBF30 User manual

Dimplex

Dimplex Revillusion RBF30 User manual

Dimplex BF392SD User manual

Dimplex

Dimplex BF392SD User manual

Dimplex Crestmore CRS20 Instruction Manual

Dimplex

Dimplex Crestmore CRS20 Instruction Manual

Dimplex IN-STUD V1525BT User manual

Dimplex

Dimplex IN-STUD V1525BT User manual

Dimplex BF5000NT Quick start guide

Dimplex

Dimplex BF5000NT Quick start guide

Dimplex DF2608 User manual

Dimplex

Dimplex DF2608 User manual

Dimplex Mini Mozart User manual

Dimplex

Dimplex Mini Mozart User manual

Dimplex BFSL33 User manual

Dimplex

Dimplex BFSL33 User manual

Dimplex DFG2562 User manual

Dimplex

Dimplex DFG2562 User manual
Dimplex OPTIMYST CAS250-INT User manual

Dimplex

Dimplex OPTIMYST CAS250-INT User manual

Dimplex DIMPLEX ELECTRIC FIREPLACE User manual

Dimplex

Dimplex DIMPLEX ELECTRIC FIREPLACE User manual

Dimplex 3-STEP Optimyst Instruction Manual

Dimplex

Dimplex 3-STEP Optimyst Instruction Manual

Dimplex MULTIFIRE DF3215 User manual

Dimplex

Dimplex MULTIFIRE DF3215 User manual

Dimplex SP120 User manual

Dimplex

Dimplex SP120 User manual

Dimplex OPTIMYST RTOPCS20 User manual

Dimplex

Dimplex OPTIMYST RTOPCS20 User manual

Dimplex Clova CLV20B User manual

Dimplex

Dimplex Clova CLV20B User manual

Dimplex SAHARA SHR12 User manual

Dimplex

Dimplex SAHARA SHR12 User manual

Dimplex DF2690 User manual

Dimplex

Dimplex DF2690 User manual

Popular Indoor Fireplace manuals by other brands

drew & jonathan SCOTT LIVING Blaine HDSLFP65W-5A Assembly instructions

drew & jonathan

drew & jonathan SCOTT LIVING Blaine HDSLFP65W-5A Assembly instructions

Mendota SEABROOK D-30 Installation & operating instructions
Mendota

Mendota SEABROOK D-30 Installation & operating instructions
Quadra-Fire 5100I-GD-B user manual

Quadra-Fire

Quadra-Fire 5100I-GD-B user manual

CVO Fire FR600 Technical installation manual

CVO Fire

CVO Fire FR600 Technical installation manual

Rinnai Linear Series installation guide

Rinnai

Rinnai Linear Series installation guide

Faber e-MatriX 800 installation manual

Faber

Faber e-MatriX 800 installation manual

WANDERS KANDA 50 Product dimensions

WANDERS

WANDERS KANDA 50 Product dimensions

Montigo H34VO Installation & maintenance manual

Montigo

Montigo H34VO Installation & maintenance manual

Napoleon GDS60 Conversion instructions

Napoleon

Napoleon GDS60 Conversion instructions

Clihome IF-72FSB Installation

Clihome

Clihome IF-72FSB Installation

Valor RetroFire RF24JDN installation manual

Valor

Valor RetroFire RF24JDN installation manual

FMI C36TU installation instructions

FMI

FMI C36TU installation instructions

Mendota DXV-35 DT4 Installation & operating instructions
Mendota

Mendota DXV-35 DT4 Installation & operating instructions

Enviro Sienna Indoor Gas Fireplace owner's manual

Enviro

Enviro Sienna Indoor Gas Fireplace owner's manual

real living 28WM20541-16001 Assembly instructions

real living

real living 28WM20541-16001 Assembly instructions

Robinson Willey SuperEco Contemporary Handbook

Robinson Willey

Robinson Willey SuperEco Contemporary Handbook

DELLA 050-HA-50138 instruction manual

DELLA

DELLA 050-HA-50138 instruction manual

Sunjoy L-OF083PST-2 Assembly instructions

Sunjoy

Sunjoy L-OF083PST-2 Assembly instructions

manuals.online logo
manuals.online logoBrands
  • About & Mission
  • Contact us
  • Privacy Policy
  • Terms and Conditions

Copyright 2025 Manuals.Online. All Rights Reserved.