DirecTV Genie User manual

P
RODUCT
M
ANUAL
–
G
ENIE
A
IR
TM
REVISION HISTORY
Version 1.3.0, 11/22/2016
AT&T DIRECTV, Inc. Proprietary and Confidential

Date
Author
Description of Change
Version
Sept 02,2016 S. Pardue First Draft 0.0.1 DRAFT
Sept 21, 2016
S. Pardue Initial Review with Eng 0.0.2 DRAFT
Oct 7,2016 S. Pardue Review with Eng and Care 0.0.3 DRAFT
Nov 18, 2016 S. Pardue Received Updated tech comm and Product Name 0.0.4 DRAFT
Nov 22, 2016 S.Pardue Updated draft with latest tech comm changes 0.0.5 DRAFT
Apr 8, 2016 S. Wrobel Reviewed Draft 0.0.6 DRAFT
Apr 13, 2016 S. Kobayashi Reviewed STB Features 0.0.7 DRAFT
Apr 13, 2016 G. Bicanek Reviewed HW Details 0.0.8 DRAFT
Apr 14, 2016 T. Brusehaver Reviewed Initial Installation 0.0.9 DRAFT
Apr 18, 2016 B. Toupin Reviewed UE Features 0.1.0 DRAFT
Apr 18, 2016 S. McNabb Reviewed Installation, Verification & Manage 0.1.1 DRAFT
Apr 18, 2016 S. Lee Reviewed Internal WVB 0.1.2 DRAFT
Apr 20, 2016 K. Kaushik Updated tech comm with changes 0.1.3 DRAFT
Apr 22, 2016 K. Kaushik -0- rev for Distribution 1.0.0
July 5, 2016 K. Kaushik Updates to Features 1.0.1 DRAFT
July 19, 2016 S. Wrobel Reviewed draft and made changes to Installation 1.0.2 DRAFT
July 22, 2016 S. Wrobel
S. McNabb
Reviewed draft and made updates to Activation, Manage &
Troubleshooting 1.0.3 DRAFT
July 25, 2016 S. Wrobel Reviewed draft and made additions to Installation 1.0.4 DRAFT
July 26, 2016 K. Kaushik Updated tech comm with changes 1.0.5 DRAFT
July 26, 2016 S. Wrobel Added new sections Menu UI & Feature Changes 1.0.6 DRAFT
July 26, 2016 K. Kaushik Updated tech comm with changes 1.0.7 DRAFT
July 29, 1016 K. Kaushik Updated tech comm with changes after Team Review 1.0.8 DRAFT
Aug 8, 2016 K. Kaushik Updated wireframes with screenshots 1.0.9 DRAFT
Aug 9, 2016 S. Wrobel Reviewed draft 1.0.10 DRAFT
Aug 15, 2016 S. Kobayashi Reviewed STB Features 1.0.11 DRAFT
Aug 16, 2016 T. Wood
T. Brusehaver
Reviewed draft
Reviewed BSL 1.0.12 DRAFT
Aug 17, 2016 M. Gabeler Lee Reviewed draft 1.0.13 DRAFT
Aug 19, 2016 P. Stein
M. Finegan
Reviewed draft
Reviewed Mobile Features 1.0.14 DRAFT
Aug 22, 2016 A. Rathert
C. She
Reviewed draft
Reviewed HW Features 1.0.15 DRAFT

REVISION HISTORY
Date
Author
Description of Change
Version
Aug 23, 2016 B. Toupin
D. Kuether
Reviewed UE Features
Reviewed draft 1.0.16 DRAFT
Aug 24, 2016 E. Mateik Reviewed draft 1.0.17 DRAFT
Aug 30, 2016 S. McNabb Reviewed draft 1.0.18 DRAFT
Aug 31, 2016 K. Hughes Reviewed Recording & Streaming Conflicts 1.0.19 DRAFT
Aug 31, 2016 K. Kaushik Updated tech comm with changes 1.0.20 DRAFT
Sep 1, 2016 K. Kaushik -0- rev for Distribution 2.0.0
Oct 14, 2016 K. Kaushik
S. Wrobel
S. McNabb
Updates to Resource Conflicts, Troubleshooting & Addressing
questions from 2.0 review 2.0.1 DRAFT
Nov 3, 2016 S. Wrobel Reviewed drafts and suggested edits to Installation &
troubleshooting 2.0.2 DRAFT
Nov 4, 2016 K. Kaushik
S. McNabb
Updated LED table with troubleshooting states 2.0.3 DRAFT
Nov 4, 2016 S. Wrobel Reviewed draft 2.0.4 DRAFT
Introduction
Before using the equipment, read the “Important safety instructions” of this manual. This manual outlines safeguards
information. The safety information contained in this manual was developed and provided solely by the manufacturer.
Safety Information is found in the back of this document
Product Manuals are intended to aid a customer in understanding the workings of the hardware
devices. This Product Manual will be posted online at ATT.com for customer access.
The purpose of this document is to communicate information associated with the Genie Air
TM
,
and to provide an overview addressing specific functions of the device.

Field Engineering Technical Communications are internal communiqués that aid in preparing
customer-facing departments ahead of product launches. Technical Communications comprise
much of the source documentation that is subsequently transformed into customer facing
materials such as scripts for Agent Call Center, troubleshooting guidelines, dot com web site
content, and other materials that are customized for various agent or technician audiences.
The purpose of this document is to communicate the technical information associated with the
Genie Air, and to provide an overview addressing how the new capabilities may impact the
customer, agent and field technician.
Any references to specifications developed by other departments defining this release are linked
here, if available.
Field Engineering staff wishes to aid and facilitate DIRECTV departments providing customer
service at all levels. Please send any requests or suggestions for any additional materials or

Product Manual Genie Air
TM
Version 1.3.0 – 11/22/2016
Page i DIRECTV, Inc. Proprietary and Confidential
功
功功
功能變
能變能變
能變數代
數代數代
數代碼變
碼變碼變
碼變更
更更
更
C
ONTENTS
I. Overview ........................................................................................................................... 6
II. Hardware Information........................................................................................................ 7
A. Front Panel.................................................................................................................. 7
B. Top Panel.................................................................................................................... 7
C. Rear Panel .................................................................................................................. 8
D. Side Panel ................................................................................................................... 9
E. Remote........................................................................................................................ 9
F. Power Supply .............................................................................................................. 9
G. SIM Card and SIM Card Interface...............................................................................10
H. Specifications .............................................................................................................10
III. Features.......................................................................................................................
1211
A. Hardware Feature Comparison...............................................................................1211
B. Software Feature Comparison ................................................................................1312
IV. Minimum Requirements................................................................................................1413
V. Installation....................................................................................................................1514
A. Genie Air
TM
Initial Installation ..................................................................................1514
1. Physical Installation ..........................................................................................1514
2. Genie Air
TM
Boot-Up & Activation......................................................................1514
B. Client Installation ....................................................................................................2019
1. Genie Wired Client............................................................................................2019
2. Genie Wireless Client .......................................................................................2019
3. RVU TV / 4K RVU TV .......................................................................................2120
C. Add a Client Process ..............................................................................................2120
D. Add External WVB..................................................................................................2322
E. Program Remote to Genie Mini Clients...................................................................2423
F. Program Remote to RVU TV using RF4CE to Server .............................................2423
VI. Manage (Replace & Remove) ......................................................................................2524
A. Replace Genie Air
TM
...............................................................................................2524
B. Replace Client ........................................................................................................2524
C. Remove Client........................................................................................................2524
D. Replace External WVB ...........................................................................................2524
VII. Internet Configuration...................................................................................................2726
A. Never Connected Flow ...........................................................................................2726
B. Previously Connected Flow ....................................................................................2928
VIII. Menu and UI Differences..............................................................................................3029

Product Manual Genie Air
TM
Version 1.3.0 – 11/22/2016
Page ii DIRECTV, Inc. Proprietary and Confidential
功
功功
功能變
能變能變
能變數代
數代數代
數代碼變
碼變碼變
碼變更
更更
更
A. Main Menu..............................................................................................................3029
B. My DIRECTV..........................................................................................................3029
C. Search & Browse....................................................................................................3029
D. Recordings .............................................................................................................3029
E. Extras .....................................................................................................................3029
F. Settings & Help -> Settings.....................................................................................3029
1. Settings & Help -> Settings -> Info & Test Screen Differences..........................3130
2. Settings & Help -> Settings -> Whole-Home Screen Differences ......................3433
3. Settings & Help -> Settings -> Reset Screen Differences..................................3635
4. Settings & Help -> Settings -> Remote Control Screen Differences ..................3837
IX. Updates to Existing Genie OSDs..................................................................................3938
A. Video Bridge Connection Failed OSD.....................................................................3938
B. Wireless Connection Lost OSD ..............................................................................3938
C. Internet Never Connected, Content Missing OSD...................................................3938
D. Program Requires Internet Connection OSD ..........................................................3938
E. WVB Not Found OSD.............................................................................................3938
F. Connect to the Internet OSD...................................................................................3938
X. Feature Differences......................................................................................................4039
A. Transcoding............................................................................................................4039
B. Recording & Streaming Conflicts ............................................................................4039
XI. Troubleshooting............................................................................................................4241
A. New OSD’s.............................................................................................................4241
1. Tilt Error OSD ...................................................................................................4241
2. Thermal Warning OSD......................................................................................4241
3. Bad AV Chip OSD ............................................................................................4241
B. System Test Diagnostic Codes...............................................................................4342
1. New Wireless IV Diagnostic Codes...................................................................4342
2. Updates to MoCA Test Errors ...........................................................................4342
C. Symptoms ..............................................................................................................4342
1. 5GHz SSID’s not listed .....................................................................................4342
D. Change to Existing Troubleshooting on Client / Server .........................................4342
1. Checks at Server ..............................................................................................4342
2. No Servers Were Detected ...............................................................................4342
3. Wireless Connection Lost .................................................................................4544
XII. LED Summary..............................................................................................................4746
A. Front Panel LEDs ...................................................................................................4746

Product Manual Genie Air
TM
Version 1.3.0 – 11/22/2016
Page iii DIRECTV, Inc. Proprietary and Confidential
功
功功
功能變
能變能變
能變數代
數代數代
數代碼變
碼變碼變
碼變更
更更
更
1. Status LED Table..............................................................................................4746
2. Wireless LED (Internal WVB Status).................................................................4847
B. Top Panel LED – Add Client...................................................................................4847
C. Back Panel LEDs....................................................................................................4847
1. Power LED .......................................................................................................4847
2. MoCA LED........................................................................................................4948
XIII. Appendix ......................................................................................................................5049
A. Steps To Connect Mobile Installation App to the WVB:..........................................5049
B. Federal Communications Commission Interference Statement...............................5150

Product Manual Genie Air
TM
Version 1.3.0 – 11/22/2016
Page iv DIRECTV, Inc. Proprietary and Confidential
功
功功
功能變
能變能變
能變數代
數代數代
數代碼變
碼變碼變
碼變更
更更
更
FIGURES
Figure 1: Genie Air
TM
Front Panel ............................................................................................. 7
Figure 2: Genie Air
TM
Top Panel................................................................................................ 7
Figure 3: Genie Air
TM
Rear Panel .............................................................................................. 8
Figure 4: Genie Air
TM
Side Panel............................................................................................... 9
Figure 5: EPS17 Power Supply................................................................................................. 9
Figure 6: SIM Card Front & Rear..............................................................................................10
Figure 7: Installation Satellite Setup Screen (Subject to Change).........................................
1716
Figure 8: Genie Air
TM
Activation Screen (Subject to Change)...............................................1716
Figure 9: Genie Air
TM
Installation Verification SCreen (Subject to Change) ..........................1817
Figure 10: Genie Air
TM
APG Guide Screen...........................................................................1817
Figure 11: Genie Air
TM
Data Feed Screens ..........................................................................1918
Figure 12: Mobile Installation App - Installation Complete Screen (Subject to Change).........1918
Figure 13: Connecting to WVB - Excellent Signal Strength Screen ......................................2019
Figure 14: Full Client Tracking - Add a Client Screen...........................................................2120
Figure 15: Activate your new Location Screen (Subject to Change) .....................................2221
Figure 16: Full Client Tracking - Guided Setup Complete Screen (Subject to Change) ........2221
Figure 17: Manage Clients - Stop Looking Screen (Subject to Change)...............................2322
Figure 18: Wireless Video Bridge Status Screen..................................................................2423
Figure 19: Remove Video Bridges Screen ...........................................................................2625
Figure 20: Plug in Ethernet Cable Screen ............................................................................2726
Figure 21: Checking Connection Status Screen...................................................................2726
Figure 22: Internet Setup Complete Screen .........................................................................2827
Figure 23: Wireless Internet Confirmation Screen ................................................................2827
Figure 24: Select Wireless Network Screen .........................................................................2827
Figure 25: Genie Air
TM
Menu SCreen...................................................................................3029
Figure 26: Genie Server & Clients connected to a Genie Settings Screen ...........................3130
Figure 27: Genie Air
TM
Client Settings Screen (Subject to Change) .....................................3130
Figure 28: Genie & Clients Connected to Genie - Info & Test Screen ..................................3231
Figure 29: Genie Air
TM
Info & Test Screen ...........................................................................3231
Figure 30: Genie Air
TM
Info Screen.......................................................................................3332
Figure 31: Manage Clients - Genie Client & Genie Server....................................................3433
Figure 32: Genie Air
TM
Manage Clients Screen ....................................................................3433
Figure 33: Genie Air
TM
Manage Clients - Add Clients Screen...............................................3534
Figure 34: Genie Air
TM
Manage Clients - Add Clients Instructions Screen............................3534
Figure 35: Receiver Reset - Genie Client & Server ..............................................................3635
Figure 36: Genie Air
TM
- Reset Client Screen .......................................................................3635
Figure 37: Genie Air
TM
- Reset Client Confirmation SCreen .................................................3736
Figure 38: Genie Air
TM
- Reset Client to Default Screen .......................................................3736
Figure 39: Genie Air
TM
- Reboot Everywhere Screen ...........................................................3837
Figure 40: Genie Air
TM
- Everywhere to Default Screen........................................................3837
Figure 41: Resource Conflict - First Run Screen (Subject to Change)..................................4039
Figure 42: Resource Conflict - No Option or Cancel Recording Screen................................4140
Figure 43: Resource Conflict during Double-Play.................................................................4140
Figure 44: Tilt Error OSD Screen .........................................................................................4241
Figure 45: Android Settings Screen......................................................................................5049
Figure 46: iOS Settings Screen............................................................................................5150
Product Manual Genie Air
TM
Version 1.3.0 – 11/22/2016
Page v DIRECTV, Inc. Proprietary and Confidential
功
功功
功能變
能變能變
能變數代
數代數代
數代碼變
碼變碼變
碼變更
更更
更
TERMINOLOGY
Term
Description
Client (RVU) Any RVU certified and DIRECTV approved device that can be
connected to the DIRECTV Genie Server (e.g. TV’s, Blu-ray Players,
etc.)
DIRECTV RVU
clients
C31, C41, C41W, C51, C61K, C61W client
non-DIRECTV RVU
clients
Samsung RVU TV, Sony RVU TV, PS3 etc.
DECA (CCK) DIRECTV Ethernet to Coaxial Adapter, also known as CCK, facilitates
an easy connection of a DIRECTV receiver with the customer provided
internet, using a single coaxial cable.
DECA (CCK) BB Broadband Ethernet to Coaxial Adapter
HDD Hard Disk Drive
LUI Local User Interface, Samsung RVU TV’s user interface, such as
“Picture”, “Dolby Digital”, “Captioning”, etc., independent of, but
accessed through the DIRECTV RUI.
MoCA Multimedia over Coax Alliance.
Protocol (RVU) A set of instructions defined to do a specific task. In case of RVU, the
instructions will allow non-DIRECTV clients (TV’s) to display and interact
with DIRECTV content without having a physical DIRECTV receiver in
every room.
RUI Remote User Interface, the DIRECTV UI which is accessed and
manipulated directly thru an RVU client.
RVU Standard used by manufacturers of consumer electronics to allow
entertainment devices within the home to share their content with each
other across a home network.
Server (RVU) The DIRECTV HR34, HR44, H44 (with HDD), HR54 HD DVR.
STB Set-top box or receiver.
WVB Wireless Video Bridge
RF4CE RF Remote control technology based on the ZigBee standard for
consumer electronics devices.

Product Manual Genie Air
TM
Version 1.3.0 – 11/22/2016
Page 6 DIRECTV, Inc. Proprietary and Confidential
功
功功
功能變
能變能變
能變數代
數代數代
數代碼變
碼變碼變
碼變更
更更
更
I. O
VERVIEW
Welcome to AT&T’s DIRECTV video service. Genie Air
TM
is the next generation Genie Server,
satellite receiver that, provides breakthrough features, sophisticated integration and
enhanced customer experience.
Genie Air
TM
is a Headless Server. A Headless Server is a satellite receiver that has no local
display (no TV connection) on its own and is dedicated to providing services to its Genie
clients and RVU TV Clients.
Genie Air
TM
integrates Wireless Video Bridge (Gen 2) and transcoding (Mobile DVR)
capabilities. Genie Air
TM
will use eleven tuners (plus one Network Tuner), is capable of
Transponder Bonding and can support up-to Seven RVU clients simultaneously (two of
which can be 4K streams). Genie Air
TM
has built-in SWiM power and storage of 2TB. Genie
Air
TM
is compatible with all Genie clients and Wireless Video Bridge.

Product Manual Genie Air
TM
Version 1.3.0 – 11/22/2016
Page 7 DIRECTV, Inc. Proprietary and Confidential
功
功功
功能變
能變能變
能變數代
數代數代
數代碼變
碼變碼變
碼變更
更更
更
II. H
ARDWARE
I
NFORMATION
A. FRONT PANEL
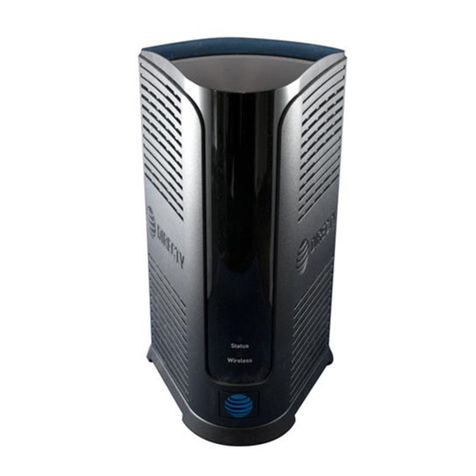
•No Front-Panel Buttons.
•”Status”: Multi-Color Status Indicator LED
•”Wireless”: Multi-Color Wi-Fi Status Indicator LED (Internal WVB Status)
FIGURE 1: GENIE AIRTM FRONT PANEL
B. TOP PANEL
•”Add Client”: Add Client Button with Green LED (At the Top)
FIGURE 2: GENIE AIRTM TOP PANEL

Product Manual Genie Air
TM
Version 1.3.0 – 11/22/2016
Page 8 DIRECTV, Inc. Proprietary and Confidential
功
功功
功能變
能變能變
能變數代
數代數代
數代碼變
碼變碼變
碼變更
更更
更
C. REAR PANEL
•“DC IN – 25.2V”: DC power connector with power indicator LED
•“SAT IN - SWM”: One satellite input coax connector (SWiM)
•“MoCA”: One MoCA status indicator LED
•“USB”: One USB 3.0 port
•“Ethernet”: One Ethernet port
•“eSATA”: One eSATA port
•“SIM CARD” with instruction to “PUSH TO EJECT”: One Conditional Access SIM
card slot - Do not access unless instructed by AT&T agent
FIGURE 3: GENIE AIRTM REAR PANEL

Product Manual Genie Air
TM
Version 1.3.0 – 11/22/2016
Page 9
DIRECTV, Inc. Proprietary and Confidential
功
功功
功能變
能變能變
能變數代
數代數代
數代碼變
碼變碼變
碼變更
更更
更
D. S
IDE
P
ANEL
•“RESET”: One red reset button - To be used only when instructed by AT&T agent
during troubleshooting
FIGURE 4: GENIE AIR
TM
SIDE PANEL
E. R
EMOTE
There is no remote with the Genie Air
TM
. However Genie Air
TM
has RF4CE. It will serve to
program remotes (RC71/RC72/RC73) for RVU TV clients
F. P
OWER
S
UPPLY
The Genie Air
TM
requires the EPS17 (DC 25.2V) External Power Supply.
FIGURE 5: EPS17 POWER SUPPLY

Product Manual Genie Air
TM
Version 1.3.0 – 11/22/2016
Page 10 DIRECTV, Inc. Proprietary and Confidential
功
功功
功能變
能變能變
能變數代
數代數代
數代碼變
碼變碼變
碼變更
更更
更
G. SIM CARD AND SIM CARD INTERFACE
Genie Air
TM
has a SIM card in the Rear Panel (Ref: Figure 3). The SIM card replaces the
Access Card. The SIM card will be pre-installed in the Genie Air
TM
. Similar to the Access
card, the SIM card is paired to the Genie Air
TM
(with a Receiver ID) and can be swapped out
with a new SIM card if necessary. The Card Number will be located on the back side of the
SIM. The way to insert the card is explained with an illustration near the SIM card slot.
FIGURE 6: SIM CARD FRONT & REAR
H. SPECIFICATIONS
•Memory : 3 GB DDR4, 8MB SNOR / 256MB NAND Flash
•Processor : BCM7366
•Storage : 2 TB SATA HDD
•Dimensions
•Height: 266 mm (10.47 inches);
•Width: 154 mm (6.06 inches);
•Depth: 142 mm (5.59 inches)
•Video & Audio Formats
•N/A
•Environmental Requirements
•Operating temperature: 32 to 122 ℉( 0
℃
to 50
℃
)
•Storage temperature (No Damage): -40 to 150 ℉( -40
℃
to 66
℃
)
•Relative humidity: 5-85% non-condensing

Product Manual Genie Air
TM
Version 1.3.0 – 11/22/2016
Page 11 DIRECTV, Inc. Proprietary and Confidential
功
功功
功能變
能變能變
能變數代
數代數代
數代碼變
碼變碼變
碼變更
更更
更
•Mechanical Housing Design
•Genie Air
TM
needs to be placed in a Vertical position. Sensors will detect
when the orientation is not vertical. The Wireless LED will display
Flashing Yellow, and the clients will display a Tilt Error OSD.

Product Manual Genie Air
TM
Version 1.3.0 – 11/22/2016
Page 12 DIRECTV, Inc. Proprietary and Confidential
功
功功
功能變
能變能變
能變數代
數代數代
數代碼變
碼變碼變
碼變更
更更
更
III. F
EATURES
•Genie Air
TM
is a Headless Server satellite receiver that has no output to a TV.
•Supports Wired, Wireless, 4K and RVU Clients
•Has built-in capability to connect to an internet Wi-Fi access point.
•Has Built-In Wireless Video Bridge Gen 2.
•Has Built-In Genie GO functionality.
•Capable of Transponder Bonding.
•Uses Eleven (11) Satellite Tuners (+ 1 Network Tuner).
•Support up-to Seven (7) RVU sessions simultaneously (two of which can be 4K
streams).
•Has built-in SWiM Power.
•Has internal storage of 2TB with expansion capability.
•Supports RF4CE Interface.
A. HARDWARE FEATURE COMPARISON
Feature
HR54
Genie Air
TM
Built in SWM Power (similar to PI21) Yes Yes
Tuners Used (Video + Network) 7+1 11 + 1
Audio / Video Output Yes No
Transponder Bonding Yes Yes
Built in WVB No Yes
Add Client Button (for Wireless Video) No Yes (At the Top)
Supports MoCA 1.1 Yes Yes
Supports MoCA 2.0 No Yes
Hard drive (Internal) 1TB 2TB
Hard drive expansion capable (eSATA) Yes Yes
Remote control compatible Yes No
Power Button Yes No
Recording LED Yes No
Menu/Guide/Arrows/Select/Res buttons
No No
Resolution LED No No
Reset Button Side Side
Access Card Yes No

Product Manual Genie Air
TM
Version 1.3.0 – 11/22/2016
Page 13 DIRECTV, Inc. Proprietary and Confidential
功
功功
功能變
能變能變
能變數代
數代數代
數代碼變
碼變碼變
碼變更
更更
更
SIM Card No Yes
Receiver ID Yes Yes
USB 1 (USB 2.0) 1 (USB 3.0)
Power Supply EPS44 (12V) EPS17 (25.2V)
AM21 Support Yes No
B. SOFTWARE FEATURE COMPARISON
Feature
HR54
Genie Air
TM
4K ready (Receive, Record and
Distribute 4K content)
Yes Yes
Display 4K content (local decode) No (distribute to
4K client)
No (distribute to 4K
client)
Linear 4K Yes Yes
Push 4K Yes Yes
4K VOD Yes Yes
Number of 4K Linear/Recordings at
once
1 2
Total Number of recordings at once 5 7
Total number of registered RVU clients 8 8
Total number of active sessions (RVU,
MRV or Transcode Currently
Streaming)
3 7
Number of active 4K clients within total
number of clients
1 2
MRV Yes Yes
External WVB Compatible Yes Yes
AM21 Compatible Yes No
Built in Wi-Fi connection capability Yes Yes
2.4 GHz Wi-Fi Internet Interface Yes Yes
5 GHz Wi-Fi Internet Interface Yes No
Transcoding Support Yes Yes
Simultaneous SD Transcode 1 1
Simultaneous HD / 4K Transcode 0 0
Built in Transcoding Sync and Go Yes Yes
Built in Transcoding In Home / Out of
Home Streaming
Yes Yes

Product Manual Genie Air
TM
Version 1.3.0 – 11/22/2016
Page 14 DIRECTV, Inc. Proprietary and Confidential
功
功功
功能變
能變能變
能變數代
數代數代
數代碼變
碼變碼變
碼變更
更更
更
IV. M
INIMUM
R
EQUIREMENTS
All Minimum Requirements of Genie are applicable to Genie Air
TM
EXCEPT the Genie Air
TM
requires:
•DSWiM (DSWiM 13 module, SL3DS LNB, 3D2 LNB, 3D2RB LNB or 5D2RB LNB)
•Minimum of 11 available SWiM channels
•Minimum of 1 registered Client.

Product Manual Genie Air
TM
Version 1.3.0 – 11/22/2016
Page 15 DIRECTV, Inc. Proprietary and Confidential
功
功功
功能變
能變能變
能變數代
數代數代
數代碼變
碼變碼變
碼變更
更更
更
V. I
NSTALLATION
A. GENIE AIR
TM
INITIAL INSTALLATION
The following steps are to be followed by an Installer for new installations (not replacement).
1. Physical Installation
Genie Air
TM
needs to be placed in a vertical position. Since Genie Air
TM
is a Headless
Server, a TV cannot be attached to it, and this provides placement flexibility.
Steps To Install Genie Air
TM
:
1) Install the ODU with a Digital SWiM LNB.
•Refer D-114 H44 Tech Comm for detailed information regarding
installation using the built-in SWiM power inserter.
2) If Internet is available (or will be available soon if known), place the Genie Air
TM
near the customer’s router and connect the Ethernet cable from the customer’s
router to the Genie Air
TM
. Genie Air
TM
will automatically connect to the Internet.
This is the preferred method. The minimum distance from other Wireless
devices is 4 feet (similar to present day wireless video and Wi-Fi guidance).
•Alternate Internet Connection – The Genie Air
TM
can also be Internet
connected using BB-DECA or Internal Wi-Fi (similar to HR44/54).
•Alternate Genie Air
TM
Location: Place the Genie Air
TM
in a location for
optimal signal between the built-in WVB and Wireless Client (per current
WVB placement guidance). Refer D-040 WVB Tech Comm for detailed
information.
3) Connect the coax cable from the wall plate to the Genie Air
TM
.
4) Connect the power cable to the Genie Air
TM
.
2. Genie Air
TM
Boot-Up & Activation
Once the Genie Air
TM
has Power, the Status LED on the front of the Genie Air
TM
goes
through various color state changes.
1) The Status LED remains OFF during boot-up (about 10 seconds). Note: This
initial LED Off state is subject to change before launch.
2) Once the Status LED turns Solid White (approx. 5 seconds), the Installer needs
to press the Add Client button located at the top of the Genie Air
TM
to force a
SWDL to the Genie Air
TM
(if necessary).
•SWDL over Broadband takes priority over SWDL over Satellite.
•The Status LED will change to Flashing White while the download occurs.
•Do not unplug or reset the Genie Air
TM
while it is in the Flashing White
LED state.

Product Manual Genie Air
TM
Version 1.3.0 – 11/22/2016
Page 16 DIRECTV, Inc. Proprietary and Confidential
功
功功
功能變
能變能變
能變數代
數代數代
數代碼變
碼變碼變
碼變更
更更
更
•The SWDL duration via Satellite will be approx. the same as today while
the broadband download will be faster.
•Once the download completes, the Genie Air
TM
will reboot itself, and LED
sequence will go back to step 1 (Status LED Off for approx. 10 seconds,
Solid White for approx. 5 seconds)
•SWDL failure: In case of any issues during SWDL, the Status LED will
start Flashing Red. At this point the Genie Air
TM
will reboot itself and
attempt to download the software again.
3) The Status LED will turn Flashing Green (approx. 3-4 minutes), and the Add
Client button will begin Flashing Green (this indicates that the Installer’s Mobile
App and Wireless Clients can connect to the Genie Air
TM
).
4) The Installer can see the Initial setup screens by one of the following:
•On the Installer’s mobile device with the Mobile Installation App (that has
been previously configured), turn the Wi-Fi On. Then connect the
Installer’s mobile device to the Genie Air
TM
internal WVB wireless network
and launch the App. The role of the App is to allow the technician to setup
the Genie Air
TM
without a TV connected to it.
•If the Installer’s Mobile Device is unable to detect the WVB
Wireless Network, press the “Add Client” Button on the Genie
Air
TM
.
•This connection does not need Internet or cellular service.
•The steps for the one-time configuration of the Mobile Installation
App is explained in the Appendix.
•Connect a Wireless client to a TV to see the same installation screens
that will be displayed on the Mobile Installation App. If the screens don’t
appear, press the “Add Client” Button on the Genie Air
TM
•Connect a Wired Client to a TV and the Genie Air
TM
MoCA network to see
the same installation screens that will be displayed on the Mobile
Installation App.
5) The following Satellite Dish Setup (Verifying configuration) screen will be
displayed on the Mobile Installation App (or clients).
Other manuals for Genie
3
Table of contents
Other DirecTV Receiver manuals

DirecTV
DirecTV H20 User manual

DirecTV
DirecTV HD DVR Receivers User manual

DirecTV
DirecTV HIRD-B4 User manual

DirecTV
DirecTV D11 User manual

DirecTV
DirecTV SL5 User manual

DirecTV
DirecTV R34 User manual

DirecTV
DirecTV R15 User manual

DirecTV
DirecTV D10 User manual

DirecTV
DirecTV GenieGO Gen 2 User manual

DirecTV
DirecTV DIRECT TV User manual

DirecTV
DirecTV GENIE HR44 User manual

DirecTV
DirecTV HIRD-E6 User manual

DirecTV
DirecTV HIRD-E4 User manual

DirecTV
DirecTV H20 User manual

DirecTV
DirecTV D10 Manual

DirecTV
DirecTV C61W User manual

DirecTV
DirecTV Genie User manual

DirecTV
DirecTV L12 User manual

DirecTV
DirecTV HD RECEIVER User manual

DirecTV
DirecTV HAH-SA User manual