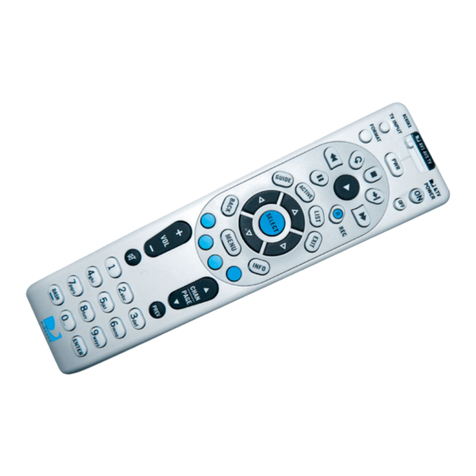
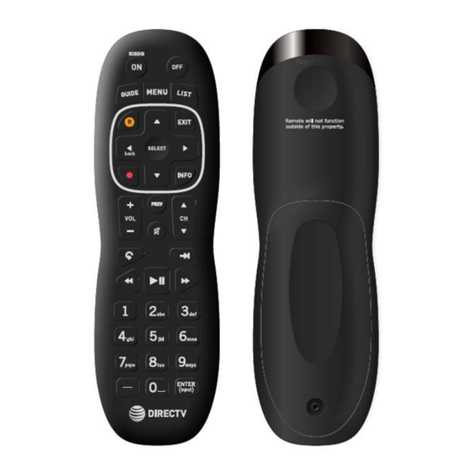
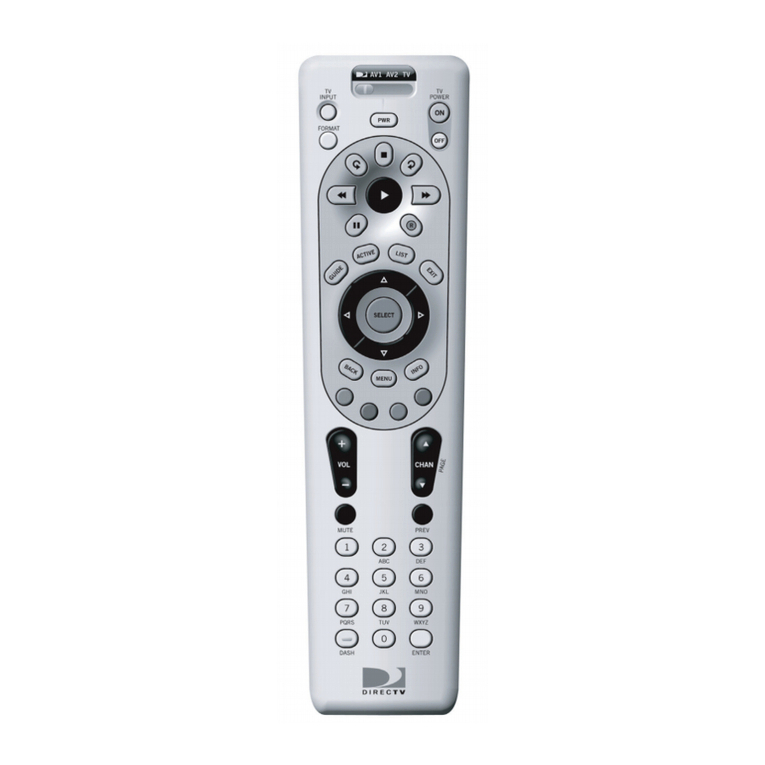
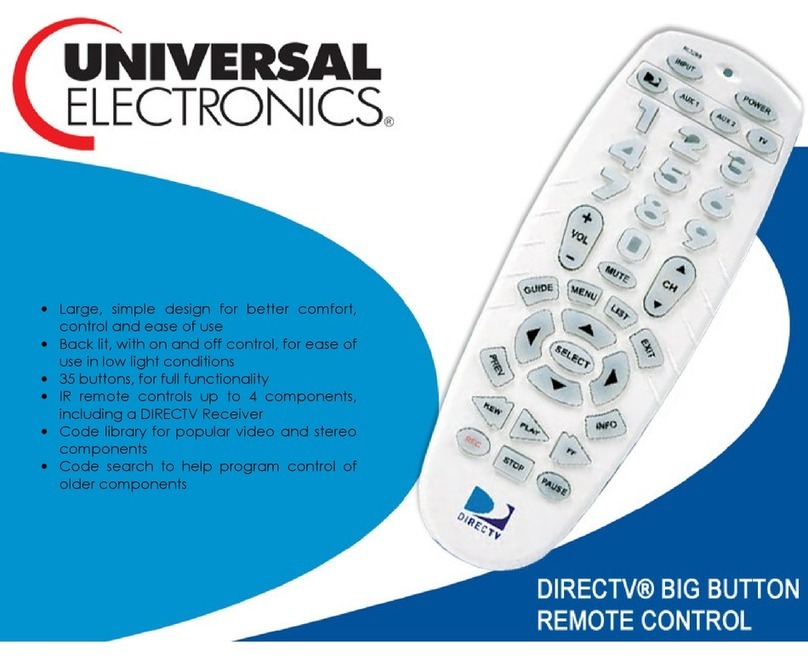
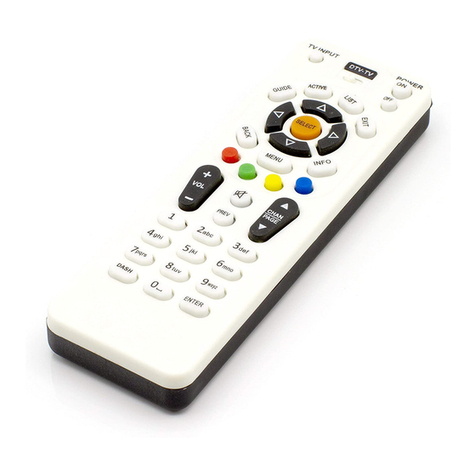
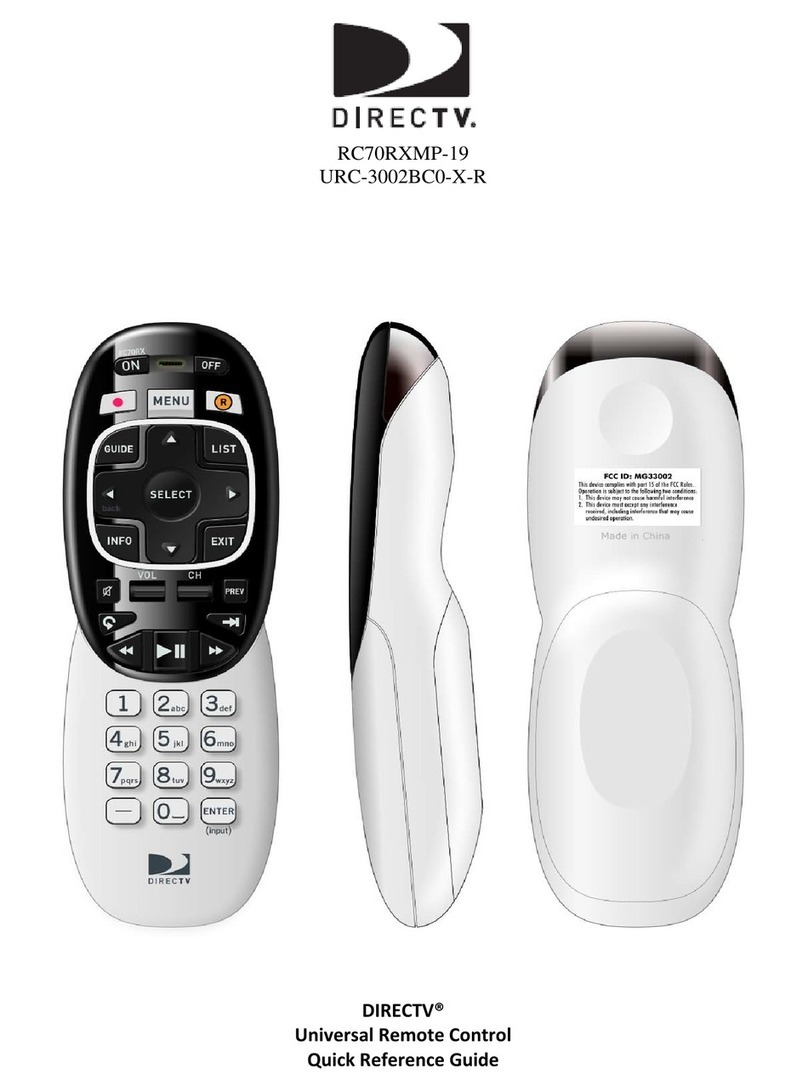
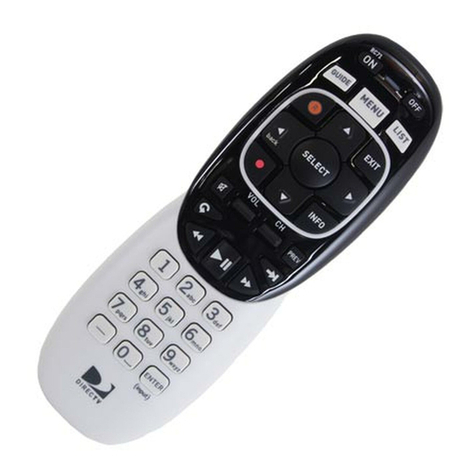
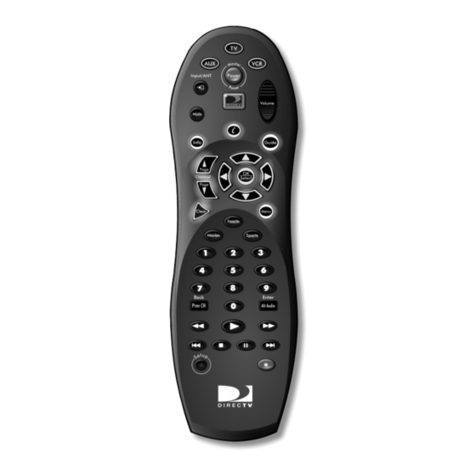
DirecTV C66RBX User manual

1
DIRECTV®
Universal Remote Control
User Guide
DIRECTV RC65RBX.fm Page 1 Wednesday, May 5, 2010 6:25 PM

2
2
CONTENTS
Introduction . . . . . . . . . . . . . . . . . . . . . . . . . . . . . . . . . . . . . . . . . . . . 3
Features and Functions . . . . . . . . . . . . . . . . . . . . . . . . . . . . . . . . . . . 4
Key Charts. . . . . . . . . . . . . . . . . . . . . . . . . . . . . . . . . . . . . . . . . 4
Installing Batteries . . . . . . . . . . . . . . . . . . . . . . . . . . . . . . . . . . . . . . . 7
Controlling Your DIRECTV® Receiver. . . . . . . . . . . . . . . . . . . . . . . . . 7
Setting Up Your DIRECTV Remote . . . . . . . . . . . . . . . . . . . . . . 7
Onscreen Remote Setup . . . . . . . . . . . . . . . . . . . . . . . . . . . . . . . . . . 8
Advanced Remote Settings. . . . . . . . . . . . . . . . . . . . . . . . . . . . . . . . 13
Controlling Your TV . . . . . . . . . . . . . . . . . . . . . . . . . . . . . . . . . . . . . . 18
Controlling Other Components . . . . . . . . . . . . . . . . . . . . . . . . . . . . . 19
Searching for TV, AV1 or AV2 Codes . . . . . . . . . . . . . . . . . . . . . . . . . 19
Verifying the Codes . . . . . . . . . . . . . . . . . . . . . . . . . . . . . . . . 20
Changing Volume Lock . . . . . . . . . . . . . . . . . . . . . . . . . . . . . . . . . . . 21
Locking Volume to AV1, AV2 or TV . . . . . . . . . . . . . . . . . . . . . 21
Activating and Deactivating the RF Transmitter . . . . . . . . . . . . . . . 21
Activating the RF Transmitter. . . . . . . . . . . . . . . . . . . . . . . . . 21
Deactivating the RF Transmitter . . . . . . . . . . . . . . . . . . . . . . 22
Restoring Factory Default Settings . . . . . . . . . . . . . . . . . . . . . . . . . 22
Troubleshooting . . . . . . . . . . . . . . . . . . . . . . . . . . . . . . . . . . . . . . . . 22
DIRECTV Setup Codes . . . . . . . . . . . . . . . . . . . . . . . . . . . . . . . . . . . . 24
Setup Codes for DIRECTV® Receivers . . . . . . . . . . . . . . . . . . 24
Setup Codes for DIRECTV® HD Receivers . . . . . . . . . . . . . . . 24
Setup Codes for DIRECTV® DVRs . . . . . . . . . . . . . . . . . . . . . . 25
Setup Codes, Other Devices . . . . . . . . . . . . . . . . . . . . . . . . . . . . . . . 25
Setup Codes for TVs . . . . . . . . . . . . . . . . . . . . . . . . . . . . . . . . 25
Setup Codes for TV/DVD Combos . . . . . . . . . . . . . . . . . . . . . . 33
Setup Codes for TV/VCR Combos . . . . . . . . . . . . . . . . . . . . . . 34
Setup Codes for VCRs . . . . . . . . . . . . . . . . . . . . . . . . . . . . . . . 36
Setup Codes for Satellite Set-top Boxes . . . . . . . . . . . . . . . . 39
Setup Codes for Satellite Set-top Box/PVR Combos . . . . . . . 40
Setup Codes for DVD Players . . . . . . . . . . . . . . . . . . . . . . . . . 40
Setup Codes for Audio Receivers. . . . . . . . . . . . . . . . . . . . . . 44
Setup Codes for Audio Amplifiers. . . . . . . . . . . . . . . . . . . . . . 47
Setup Codes for Audio Accessories . . . . . . . . . . . . . . . . . . . . 47
Repair or Replacement Policy . . . . . . . . . . . . . . . . . . . . . . . . . . . . . 48
Additional Information . . . . . . . . . . . . . . . . . . . . . . . . . . . . . . . . . . . 48
Compliance with FCC Rules and Regulations. . . . . . . . . . . . . . . . . . 48
DIRECTV RC65RBX.fm Page 2 Wednesday, May 5, 2010 6:25 PM
Deactivating the TV Input Select Key . . . . . . . . . . . . . . . . . . . . . . . 18

3
3
INTRODUCTION
Congratulations! You now have an exclusive DIRECTV®
Universal Remote Control that will control four
components, including a DIRECTV Receiver, TV, and two
stereo or video components (for example, a DVD, stereo, or
second TV). Moreover, its sophisticated technology allows
you to consolidate the clutter of your original remote
controls into one easy-to-use unit that's packed with
features such as:
• Four-position MODE slide switch for easy component
selection
• Code library for popular video and stereo components
• Code search to help program control of older or dis-
continued components
• Memory protection to ensure you will not have to re-
program the remote when the batteries are replaced
Before using your DIRECTV Universal Remote Control, you
may need to program it to operate with your particular
component. Please follow the instructions detailed in this
guide to set up your DIRECTV Universal Remote Control so
you can start enjoying its features.
DIRECTV RC65RBX.fm Page 3 Wednesday, May 5, 2010 6:25 PM

4
4
FEATURES AND FUNCTIONS
Key Charts
Press this key… To…
Slide the MODE switch to the DIRECTV, AV1,
AV2 or TV positions to select the component
you want to control. A green LED under
each switch position indicates the
component being controlled.
Press TV INPUT to select the available inputs
on your TV.
NOTE: Additional setup is required to
activate the TV INPUT key. (See
instructions on page 18.)
Press FORMAT to cycle through the
resolution and screen formats. Each press
of the key cycles to the next available
format and /or resolution. (Not available on
all DIRECTV®Receivers.)
Press PWR to turn on/off the piece of
equipment the mode switch is set to.
Press TV POWER ON/OFF to turn the TV and
DIRECTV Receiver on or off.
(NOTE: These keys are only active after the
remote has been setup for your TV. See
page 18.)
Use these keys to control your DIRECTV
DVR or your VCR, DVD, or CD/DVD player.
On a DIRECTV DVR, enables one-
touch record for any selected program.
Replay jumps back 6 seconds and
plays video from that location. You can also
hold the button down to jump back to the
beginning.
Advance jumps ahead in a recording.
You can also hold the button down to jump
forward to the end.
Use GUIDE to display the DIRECTV
Program Guide. Press twice to see
programs by category.
DIRECTV RC65RBX.fm Page 4 Wednesday, May 5, 2010 6:25 PM
de

5
5
ACTIVE displays the DIRECTV Active™
Channel which includes local weather,
horoscopes and more!
For non-DVR boxes, pressing LIST takes
you to the To Do List. For DVR boxes, LIST
takes you to the Playlist (recordings). (Not
available on all DIRECTV®Receivers.)
Press EXIT to exit menu screens and the
Program Guide and return to live TV.
Press SELECT to choose highlighted items
in menu screens or the Program Guide.
Use the ARROW keys to move around in the
Program Guide and menu screens.
Press BACK to return to the previously
displayed screen.
Press MENU to display the Quick Menu in
DIRECTV mode, or other menu for another
selected device.
Use INFO to display current channel and
program information when watching live
TV or in the Guide.
Displays various options while viewing live
TV, the Guide or the Playlist.
Press YELLOW* to display TV Options
Press BLUE* in full-screen TV to display the
Mini-Guide.
Press RED* in the Guide to jump 12 hours
back.
Press GREEN* in the Guide to jump 12
hours forward.
*Other functions vary–look for onscreen
hints or refer to your DIRECTV®Receiver's
user guide. (Not available on all DIRECTV
Receivers.)
Press VOL to raise or lower the sound
volume. The volume key is only active
when the remote is set up for your TV.
Press this key… To…
DIRECTV RC65RBX.fm Page 5 Wednesday, May 5, 2010 6:25 PM

6
6
While watching TV, press CHAN (or
CHAN) to select the next higher (or
lower) channel.
While in the DIRECTV Program Guide or
menu, press PAGE+ (or PAGE-) to page up
(or down) through available channels in
the Guide.
Press MUTE to turn the sound off or back
on.
Press PREV to return to the last channel
viewed.
Press the number keys to directly enter a
channel number (e.g. 207) while watching
TV or in the Guide.
Press DASH to separate main and sub-
channel numbers.
Press ENTER to activate number entries
quickly.
Use the LIGHT key, located on the right side
of your remote control, to turn backlighting
of all keys on or off.
Press this key… To…
DIRECTV RC65RBX.fm Page 6 Wednesday, May 5, 2010 6:25 PM

7
7
INSTALLING BATTERIES
1. On the back of the remote control, push down on the
door (as shown), slide the battery cover off, and
remove the used batteries.
2. Obtain two (2) new AA alkaline batteries. Match their
+ and - marks to the + and - marks in the battery
case, then insert them.
3. Slide the cover back on until battery door clicks into
place.
CONTROLLING YOUR DIRECTV® RECEIVER
The DIRECTV®Universal Remote Control comes
programmed to work with most DIRECTV Receivers.
Should the remote control not work with your DIRECTV
Receiver, you will need to set up the remote control by
performing the following steps.
Setting Up Your DIRECTV Remote
1. Locate the DIRECTV Receiver's brand and model
number (on the back or bottom panel) and write it in
the spaces below.
BRAND: ......................................................................
MODEL: ......................................................................
DIRECTV RC65RBX.fm Page 7 Wednesday, May 5, 2010 6:25 PM

8
8
2. Locate the 5-digit code for your DIRECTV®Receiver.
(See page 24.)
3. Power on the DIRECTV Receiver.
4. Slide the MODE switch to the DIRECTV position.
5. Press and hold the MUTE and SELECT keys at the same
DIRECTV position
6. Using the number keys, enter the 5-digit code. If
performed correctly, the green light under the
DIRECTV position flashes twice.
7. Aim the remote at your DIRECTV Receiver and press
the PWR key once. The DIRECTV Receiver should
turn off; if it does not, repeat steps , trying
each code for your brand until you find the correct
code.
8. For future reference, write down the working code for
your DIRECTV Receiver in the blocks below:
ONSCREEN REMOTE SETUP
Once your remote is setup to work with your DIRECTV®
Receiver, you can also set it up to control your TV, DVD,
VCR, Stereo and other equipment.
Program your remote to control your TV:
1. Turn on your TV and DIRECTV Receiver.
2. Slide the MODE switch to the DIRECTV position.
3. Press MENU on your remote control, then select
“Parental, Fav's & Setup,” “ System Setup,” a n d
“Remote Control.”
4. Select “Program Remote.”
5. Select “Setup TV.”
DIRECTV RC65RBX.fm Page 8 Wednesday, May 5, 2010 6:25 PM
4 - 7
time until the green light under the
flashes twice, then release both keys.

9
9
6. Enter the brand name of your TV using the on-screen
keypad or the number keys on your remote. When the
brand appears in the list, highlight it and press
SELECT.
7. Enter the model number of your TV using the on-
screen keypad or the number keys on your remote.
When the model number appears in the list, highlight
it and press SELECT. If you don't know the model
number, select “I don't know my model.”
8. Read the on-screen Setup Instructions and select
“OK.”
TIP: Don't forget to keep your remote pointed at the
DIRECTV Receiver! Your remote is receiving
information from the DIRECTV Receiver.
9. Read the on-screen Code Test instructions. You'll be
asked to test whether pressing the VOLUME +/- on the
DIRECTV Remote adjusts the TV volume. If the TV
volume changed, select “It Worked.” If the TV volume
did not change, select “Try Next Code,” which will
repeat the process starting from step 8.
DIRECTV RC65RBX.fm Page 9 Wednesday, May 5, 2010 6:25 PM

10
10
10. When TV setup is complete, the Program Remote
screen will display giving you the option to change
your settings or set up the remote to control another
device.
Program your remote to control a DVD Player, VCR,
Audio Equipment, or second TV
EXAMPLE : You want to control your DVD player with your
DIRECTV remote. You will assign Mode, AV1 to
your DVD player.
1. Turn on your TV, DIRECTV Receiver and the device
you want to control (Ex. DVD Player).
2. Slide the MODE switch to the DIRECTV position.
3. Press MENU on your remote control, then select
“Parental, Fav's & Setup,” “ System Setup,” a n d
“Remote Control.”
4. Select “Program Remote.”
5. Select either “Setup AV1” or “Setup AV2” (Ex. Select
“Setup AV1”).
6. Select the device you want to set up. You'll be given the
following options: DVD, Audio Equipment, VCR or
TV (Ex. Select “DVD”).
DIRECTV RC65RBX.fm Page 10 Wednesday, May 5, 2010 6:25 PM

11
11
7. Enter the brand name of your device using the on-
screen keypad or the number keys on your remote.
When the brand appears in the list, highlight it and
press SELECT.
8. Enter the model number of your device using the on-
screen keypad or the number keys on your remote.
When the model number appears in the list, highlight
it and press SELECT. If you don't know the model
number, select “I don't know my model.”
9. Read the on-screen Setup Instructions and select
“OK.”
TIP: Don't forget to keep your remote pointed at the
DIRECTV Receiver! Your remote is receiving
information from the DIRECTV Receiver.
10. Read the on-screen Code Test instructions. You'll be
asked to test whether pressing PWR (Power) on the
DIRECTV Remote powered off your device. If the
device powered off, select “It Worked.” If it stayed on,
select “Try Next Code,” which will repeat the process
starting from step 8.
DIRECTV RC65RBX.fm Page 11 Wednesday, May 5, 2010 6:25 PM

12
12
11. When setup is complete, the Program Remote screen
will display, giving you the option to change your
settings or set up the remote to control another
device.
Copy existing remote settings to another DIRECTV
Remote
Once you've set up a DIRECTV Remote to control your TV
and other devices, your receiver stores this information.
This way, if you lose your remote (and get a replacement),
or you upgrade to a newer model, you can copy your
previous remote settings to the new remote.
1. Turn on your TV and DIRECTV Receiver.
2. Slide the MODE switch to the DIRECTV position.
3. Press MENU on your remote control, then select
“Parental, Fav's & Setup,” “ System Setup,” a n d
“Remote Control.”
4. Select “Program Remote.”
5. Select “Copy Settings.”
6. Read the on-screen Copy Settings instructions and
select “OK.”
DIRECTV RC65RBX.fm Page 12 Wednesday, May 5, 2010 6:25 PM

13
13
TIP: Don't forget to keep your remote pointed at the
DIRECTV Receiver! Your remote is receiving
information from the DIRECTV Receiver.
Reset your DIRECTV Remote to factory default settings
You can reset the remote control to factory default settings
which clears all but the DIRECTV mode.
1. Turn on your TV and DIRECTV Receiver.
2. Slide the MODE switch to the DIRECTV position.
3. Press MENU on your remote control, then select
“Parental, Fav's & Setup,” “ System Setup,” a n d
“Remote Control.”
4. Select “Reset Remote.”
5. Follow the on-screen instructions.
ADVANCED REMOTE SETTINGS
In addition to setting up your DIRECTV Remote to control
your TV and other devices the following Advanced Settings
are available: IR/RF Setup, Volume Lock, Set Receiver Mode
and Multi-Box Setup.
IR/RF Setup
Your DIRECTV Remote Control features RF (radio
frequency) capability. When you activate the RF feature of
your remote control, you can control your DIRECTV
Receiver from anywhere in your home. You do not need to
be within the line of sight of your receiver to control it.
NOTE: Not all DIRECTV Receivers are RF-capable. Also,
some RF-capable DIRECTV Receivers include integrated
RF antennas and do not require an external antenna. If
your receiver requires the external RF antenna, before
activating the RF transmitter, locate the RF antenna
included with your remote control and insert it into the RF
remote antenna coaxial connector on the back of your
DIRECTV Receiver.
To activate the RF transmitter on your DIRECTV Remote:
1. Turn on your TV and DIRECTV Receiver.
DIRECTV RC65RBX.fm Page 13 Wednesday, May 5, 2010 6:25 PM

14
14
2. Slide the MODE switch to the DIRECTV position.
3. Press MENU on your remote control, then select
“Parental, Fav's & Setup,” “ System Setup,” a n d
“Remote Control.”
4. Select “Program Remote.”
5. Select “Advanced.”
6. Select “IR/RF Setup.”
7. Change remote type from “IR” to “RF” and select
“Continue.”
DIRECTV RC65RBX.fm Page 14 Wednesday, May 5, 2010 6:25 PM

15
15
8. Follow the on-screen instructions to complete the
process.
Volume Lock
If you've programmed your DIRECTV remote to control
your TV, this “locks” the VOL +/- and MUTE control to your
TV. In other words, any time you press the VOL +/- or MUTE
keys on your remote, it will adjust the volume through your
TV, regardless of the position of the MODE switch.
If you want the audio for your DIRECTV programs to come
through a component other than your TV (Ex. Stereo), you
can “lock” volume control to that device as follows:
1. Turn on your TV, DIRECTV Receiver and other
component (Ex. Stereo).
TIP: If you have not already done so, first program
your remote to control your TV and then pro-
gram your remote to control your other compo-
nents, Ex. Stereo. See instructions on pages 8
and 10, respectively.
2. Slide the MODE switch to the DIRECTV position.
3. Press MENU on your remote control, then select
“Parental, Fav's & Setup,” “ System Setup,” a n d
“Remote Control.”
4. Select “Program Remote.”
5. Select “Advanced.”
6. Select “Volume Lock.”
DIRECTV RC65RBX.fm Page 15 Wednesday, May 5, 2010 6:25 PM

16
16
7. Select the device you want to control audio (Ex. Stereo
that you’ve already programmed to AV2) and select
“OK.”
8. Follow the on-screen instructions to complete the
process.
TIP: Don't forget to keep your remote pointed at the
DIRECTV Receiver! Your remote is receiving
information from the DIRECTV Receiver.
DIRECTV RC65RBX.fm Page 16 Wednesday, May 5, 2010 6:25 PM

17
17
9. If Volume Lock was successful, the following message
will display. If not, you will be given the options to
“Try Again” or “Cancel.”
Set Receiver Mode
To program your remote to control 2 receivers located in the
same room:
1. Turn on your TV and DIRECTV Receiver.
2. Slide the MODE switch to the DIRECTV position.
3. Press MENU on your remote control, then select
“Parental, Fav's & Setup,” “ System Setup,” a n d
“Remote Control.”
4. Select “Program Remote.”
5. Select “Advanced.”
6. Select “Set Receiver Mode.”
7. Follow the on-screen instructions to complete the
process.
Multi-Box Setup
To program your remote to control 3 or more DIRECTV
Receivers in one room:
1. Turn on your TV and DIRECTV Receiver.
2. Slide the MODE switch to the DIRECTV position.
3. Press MENU on your remote control, then select
“Parental, Fav's & Setup,” “ System Setup,” a n d
“Remote Control.”
4. Select “Program Remote.”
5. Select “Advanced.”
6. Select “Multi-Box Setup.”
7. Follow the on-screen instructions to complete the
process.
DIRECTV RC65RBX.fm Page 17 Wednesday, May 5, 2010 6:25 PM

18
18
CONTROLLING YOUR TV
Once you have successfully set up your DIRECTV Remote
to operate your DIRECTV Receiver, you can set it up to
control your TV. We recommend you use the on-screen
steps described on page 8, but you can also use the
manual method below:
1. Turn on the TV.
NOTE: Please read steps 2-5 completely before proceed-
ing. Highlight or write down the codes and com-
ponent you wish to set up before moving on to
step 2.
2. Locate the 5-digit code for your TV. (See “Setup
Codes for TVs” on page 25.)
3. Slide the MODE switch to the TV position.
4. Press and hold the MUTE and SELECT keys at the same
time until the green light under the TV position
flashes twice, then release both keys.
5. Using the number keys enter the 5-digit code for your
brand of TV. If performed correctly, the green light
under TV flashe twice.
6. Aim the remote at your TV and press the PWR key
once. Your TV should turn off. If it does not turn off,
repeat steps , trying each code for your brand
until you find the correct code.
7. Slide the MODE switch to the DIRECTV position. Press
TV POWER. Your TV should turn on.
8. For future reference, write down the working code for
your TV in the blocks below:
ING UP TV INPUT KEY
TV INPUT key, follow the steps
1. Slide the MODE switch to the TV position.
2. Press and hold the MUTE and SELECT keys at the same
3. Using the number keys enter 9-6-0. (The green light
under the TV position flashes .)
DIRECTV RC65RBX.fm Page 18 Wednesday, May 5, 2010 6:25 PM
s
4 - 6
SELECT DEACTIVAT
If you want to deactivate the
below. Pressing the TV INPUT Key will now do nothing.
time until the green light under the TV position flashes
flashes twice, then release both keys.
four times

19
19
CONTROLLING OTHER COMPONENTS
The AV1 and AV2 switch positions can be setup to control a
VCR, DVD, Stereo, second DIRECTV Receiver or second TV.
We recommend you use the onscreen steps described
on page 8, but you can also use the manual method below:
1. Turn on the component you wish to control (Ex. your
DVD Player).
2. Locate the 5-digit code for your component. (See
“Setup Codes, Other Devices” starting on page 25.)
3. Slide the MODE switch to the AV1 (or AV2) position.
4. Press and hold the MUTE and SELECT keys at the same
time until the green light under AV1 (or AV2) flashes
twice, then release both keys.
5. Using th keys, enter the 5-digit code for the
brand of component being set up. If performed
correctly, the green light under the selected position
flashes twice.
6. Aim the remote at your component and press the PWR
key once. The component should turn off; if it does
not, repeat steps , trying each code for your
brand until you find the correct code.
7. Repeat steps 1 through 6 to set up a new component
under AV2 (or AV1).
8. For future reference write down the working code for
the component(s) set up under AV1 and AV2 below:
AV 1 :
COMPONENT: ___________________
AV 2 :
COMPONENT:___________________
SEARCHING FOR TV, AV1 OR AV2 CODES
If you were unable to find the code for your brand of TV or
component, you can try a code search. This process may
take up to 30 minutes.
1. Turn on the TV or component. Insert a tape or disk if
applicable.
2. Slide the MODE switch to the TV, AV1 or AV2 position,
as desired.
3. Press and hold the MUTE and SELECT keys at the same
time until the green light under the selected switch
position flashes twice, then release both keys.
DIRECTV RC65RBX.fm Page 19 Wednesday, May 5, 2010 6:25 PM
4 - 6
umbere n

20
20
4. Enter 9-9-1 followed by one of the following four-
digits:
5. Press PWR, or other functions (e.g. PLAY for VCR) you
want to use.
6. Point the remote at the TV or component and press
CHAN. Repeatedly press CHANuntil the TV or
component turns off or performs the action you
selected in step 5.
NOTE: Every time CHANis pressed the remote
advances to the next code and power is trans-
mitted to the component.
7. Use the CHANkey to step back a code.
8. When the TV or component turns off or
performs the action you selected in step 5, stop
pressing the CHANkey. Then, press and release the
SELECT key.
NOTE: If the light flashes 3 times before the TV or com-
ponent responds, you've cycled through all
codes and the code you need is not available. You
must use the remote that came with your TV or
component.
Verifying the Codes
Once you have set up the DIRECTV®Universal Remote
Control using the above steps, use the following
instructions to find out the 5-digit code to which your
component responded:
1. Slide the MODE switch to the appropriate position.
2. Press and hold the MUTE and SELECT keys at the same
time until the green light under the selected switch
position flashes twice, then release both keys.
3. Enter 9-9-0. (The green light under the selected
switch position flashes twice.)
4. To view the first digit in the code, Press and release
the number 1 key. Wait three seconds, and count the
number of times the green light flashes. Write this
number down in the leftmost TV, AV1 or AV2 code
box found on 19. (page 18 for TV, page 19 for AV1, AV2)
5. Repeat step 4 four more times for the remaining
digits; i.e., press number 2 for the second digit, 3 for
the third digit, 4 for the fourth digit and 5 for the final
digit.
COMPONENT TYPE COMPONENT ID #
Satellite 0
TV 1
VCR/DVD/PVR 2
Stereo 3
DIRECTV RC65RBX.fm Page 20 Wednesday, May 5, 2010 6:25 PM
Green light ( LED) flashes twice after entering
component I.D.
Table of contents
Other DirecTV Remote Control manuals

DirecTV
DirecTV STREAM User manual

DirecTV
DirecTV RC65 User manual

DirecTV
DirecTV RC73 User manual

DirecTV
DirecTV RC32 User manual

DirecTV
DirecTV RC73 User manual

DirecTV
DirecTV RC-64 Operating instructions

DirecTV
DirecTV Remote Control User manual

DirecTV
DirecTV RC32BB User manual

DirecTV
DirecTV RC71 User manual

DirecTV
DirecTV Universal Remote Control User manual