Distech Controls UNIWAVE User manual

User Guide
UNIWAVE

2 UNIWAVE
Copyright
©, Distech Controls Inc., 2018 - 2019. All rights reserved.
While all efforts have been made to verify the accuracy of information in this manual, Distech Controls
is not responsible for damages or claims arising from the use of this manual. Persons using this man-
ual are assumed to be trained HVAC professionals and are responsible for using the correct wiring
procedures, correct override methods for equipment control and maintaining safe working conditions
in fail-safe environments. Distech Controls reserves the right to change, delete or add to the informa-
tion in this manual at any time without notice.
Distech Controls, the Distech Controls logo, Innovative Solutions for Greener Buildings, ECO-View, Al-
lure, and Allure UNITOUCH are registered trademarks of Distech Controls, Inc. The
Bluetooth
® word
mark and logos are registered trademarks owned by Bluetooth SIG, Inc. and any use of such marks is
under license. All other trademarks are property of their respective owners.
Copyright

Table of Contents
3UNIWAVE
TABLE OF CONTENTS
CHAPTER 1
Introduction.......................................................................................................................................................4
About This User Guide .............................................................................................................................4
Referenced Documentation .......................................................................................................... 4
Conventions Used in this Document............................................................................................. 4
CHAPTER 2
Home Screen....................................................................................................................................................5
CHAPTER 3
Main Menu........................................................................................................................................................6
CHAPTER 4
Lighting Control ................................................................................................................................................7
Lighting Groups ........................................................................................................................................8
CHAPTER 5
Temperature Control ........................................................................................................................................9
CHAPTER 6
Fan Control.....................................................................................................................................................10
CHAPTER 7
Sunblind Control .............................................................................................................................................11
Sunblind Rotational Angles.....................................................................................................................12
Sunblind Groups .....................................................................................................................................12
CHAPTER 8
Custom Actions ..............................................................................................................................................13
CHAPTER 9
Settings...........................................................................................................................................................14
my
PERSONIFY App..............................................................................................................................15
Device Information..................................................................................................................................15

4 UNIWAVE
CHAPTER 1
Introduction
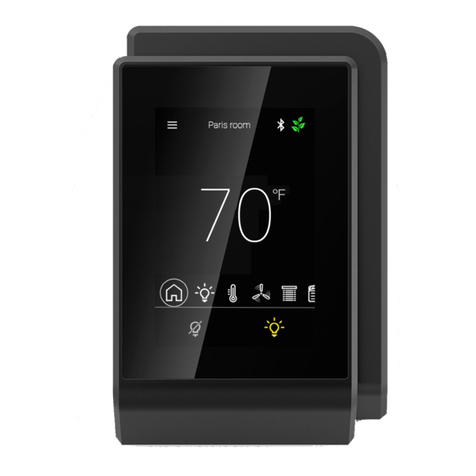
The UNIWAVE Series is a new range of modern wireless interfaces which allows users to manage all
comfort settings for a room. This technology is available in a remote-control version for control directly
from your desk or as a wireless wall-mounted sensor which is particularly suitable for renovation or
retrofit projects or areas where wiring is impossible.
About This User Guide
This user guide shows you how to setup and operate the Allure UNIWAVE and Remote UNIWAVE.
This user guide does not provide and does not intend to provide instructions for safe wiring practices.
It is the user’s responsibility to adhere to the safety codes, safe wiring guidelines, and safe working
practices to conform to the rules and regulations in effect in the job site jurisdiction. This user guide
does not intend to provide all the information and knowledge of an experienced HVAC technician or
engineer.
The UNIWAVE is a programmable communicating sensor and remote that can have many different
configurations. While all efforts were made to show every option, icon, and screen available, some op-
tions represented in this document may or may not be available to you on your UNIWAVE device
based on its EC-
gfx
Program code.
Referenced Documentation
The follow documentation is referenced in this document.
£Device Installation Guides
£EC-
gfx
Program User Guide
£ECLYPSE User Guide
EC-
gfx
Program is the programming software used by techncians to configure the User Interface and screens of
UNIWAVE device.
Conventions Used in this Document
This is an example of Note text. Wherever the note-paper icon appears, it means the associated text is
giving a time-saving tip or a reference to associated information of interest.
This is an example of Caution or Warning text. Wherever the exclamation icon appears, it means that there
may be an important safety concern or that an action taken may have a drastic effect on the device,
equipment, and/or network if it is improperly carried out.
Introduction

5UNIWAVE
CHAPTER 2
Home Screen
The home screen provides a quick view of the name and temperature of the room or the temperature
setpoint depending of the configuration. It also indicates whether the lights are on or off. Pushing the
UP and DOWN arrows will adjust the temperature, and the LEFT and RIGHT arrows toggle the lights
on or off. Press the OK button to view or modify other settings.
Home Screen

6 UNIWAVE
CHAPTER 3
Main Menu
The Main Menu can be accessed by pressing the OK button. From here, controls for lighting, tempera-
ture, fan speed, blinds, custom actions and advanced settings can be accessed using the arrows and
OK button. In addition, at the bottom of the screen there is a quick access button to toggle occupied or
unoccupied mode.
Icon Description
Additional lighting options can be found here such as light intensity, automatic mode and lighting groups.
Adjust temperature settings and view room conditions such as humidity and CO2.
Adjust fan speed and toggle automatic mode on or off.
Adjust the position and angle of the blinds,
Enable any configured custom actions. Custom actions are programmed and configured using EC-
gfx
Program.
Enter the settings menu to toggle between Fahrenheit and Celsius, view QR codes for quick access to the
my
PERSONIFY mobile application, and view device information.
OCCUPIED /
UNOCCUPIED
Toggle between OCCUPIED and UNOCCUPIED mode.
Main Menu

7UNIWAVE
CHAPTER 4
Lighting Control
The main lighting control can be configured here. The center graphic indicates the current light inten-
sity level.
Icon Description
Use the UP and DOWN arrows to move the slider icon to adjust the dimming level of the lights. Using this
will override Auto mode.
Press the OK button on the lighting groups icon to access the lighting group controls.
Auto OFF / ON
Use the OK button to toggle automatic mode ON. To turn Auto mode OFF, adjust the light intensity slider,
or the light bulb MIN / MAX icons. The auto function parameters are configured using EC-
gfx
Program. See
the EC-
gfx
Program User Guide for more information.
Lights OFF / ON
Press the OK button on the lightbulb icon to quickly toggle the lights to either the OFF or ON position.
Lighting Control

8 UNIWAVE
Lighting Groups
Up to eight lighting groups can be used. The lighting groups must first be programmed using EC-
gfx-
Program and enabled or disabled using the ECLYPSE Web Interface. See the ECLYPSE User Guide
and the EC-
gfx
Program User Guide for more information.
Once the lighting groups are open, use the UP and DOWN arrows to highlight the desired group and
use the OK button to input your choice. Once a lighting group has been selected, the name of the
group will appear on the lighting controls screen to indicate that a lighting group is currently being
used. The lighting controls will now operate for that specific lighting group only. To change or exit the
current lighting group, press the back button .
Lighting Control

9UNIWAVE
CHAPTER 5
Temperature Control
The main temperature settings can be adjusted here. Ambient temperature or the temperature set-
point (depending of the configuration) is displayed in the middle of the screen.
Depending on the programming with EC-
gfx
Program and the model of UNIWAVE, certain options may
not be present.
Icon Description
The percent humidity is indicated here.
The measured carbon dioxide level (in ppm) is indicated here.
The temperature setpoint and heating/cooling mode is displayed here. Use the UP and DOWN arrows to
adjust the temperature, then press the OK button to validate the change.
Depending on the chosen programming, the setpoint offset may be displayed instead.
Temperature Control

10 UNIWAVE
CHAPTER 6
Fan Control
The main fan settings can be controlled here. The center graphic displays the current fan speed set-
ting.
Depending on the programming with EC-
gfx
Program, Fan Control will be displayed in either Level or
Analog mode. Use the UP and DOWN arrows to move the slider to the desired position. Use the OK
button to confirm your selection if in Level mode. Automatic mode can be activated by selecting the
Auto mode icon and pressing OK.
Analog fan mode Level fan mode
Fan Control

11UNIWAVE
CHAPTER 7
Sunblind Control
The main controls for sunblinds can be found here. The slider displays the current sunblind vertical po-
sition.
Icon Description
Press the OK button on the sunblind rotational angle icon to access the sunblind rotational angle controls.
Use the UP and DOWN arrows to move the slider icon to adjust the vertical position of the sunblinds.
Press the OK button to validate your selection.
Auto OFF / ON
Use the OK button to toggle automatic mode ON. To turn Auto mode OFF, adjust the sunblind slider or the
rotational angle. The auto function parameters are configured using EC-
gfx
Program. See the EC-
gfx
Program User Guide for more information.
Press the OK button on the sunblind groups icon to access the sunblind group controls.
Sunblind Control

12 UNIWAVE
Sunblind Rotational Angles
The sunblind rotational angles can be found here. Use the UP and DOWN arrows to select the desired
rotational angle and press OK to validate your selection. Press the back button to return to the main
sunblind control screen.
Availability of some rotational angles may be limited to the programmed settings.
Sunblind Groups
Up to eight sunblind groups can be used. The sunblind groups must first be programmed using EC-
gfx
Program and enabled or disabled using the ECLYPSE Web Interface. See the ECLYPSE User
Guide and the EC-
gfx
Program User Guide for more information.
Once the sunblind groups are open, use the UP and DOWN arrows to highlight the desired group and
use the OK button to input your choice. Once a sunblind group has been selected, the name of the
group will appear on the sunblind controls screen to indicate that a sunblind group is currently being
used. The sunblind controls will now operate for that specific sunblind group only. To change or exit
the current sunblind group, press the back button .
Sunblind Control

13UNIWAVE
CHAPTER 8
Custom Actions
Custom actions must first be programmed using EC-
gfx
Program and enabled or disabled using the
ECLYPSE Web Interface. See the ECLYPSE User Guide and the EC-
gfx
Program User Guide for
more information.
Depending on the programmed configuration of the custom actions, different options will be available
for each action.
To enable a custom action, use the UP and DOWN arrows to highlight the desired custom action from
the list and use the OK button to input your choice. Once a custom action has been chosen, a check-
mark will appear to indicate if the custom action is enabled.
Pressing the back button to return to the Main Menu will show a checkmark next to the Cus-
tom Actions icon to indicate that a custom action is currently enabled.
Custom Actions

14 UNIWAVE
CHAPTER 9
Settings
From the settings menu, a user can choose which units to display, view device information and mobile
app information.
Item Description
Toggle the display units between Celsius and Fahrenheit using the OK button.
Enter the Mobile Apps menu to access a QR code to quickly download the
my
PERSONIFY mobile
application from either the Google Play Store or the Apple App Store.
Enter the Device Information screen to view device information.
Settings

15UNIWAVE
my
PERSONIFY App
Enter the Mobile App screen to reveal QR codes that can be scanned with your mobile device. The
QR code is a shortcut download link for the UNIWAVE companion mobile application,
my
PERSON-
IFY.
Device Information
The Device Information screen displays the current firmware, bootloader, and device model.
Settings

UNIWAVE_UG_10_EN
This manual suits for next models
2
Table of contents
Other Distech Controls Accessories manuals
Distech Controls
Distech Controls EC-Multi-Sensor-BLE User manual

Distech Controls
Distech Controls EC-Multi-Sensor Series Manual
Distech Controls
Distech Controls Allure UNITOUCH Manual

Distech Controls
Distech Controls Allure EC-Smart-Vue Series User manual

Distech Controls
Distech Controls Allure EC-Smart-Air Series User manual

Distech Controls
Distech Controls Allure EC-Sensor Series Manual
Distech Controls
Distech Controls HS-THX User manual
Distech Controls
Distech Controls GS-AQR Manual