Disty distybox 300 User manual
Bedienungsanleitung
1
DE
www.disty.de
German
English
French
Italian
Spanish
DE
EN
FR
IT
ES
Operating
Instructions

Operating instructions
15
EN
Bedienungsanleitung
14
DE
Zulassung/CE-Zeichen
Wir, disty communications gmbh, erklären, dass die
distybox300 mit den grundlegenden Anforderungen und
anderen relevanten Bestimmungen der Richtlinie 1999/5/EU
(Radio und Telekommunication Terminal Equipment, R&TTE)
übereinstimmt. Die Übereinstimmung ist durch das CE Kenn‑
zeichen bestätigt. Die vollständige Konformitätserklärung
kann auf folgender Internetseite eingesehen werden:
www.disty.de
Reinigung
Wischen Sie das Gerät einfach mit einem leicht feuchten Tuch
oder mit einem Antistatiktuch ab; verwenden Sie bitte kein
trockenes Tuch. Vermeiden Sie bitte den Einsatz von Putz‑ und
Scheuermitteln.
Table of contents
distybox300
Important information 16
Connections and indicators 17
Tones 18
Commissioning 19
Mounting 19
Registration/programming 20
Automatic registration 20
Programming mode 21
Activating programming mode 21
Setting parameters in programming mode 22
Annex 26
Technical data 26
Product approval/CE mark 27
Cleaning 27

Operating instructions Operating instructions
16 17
EN EN
Important information
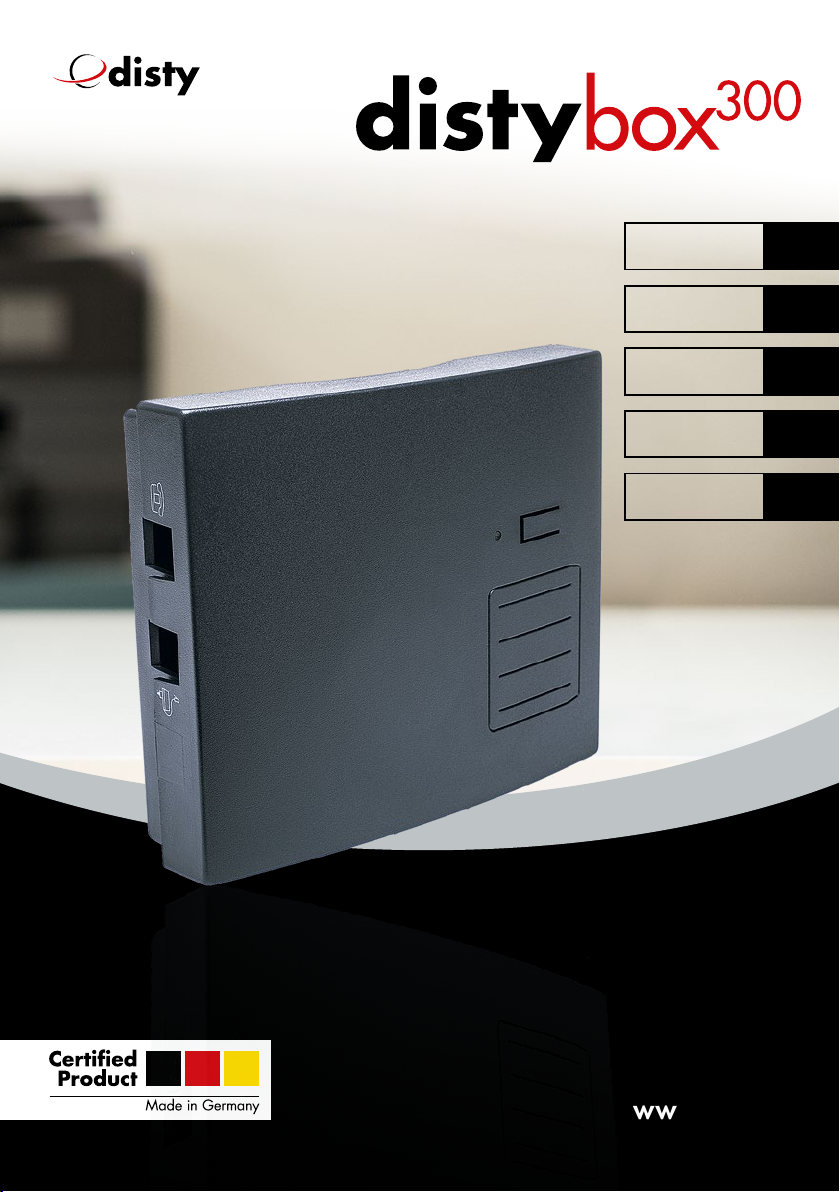
The distybox300 is a DECT‑standard cordless adapter for
universal usage when operating analogue terminals on GAP‑
compatible DECT systems. Essentially a ”cordless extension
cable”, the distybox300 eliminates the need for complicated
cabling work and can be registered on any standard DECT/
GAP base station just like an extra cordless handset. The
distybox300 can be used to connect analogue telephones,
fax machines, answering machines, entrance intercoms and
modems to your DECT base station. The device must use
DTMF dialling (voice frequency signalling); terminals that only
support pulse dialling cannot be used on the distybox300. If
your device uses pulse dialling, please check if it can also be
switched over to DTMF dialling.
The distybox300 features an integrated aerial and has a
standard DECT range of up to 30 m indoors and up to 300 m
out of doors.
More information can be found in the download area on our
homepage www.disty.de
NOTE
Connections and indicator
1Power supply
2Power supply unit (adapter)
After plugging in the power supply unit, the handset on the
connected telephone must remain on the hook for at least
30 seconds.
Only the power unit supplied should be used. Before opening
the housing, ensure that the power supply unit is disconnected!
3LED
I ‑ time interval 8 sec ‑ I LED on
LED off No power supply
Ready to use / standby mode /
power available (220/230 V) /
device is registered at a base station
Incoming call alert
Connection
Programming mode (Menu)
Search for the base
Found the base
No Basis
220/230V
50 Hz 21
4
3
1 m
NOTE
NOTE

Operating instructions Operating instructions
18 19
EN EN
4Line connection Connection for a telephone, fax
machine, answering machine or
modem. The RJ‑11 socket is
assigned to the two middle
connections (pins 3 and 4).
Tones
Dial tone
(continous)
Special dial tone
(400/425Hz, continous)
Busy tone
(425 Hz, repeated)
Positive acknowledge
tone (single)
Negative
acknowledge
tone (single)
Description of the tones
(given in seconds) Pause
Tone
SELECTING
A SUITABLE
LOCATION
Mounting
The distybox300 is designed for wall mounting in interior
rooms.
Please note that the device must not be tted in the immediate
vicinity of any other electronic devices such as hi systems,
ofce machines or microwave ovens. This prevents any inter‑
ference between the devices. In addition, the device should
not be installed near heat sources (e.g. radiators or in direct
sunlight).
To prevent noise interference when making calls, the
connected terminal should not be positioned closer than
one metre away from the distybox300.
The distybox300 must be able to establish a radio link to the
DECT base station. Before determining the nal mounting
position, you should therefore check that your desired location
is within the range of the DECT base station. Owing to the
digital transmission in the frequency range used, there may
be radiowave ”blind spots” even within the specied range,
depending on the nature of the building. This results in
a loss of transmission quality. However, just a small change
in position will restore normal transmission quality. As the
distybox300 works as a cordless unit on your DECT base
station, you can use your cordless handset to check whether
or not the mounting position is suitable.
Follow the steps given below to install the distybox300
1. Drill two 6 mm diameter holes into
the wall at a distance of 60 mm
apart.
2. Insert the rawl plug and turn the
screws until they are approx. 5 mm
away from the wall.
3. Connect your terminal to the
distybox300.
RADIO
COVERAGE
WALL
MOUNTING
60 m
NOTE

Operating instructions Operating instructions
20 21
EN EN
4. Connect the distybox300 to the power supply.
5. Fit distybox300 in place.
The distybox300 must be registered on your DECT/GAP base
station before it can be used. The registration process can
normally be carried out using the ”Automatic registration”
function.
“Programming mode” allows you to set various parameters
to modify the distybox300 to suit the functionality of your
base station. Additional parameters allow the distybox to be
set according to your personal preferences. Manual registra‑
tion can also be carried out in this mode.
Automatic registration
The distybox300 can be registered automatically, assuming
it has not been registered on any other base station yet.
To do this, the PIN on your base station must be set to ”0000”
or ”1111”.
1. Connect the power supply unit (adapter) to your
distybox300.
2. Connect your telephone to the distybox300, leaving the
handset on the hook.
3. Ensure that your base station enables an additional
cordless phone to be registered.
4. During the registration process, the distybox300 should be
located close to your base station.
5. Start the registration procedure for the device on your
DECT/GAP base station as if you were registering an
additional cordless unit. Instructions on how to do this
will be given in the operating manual for your base station.
6. Plug the power supply unit into a power socket.
The registration process will be started automatically.
7. The registration process has been successful if the LED
ashes at intervals of approx. 10 seconds.
If the registration process has not been completed successfully
within approx. 3 minutes, register the device manually in
programming mode.
Programming mode
Programming mode on the distybox300 can only be activated
within the rst 10 minutes after plugging in the power supply
unit. This prevents the parameters being changed accidentally
during operation.
Activating programming mode
To put the distybox300 into programming mode, proceed
as follows:
1. Connect your telephone to the distybox300.
2. Connect the power supply unit to your distybox300.
3. Plug the power supply unit into a power socket. Leave the
phone on the hook for at least 30 seconds.
4. Lift the handset on your telephone. Depending on whether
or not your distybox300 is already registered on a base
station, you will either hear a busy tone or a dialling tone.
5. On your telephone, enter: * * 9
6. You will hear a positive acknowledgement tone.
7.
Optional step: Enter the PIN for the distybox300 via your
telephone.
The PIN only needs to be entered if a new PIN has been set up
beforehand in programming mode.
Access to programming mode can be protected using the PIN!
NOTE
NOTE
NOTE
NOTE

Operating instructions Operating instructions
22 23
EN EN
8. You will hear the special dialling tone indicating that
programming mode is active.
You can now enter the parameter codes to change the
relevant features of your distybox300.
Let’s say, for example, you want to use your distybox300 on
a base station with an ISDN telephone connection. Activate
programming mode as described above in points 1– 8 and
then proceed as follows:
1. Enter the programming code for ”Connection to an ISDN/
analogue Line”: 04
2. To activate the feature, enter: #0
3. You will hear a positive acknowledgement tone, followed
by the special dialling tone once more. The feature is now
active.
Setting parameters in programming mode
Not all the features offered by the distybox300 are
supported by every DECT/GAP base station. Refer to the
operating manual for your base station to clarify which
features you can use.
Programming mode needs to be activated before this pa‑
rameter can be set. The function‑programming process is
concluded by entering # and conrmed by the positive
acknowledgement tone. You will then hear the
special dialling tone once more, which means that you can
continue programming other functions. With the exception of
programming points 90, 91 and 99, the change is effective
without having to restart the distybox300.
If an invalid value is entered during programming, a negative
acknowledgement tone is sounded, the procedure is cancelled
and you will hear the special dialling tone once more.
NOTE
EXAMPLE
If during programming no input is made for one minute, the
procedure is cancelled and you will hear the special dialling
tone again.
Programming mode can be exited at any time by replacing
the handset; the distybox300 will then be returned to normal
mode.
Function Parameter Other input
code
Manual registration 1 Base PIN #
of the distybox300
The base station PIN needs to be entered to register the
distybox300. A PIN with 0 to 8 digits will be accepted by the
distybox300. After entering #you will hear the positive
acknowledge tone. Leave the handset off hook and wait
until you hear again the special dial tone, which means that
the registration is completed. If the registration process has
not been completed successfully within approx. 3 minutes,
crosscheck the settings of the base station and try again.
Access to programming mode can be protected using the
four‑digit PIN.
Connection to 40 0 #
an ISDN/analogue
line
This setting has to be used if your base station is connected
to an ISDN phone line. Send Keypad Information, while
connection Keypad information will be suppressed, so it is
possible to transmit DTMF signals.
40 1 #
Suppress Keypad Information: This setting has to be used if
your base station is connected to an analogue phone line.

Operating instructions Operating instructions
24 25
EN EN
Function Parameter Other input
code
40 2 #
Send always Keypad Information: This setting has to be used
if your base station is a distybase Duo or other specied ISDN
system.
Factory setting: 0
Set PARK 80 PARK nummer #
number
As an option, the registration process can be carried out
using the PARK number of your DECT base station (PARK =
Portable Access Rights Key). This can have up to 15 digits.
The procedure is advisable if the registration process cannot
be completed due to other active DECT base stations. Please
refer to the user’s guide for your base station for further
details about PARK numbers.
Factory setting: no PARK number set.
Activate PARK/ARI 81 0 #
number
The PARK/ARI number set under programming point 80/85
is not used during the registration process.
81 1 #
The PARK/ARI number set under programming point 80/85
is used during the registration process.
Factory setting: 0
Function Parameter Other input
code
Set ARI number 85 31 ARI #
Instead of the PARK number (see Parameter 80) the ARI number
can be used for subsciption. For input of the ARI number use 31
as prex.
Factory setting: no ARI number set.
Reset distybox300 90 #
The distybox300 is reset to the factory settings.
This means, however, that the distybox300 is no longer re‑
gistered on a base station. All previous settings are deleted.
After unplugging/plugging in the adapter, the distybox300
is restarted and reprogramming of the distybox300 can begin.
Reset parameter 91 #
The distybox300 remains registered on the base station;
all other parameters are reset to the factory settings.
After entering the parameter, replace the handset and wait for
30 seconds. The distybox300 will be restarted automatically.
NOTE
NOTE

Operating instructions Operating instructions
26 27
EN EN
Technical data
Standard: DECT (Digital Enhanced Cordless
Telecommunications, GAP‑
compatible)
Frequency range: 1880 MHz to 1900 MHz
Transmission performance: 10 mW on average
Voice transmission: 32 kbit/s ADPCM
Fax mode: Group 3, V.29, 9600 bit/s max.
Modem mode: 9600 bit/s maximum
Dialling mode: DTMF (voice frequency signalling)
Connectable telephones: Up to three standard telephones
can be connected in parallel
CLIP: Transmission via FSK1; protocol
conforms to ETSI standard
Operating temperature: +10°C to +40°wC
Relative humidity: 20% to 75%
Permissible storage
temperature: ‑10°C to +60°C
Display unit: LED
Dimensions: 120 x 100 x 38 mm (W x H x D)
Weight: 140 g
Mounting location: Wall mounting in interior rooms
Power supply: 12 V DC +/‑ 15% = 10.2‑13.8 V
(0.12 A zero signal current,
0.4 A max.)
Delivery package: 230 V AC, 50 Hz power supply
unit, optional adapter
Product approval/CE mark
disty communications gmbh hereby declares that the
distybox300 conforms to the fundamental requirements and
other relevant regulations stated in Directive 1999/5/EU
(Radio and Telecommunication Terminal Equipment, R&TTE).
Conformity is declared by the CE mark. The full declaration
of conformity can be viewed on the following website:
www.disty.de
Cleaning
Simply wipe the device with a slightly damp cloth or with an
antistatic cloth; do not use a dry cloth. Do not use cleaning or
scouring agents.

disty communications GmbH
Holzkoppelweg 14 ·D -2 4118 K i e l
phone +49 (0)4 31·
3 64 58 01
Servicetelefon: +49 (0)4 31 · 3 64 58 24 (German-speaking)
Help & Contact: distybox@disty.de
www.disty.de
Bedienungsanleitung distybox
300
Operating instructions distybox
300
Mat.‑No.: 5000 233 / Version 6.0 / Ausgabe/Edition: 09/2019
Technische Änderungen vorbehalten
/All rights to change reserved
Other manuals for distybox 300
3
Table of contents
Other Disty Adapter manuals


