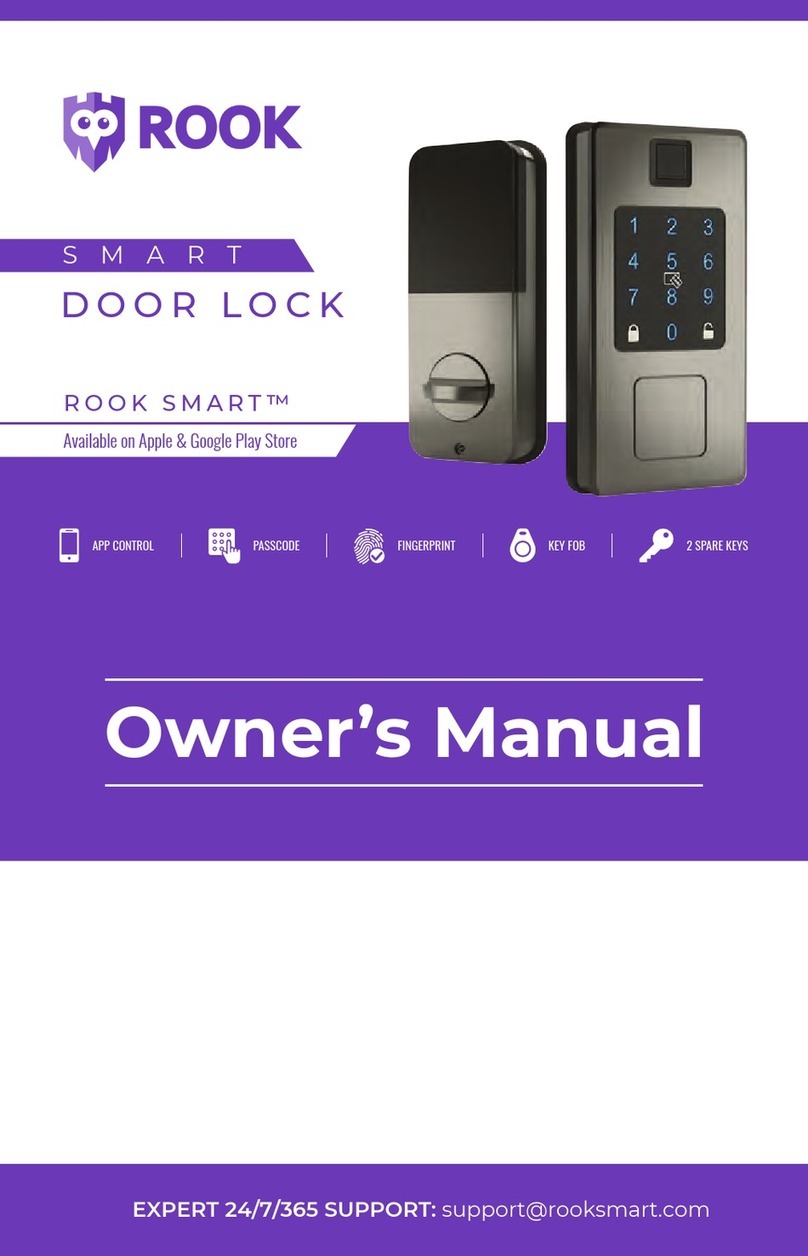
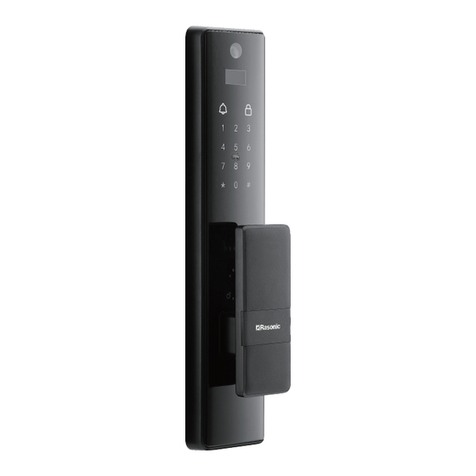
Ditto S-200 User manual

Global Fingerprint Identification Business Solution
Fingerprint Identification Door Lock
User's Manual
S-200
Thank you for using our Ditto product.
Before using this product, read "Cautions for safety" carefully to
ensure correct use.
Please keep this User's manual for your reference at any time.

Caution for establishment and using 1
Name of each parts 2
Main function and characteristics of product 3
Registration of password and fingerprint 5
Deletion of password and fingerprint 9
Using when you enter and leave 11
Additional functions 13
Establishment drawing 15
Establishment order 16
In case of Error or unusual situation 18
Product specification 19
Product quality warranty 20
Standard of consumer loss compensation 21

- 1 -
Before using this product, read "Cautions for safety" carefully to ensure correct use
Please use it according to marked caution for your safety and protecting from product
damage.
When you establish this product
Please do not establish it under high temperature and moisture
Please avoid it from direct sunlight and rain
When you use this product
All functions of this product are initialized when it delivered.
After establishment, please register your or your family member's fingerprint as a master
according to official's direction.
Please do not register other person's fingerprint as a master
(As for registration and using of this product, please refer to each part manual)
Please do not apply unreasonable strong power to slide cover when you enter and leave.
Please do not wipe it as benzene and alcohol
When you carry this product
Please do not drop and impact on it.
Please do not carry it when the slide cover was opened.
Cautions for A/S
We do not take responsibility for any loss or demage by intention after establishment
Please call our customer center when you have any trouble to use this product or when
it out of order.
Suggestions for establishment and use
This manual and contents about specification of
product
can be changed voluntarily for performance improvement
of
product
.

- 2 -
Product composition
1.IN BODY
1. Battery case
2. Auto lock button
3. Registation button
4.
Open/Lock select button
5. Deletion button
6. Outside lock button
(Outside
interception.....)
7. Open/Lock Lever
8. Latch
9. Latch ring
2.OUT BODY
1. No guide window
2. LED Lamp
3. Fingerprint sensor
4. No function button
5. Input/Confirm button
6. Lock button
Contents
Fingerprint Identification door lock:1 User's Manual: 1
Screw for fixing: 16 Latch : 1
Battery(AA size): 4 Drawing for drilling 1
Name of each part

- 3 -
1.Interception function to outside
No one can not enter from outside if you set this function
2.Identification function by master
It is impossible to register, modify and delete without master.
3.Password( 3~9digits)
You can use this function when the sensor out of order or your fingerprint is
damaged
4.Deletion function of part
You can delete and change fingerprint with registered ID.
5.Adoption of outside communication terminal
This function makes it possible to easy ungrade and self-test.
6.Power saving function
You can use it for a long time without change of battery
7.Protection function of circuit
This function protect circuit from static electricity and moisture and help to do
stable operation.
8.Adoption slide cover
We maximize sensor protect and waterproof function
9. Lock function by one touch 원터치 잠금 기능
It operated by pressing only one button when you lock and open
10. Adoption emergency power supply (9v)
Main function and characteristics

- 4 -
This function makes it possible to enter and leave when the battery is discharged
11. Convenient No. key
It is convenient to use when you enter/leave
12.Display function of user
It is easy to administrate registration, modification and etc due to given ID of
fingerprint and password
13.Optical indication window
It offers you convenient service with indicate operation state shown in display
window. Also you can hide above information according to your needs.
14.Low voltage warning function
Buzzer for the time to change battery
15.Hand/Auto lock function
When you establish auto lock function, doors are locked automatically after 7sec.
Also You can change mode to hand operation when enter and leave does frequently
16.System suspension function when identification is refused 3times
This system is suspended for 30seconds when identification is refused 3times
17. Convenient power interception switch
Please press CLOSE button outside to intercept power.
18. Selection of invisible password function according to user's need
It prevent exposure of your password when you enter and leave with it.

- 5 -
1.First Fingerprint Registration
At first, you have to register your fingerprint as a master because there is no fingerprint
information when it delivered. If there is one person to register as master, please register
reliable fingerprint to easy identification . Also registration of several fingerprints are
available.
①After establishment, if you open the cover or put any button, you can register
your fingerprint as a master.
②The first ID will indicate [] .
The ID can be changed by user's fondness using NUM/CLR button [ ]
Please press ENTER button[ ] after confirming ID
(Master ID : []~[ ])
③Please put your fingerprint to register sensor when the LED is turned red.
Caution
:
Please don't move your finger when you register your fingerprint.
④The LED will change green color if you put your fingerprint to right place for
registration. The LED will turn off after finishing registration and remove your
fingerprint from the sensor.
⑤The LED will change red again and repeat the action which you have done
No. ④3 times. If the registration is finished by normally, display window
indicate [],[ ],[ ]. If the registration failed, system restarted
from
first order. Please do it again you have done in above.
⑥When the registration is completed, the LED will change green and you can
hear buzzer sound. Also you can check your ID through the display window.
You can set option function after finishing registration.
(Registration, Deletion, Modification)
Please notice that all function will be operated after master identification.
Registration mode

- 6 -
2.Master Fingerprint Registration
(You can not be a master if you use password)
We encouraged that the master should be one of you family members who has a reliable
fingerprint. (Master ID : []~[ ])
①If you raise slide cover or press any button, electric power is supplied
to
system automatically. If power supply, the LED flickered green color
after
self-test
②When the LED flickered green color, please press registration button outside[ ]
until you can hear buzzer sound.
③Please input registered fingerprint as master when the LED flickered
green
color and display window indicates [].
④The LED will indicate new ID after identification as a master, if you use the ID
without change please choose ENTER button[ ]. Also you can choose your ID
through using NUM/CLR button[ ]. After confirming your ID, please press ENTER
button[ ]
The registration to be completed in the accordance with the three times input of the
master's fingerprint after ID selection.
(For input way, please refer to No 3~4 in First fingerprint registration)
3. User registration
User's ID : From [] to[ ]
■Fingerprint registration
①If you press registration button[ ] shortly once, you can hear buzzer sound
②Please input registered fingerprint as master when the LED flickered
green
color and display window indicates [].
③The LED will indicate new ID after identification as a master, if you use the ID
without change please choose ENTER button[ ]. Also you can choose your ID
through using NUM/CLR button[ ]. After confirming your ID, please press ENTER
button[ ]. At this time the lamp in button flickered green color

- 7 -
☞Reference:
When you make mistake ID input, you can return to First ID
if
you press NUM/CLR [] button long.
④Please input fingerprint which you want to register when the LED change to red.
Caution
:
Please don't move your finger when you register your fingerprint.
⑤If you put your finger to right place LED change to green color. After finishing
registration LED turned off. Please remove your finger at this time.
⑥The LED will change red again and repeat the action which you have done
No. ④3 times. If the registration is finished by normally, display window
indicate [],[ ],[ ]. If the registration failed, system restarted from first
order. Please do it again you have done in above.
⑦When the registration is completed, the LED will change green and you can
hear buzzer sound. Also you can check your ID through the display
window.
⑧After indicating new ID, the lamp in button flickered. If you want to
input
additional fingerprint, please press NUM/CLR button[ ] . If you want to finish
registration, please press ENTER button[ ] .
⑨If you press ENTER button[ ] there is a registration success confirm process in
system The system change to identification mode, After registration is ended.
When LED flickered green color, if you input fingerprint, you can enter or leave. In this
time display window indicates registered ID.
■Password registration
☞Password is available from 3 to 9digits.
①Please press registration button[ ] shortly.
②Please input registered fingerprint as master when the LED flickered
green
color and display window indicates [].
③The LED will indicate new ID after identification as a master, if you use the ID
without change please choose ENTER button[ ]. Also you can choose your ID through
using NUM/CLR button[ ]. After confirming your ID, please press ENTER button[ ].At
this time the lamp in button flickered green color.
④If you press NUM/CLR button[ ] after ID selection, display window indicates

- 8 -
[].
⑤According to the number of your press of NUM/CLR button[ ], the digit will
increased.
⑥Please press ENTER button to register it when you select first No of
your
password.
⑦The display window indicates []. To select the second No of password,
please press NUM/CLR button[ ]. If display window indicates the number, please
press ENTER button[ ].
⑧If password for registration consist of many characters, please repeat above
action in ⑦and⑧as the number of password.
⑨To finish password registration, please press ENTER button[ ] again.
☞
EX)If you want to register 3456 as a password
The display indicate double digit. First number indicate order of password,
and
second number indicate number which you want to register.
Please press NUM/CLR button [] 3 times. If FND indicate [], please
press
ENTER[ ].
Please press NUM/CLR button []4 times. If FND indicate [], please
press
ENTER[ ].
Please press NUM/CLR button [] 5 times. If FND indicate [], please
press
ENTER[ ].
Please press NUM/CLR button [] 6 times. If FND indicate [], please
press
ENTER[ ].
The first number [],[ ],[ ],[ ]in above indicates the order
of
password. And second number [],[ ],[ ],[ ] indicates password.
When you finish to register [],[ ],[ ],[ ] as a password, please
press
ENTER button[ ] to complete password registration.

- 9 -
■Master deletion
( Master's ID :
[]~[ ]
)
①Please press deletion button [] shortly once.
②Please input registered fingerprint as master when the LED flickered green
color and display window indicates [].
③After master identification, input master's ID to erase it by NUM/CLR button
[] and press ENTER button [].
④Please press ENTER button[ ] again to finish deletion.
If you want to do deletion continuously, please press NUM/CLR button []
and repeat an action in ③.
Caution : If there are several registered user and only one master, you
can
delete master after deleting all registered users.
■User's deletion
There are two type of users who are fingerprint users and password users.
When you want to delete user's information, please select ID and then delete it
regardless user's type.
①Please press deletion button[ ] shortly once.
②Please input registered fingerprint as master when the LED flickered green
color and display window indicates [].
③After master identification, please press NUM/CLR button[ ] until
the
display window indicates ID which you want to delete.
④Please press ENTER button [] to delete it.
⑤Please press ENTER button[ ] again to finish deletion.
If you want to do deletion continuously, please press NUM/CLR button []
and repeat actions in ③~④.
■All deletion (System initialized)
Deletion mode

- 10 -
①Please press deletion button [] till you can hear buzzer sound.
②Please input registered fingerprint as master when the LED flickered green
color and display window indicates [].
③The red LED turn on at the same time after finish master identification.
Power turned off after buzzer sound. As this, all information are deleted.
☞Caution: If you want to use again, please refer to manual about The
first
fingerprint registration
.
Caution
: Please pay attention to this function as this function will
delete
all information.

- 11 -
1. When you enter
■Using fingerprint
①If you raise slide cover, electric power is supplied to system automatically.
In case electric power is not supplied, please press any button in outside.
②In case electric power is supplied, the LED flickered green color then input
fingerprint.
③If identification is succeeded, LED is change to green color and door is
opened with buzzer sound
④If identification failed, Display window indicate [] error. Please put your finger to
right place to succeed the identification.
⑤If identification fails 3 times, display window indicate [] error.
In this case, the system is turned off automatically for 30seconds.
☞Caution: In spite of power off, every button and function inside is operated
normally
⑥If you want to use it again, please repeat action in ①~②after 30seconds.
⑦When you want to lock the door, please press OPEN/CLOSE button [
]
inside. Also you can operate lever in inside by hand
■Using password
①If you raise a slide cover, electric power is supplied to system automatically.
In case electric power is not supplied, please press any button outside
②Please press NRM/CLR button[ ], when LED flickered green color.
③When display window indicates [], please input the first No of your
password using NUM/CLR button[ ].
④When display window indicates [], please input the second No of your
password using NUM/CLR button [].
⑤When display window indicates [], please input the third No of your
Entrance & Exit mode

- 12 -
password using NUM/CLR button[ ].
If the registered password is 3digits, please press ENTER button[ ].
Then, identification is completed
If the registered password is more than 3digits, please repeat the actions in ③~
⑤. If you input all password, please press ENTER button[ ].
⑥If identification is succeeded, LED change to green color and door is opened
with buzzer sound
⑦The method to close the door is the same when you use Fingerprint.
☞When automatic lock function is established, the door is
closed
automatically after 7 seconds. Otherwise, if you press OPEN/CLOSE
button,
[]
the door is also closed.
■When you leave
①Please press OPEN/CLOSE button[ ]inside or operate lever inside
by
hand.
②In this state, the door is closed automatically after 7 seconds when you leave.
③When automatic lock function is not established, please press CLOSE button
[] outside to close door.
Caution:After door is closed, If [] error mark with buzzer sound
is
indicated, it means something wrong in lock device. Also, in case door
is
closed abnormally, you can see the same error mark. In case, please
check
your door state and repeat above actions.

- 13 -
■Interception from outside
When this function settled :
Please press button[ ] for interception outside shortly.
The display window indicates [] with buzzer sound.
Under this function, if you try to enter, the display window indicates [] and system is
not operated.
When you remove this function: Please press OPEN/LOCK button[ ] inside or
interception button[ ] outside.
■Lock/Open
Door is opened and closed by only one button CLOSE/OPEN.
■Automatic lock
When this function settled :
Door is closed by automatically after 7 seconds with [] sign in display window, if you
press Automatic lock button[ ].
When you remove this function:
If you press it[ ] again, this function is removed. When automatic lock function is
established, You can press CLOSE/OPEN button within 7sec to close door.
■Law voltage buzzer sound
If battery replace time arrived, system informs you with buzzer sound after power supply
with [] sign in display window.
Caution: The system operated normally, after law voltage warning
sign.
However please change battery because the efficiency is declined as
time
goes by.
■When you forget password or ID which registered password
Please use this function, when you forget password or ID which registered password.
Please press NUM/CLR button[ ] after pressing registration button[ ]. The display
Additional function

- 14 -
window indicates [], after indicating ID which registered password for 2SEC. Please
finish password registration mode, after checking the ID. Please delete the ID in deletion
mode. After deletion, please register new password.
■Selection of invisible password function according to user's need
It prevent exposure of your password when you enter and leave with it.
When LED flickered green color after power supply, please press NUM/CLR button
[] to indicate password. This is password open function. If you press ENTER button
[], there is no password in display window. In this please input your password by
NUM/CLR button [].
■Operation code
Code Operation
Sign of each level when you input your
fingerprint 3 times.
Error code (Please refer to appendix part)
The order of password.
When door is opened
When door is closed
Under automatic lock function
Under interception function from outside
Master identification mode

- 15 -
■Screw standard
No Shape Ea Standard(mm) Name
1 6 4*10 Self Drill screw
2 2 5*18 Flat Head Screw
3 2 4*10 Flat Head Screw
4 2 4*14 Pan Head Screw
5 1 3*8 Pan Washer Head Screw
■Drawing
Establishment drawing

- 16 -
■Tool for establishment
1.Hole cutter (32mm~35mm)
2.Drilling machine
3.Cross driver
☞Caution: As for size of screw, please refer to screw standard chart.
■Order of Establishment
①According to the drawing, please make a hole which size is from 32mm~35mm
to the door.
☞Caution: If there is a hole in existing door lock location, you can use it
②According to the drawing, please mark with a pencil or pen for the location of
screw. Also you can make hole for it.
③After you arrange an iron plate for fixing to inside of door, please fixing it with
4pcs of No 1 screw[ ].
Order of Establishment

- 17 -
④Please fix case of outside with No 2 screw[ ], after drawing out cable
between an iron for fixing
⑤Please cork semicircle hole of inside as a black rubber plug.
⑥Push remained cable after connecting connector of cable with connector of
inside to space between doors and arrange it.
⑦Please fix interior part with No 3[ ] and No 4 []screw
⑧Please fix hasp ring as No 1screw[ ]on hole which you made beforehand
⑨Please fix cover with No 5 screw[ ], after put battery at battery case
according to direction.
■Examination.
①Please confirm whether hand lever is operated without any problem of friction.
②Please confirm whether there is any error or not, when you press OPEN/LOCK
button[ ] inside.
NOTE: This equipment has been tested and found to comply with the limits
for a Class B digital device, pursuant to part 15 of the FCC Rules.
These limits are designed to provide reasonable protection against
harmful interference in a residential installation. This equipment
generates, uses and can radiate radio frequency energy and, if not
installed and used in accordance with the instructions, may cause
harmful interference to radio communications. However, there is
no guarantee that interference will not occur in a particular
installation. If this equipment does cause harmful interference to
Caution: Please notice that case of outside do not incline
Caution: When you fix hasp ring, please make sure there is no friction
with hasp of inside.
Caution:
Please ensure pathway for cable before fixing it with screw.

- 18 -
radio or television reception, which can be determined by turning
the equipment of and on, the user is encouraged to try to correct
the interferenceby one or more of the following measures:
- Reorient or relocate the receiving antenna.
- Increase the separation between the equipment and receiver.
- Connect the equipment into an outlet on a circuit different from that to
which the receiver is connected.
- Consult the dealer or an experienced radio/TV technician for help.
CAUTION: Changes or modifications not expressly approved by
the party responsible for compliance could void the user's
authority to operate the equipment.
Table of contents
Popular Door Lock manuals by other brands
Allegion
Allegion Von Duprin 374-T-BE installation instructions

Ardwolf
Ardwolf A30 user manual

iver
iver Rose Passage Install instructions
U-tec
U-tec Ultraloq U-Bolt Pro Z-Wave Installation and user guide
Salto
Salto XS4 Original+ Ei6 Series installation guide
Paxton
Paxton PaxLock Pro Installation and commissioning guide

