Paxton PaxLock Pro User manual

1
PaxLock Pro - Latch Installation and
Commissioning Guide
Overview
Checks to make prior to installation
Door usage
Through door holes
When installing a PaxLock Pro - Latch, it is important
to ensure the environment the PaxLock Pro - Latch
is to be installed in is t for purpose.
This application note covers the preparation that
should be carried out before, during and after
installation to ensure the longevity of the product
as well as correct installation.
Before installing the PaxLock Pro - Latch onto the door, it is important to check that the door, frame and
any relevant door furniture are in good working order. This is important to ensure both the longevity and
the smooth operation of the product once installed.
The PaxLock Pro - Latch is recommended for use on doors being operated up to 75 times per day. For
usage above this number, we would recommend a Paxton hardwired solution.
The PaxLock Pro - Latch has been designed to work with the supplied tubular latch. The through door
holes must be 63/64" in diameter and the central follower must have at least 15/16" clearance around it.
AN1192-US
PaxLock
2 /"
/"

AN1192-US
PaxLock
2
Door Frame
Floor
It is best practice to ensure there is a gap of 1/8" from the door edge to the frame. The door strike plate
should also be 5/8" to avoid clashing with the PaxLock Pro - Latch when the door is closed.
The distance between the bottom of the door and the oor must be sucient to allow the door to freely
open and close without rubbing on the oor.

AN1192-US
PaxLock
3
Door Closer
Door Stop
If a door closer is being used it must be adjusted to ensure the door closes without slamming but does
not require excessive force to open.
The use of a door stop is advised on doors that can hit an adjacent wall when fully opened. This will
prevent damage being caused to the PaxLock Pro - Latch.
Acoustic and draft seals
Metal doors
Should a door have either an acoustic or draft seal around the outer edge, it is important that the door
can still easily close without putting undue stress on the latch and strike plate. If this is not the case, the
strike plate may need adjusting.
The PaxLock Pro - Latch is suitable for installation onto metal doors providing both the width and tubular
latch are within the specications outlined on the PaxLock Pro - Latch datasheet.
To ensure correct operation, the following must be checked:
• If using in online mode, the bridge may have to be positioned well within the 50ft range as a
metal door will reduce the range of the bridge. To ensure reliable operation, standalone mode
may be more appropriate.
• The anti-rotation tee nut should be replaced with an equivalent M4, self-tapping pan head screw
suitable for installation into metal (not supplied).

AN1192-US
PaxLock
4
Door Widths
Notes will need to be taken on the door thicknesses across a potential site, this information will be required
when ordering the PaxLock Pro - Latch.
• Out of the box, the PaxLock Pro - Latch will work with 1 1/2" - 1 3/4" door widths.
• Before installing a PaxLock Pro - Latch on a unit that is 1 3/8" - 1 13/32", both the spindle and through
door bolts will need to be cut down to the correct length as per the drilling template.
• For door widths of 1 29/32" - 2 1/8" or 2 13/64" - 2 13/32", a separate Wide Door kit will need to be
purchased.
Once you are happy the site is suitable for the PaxLock Pro - Latch, you will need to ensure you have the
right information to order the correct products.
There are 4 sales codes to choose from for the PaxLock Pro - Latch. You'll need to know whether you prefer
the Galaxy or Eclipse handle and if you would like the black or white fascia.
The supplied template ( www.paxton.info/5578 ) should be used to check that the holes in the door are
in the right location and correctly sized for the PaxLock Pro - Latch.
To ensure the PaxLock Pro - Latch is perpendicular to the door edge, it is important to mark and drill the
anti-rotation screw in the correct location, as indicated below.
When passing the PaxLock Pro - Latch through the door to t it, the unit must sit completely ush against
the face of the door. If this is not the case the holes in the door may need adjusting.
After terminating the power and data cables it is important to tuck the cables behind the PCB in the
center of the device, as indicated below.
Ordering the right equipment
During installation

AN1192-US
PaxLock
5
Once the PaxLock Pro - Latch has been installed, there are several checks that can be made to ensure the
product has been installed correctly and is functioning correctly.
When the PaxLock Pro - Latch is rst powered up it will remain in an unlocked state. This will give you the
chance to check the following:
1. Does the latch fully retract when depressing the handle?
2. Does the door open smoothly without rubbing on the frame, latch or oor?
3. When letting go of the handle, does the latch fully return to its natural position?
4. Is it smooth and easy to open the door?
5. When closing the door, does the latch sit within the strike plate?
If the answer is yes to all the above, then either a standalone pack can be enrolled or the unit can be
bound to a Net2Air bridge. If the answer is no, refer to the troubleshooting guide below.
Post installation commissioning
Problem Recommendation
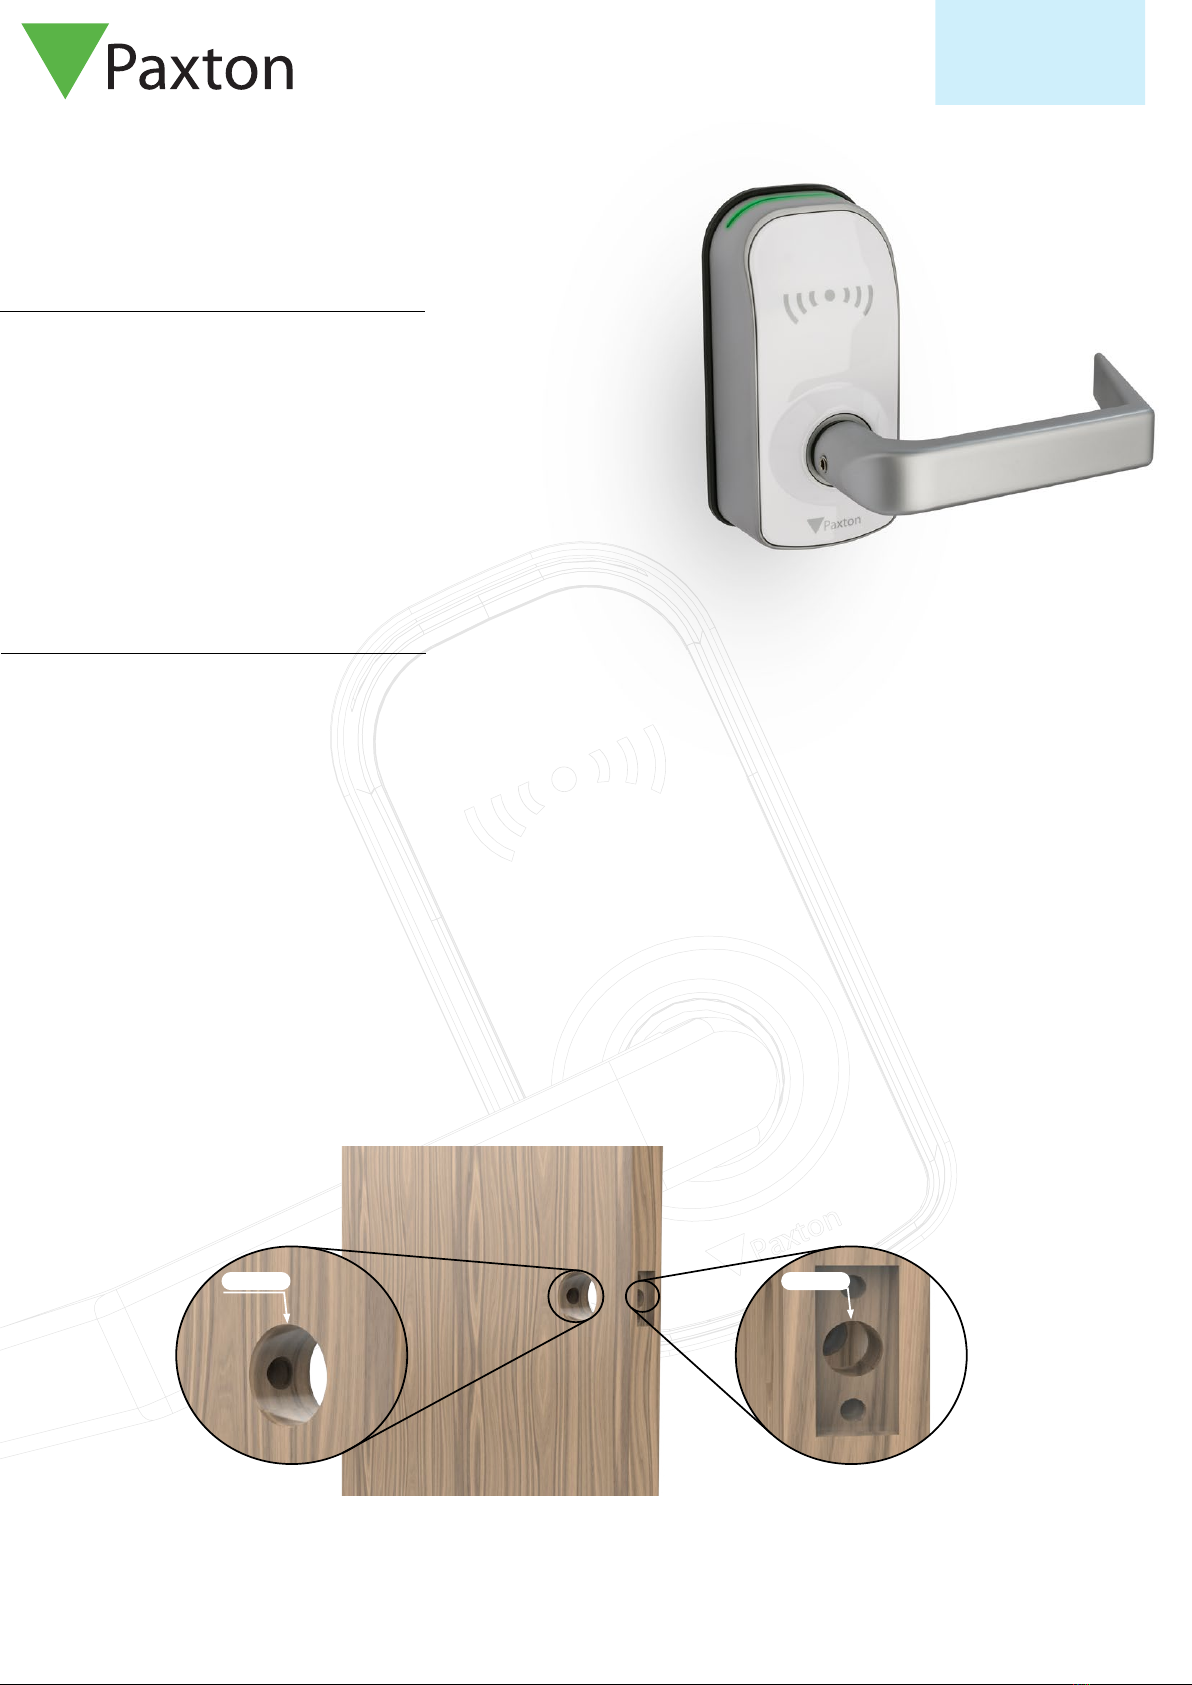
Tubular latch is old, worn or not moving freely.
Lock case
The latch bolt is not fully retracting when the
handle is fully depressed.
When the door is closed the latch does not sit
in the strike plate.
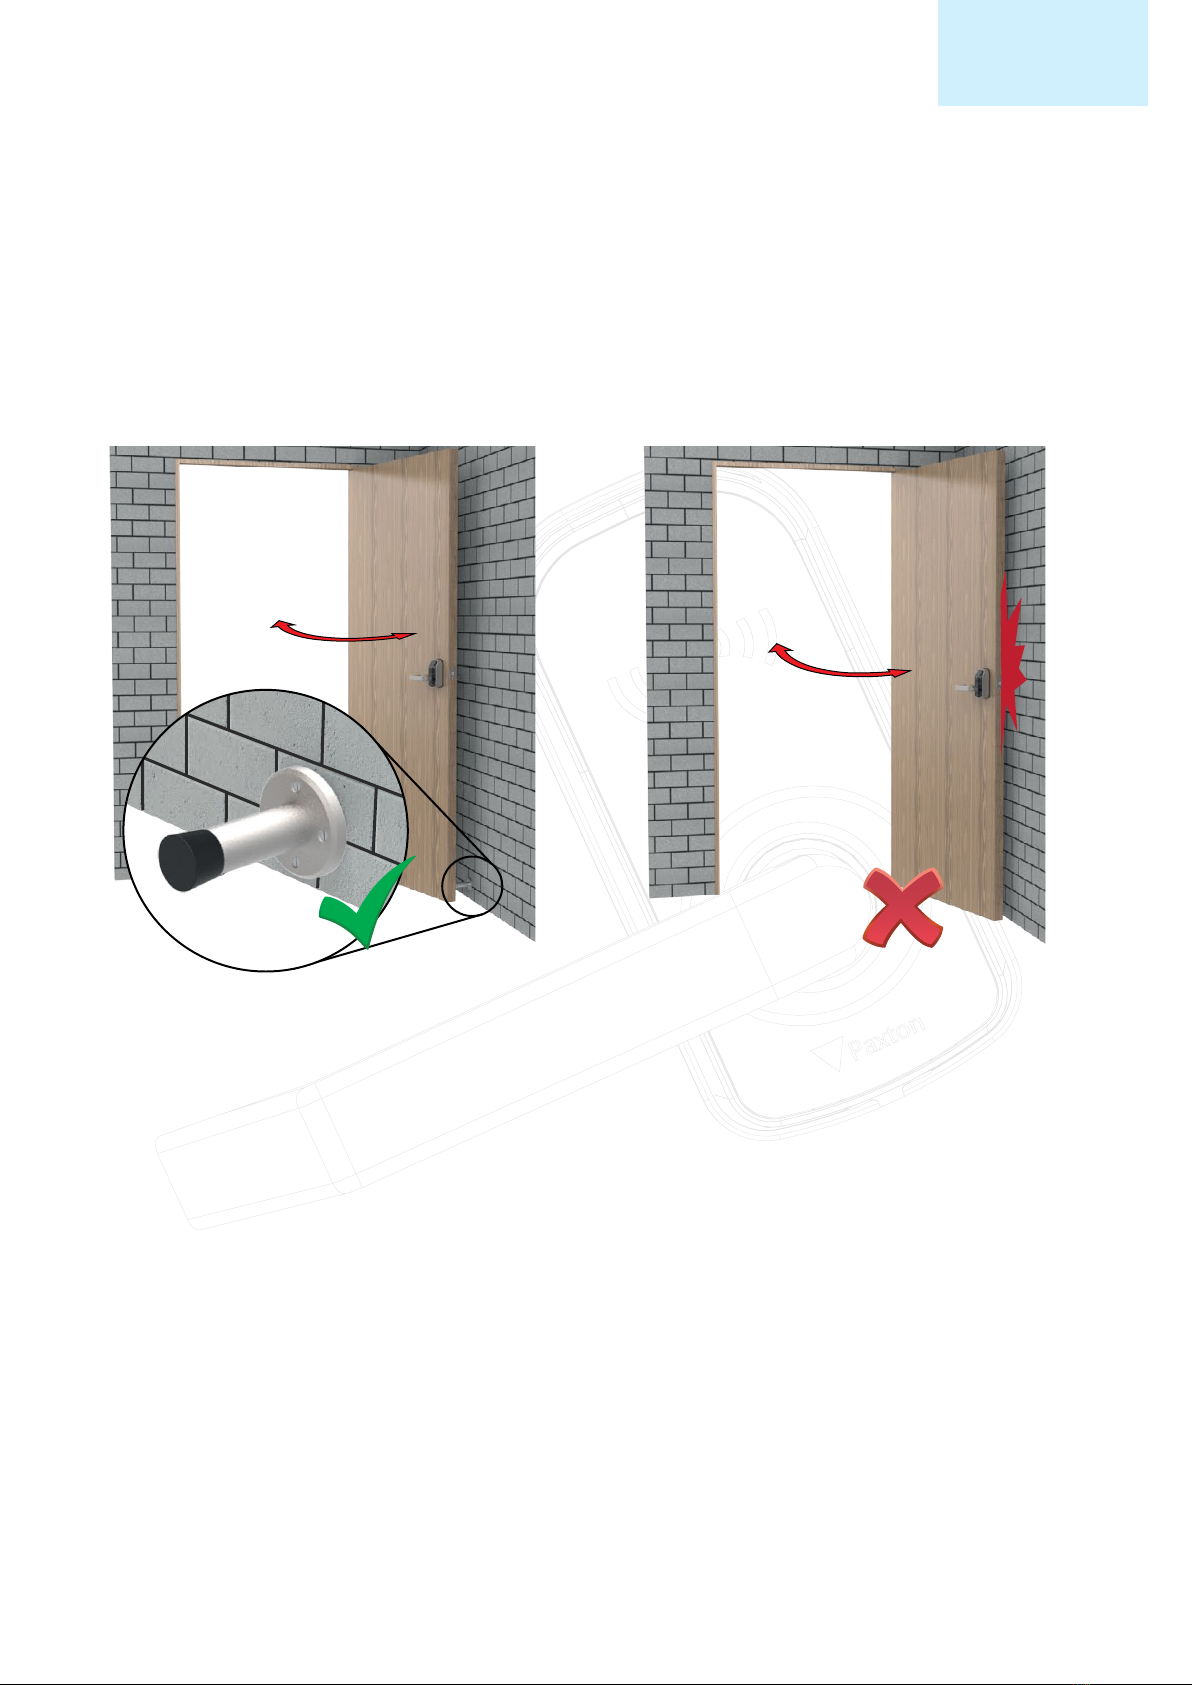
The tubular latch will not retract the latch
when the door is closed, even from the secure
side of the door.
Applying a silicone-based lubricant may
improve this operation. If not, a replacement
tubular latch is recommended. A broken or
worn tubular latch could cause permanent
damage to the PaxLock Pro - Latch, which
would not be covered under the warranty.
The turning angle of the tubular latch must be
45° or lower for the PaxLock Pro - Latch to fully
retract the latch. If it is over this, the tubular
latch will need replacing.
The position of the strike plate should be
adjusted so that the latch sits comfortably in
the strike plate when the door is closed. Failure
to do this compromises the security of the
door.
Check the distance from edge of door to
frame is no more than 1/8". Failure to do
this can in some cases cause issues with the
locking hardware or compromise the security
of the door.
To help improve the quality of the installation and the longevity of the product, several common issues
and potential solutions are listed below.
Troubleshooting

AN1192-US
PaxLock
6
The door is hitting the wall when opened.
Door seals installed post install are applying too
much pressure to the latch and deadbolt.
The door rubs against the frame/oor when
opened.
It is important that a door stop is installed to
prevent the handle hitting a wall or object
when the door is opened fully. Failure to do
this can damage the PaxLock Pro - Latch when
swung open.
Door seals must be routed into the frame to
prevent excessive force on the latch when the
door is closed. The strike plate may need to
be moved if seals have been installed without
accounting for the tolerance needed.
The door or frame may need shaving down to
ensure smooth operation.
Door Hardware
The through door cables have sheered when
installing the handle assembly.
There is free play in the handles.
The PaxLock Pro - Latch is not responding when
I present a token.
This may be because the door is too narrow
for the bolts that have been used. Refer to the
template for the correct bolt and spindle sizes
for each door thickness.
It is important the grub screws on both handles
are fully tightened to remove any free play.
Make sure the secure side chassis is tted.This is
required for the PaxLock Pro - Latch to function.
Paxlock Pro - Latch
The edge of the PaxLock Pro - Latch or handle
is clipping the door frame when opening and
closing the door.
The PaxLock Pro - Latch will not sit ush against
the door when tting.
If this occurs, it may be a result of the
backset on the lock case being too low. We
recommend a 2 3/4" backset to be suitable for
most doors.
The through door holes must be 5/16"
diameter and the central spindle must have
at least 25/32" clearance around it. If this is
not the case, it will need correcting before
installing the PaxLock Pro - Latch.
Event in Net2: "Handle held down during
operation".
This occurs when the handle of the PaxLock Pro
- Latch is held down when a token is presented
to the reader. For proper use of the PaxLock,
present your token, wait for a green LED &
beep, then depress the handle.
Net2

AN1192-US
PaxLock
7
Event in Net2: “Battery-side handle stuck”
or “Reader-side handle stuck.”
These events indicate the respective PaxLock
Pro - Latch handle has been held down for
more than 30 seconds. Most likely, someone
is holding the handle down for too long or
something has been left on the handle.
Other manuals for PaxLock Pro
3
This manual suits for next models
1
Table of contents
Other Paxton Door Lock manuals