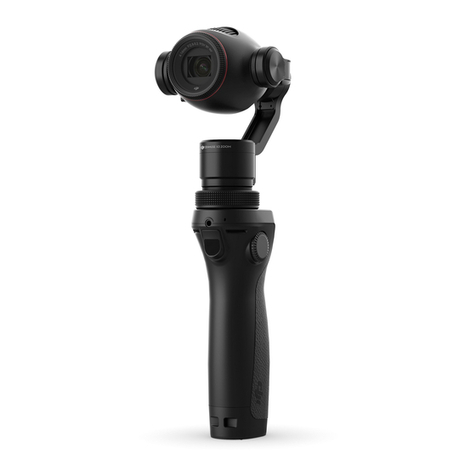
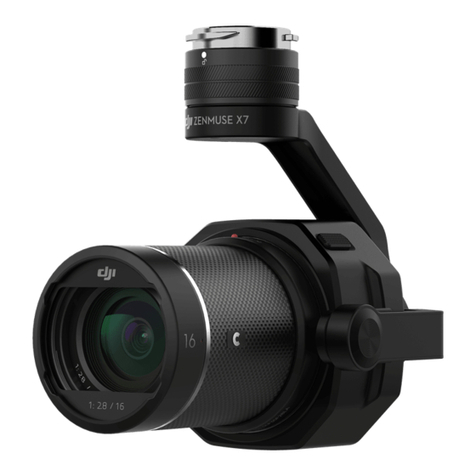
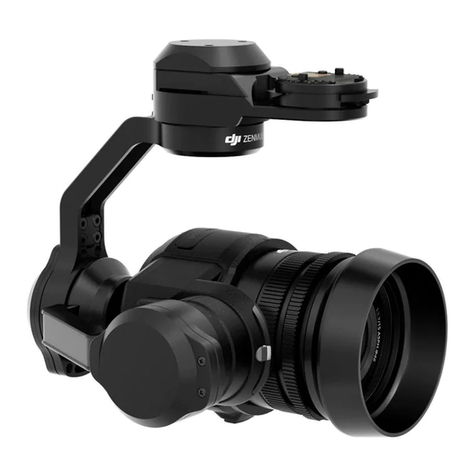
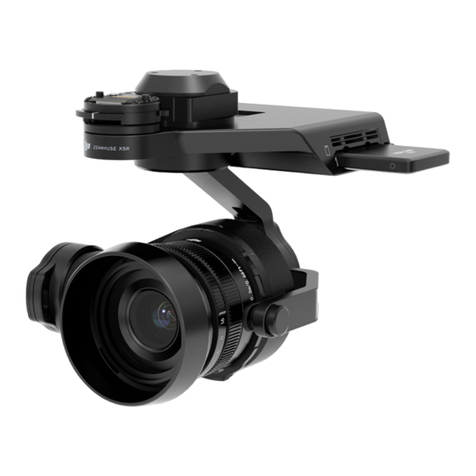
dji Zenmuse X5 User manual

©2016 DJI. All Rights Reserved.
37
Gimbal and Camera
This chapter provides the technical
specications of the camera and explains
the working mode of the gimbal.

38
©2016 DJI. All Rights Reserved.
Camera and Gimbal
CameraProle
The Zenmuse X5 offers advanced photographers a high-performance, robust gimbal and camera system
with an M4/3 interchangeable lens. The Type 4/3 CMOS sensor supports video recording in 4K and
16MP still photos.
The Zenmuse X5 lens kit comes with the DJI MFT 15mm f/1.7 ASPH that provides a 72 degree eld of
view and a manually adjustable f/1.7-f/16 aperture range. The camera can shoot burst, AEB or time-lapse
in JPEG and DNG RAW, and output video in MP4 and MOV formats. Live HD video from the camera can
be viewed on your mobile device through the DJI GO app.
The 3-axis gimbal provides an incredibly stable platform for the camera to capture clear shots even
during high speed maneuvers. The gimbal tilts the camera across a -90° to +30° pitch angle and pans a
full 360 degrees.
Camera Micro-SD Card Slot
To store your photos and videos, plug in the micro-SD card into the slot shown below before powering on
the Inspire 1 Pro. The Inspire 1 Pro comes with a 16GB micro-SD card and supports up to a 64GB micro-
SD card. A UHS-1 type micro-SD card is recommended, because the fast read and write capability of
these cards enables you to store high-resolution video data.
Do not remove micro-SD card from the Inspire 1 Pro when it is powered on.
Camera Data Port
Power on the Inspire 1 Pro and then connect a USB cable to the Camera Data Port to download photos or
videos from the camera to your computer.

©2016 DJI. All Rights Reserved.
39
INSPIRE 1 PRO User Manual
Power on the aircraft before attempting to download the les.
Status LED
The Status LED describes the working status of the camera.
Status LED
Status LED Camera Status
Solid Green Powered on; system is on standby.
Blinks Green quickly (0.1 on, 0.2s off) System is warming up.
Blinks Green once (0.2s off) Taking a single photo.
Blinks Green 3 times (0.2s on, 0.2s off) Burst shooting 3 to 5 photos.
Blinks Red slowly (0.8s on, 0.8s off) Recording video.
Blinks Green and Red alternatively
(0.8s Green, 0.8s Red) Firmware update in progress.
Blinks Red quickly (0.2s on, 0.3s off) SD card error.
Solid Red Firmware update failed.
Blinks Red twice (0.1s on, 0.1s off) Camera overheated.
Camera Operation
Use the Shutter and Record button on the remote controller to shoot the images or the videos through the
DJI GO app. For more information about how to use these buttons, refer to “Controlling Camera” P27.

40
©2016 DJI. All Rights Reserved.
INSPIRE 1 PRO User Manual
Gimbal
GimbalProle
The 3-axis Gimbal provides a steady platform for the attached camera, allowing you to capture
stabilized images and video. The Gimbal can tilt the camera up to 120 degrees and rotate 360
degrees.
Use the gimbal dial on the remote controller to control pitch movement of the camera by default. Note that
you cannot control the pan motion of the camera by default. Enable the “Master-and-Slave” mode and
set the remote controller to “Slave” state if you wish to control both the pan and pitch movement of the
camera.
Pan Control
Follow the instructions below to use the gimbal dial to control the pan movement of the gimbal:
1. Power on the aircraft and remote control, launch DJI GO app and enter “Camera” page.
2. Tap “RC Control Settings” icon and select either C1 or C2 customizable button as the gimbal pitch/
yaw switching button.
3. Select “Gimbal Pitch/Yaw” from the dropdown list.
+320°
-320°
+30°
-90°
0°

©2016 DJI. All Rights Reserved.
41
INSPIRE 1 PRO User Manual
Press C1 or C2 button to switch from pitch mode to yaw mode. You may use the gimbal dial to pan the
gimbal under yaw mode. Press C1 or C2 again to exit yaw mode.
While pressing the C1 button, turn the gimbal dial to focus the X5 camera manually.
While pressing the C2 button, turn the camera settings dial to ne tune the roll axis of the gimbal.
Using DJI GO App to Control Gimbal
Follow the steps below to use DJI GO app to control the gimbal orientation:
1. Launch DJI GO app, enter “Camera” page.
2. Tap and press on the screen until a blue circle is shown.
3. Slide to control the gimbal orientation within the “Camera” page as shown below.
RC Control Setting
Remote Control Calibration
Stick Mode
Gimbal Pitch/YawC1 C2 Reset gimbal yaw
Default stick mode is Mode 2, changing stick modes alters the way the aircraft is controlled.
Do not change unless familiar with your new mode.
You can customize the C1 and C2 buttons on the back
of the remote controller.
Linking Remote Controller
MENU
Safe to Fly (GPS)
P-GPS
H: D:
V.S
M/S M/S
H.S
4.22.3
39M210M
232M
AF/MF
1/320 4821 4K 24
ISO 100 EV 0F 0 LOG

42
©2016 DJI. All Rights Reserved.
INSPIRE 1 PRO User Manual
Follow Mode
The angle between Gimbal’s orientation and aircraft’s nose remains
constant at all times. One user alone can control the pitch motion of the
Gimbal, but a second user is required to control the pan motion using a
second remote controller.
FPV Mode The Gimbal will lock to the movements of the aircraft to provide a First-
Person-View ying experience.
Free Mode
The Gimbal’s motion is independent of the aircraft’s orientation. One user
alone can control the pitch motion of the Gimbal, but a second user is
required to control the pan motion using a second remote controller.
Re-alignment
Tap to force the Gimbal orientation to re-align with aircraft’s orientation
by panning from gimbal’s current orientation. Pitch angle will remain
unchanged during the re-alignment.
Gimbal motor error may occur in these situations: (1) Gimbal is placed on uneven ground. (2)
Gimbal has received an excessive external force, e.g. a collision. Please take off from at, open
ground and protect the gimbal after powering up.
Flying in heavy fog or cloud may make the gimbal wet, leading to a temporary failure. The
gimbal will recover when it dries out.
Pitch Pan
Gimbal Operation Modes
Three Gimbal operation modes are available. Switch between the different operation modes on the
Camera page of the DJI GO App. Note that your mobile device must be connected to the remote
controller for changes to take effect. Refer to the table below for details:
Roll

©2016 DJI. All Rights Reserved.
43
DJI GO App
This chapter describes the four main
GUI of the DJI GO app.

44
©2016 DJI. All Rights Reserved.
MENU
Safe to Fly (GPS)
P-GPS
H: D:
V.S
M/S M/S
H.S
4.22.3
39M210M
232M
AF/MF
1/320 4821 4K 24
ISO 100 EV 0F 0 LOG
DJI GO App
The DJI GO app is a new mobile app designed specically for the Inspire 1 Pro. Use this app to control
the gimbal, camera and other features of your ight system. The app also comes with Map, Store a User
Center, for conguring your aircraft and sharing your content with friends. It is recommended that you use
a tablet for the best experience.
Connect your Aircraft, Take to the Skies
iPad
Equipment Library Discorvery Me
Learn More>
Use AEB shoot to get more dynanic image
Enter Camera View
80%
INSPIRE 1
Camera
The Camera page contains a live HD video feed from the Inspire 1 Pro’s camera. You can also congure
various camera parameters from the Camera page.
[18]
[17]
[16]
[15]
[14]
[13]
[12]
[10][11]
[9]
[8]
[7][6][5]
[4]
[3][2][1]

©2016 DJI. All Rights Reserved.
45
INSPIRE 1 PRO User Manual
[1] Flight Mode
: The text next to this icon indicates the current ight mode.
Tap to congure the MC (Main Controller) Settings. These settings allow you to modify ight limits and
set the gain values.
[2] GPS Signal Strength
: This icon shows the current strength of GPS signals. Green bars indicate adequate GPS
strength.
[3] System Status
: This icon indicates the current aircraft system status and GPS signal strength.
[4] Battery Level Indicator
: The battery level indicator provides a dynamic display of the battery level. The colored
zones on the battery level indicator represent the power levels needed to carry out different functions.
[5] Remote Controller Signal
: This icon shows the strength of remote controller’s signal.
[6] HD Video Link Signal Strength
:
This icon shows the strength of the HD video downlink connection between the aircraft and
the remote controller.
[7] Battery Level
: This icon shows the current battery level.
Tap to view the battery information menu, set the various battery warning thresholds, and view the
battery warning history.
[8] General Settings
: Tap this icon to view the General Settings page. From this page, you can set ight parameters,
reset the camera, enable the quick view feature, adjust the gimbal roll value, and toggle the ight
route display.
[9] Camera Operation Bar
MENU: Photo Styles
Tap MENU -> -> Style to choose from the following styles:
1. Standard
A general-purpose style for most scenes.
2. Landscape
The camera will focus on as much of the scene as possible by using a large depth of eld.
3. Soft
Suitable for scenes with natural or soft colors.

46
©2016 DJI. All Rights Reserved.
INSPIRE 1 PRO User Manual
4. Custom
Sharpness: -3 to +3
Contrast: -3 to +3
Saturation: -3 to +3
MENU: White Balance
Tap MENU -> ->White Balance to choose from the following modes:
1. Auto
The camera adjusts the white balance automatically.
2. Sunny / Cloudy / Incandescent / Neon
Choose one of these modes if natural-looking colors cannot be achieved through photo styles.
3. Custom (2000K~10000K)
Set a value between 2000K and 10000K to compensate for a specic light source.
MENU: List of Settings
Photo
Shooting Modes Single shoot, Burst Mode, AEB(3/5 bracketed frames), Time-lapse
Image Format JPEG, DNG, JPEG+DNG
Image Size 4:3, 16:9
White Balance Auto, Sunny, Cloudy, Incandescent, Neon, Custom (2000K~10000K)
Style Standard, Landscape, Soft, Custom (Sharpness/Contrast/ Saturation)
Color LOG, None, Vivid, Black White, Art, Film, Beach, Dream, Classic, Nostalgia
Video
Video Size UHD:4K (4096×2160) 24/25p, 4K (3840×2160) 24/25/30p,
2.7K (2704×1520) 24/25/30p; FHD:1920×1080 24/25/30/48/50/60p
Video Format MOV, MP4
NTSC/ PAL PAL, NTSC
White Balance Auto, Sunny, Cloudy, Incandescent, Neon, Custom (2000K~10000K)
Style Standard, Landscape, Soft, Custom (Sharpness/Contrast/ Saturation)
Color LOG, None, Vivid, Black White, Art, Film, Beach, Dream, Classic, Nostalgia
General
Quick Preview Off, 1s, 2s, 3s, 4s, 5s, 6s, 7s, 8s, 9s, and 10s
Anti-Flicker Auto, 60Hz, and 50Hz
Show Grid Off, Grid Line, Grid + Diagonal, Center Point
File Index Mode Reset, Continuous
Others Show Histograms, Video Captions, Lens Profile, Reset Camera Settings,
Format SD Card
©2016 DJI. All Rights Reserved.
47
INSPIRE 1 PRO User Manual
: Taking Photos
Slide the Photo/Video Switch to the position. Tap the button or the shutter button on the remote
controller to take a single photo. Choose from one of the shooting modes by tapping “MENU” -> ->
Photo.
1. Burst Mode
Take 3, 5, or 7 shots in a row.
2. AEB (Auto Exposure Bracketing)
Take 3 or 5 bracketed frames with ±0.7EV steps for exposure compensation.
3. Time-lapse
Take photos in 5, 7, 10, 20 or 30 second intervals.
: Recording Videos
Slide the Photo/Recording Switch to the position. Tap the icon or the Record Button on the remote
controller to start or stop recording video.
: Exposure Modes
Tap to choose from the following exposure modes:
1. AUTO
The shutter speed and aperture are set automatically to obtain the correct exposure.
2. S (Shutter Priority)
Set your desired shutter speed, while the camera chooses the aperture automatically. This mode is
ideal for freezing action, creating motion blur or low-light shots.
3. A (Aperture Priority)
Set your desired aperture, while the camera chooses the shutter speed automatically. This mode
provides a wider depth of eld and can be used to blur out backgrounds.
4. M (Manual Exposure)
In general, increase the ISO for low light environments, and decrease the ISO if the surrounding is
very bright.
: Playback
Tap in the DJI GO app or press the Playback Button on the remote controller to review photos and
videos that you have captured. Press the same button again to return to capturing images.
[10 ] Map
Display the ight path of the current ight. Tap to switch from the Camera GUI to the Map GUI.

48
©2016 DJI. All Rights Reserved.
INSPIRE 1 PRO User Manual
[11] Aircraft Distance
: The distance of the aircraft from the Home Point. When the aircraft is near the ground, this icon
will change to to display the height the Vision Position System’s sensors from the ground.
[12] Flight Telemetry
Flight attitude is indicated by the ight attitude icon.
(1) The red arrow shows which direction the aircraft is facing.
(2) Light blue and dark blue areas indicate pitch.
(3) The angle of the boundary between the light blue and dark blue areas indicates the roll angle.
[13] Home Point Settings
: Tap this button to reset the current home point. You may choose to set the aircraft take-off
location, the remote controller’s current position, or the aircraft’s current position as the Home Point.
[14] Return to Home (RTH)
: Initiate RTH home procedure. Tap to have the aircraft return to the latest home point.
[15] Gimbal Operation Mode
Refer to "Gimbal Operation Mode" P42 for more information.
[16] Auto Takeoff/Landing
/ : Tap to initiate auto takeoff or landing.
[17] Livestream
: Livestream icon indicates the current video feed is broadcasting live on YouTube. Be sure the
mobile data service is available on the mobile device.
[18] Back
: Tap to return to the main GUI.
Library
View, edit and share your artwork all in one place. The Library has a range of simple but powerful tools
that let you edit your videos and photos before sharing them online, minutes after they are captured.
Explore
Find out about our latest events, featured products and trending Skypixel uploads in the Explore page.
Me
If you already have a DJI account, you will be able to participate in forum discussions, earn Credits in the
DJI Store, and share your artwork with the community

©2016 DJI. All Rights Reserved.
49
Flight
This chapter describes the flight safety
and ight restrictions.

50
©2016 DJI. All Rights Reserved.
Flight
Once pre-ight preparation is complete, it is recommended to use the ight simulator to learn how to y
safely. Ensure that all ights are carried out in a suitable location.
Flight Environment Requirements
1. Do not use the aircraft in severe weather conditions. These include wind speed exceeding 10m/s ,
snow, rain and smog.
2. Only y in open areas. Tall buildings and steel structures may affect the accuracy of the on-board
compass and GPS signal.
3. Avoid from obstacles, crowds, high voltage power lines, trees or bodies of water.
4. Minimize electromagnetic interference by not flying in area with high levels of electromagnetism,
including mobile phone base stations or radio transmission towers.
5. Aircraft and battery performance is subject to environment factor such as air density and temperature.
Be very careful when ying 14700 feet (4500 meters) or more above sea level as battery and aircraft
performance may be reduced.
6. The Inspire 1 Pro cannot operate within the polar areas in “P” mode.
Flight Limits and Flight Restriction Area
Flight limits on height and distance can be set. The details of these ight limits are described in the following
section.
All unmanned aerial vehicle (UAV) operators should abide by all regulations from such organizations as
the ICAO (International Civil Aviation Organization), FAA and their own national airspace regulations. For
safety reasons, the ight limits function is enabled by default to help users use this product safely and
legally. The ight limits function includes height limits, distance limits and No Fly Zones.
When operating in P Mode, height, distance limits and No Fly Zones work together to manage ight. In A
mode only height limits work and ights cannot go higher than 120 meters.
Max Height & Radius Limits
Max Height & Radius limit ying height and distance, and the user may change these settings in the DJI
GO App. Once complete, your Inspire 1 Pro will y in a restricted cylinder that is determined by these
settings. The tables below show the details of these limits.
Max Height Max Radius
Home Point
Height of aircraft
when powered on

©2016 DJI. All Rights Reserved.
51
INSPIRE 1 PRO User Manual
GPS Signal Weak Blinking Yellow
Flight Limits DJI GO App Aircraft Status Indicator
Max Height Flight height restricted to
120m and under.
Warning: Height limit
reached. None.
Max Radius No limits
If you y out of the limit, you can still control the Inspire 1 Pro, but cannot y it further.
If the Inspire 1 Pro ies out of the max radius in Ready to Fly (non-GPS) mode, it will y back
within range automatically.
No-Fly Zones
All No-Fly Zones are listed on the DJI ofcial website at http://www.dji.com/ysafe/no-y. No-Fly Zones are
divided into Airports and Restricted Areas. Airports include major airports and ying elds where manned
aircraft operate at low altitudes. Restricted Areas include borders between countries or sensitive sites.
The details of the No-Fly Zones are explained below:
Airport:
(1) Airport No-Fly Zones are comprised of Takeoff Restricted Zones and Restricted-Altitude Zones. Each
zone features circles of various size.
(2) R1 depends on the size and shape of the airport, and is an area around the airport that is a Takeoff
Restricted Zone, inside of which take-off and ight is prevented.
(3) From R1 to R1+1 mile around the airport, the ight altitude is limited on a 15 degree incline, starting at
65 feet (20 meters) from the edge of airport and radiating outward. The ight altitude is limited to 1640
feet (500 meters) at R1+1 mile.
(4) When the aircraft is within 320 feet (100 meters) of the No-Fly Zones, a warning message will appear
in the DJI GO app.
GPS Signal Strong Blinking Green
Flight Limits DJI GO App Aircraft Status Indicator
Max Height Flight altitude must be under
the set height.
Warning: Height
limit reached. None.
Max Radius Flight distance must be within
the max radius.
Warning: Distance
limit reached.

52
©2016 DJI. All Rights Reserved.
INSPIRE 1 PRO User Manual
Restricted Areas:
(1) Restricted Areas do not have a ight altitude restriction.
(2) R around the designated Restricted Area is a Take-off Restricted area. Aircraft cannot takeoff within
this zone. The value of R varies depending on the denition of the Restricted Area.
(3) A “warning zone” has been set around each Restricted Area. When the aircraft is within 0.6 miles (1
km) of this zone, a warning message will appear in the DJI GO app.
Restricted Areas
R1
66 feet
1 mile
320 feet R2
100m R
Airports
1640
feet
Restricted Areas
R1
66 feet
1 mile
320 feet R2
100m R
Airports
1640
feet

©2016 DJI. All Rights Reserved.
53
INSPIRE 1 PRO User Manual
GPS Signal Strong Blinking Green
Zone Restriction DJI GO App Prompt
Aircraft
Status
Indicator
No-y Zone
Motors will not start. Warning: You are in a No-y
zone. Take off prohibited.
Red ashing
If the aircraft enters the
restricted area in A mode but
P mode activates the aircraft
will automatically descend to
land then stop its motors after
landing.
Warning: You are in a No-y
zone, automatic landing has
begun. (If you are within 1.5 mile
radius)
Restricted-
altitude ight
zone
If the aircraft enters the
restricted area in A mode but P
mode activates, it will descend
to a safe altitude and hover 15
feet below the safe altitude.
Warning: You are in a restricted
zone. Descending to safe
altitude. (If you are between the
range of 1.5 mile and 5 mile
radius)
Warning: You are in a restricted
zone. Max ight height restricted
to between 10.5m and 120m. Fly
Cautiously.
Warning zone No ight restriction applies, but
there will be warning message.
Warning: You are approaching a
restricted zone, Fly Cautiously.
Free zone No restrictions. None. None.
Semi-automatic descent: All stick commands are available except the throttle stick command
during the descent and landing process. Motors will stop automatically after landing.
When ying in the safety zone, aircraft status indicator will blink red quickly and continue for 3
seconds, then switch to indicate current ying status and continue for 5 seconds at which point
it will switch back to red blinking.
For safety reasons, please do not y close to airports, highways, railway stations, railway lines,
city centers and other special areas. Try to ensure the aircraft is visible.

54
©2016 DJI. All Rights Reserved.
INSPIRE 1 PRO User Manual
PreightChecklist
1. Remote controller, aircraft battery, and mobile device are fully charged.
2. Propellers are mounted correctly and rmly.
3. Micro-SD card has been inserted if necessary.
4. Gimbal is functioning as normal.
5. Motors can start and are functioning as normal.
6. DJI GO app connected to the aircraft.
Calibrating the Compass
Only calibrate the compass when the DJI GO app or the status indicator prompt you to do so. Observe
the following rules when calibrating your compass:
1. DO NOT calibrate your compass where there is a chance of strong magnetic interference, such as
magnetite, parking structures, and steel reinforcements underground.
2. DO NOT carry ferromagnetic materials with you during calibration such as cellular phones.
3. The DJI GO app will prompt you to resolve the compass issue if the compass is affected by strong
interference after calibration is complete. Follow the prompted instructions to resolve the compass
issue.
Calibration Procedures
Choose an open space to carry out the following procedures.
1. Ensure that the compass is calibrated. If you did not calibrate the compass as part of your pre-ight
preparations, or if you have moved to a new location since the last calibration, tap Aircraft Status
Indicator bar in the app and select “Calibrate”, then follow the on-screen instructions.
2. Hold and rotate the aircraft horizontally 360 degrees, and the Aircraft Status Indicator will display a
solid green light.
Other manuals for Zenmuse X5
4
Table of contents
Other dji Digital Camera manuals

dji
dji ZENMUSE L1 User manual

dji
dji Zenmuse X5R User manual

dji
dji O3 Air Unit User manual

dji
dji OSMO POCKET 3 Instruction Manual

dji
dji Zenmuse X5 User manual

dji
dji RONIN 4D User manual

dji
dji OSMO ACTION 3 User manual

dji
dji ZENMUSE P1 User manual

dji
dji POCKET 2 User manual

dji
dji ZENMUSE X5S User manual