dji AGRAS T30 User manual

2021.08
v2.0
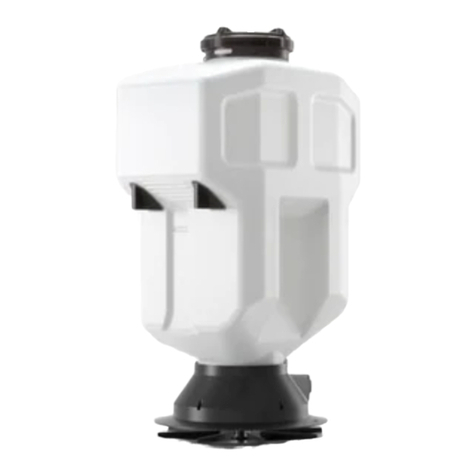
T30/T10 Spreading System 3.0
User Guide
使用說明
ユーザーガイド
사용자 가이드
Hướng dẫn sử dụng
Bedienungsanleitung
Guía de usuario
Guide d’utilisateur
Guia do Usuário

EN
2
© 2021DJI All Rights Reserved.
Disclaimer
Carefully read this entire document and all safe and lawful practices provided by DJITM before using this product for the
rst time. Failure to read and follow instructions and warnings may result in serious injury to yourself or others, damage
to your DJI product, or damage to other objects in the vicinity. By using this product, you hereby signify that you have
read this document carefully and that you understand and agree to abide by all terms and conditions of this document
and all relevant documents of this product. You agree that you are solely responsible for your own conduct while using
this product, and for any consequences thereof. DJI accepts no liability for damage, injury, or any legal responsibility
incurred directly or indirectly from the use of this product.
DJI is a trademark of SZ DJI TECHNOLOGY CO., LTD. (abbreviated as “DJI”) and its aliated companies. Names of
products, brands, etc., appearing in this document are trademarks or registered trademarks of their respective owner
companies. This product and document are copyrighted by DJI with all rights reserved. No part of this product or
document shall be reproduced in any form without the prior written consent or authorization of DJI.
This disclaimer is available in various languages. In the event of divergence among dierent versions, the English version
shall prevail. The nal interpretation of this document and all related documents of this product belongs to DJI. This
content is subject to change without prior notice. For up-to-date product information, visit www.dji.com and go to the
product page for this product.
Warning
1. The T30/T10 Spreading System 3.0 is only compatible with the DJI AGRASTM T30/T10 aircraft and the rmware of the
aircraft must support the spreading system. Refer to the Specications section for more information about compatibility.
DO NOT use it with other products or for non-agricultural purposes.
2. The spreading system is compatible with dry materials that have a diameter between 0.5-5 mm. DO NOT use with other
materials. If used with other materials, the operating performance will be negatively aected and the spreading system
may be damaged. All materials must be used in strict accordance with the instructions for those materials.
3. The max load of the spread tank depends on the takeoff weight of the aircraft. DO NOT overload. Refer to the
Specications section for more information.
4. When connecting the cables, make sure the connection is correct and secure. Operate with caution to avoid damaging
the cables.
5. Make sure that the hopper gate and spinner disk function normally before each use.
6. Operate with caution to avoid injury caused by sharp or moving mechanical parts.
7. While spreading, maintain a safe distance from the spreading system to avoid injury.
8. While spreading, the detection distance range of the omnidirectional digital radar will be 5-30 m instead of 1.5-30 m
due to obstruction from the materials being spread. Note that the aircraft cannot sense obstacles that are not within
the detection range. The detection performance of the radar module will also decrease. Fly with caution. Refer to the
disclaimer and safety guidelines of the aircraft being operated for more information on the radar module.
9. Make sure to attach the corresponding waterproof cover if the liquid level gauge port or spreading system cable port are
not in use. Otherwise, water may enter the port causing it to short circuit.
10. DO NOT attempt to disassemble any part of the spreading system that has already been mounted prior to shipping.
Unless this user guide states that part may be detached. Otherwise, the ingress protection performance will be aected.
11. Under stable laboratory conditions, the spreading system has a protection rating of IP67 (IEC standard 60529) and can
be cleaned using a small amount of water. This protection rating is not permanent, however, and may reduce over an
extended period due to aging and wear. The product warranty does not cover water damage. The protection ratings of
the aircraft mentioned above may decrease in the following scenarios:
• If there is a collision and the seal structure is deformed.
• If the seal structure of the shell is cracked or damaged.
• If the waterproof covers are not properly secured.

EN
© 2021DJI All Rights Reserved. 3
In the Box
The T30 Spreading System and T10 Spreading System are similar in appearance, but the spread tanks are dierent
sizes. Unless otherwise specied, the illustrations in this document use the T30 Spreading System 3.0 as an example.
Overview
Installation
• Make sure to remove the Intelligent Flight Battery from the aircraft before installation.
• Operate with caution to avoid injury caused by sharp or moving mechanical parts.
Spread Tank
Spreader
Spreader Lock Knob
Spinner Disk
Control Module
Cable
Weight Sensors
Introduction
The T30/T10 Spreading System 3.0 is compatible with the Agras T30/T10 aircraft respectively and oers ecient and
reliable spreading operations.
The spreading system comes up with a built-in stirring device and hopper gate control structure to prevent material
blockages and improve operating accuracy and reliability. The weight sensors monitor the weight of the remaining
material in the spread tank in real time while the control module improves the accuracy of the spread rate control and
empty tank warning. Fenders are included in the packaging and can block spreading material that ies upward from
damaging the propellers.
Users can congure spreading settings in the DJI Agras app and create specic templates for dierent materials in order
to meet dierent requirements. The app also provides warning prompts for an empty tank as well as for abnormalities in
rotational speed, temperature, and hopper outlet size.
Spreading System 3.0 × 1 Spare Spinner Disk × 2 Fender Pair × 1 Small Flow Hopper Gate
× 1
Fender Screw × 4 Stopper
(for T30 only)
(for T10 only)

EN
4
© 2021DJI All Rights Reserved.
c. Lift and remove the spray tank on the aircraft.
1
2
2
1
1
2
1. Remove the bottom cover on the front of the aircraft. Pry the bottom cover from the gap between the bottom cover
and the rest of the aircraft using a tool if required. Be careful not to damage the cover.
2. When using the T30 aircraft:
a. Unplug the liquid level gauge cable from the port at the bottom of the aircraft front, attach the cover of the port,
and remove the cable from the cable strainer at the bottom of the aircraft.
b. Use the double-ended wrench included in the aircraft package to remove the two nuts that secure the aircraft and
T-shaped connector on the spray tank, detach the T-shaped connector, and attach the stopper to the hoses on the
aircraft.

EN
© 2021DJI All Rights Reserved. 5
3. When using the T10 aircraft:
a. Lift and remove the spray tank on the aircraft and attach the the stopper to the base of the spray tank connector.
4. Insert the spreading system into the aircraft. The spreading system needs to be inserted at an angle. Do not insert by
force.
b. Locate the liquid level gauge next to the omnidirectional digital radar and remove the M3 screw at the bottom.
c. Unplug the liquid level gauge cable from the port at the bottom of the aircraft front and attach the cover of the port.
Remove the cable from the cable strainer at the bottom of the aircraft and the liquid level gauge. Make sure to
store the liquid level gauge properly.
T30 T10
2
1

EN
6
© 2021DJI All Rights Reserved.
5. Insert the spreading system cable to the cable strainer at the bottom of the aircraft and connect it to the 12-pin port
inside of the aircraft after detaching the cover on the port.
1
2
6. Reattach the bottom cover of the aircraft rmly and make sure that there is no gap between the structures.
7. Perform ow calibration before installing the fenders. Refer to the Spreading System Calibration section for more
information.
a. Place one of the fenders on one side of the spreader base, align the edge of the spreader base to the slots on the
fender, and insert the fender rmly.
b. Mount the fender for the other side in the same way. The screw holes at the point where the two fenders meet
must be aligned.
c. Insert two screws into the screw holes and tighten.
Check the parts on the aircraft and spreading system after installation to make sure that the spinner disk will
not damage the cables or any other part during operations.

EN
© 2021DJI All Rights Reserved. 7
Spreading System Calibration
Tare Calibration
Make sure to perform tare calibration before operating for the rst time. Otherwise, the weighing accuracy may be
adversely aected. Tare calibration is required if the spread tank is empty but the weight detected is not zero.
1. Make sure that the aircraft has an empty spread tank and is placed down horizontally. Power on the remote controller
and aircraft.
2. Go to Operation View in the app, select , then , and tap Calibration on the right of the tare calibration section.
3. Tap Start Calibration to begin and calibration will start automatically. The result of the calibration will be displayed in
the app when completed.
Flow Calibration
There are several templates for typical spreading materials in the spreading settings in the DJI Agras app. Users can
start spreading operations directly when using any of the templates. Users can also create templates if the performance
of the templates in the app are not satisfactory or if other spreading materials are being used. Flow calibration is required
when creating a new template. Refer to the Usage section for more information about creating templates.
Weight Calibration
Weight calibration for the spreading system has been completed before delivery. There is no need to calibrate before
using for the rst time. Calibration is required when the detected weight of the material inside of the tank is dierent from
the actual weight. The weight sensors detect the weight of the material inside the tank and users can check the weight
and perform weight calibration in the app.
1. Make sure that the aircraft is placed down horizontally. Power on the remote controller and aircraft.
2. Go to Operation View in the app, tap , and then to view the total weight of the spread tank. Follow the
instructions below if there is a dierence between the detected and actual weight.
a. Tap Calibration on the right of the tare calibration section and follow the onscreen instructions to complete.
b. Tap Calibration on the right of the weight calibration section and follow the onscreen instructions to complete.
Empty Tank Calibration
Empty tank calibration for the spreading system has been completed before delivery. There is no need to calibrate
before using for the rst time. Calibration is required if the app incorrectly displays an empty tank warning or when the
app is unable to detect when the tank is empty.
1. Make sure that the aircraft has an empty tank and is placed down horizontally. Power on the remote controller and
aircraft.
2. Go to Operation View in the app, tap , then , and tap Calibration on the right of the empty tank calibration
section.
3. Tap Start Calibration to begin and calibration will start automatically. The result of the calibration will be displayed in
the app when completed.

EN
8
© 2021DJI All Rights Reserved.
Usage
Creating Templates
There are templates for several typical spreading materials in the spreading settings in the DJI Agras app. In Route, A-B
Route, or Manual Plus operation mode, users can select the template according to the material used. If the performance
of the existing templates is unsatisfactory or other materials are being used, users can create a new template as follows:
1. Disassemble the spinner disk according to the instructions in the Maintenance section.
2. Make sure that the spreading system cable is connected and power on the remote controller and aircraft. Tap on
the left of the screen in Operation View in the app to enter Spreading Settings.
3. Tap the dropdown menu for templates and then New Template.
4. Tap Flow Calibration and set the type of the hopper outlet in use. Tap Start Calibration and follow the prompts to
complete calibration.
When using the standard hopper gate that has been mounted to the spreading system before delivery, set
the hopper outlet type to Hopper Outlet 1. When using the small ow hopper gate, set the hopper outlet
type to Hopper Outlet 2. Refer to the Small Flow Hopper Gate Product Information for installation.
5. Set the material amount, spinner disk speed, and ight speed. Tap Save.
6. Power o the aircraft and remount the spinner disk.
Spreading Operations
1. Power on the remote controller and then the aircraft. Enter Operation View in the DJI Agras app.
2. Open the cover, add compatible material, and close the cover. The DJI Agras app will intelligently recommend the
payload weight limit for the spread tank according to the current status and surroundings of the aircraft. Do not
exceed the recommended payload weight limit when adding material to the tank. Otherwise, the ight safety may be
aected.
3. Select the operation mode or use a planned eld.
4. Tap on the left of the screen to enter Spreading Settings.
5. In Route, A-B Route, or Manual Plus operation mode, select a template for the spreading material and set parameters
such as the material amount, spinner disk speed, ight speed, line spacing, and height relative to the vegetation. In
Manual operation mode, set the hopper outlet size and spinner disk speed. Adjustable parameters vary depending
on the operation mode. It is recommended to adjust the settings so that they are suitable for the materials you are
using and perform a test to make sure the performance is as expected.
It is recommended to do the following when spreading 45 kg/ha of materials in Manual operation mode.
• Adjust the hopper outlet size so that the material delivery rate is 8 kg/min.
• Adjust the spinner disk rotational speed so that the spreading range is 5 to 7 meters.
• Maintain a ight speed of approximately 5 m/s.
6. Start the operation. The operations of the spreading system vary depending on the operation mode.
Route Operation Mode
After starting an operation, the aircraft ascends to a preset takeo altitude and the spinner disk spins. When the aircraft
reaches the starting point of the route, the hopper gate opens and the aircraft ies along the route and spreads material
automatically. Spreading cannot be started or stopped manually.
The operation resumption function can be used during operation. Once the operation is paused, the hopper gate closes
automatically to stop spreading while the spinner disk is still spinning. After the operation is resumed, the aircraft returns
to the breakpoint or projection point and continues spreading.

EN
© 2021DJI All Rights Reserved. 9
Spinner Disk
Washer
Nut
Pin
A-B Route Operation Mode
Switch to A-B operation mode after the aircraft takes o and the spinner disk begins to spin. When the aircraft reaches
the rst turning point, the hopper gate opens and the aircraft ies along the route and spreads material automatically.
Spreading cannot be started or stopped manually.
The operation resumption function can be used during operation. Once the operation is paused, the hopper gate closes
automatically to stop spreading while the spinner disk continues to spin. After operation is resumed, the aircraft returns
to the breakpoint or projection point and continues spreading.
Manual Plus Operation Mode
Switch to M+ mode after the aircraft takes o and the spinner disk begins to spin. The hopper gate opens and the
aircraft spreads material automatically once it has begun ying.
Manual Operation Mode
Switch to M mode after the aircraft takes o. Use the Spray button on the remote controller to start or stop spreading
manually.
In all operation modes except Manual operation mode:
• When the aircraft ies along spreading ight routes, the hopper gate opens automatically to start spreading.
• When the aircraft ies along the connecting routes between spreading ight routes, the hopper gate closes
automatically to stop spreading while the spinner disk continues to spin.
Maintenance
1. Clean the residue in the spread tank and spreader immediately after spreading and keep the system dry.
2. The spinner disk is a consumable part. Follow the steps below to replace the spinner disk if there are obvious signs of wear.
a. Make sure that the aircraft is powered o.
b. Remove the pin, nut, washer, and spinner disk at the bottom of the spreader. Mount a new spinner disk and secure it
using the washer, nut, and pin.
Operate with caution to avoid injury caused by sharp or moving mechanical parts.

EN
10
© 2021DJI All Rights Reserved.
Specications
Items T30 Spreading System 3.0 T10 Spreading System 3.0
Compatible Aircraft[1] Agras T30 Agras T10
Spreading System Weight (inc. spread
tank and fenders) 4.1 kg 3 kg
Spread Tank Volume 40 L 12 L
Spread Tank Internal Load[2] 40 kg 6 kg[3]
Compatible Material Diameter 0.5-5 mm
Spreading Range
Varies according to material diameter, spinner disk rotational speed, hopper
outlet size, and flight altitude. For optimal performance, it is recommended
to adjust the corresponding variables to achieve a spreading range of 5-7
meters.
[1] The aircraft firmware must support the spreading system. Check the release notes of the corresponding aircraft on the official
DJI website.
[2] The DJI Agras app will intelligently recommend the payload weight limit for the spread tank according to the current status
and surroundings of the aircraft. Do not exceed the recommended payload weight limit when adding material to the spread
tank. Otherwise, the flight safety may be affected.
[3] Note: the internal load of Japan version of T10 is 10 kg.
This content is subject to change without prior notice.
Download the latest version from
http://www.dji.com/t30

CHT
© 2021DJI All Rights Reserved. 11
免責聲明
使用本產品之前,請仔細閱讀並遵循本文及大疆 TM 創新(DJITM)提供的所有安全指引,否則可能會給您和周
圍的人帶來傷害,並損壞本產品或其它周圍物品。一旦使用本產品,即視為您已經仔細閱讀本文件,理解、
認可和接受本聲明的全部條款和內容。您承諾對使用本產品及可能帶來的後果負全部責任。大疆創新 (DJI) 對
於直接或間接使用本產品而造成的損壞、傷害及任何法律責任概不負責。
DJI 是深圳市大疆創新科技有限公司及其附屬公司的商標。本文出現的産品名稱、品牌等,均為其所屬公司的
商標。本產品及手冊之版權為大疆創新所有。未經許可,不得以任何形式複製翻印。
本文件及本產品所有相關文件的最終解釋權歸大疆創新 (DJI) 所有。如有更新,恕不另行通知。請前往 www.
dji.com 官方網站以獲取最新的產品資訊。
注意事項
1. T30/T10 播撒系統 3.0(簡稱「播撒系統」)僅適用於 T30/T10 植保無人飛機,且需配合支援播撒系統的
飛行器韌體使用。切勿在其他產品上使用或用於農業植保以外的用途。
2. 播撒系統適合使用顆粒直徑為 0.5 - 5 mm 的乾燥物料。切勿使用其他物料,否則將會影響作業效果,甚
至損壞播撒系統。使用時,嚴格按照物料本身的使用說明進行操作。
3. 播撒系統作業箱最大載重與飛行器起飛重量有關,請參閱「規格參數」以了解詳細資訊。切勿超重使用。
4. 在連接線材時,確保正確牢固,小心操作,以免損壞線材。
5. 在每次使用前,檢查開關匣門時是否順暢,播撒盤運轉是否正常。
6. 使用時務必小心,謹防機械結構傷害手部。
7. 進行播撒作業時,務必遠離播撒系統,以免造成人身傷害。
8. 進行播撒作業時,由於播撒顆粒的遮擋,全向躲避障礙雷達的可感測距離將由 1.5 - 30 m 變更為 5 - 30 m。
如有障礙物處於探測範圍以外,則飛行器無法感測障礙物。同時,雷達模組的檢測性能亦會減弱,務必謹
慎飛行。請參閱相對應飛行器的《免責聲明和安全操作指引》以了解更多雷達模組注意事項。
9. 不使用飛行器上的液位計接頭及播撒系統接頭時,務必蓋上膠塞,否則可能進水造成短路。
10. 切勿自行拆卸出廠時已安裝的零組件(本文描述中允許的零組件除外),否則將影響產品的防護性能。
11. 在受控制的實驗室條件下,播撒系統的防護等級為 IP67(參照國際電工委員會 IEC 60529 標準),可直
接水洗。防護等級並非永久有效,可能會因長期使用導致老化磨損而下降。由於滲入液體而導致的損壞不
在保固範圍之內。防護能力可能失效的情況:
• 發生碰撞,密封處變形;
• 外殼密封處裂開破損;
• 接頭保護蓋或防水膠塞未安裝到位或出現鬆脫。
簡 介
T30/T10 播撒系統 3.0 分別適用於 T30/T10 植保無人飛機,將其安裝至飛行器,可完成高效率、可靠、穩定
的播撒作業。
播撒系統內建攪拌裝置,有效防止落料堵塞,提高作業準確度及可靠性。配備秤重感測器及控制模組,可即
時監測作業箱內的剩餘物料重量,使流量控制與無料警告更加精準。包裝內附帶的保護蓋可阻擋向上播撒的
顆粒,進而有效地避免物料對螺旋槳造成損傷。
使用者可透過大疆農業應用程式設定播撒作業參數,為各種播撒物料分別建立範本,讓專門物料得以專用,
以滿足不同作業場景的使用需求。應用程式可提示無料警告及轉速、溫度、匣口大小等參數異常警告,確保
系統安全運行。

CHT
12
© 2021DJI All Rights Reserved.
物品清單
T30 播撒系統 3.0 與 T10 播撒系統 3.0 外觀相似,但是兩種機型的作業箱不同。如無特殊註明,文中的圖示
均是以 T30 播撒系統 3.0 為範例。
零組件名稱
安 裝
•安裝前務必確保已取下飛行器智能飛行電池。
•務必小心操作,慎防機械結構傷害手部。
1. 移除飛行器前部下蓋。如有必要,可藉助工具撬開下蓋與其他外殼結構之間的縫隙。注意,切勿損壞外殼。
作業箱
播撒機
播撒機鎖緊旋鈕
播撒盤
控制模組
連接線
秤重感測器
播撒系統 3.0 ×1 備用播撒盤 × 2保護蓋 × 1 組 小流量匣門 × 1
保護蓋螺絲 × 4膠塞
(僅 T30)
(僅 T10)

CHT
© 2021DJI All Rights Reserved. 13
2. 若使用 T30 飛行器:
a. 從飛行器前方底部的接口處拔下液位計連接線,在接口處上方蓋上膠塞,然後從飛行器底部的線卡中取
出液位計連接線。
b. 使用飛行器包裝內附帶的雙頭螺母固定扳手鬆開連接作業箱三通與飛行器的兩顆螺母,將三通分離,然
後在飛行器上的軟管處蓋上膠塞。
3. 若使用 T10 飛行器:
a. 向上提起並取出飛行器的噴灑作業箱,然後在飛行器上的作業箱接頭底座處蓋上膠塞。
c. 向上提起並取出飛行器的噴灑作業箱。
1
2
2
1
1
2

CHT
14
© 2021DJI All Rights Reserved.
4. 將播撒系統插入飛行器。注意放置的角度,切勿以蠻力操作。
5. 將播撒系統連接線嵌入飛行器底部的線卡,然後連接至飛行器內部的 12 針接口(接口處有膠塞,請在連
線前取下)。
b. 在全向躲避障礙雷達旁邊找到液位計,移除其底部的 M3 螺絲。
c. 從飛行器前方底部的接頭處拔下液位計連接線,在接頭處蓋上膠塞。從飛行器底部的線卡中取出液位計
連接線,移除液位計,並妥善保管。
T30 T10
1
2
2
1

CHT
© 2021DJI All Rights Reserved. 15
6. 重新安裝飛行器下蓋,確保安裝牢固且無縫隙。
7. 為方便操作,使用者可以先進行流量校正(請參閱「播撒系統校正」章節以了解詳細資訊),然後再按照
以下步驟安裝保護蓋:
a. 準備一側的保護蓋,將播撒機底座的邊緣對準保護蓋的槽位,然後嵌入並卡緊。
b. 使用同樣的方法安裝另一側的保護蓋。請注意,兩側保護蓋接合處的孔位應對齊。
c. 在孔位處插入兩顆螺絲並鎖緊。
播撒系統校正
扣重校正
首次使用播撒系統時,務必進行扣重校正,否則將影響秤重的準確性。若在後續使用過程中,檢測到空箱時
的重量非為 0 時,則亦需進行扣重校正。
1. 確保飛行器水平放置且播撒作業箱是空的,開啟遙控器及飛行器。
2. 進入應用程式作業介面 > > ,點選扣重校正右側的「校正」按鈕。
3. 點選「開始校正」,系統會自動進行校正,在完成之後將會顯示校正結果。
流量校正
大疆農業應用程式已在播撒參數設定中為使用者提供幾種典型的播撒物料範本,選擇這些範本時,可直接進
行播撒作業。若使用應用程式內建範本的作業效果不佳或使用其他播撒物料,使用者可以建立新的範本,並
需要在新建時進行流量校正。請參閱「使用」章節了解詳細資訊。
重量校正
播撒系統出廠時即已完成重量校正,可直接使用。若使用時出現作業箱內物料重量與實際重量有偏差的情況,
則使用者需自行校正。使用者可以在應用程式中查看目前秤重感測器顯示出的作業箱物料重量並進行重量校正。
安裝完成之後,檢查飛行器及播撒系統各零組件,確保作業時播撒盤不會對線材和其他結構造成損傷。

CHT
16
© 2021DJI All Rights Reserved.
1. 確保飛行器水平放置,開啟遙控器及飛行器。
2. 進入應用程式作業介面 > > ,查看目前物料箱的總重量。若與實際有偏差,按照以下步驟操作:
a. 點選扣重校正右側的「校正」按鈕,並按照提示操作,完成扣重校正。
b. 點選重量校正右側的「校正」按鈕,並按照提示操作,完成重量校正。
無料校正
播撒系統出廠時即已完成無料校正,可直接使用。若是使用時出現誤報或未報無料警告,則使用者需要自行校正。
1. 確保飛行器水平放置且播撒作業箱是空的,開啟遙控器及飛行器。
2. 進入應用程式作業介面 > > ,點選無料校正右側的「校正」按鈕。
3. 點選「開始校正」,系統會自動進行校正,在完成之後將會顯示校正結果。
使 用
建立新範本
大疆農業應用程式已經在播撒參數設定中為使用者提供幾種典型的播撒物料範本,在航線作業、AB 點作業及
增強型手動作業的模式之下,使用者可直接選擇要使用物料所對應的範本。若使用應用程式內建範本的作業
效果不佳,或使用其他播撒物料,使用者可以按照以下步驟建立新的範本:
1. 按照「維護保養」章節的描述拆卸播撒盤。
2. 確保已連接播撒系統連接線,依次序開啟遙控器及飛行器,然後在應用程式作業介面點選螢幕左側的 ,
進入播撒參數設定。
3. 點選播撒料範本的下拉式功能表,選擇「新建範本」。
4. 點擊「流量校正」按鈕,選擇所使用的匣口類型,然後點擊「開始校正」並按照提示進行校正。
在選擇匣口類型時,若使用播撒系統已預裝的匣門,則選擇匣口 1,若使用者安裝了小流量匣門配件,
則選擇匣口 2。
5. 設定畝用量、播撒盤轉速、飛行速度,然後點選「儲存」。
6. 中斷飛行器電源,重新裝回播撒盤。
播撒作業
1 依次序開啟遙控器及飛行器,進入大疆農業應用程式作業介面。
2. 開啟作業箱上蓋,加入適量的物料,然後關好。應用程式會根據目前的飛行器狀態及周圍環境智能建議裝
載重量,使用者裝載物料的最大重量切勿超過建議值,否則可能會影響飛行安全。
3. 選擇作業模式或呼叫已規劃的地塊。
4. 點選螢幕左側的 ,進入播撒參數設定。
5. 在航線作業、AB 點作業及增強型手動作業模式下,選擇播撒料範本,設定畝用量、播撒盤轉速、飛行速度、
作業間距、相對作業高度等。在手動作業模式下,設定匣口大小、播撒盤轉速。不同作業模式下可設定的
參數有所不同。
建議使用者自行根據所使用的物料調整各參數並進行測試,以達到預期的作業效果。
對於手動作業,以物料畝用量 3 kg 為例,建議:
• 調節匣口大小,使每分鐘落料量為 8 kg;
• 調節播撒盤轉速,使播撒範圍為 5 - 7 m;
• 控制飛行速度在 5 m/s 左右。

CHT
© 2021DJI All Rights Reserved. 17
播撒盤
墊片
螺母
銷釘
6. 按照飛行器使用方法開始作業。播撒系統在不同作業模式下的執行方式會略有不同。
航線作業模式
執行作業後,飛行器起飛至預設的起飛高度,同時播撒盤開始轉動。飛行器飛至航線起點時,匣門開啟,飛
行器沿航線飛行並播撒物料。使用者不可手動開啟或停止播撒。
作業時可使用作業恢復功能:作業暫停後,匣門關閉,播撒停止(播撒盤仍繼續轉動);繼續作業後,飛行
器飛回中斷坐標點或投影點,然後自動繼續播撒作業。
A-B 點作業模式
飛行器起飛後,切換至 A-B 點作業模式,播撒盤開始轉動。飛行器飛至第一個節點時,匣門開啟,飛行器將
沿著作業路線飛行並播撒物料。使用者不可手動開啟或停止播撒。
作業時可使用作業恢復功能:作業暫停後,匣門關閉,播撒停止(播撒盤仍繼續轉動);繼續作業後,飛行
器飛回中斷坐標點或投影點,然後自動繼續播撒作業。
增強型手動作業模式
飛行器起飛後,切換至 M+ 作業模式,播撒盤開始轉動。飛行器開始飛行後,匣門開啟,並自動播撒物料。
手動作業模式
飛行器起飛後,切換至 M 作業模式。使用者可短按一次遙控器噴灑按鈕(此時作為播撒按鈕使用)手動開始
或停止播撒。
除手動作業模式外,在其他作業模式下:
• 飛行器在沿各播撒作業航線段之間的過渡性航線上飛行時,匣門自動關閉,停止播撒(播撒盤仍繼
續轉動);
• 在其他的航線上飛行時,匣門自動開啟,進行播撒。
維護保養
1. 每次作業結束後立即清理作業箱 及播撒機內的殘渣,並保持乾燥。
2. 播撒盤為易損耗零組件,如出現明顯的磨損,請按如下步驟及時更換播撒盤:
a. 確保中斷飛行器的電源。
b. 移除播撒機下方的銷釘、螺母、墊片及播撒盤,然後安裝新的播撒盤,裝回墊片,鎖緊螺母並插回銷釘。

CHT
18
© 2021DJI All Rights Reserved.
務必小心操作,慎防機械結構傷害手部。
規格參數
參數 T30 播撒系統 3.0 T10 播撒系統 3.0
適用的飛行器機種 [1]大疆 T30 植保無人飛機 大疆 T10 植保無人飛機
播撒系統重量(含作業箱及保護蓋) 4.1 kg 3 kg
播撒作業箱容積 40 L 12 L
播撒作業箱內部最大載重 [2]40 kg 6 kg[3]
適用的物料顆粒直徑 0.5 - 5 mm
播撒範圍
與物料顆粒直徑、播撒盤轉速、匣口大小、飛行高度等因素有關。建
議使用者調整相關變量,使播撒範圍處於 5 - 7 m,以便獲得較佳的
作業效果
[1] 需配合支援播撒系統的韌體使用,請注意 DJI 官網對相應機型的發布記錄。
[2] 大疆農業應用程式會根據目前飛行器的狀態及周圍環境智能建議裝載重量,使用者裝載物料的最大重量切
勿超過建議值,否則可能會影響飛行安全。
[3] 注意:T10 日本版的內部最大載重為 10 kg。
內容如有更新,恕不另行通知。
您可以在 DJI 官方網站查詢最新版本
http://www.dji.com/t10

JP
© 2021DJI All Rights Reserved. 19
免責事項
本製品を初めて使用する前に、この文書全体に目を通し、DJITMが提供する安全で合法的慣行についての説明を注意
深くお読みください。指示と警告に従わなかった場合、ご自身や他の人に重傷を負わせたり、またはお客様のDJI製
品および周辺の他の物を破損したりする恐れがあります。本製品を使用することにより、本書をよく読み、本文書
および本製品のすべての関連文書に記載されている利用規約を理解し、順守することに同意したとみなされます。
本製品の使用中の行動とこれに伴う結果には、ユーザーが全面的に責任を負うことに同意するものとします。本製
品の使用により直接または間接的に発生する損害、傷害、およびその他法的責任に対して、DJIは一切責任を負いま
せん。
DJIはSZ DJI TECHNOLOGY CO., LTD.(以下「DJI」と省略)およびその関連会社の商標です。本書に記載されて
いる製品、ブランドなどの名称は、その所有者である各社の商標または登録商標です。本製品および本書は、不許
複製。禁無断転載を原則とするDJIの著作物のため、DJIから書面による事前承認または許諾を得ることなく、本製
品または文書のいかなる部分も、いかなる方法によっても複製することは固く禁じられています。
この免責条項は複数の言語で提供されています。言語版によって相違がある場合には、英語版が優先されます。本
書の最終的な解釈および本製品のすべての関連文書はDJIに属します。本内容は予告なく変更される場合がありま
す。最新の製品情報については、www.dji.comにアクセスして、本製品に対応する製品ページをご覧ください。
警告
1. T30/T10 粒剤散布システム3.0はDJI AGRASTM T30/T10機体にのみ対応し、機体のファームウェアは散布システ
ムに対応している必要があります。互換性に関する詳細については、仕様のセクションを参照してください。
対応する機体以外との使用、および農業目的以外での使用は、絶対しないでください。
2. 粒剤散布システムは、直径0.5〜5 mmの乾燥した素材の粒剤に対応しています。他の条件や素材のものは使用しな
いでください。条件に合わないものを使用すると、作業性能に悪影響が生じ、粒剤散布システムが損傷する可能性
があります。すべての粒剤は、それぞれの説明書に記載されている指示に厳密に従って使用してください。
3. 粒剤散布タンクの最大積載量は、機体の離陸重量に依存します。過負荷にならないようにしてください。詳し
くは、仕様のセクションを参照してください。
4. ケーブルを接続するときは、接続が正しく安全であることを確認してください。ケーブルを損傷しないように
注意して操作してください。
5. 使用する前にシャッター(ホッパーゲート)とインペラ(スピナーディスク)が正常に機能することを確認し
てください。
6. 鋭利な、または動いている機械部品による怪我を避けるため、慎重に操作してください。
7. 散布中は、怪我をしないように粒剤散布システムから安全な距離を保ってください。
8. 散布中の全方向性デジタルレーダーの検知距離範囲は、散布されている粒剤が障害となり、1.5 m〜30 mでは
なく5〜30 mになります。機体は、検知範囲外の障害物を検知できませんので注意してください。レーダーモ
ジュールの検知性能も低下します。慎重に飛行してください。レーダーモジュールの詳細については、お客様
が使用する機体の免責事項と安全ガイドラインを参照してください。
9. 液面計ポートまたは粒剤散布システムケーブルポートを使用していない場合は対応する防水カバーを必ず取り
付けるようにしてください。そうしない場合、水がポート内に入り、短絡の原因となる恐れがあります。
10. 出荷前に搭載された粒剤散布システムの部品を絶対に分解しないでください。ただし、その部品が取り外し可
能であることをユーザーガイドに記載してある場合を除きます。そうしない場合、保護等級で定められている
性能に影響を及ぼす可能性があります。
11. 安定したラボ環境下では、粒剤散布システムは保護等級IP67(IEC60529規格)を満たし、少量の水で機体を清
掃することが可能です。この保護等級は、永久的に有効というわけではなく、経年劣化が原因で時間の経過と
ともにその効果が低下する場合があります。水による損傷は製品保証の対象となりません。上述の機体の保護
等級は、以下のような状況では低下する可能性があります:
• 衝突により、密封構造が変形した場合。
• シェルの密封構造にひびが入った、または破損した場合。
• 防水カバーがしっかりと閉められていなかった場合。
Other manuals for AGRAS T30
6
This manual suits for next models
1
Table of contents
Languages:
Other dji Spreader manuals
Popular Spreader manuals by other brands

Earth Way
Earth Way Ev-N-Spred M24SSD Series Assembly and operating instructions

Earth Way
Earth Way POLAR TECH 90365 Assembly & operation

Earth Way
Earth Way 3100 Assembly and operating instructions

Earth Way
Earth Way 2030 Assembly instructions

Salt Dogg
Salt Dogg TGS06 installation instructions

Chapin
Chapin 8500B manual

Chapin
Chapin 81008A Assembly / operation instructions / parts

Land Pride
Land Pride Primary Seeders PSN2096 Operator's manual

Buyers
Buyers SaltDogg PRO4000 installation instructions

BOGBALLE
BOGBALLE M2 Operator's manual

LEHNER
LEHNER AgroDos Operating instructions with parts list

RESQTEC
RESQTEC X2 user manual