manuals.online logo
Brands
  1. Home
  2. •
  3. Brands
  4. •
  5. Dolphin
  6. •
  7. Dryer
  8. •
  9. Dolphin BC 2003BM User manual

Dolphin BC 2003BM User manual

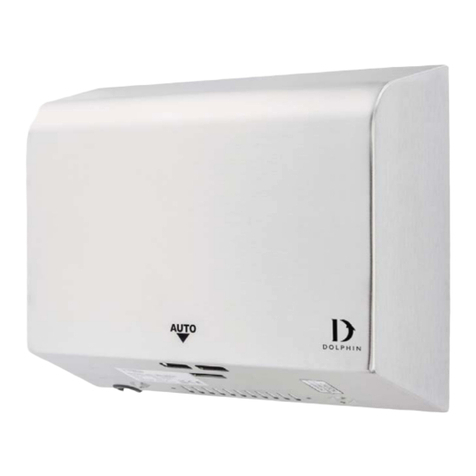
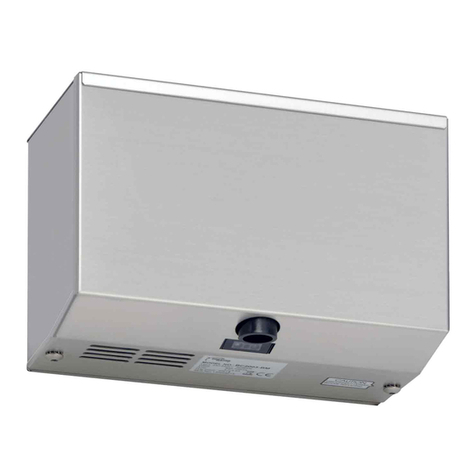
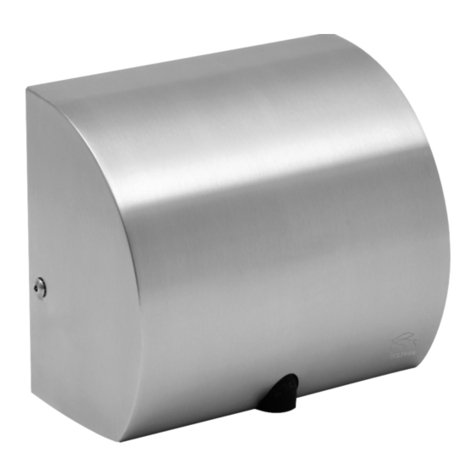
BC 2003BM Dolphin Hand Dryer
Please read carefully before use
DOLPHIN
BC 2003BM
Operating Instructions and Parts Manual (Automatic)
Surface Mount
ITEM CATEGORY PERFORMANCE DATA
TECHNICAL SPECIFICATIONS
263 mm
10-23/64”
139 mm
5-15/32”
170 mm
6-11/16”
°
75
Operating Voltage
Cover
Warm Air Speed Output
Dryer shall Deliver
Motor Type
Motor Thermal Protection
Heater Element
Heater Thermal Protection
Drying Time
Circuit Operation
Sensor Range
Timing Protection
Drip proof
Isolation
Net Weight
Shipping Weight
Unit Size
Stand-by Power Less than 0.5W
Air Output Temperature 55°C (131°F) – Ambient Temp. 25°C (77°F)
101.7 m³/h, (59.8 CFM)
11/16
220-240 Vac, 50/60 Hz, 0.84-1.0 kW
Steel ( t:1.2mm )
90 m/s (201.3 mi/h)
HP, 500W, 29000 R.P.M., Brush Type, Dual Ball Bear
i
Auto Resetting Thermostat turns unit off at 105°C [221°F]
500W
Thermal cut-off at 139°C [282°F]
Less than 15 seconds
Infrared Automatic, self adjusting
2" to 10" [51 mm to 254 mm] auto adjust; standard 7" [18 c
m
60 seconds auto shut off
IPX1
CLASS 1
4.5 kg [9.9 lbs]
5.2 kg [11.4 lbs]
263 mm W x 170 mm H x 139 mm D
[10-23/64" W x 6-11/16" H x 5-15/32” D]
BC 2003BM
General safety information
Disconnect power at
the service breaker before installing or
servicing. NOT FOR HOUSEHOLD USE -
MAY CAUSE BURNS. " IMPROPRE A
L'USAGE DOMESTIQUE - PUET
OCCASIONNER."
This product is
intended for installation by a qualified
service person. Use1.2 mm² (220-240Vac),
solid
conductor for wiring.
AWG NO. 12 (110-120Vac)
All units must be
supplied with a 3-wire service. The
ground wire must be connected to the
dryer's backplate.
Failure to properly
ground unit could result in severe
electrical shock and/or death.
【Type Y attachment】
If the power supply cord is damaged, it must be replaced by the
manufacturer or its service agent or a similar qualified person in order to
avoid a hazard. Means for disconnection must be incorporated in the fixed
wiring in accordance with the wiring rules.
This appliance is not intended for use by persons (including children) with
reduced physical, sensory or mental capabilities, or lack of experience and
knowledge, unless they have been given supervision or instruction concerning
use of the appliance by a person responsible for their safety.
Children should be supervised to ensure that they do not play with the
appliance.
Circuit Diagram
Circuit Board Module
Transistor
Power Switch
MO2 HE2 N MO1 HE1 L
Transistor
Power Switch
VR
G
N
L
Thermostat
Red (110-120~Vac) (208-240~ 277~Vac)
/ Blue
Black
Black
G/Y
Blue
Brown
Motor With Ther mal Switch 2A
Heater With Thermo-fuse
FOR MOTO R
SW.FOR HEATER
White (110-120~Vac)
(208-240~ 277~Vac)
/
Brown
Sensor module
ON
1
NOTE: We do not recommend that this dryer is installed above a basin. If you are installing
this dryer above a basin you need to satisfy yourself that reflection won’t occur
BC 2003BM
Installation
1. Make sure power supply breaker is switched off. Installation must be carried out in
accordance with the current edition of the local wiring regulations code having
jurisdiction. Installation should be performed only by a qualified electrician.
2. Place template against wall at desired height (see mounting height
recommendations) and mark locations of 4 mounting holes and wire service
entry at knockout (KO) location.
Note: For two or more dryers, dryers should be no closer than 24 inches (610 mm)
on center.
3. Connect the wire into terminal as below:
Connections:
A. Connect the live wire (colored red or brown) to
the terminal block marked "L".
B. Connect the neutral wire (colored black or blue)
to the terminal block marked "N".
C. Connect the ground wire (colored green and
yellow) to the green screw marked " ".
4. Fix the part to the wall with 4
screws of 1/4 x 1-3/4” dimension.
1. Remove and retain 2 cover screws
and cover.
2. Insert the power cord into the
suitable K.O. hole. K.O hole
Back
K.O hole
5. Put the front cover back and screw
it with L key.
BC 2003BM
Diagnostics and Remedies
If the dryer will not run
The dryer cycles by itself
or runs constantly
The dryer runs but air
stream is low pressure
and/or low velocity
Ensure that there is no obstruction on or in front of the IR sensor. Clean
any dirt or debris off the sensor lens. If problem persists, replace sensor.
First ensure that the breaker supplying the dryer is operational. If it is,
disconnect the power and remove the dryer cover. Ta ki n g suitable
precautions to avoid shock hazard, reconnect the power and check for
Voltage at the terminal block. Verify that connections are made correctly.
Ensure that the supply Voltage is correct. Dryer will run weakly if the
input Voltage is too low. Verify Voltage requirement on unit rating label
and correct supply as required.
The dryer makes a loud
noise and does not run
for a complete cycle
Ensure that the supply Voltage is correct. Dryer will make a loud humming
noise if the input Voltage is too high. Verify Voltage requirement on unit
rating label and correct supply as required. If CBM has been damaged,
replace CBM, IR sensor module and VR component and cable.
Symptom Corrective Actions for Initial Installation Failures
Symptom Corrective Actions for In-Service Failures
If the dryer will not run
The IR sensor only “sees”
close range objects
The dryer only blows cold
air during a full cycle
Ensure that there is no obstruction on or in front of the IR sensor. Clean
any dirt or debris off the sensor lens. If problem persists, disconnect the
power and remove the dryer cover. Ta k i n g suitable precautions to avoid
shock hazard, reconnect the power and try carefully adjusting the
sensitivity control (yellow shaft in blue box on CBM) to increase the
sensing range. If problem persists, replace sensor.
First ensure that the breaker supplying the dryer is operational. If it is,
disconnect the power and remove the dryer cover. Replace the CBM
and IR sensor module. Ta ki n g suitable precautions to avoid shock
hazard, reconnect the power and check for Voltage at the terminal block.
Disconnect the power. Remove the dryer cover and disassemble the
blower-motor/fan housing. Te s t the thermostat for open circuit. Check
the heater element for signs of burning or breakage. Damaged element
must be replaced.
The heater gets hot but
no air stream is produced
Disconnect the power. Remove the dryer cover and disassemble the blower-
motor/fan housing. Replace the fan motor.
The air stream is low
pressure and velocity
Check the output nozzle for obstructions. If none are present, disconnect
the power. Remove the dryer cover. Remove any dust/lint buildup from
intake vent slots. Disassemble the blower-motor/fan housing. Check the
motor brushes for worn condition (≤ 1-3/16” [30 mm] graphite remains)
and replace them, if necessary.
Other Dolphin Dryer manuals

Dolphin ECO BC 2002 User manual

Dolphin

Dolphin ECO BC 2002 User manual

Dolphin BC 2002 User manual

Dolphin

Dolphin BC 2002 User manual

Dolphin BC 2003BM User manual

Dolphin

Dolphin BC 2003BM User manual

Dolphin BC2001 User manual

Dolphin

Dolphin BC2001 User manual

Dolphin BC2001 User manual

Dolphin

Dolphin BC2001 User manual

Dolphin BC 2006 User manual

Dolphin

Dolphin BC 2006 User manual

Dolphin BC 2200SA User manual

Dolphin

Dolphin BC 2200SA User manual

Dolphin Velocity Eco User manual

Dolphin

Dolphin Velocity Eco User manual

Dolphin VELOCITY BC 2003BM User manual

Dolphin

Dolphin VELOCITY BC 2003BM User manual

Dolphin BC 2006 User manual

Dolphin

Dolphin BC 2006 User manual

Dolphin BC 109 IHD User manual

Dolphin

Dolphin BC 109 IHD User manual

Dolphin BC 2400 User manual

Dolphin

Dolphin BC 2400 User manual

Dolphin BC 2003BM User manual

Dolphin

Dolphin BC 2003BM User manual

Dolphin Velocity BC 2011 User manual

Dolphin

Dolphin Velocity BC 2011 User manual

Dolphin BC2201SS User manual

Dolphin

Dolphin BC2201SS User manual

Dolphin BC  2201 User manual

Dolphin

Dolphin BC  2201 User manual

Dolphin 02.4011 User manual

Dolphin

Dolphin 02.4011 User manual

Dolphin ECO BC 2002 User manual

Dolphin

Dolphin ECO BC 2002 User manual

Dolphin 02.4031 User manual

Dolphin

Dolphin 02.4031 User manual

Dolphin bc2002w User manual

Dolphin

Dolphin bc2002w User manual

Dolphin BC2009 Service manual

Dolphin

Dolphin BC2009 Service manual

Dolphin BC 2003BM User manual

Dolphin

Dolphin BC 2003BM User manual

Dolphin BC 2012 User manual

Dolphin

Dolphin BC 2012 User manual

Dolphin BC22011SS User manual

Dolphin

Dolphin BC22011SS User manual

Popular Dryer manuals by other brands

Whirlpool WED9270XL2 parts list

Whirlpool

Whirlpool WED9270XL2 parts list

Kleenmaid KED2000 Repair instructions

Kleenmaid

Kleenmaid KED2000 Repair instructions

SPI Supplies SPI-DRY Operation manual

SPI Supplies

SPI Supplies SPI-DRY Operation manual

Amana NGD5800DW Use & care guide

Amana

Amana NGD5800DW Use & care guide

Bosch WTG86402GB Installation and operating instructions

Bosch

Bosch WTG86402GB Installation and operating instructions

Maytag MED4200BW0 installation instructions

Maytag

Maytag MED4200BW0 installation instructions

ffuuss eos user manual

ffuuss

ffuuss eos user manual

KitchenAid 53-3498 installation instructions

KitchenAid

KitchenAid 53-3498 installation instructions

Schulthess Spirit topLine TW 8340 operating instructions

Schulthess

Schulthess Spirit topLine TW 8340 operating instructions

Whirlpool LGR4624BW0 parts list

Whirlpool

Whirlpool LGR4624BW0 parts list

World Dryer AirMax D M5-972A manual

World Dryer

World Dryer AirMax D M5-972A manual

Alliance Laundry Systems ADEE9BSS user guide

Alliance Laundry Systems

Alliance Laundry Systems ADEE9BSS user guide

Miele PDR 910 EL Operating and installation instructions

Miele

Miele PDR 910 EL Operating and installation instructions

Amana NGD5800TQ0 parts list

Amana

Amana NGD5800TQ0 parts list

Bosch WTA79200GB Installation and operating instructions

Bosch

Bosch WTA79200GB Installation and operating instructions

AEG TR838P4OB user manual

AEG

AEG TR838P4OB user manual

Asko T760 user guide

Asko

Asko T760 user guide

Electrolux EW2H328R2 user manual

Electrolux

Electrolux EW2H328R2 user manual

manuals.online logo
manuals.online logoBrands
  • About & Mission
  • Contact us
  • Privacy Policy
  • Terms and Conditions

Copyright 2025 Manuals.Online. All Rights Reserved.