manuals.online logo
Brands
  1. Home
  2. •
  3. Brands
  4. •
  5. Dolphin
  6. •
  7. Dryer
  8. •
  9. Dolphin BC 2006 User manual

Dolphin BC 2006 User manual

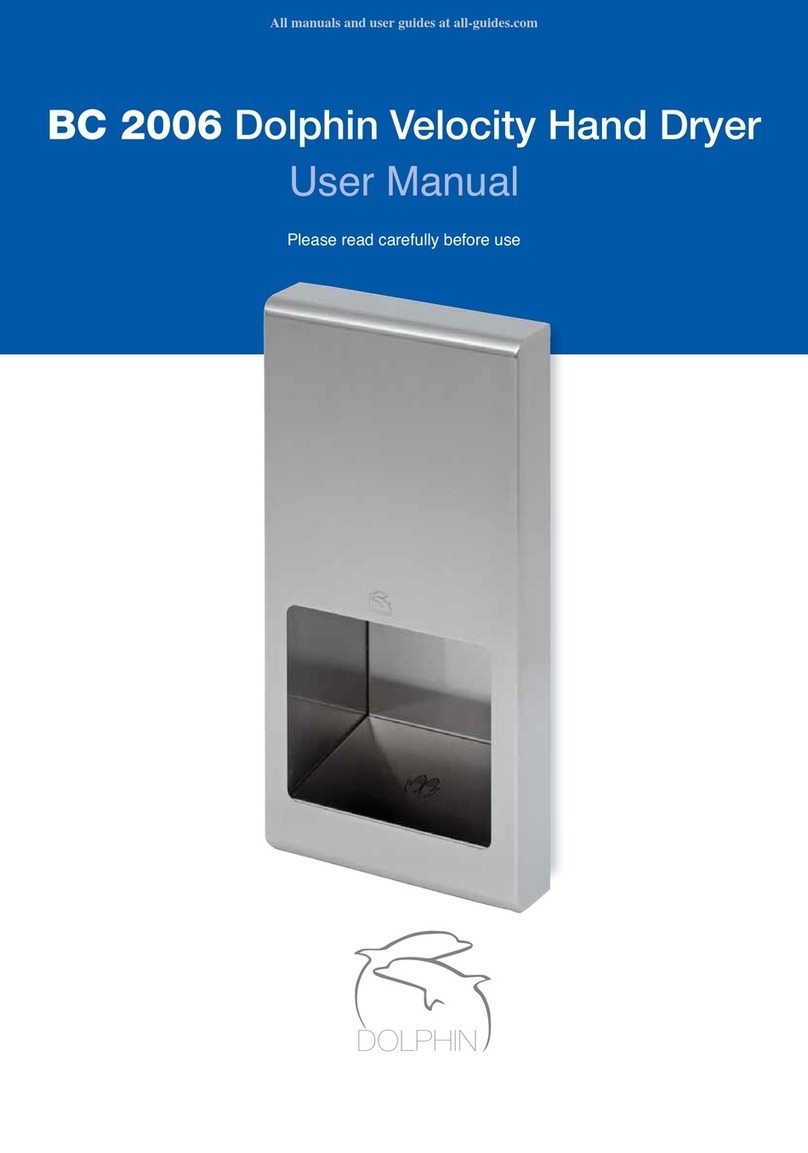
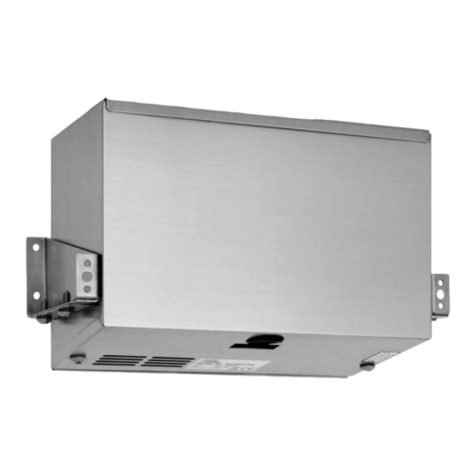
BC 2006 Dolphin Velocity Hand Dryer
User Manual
Please read carefully before use
DOLPHIN
mm
Diagram:
Rough wall opening: 235 x 495 x 123 mm
(92-33/64” x 194-57/64” x 48-27/64”)(92-33/64” x 194-57/64” x 48-27/64”)
51 (20-5/64”)51 (20-5/64”)
230 (90-35/64”)230 (90-35/64”)
51 (20-5/64”)51 (20-5/64”)
166(65-23/64”)166(65-23/64”)
26(10-15/64”)26(10-15/64”)
50(19-11/16”)50(19-11/16”)
26(10-15/64”)26(10-15/64”)
50(19-11/16”)50(19-11/16”)
489.20(192-19/32”)489.20(192-19/32”)
117.50(46-1/4”)117.50(46-1/4”)
232(91-21/64”)232(91-21/64”)
8.50(3-11/32”)8.50(3-11/32”)
Important Information
This Product falls within the scope of the Waste Electrical &
Electronic Equipment Directive 2002/96 EC. (WEEE)
NOTE:
This Product should not be disposed
of with household waste
Please recycle where facilities exist.
Check with your local authority for
recycling advice.
Operating Instructions and Parts Manual
Hand Dryer Semi-Recessed High-Speed hand dryer
Periodic cleaning of the unit is recommended to ensure optimum performance.
Cleaning and Maintenance
Disconnect the electrical supply.
Remove the two cover-mounting screws.
Remove the cover.
Clean all dust lint from the interior of the dryer.
Replace the cover. Do not over tighten the screws.
Wipe the cover with a damp cloth and mild
cleaning solution. Do not Soak. Never use
abrasives to clean the cover.
BC 2006 User Manual www.dolphindispensers.co.uk
1. Remove the front cover from the
recessed box.
2. Remove the main unit from the
recessed box.
3. Insert the bushing into the side hole
of the recessed box.
Insert the recessed box into the wall
and fix it.
Bushing
4. Attach the main unit back to the
recessed box.
5. The wire connections are as follows :
Connections:
A. Connect the live wire (colored red or brown) to
the terminal block marked "L".
B. Connect the neutral wire (colored black or blue)
to the terminal block marked "N".
C. Connect the ground wire (colored green and
yellow) to the green screw marked " ".
6. Attach the front plate back to the
recessed box.
Installation
Operating Instructions and Parts Manual
Hand Dryer Semi-Recessed High-Speed hand dryer
BC 2006 User Manual www.dolphindispensers.co.uk
General safety information:
-- NOTE: Do not install dryer over washbasin --
Disconnect power at the service breaker before
installing or servicing.
This product is intended for installation by a
qualified service person. Use AWG NO. 14
(1.6 mm²) solid conductor for wiring.
All units must be supplied with a 3-wire service.
The ground wire must be connected to the
dryer's backplate.
Failure to properly ground unit could result in
severe electrical shock and/or death.
Circuit Diagram
ITEM CATEGORY
Operating Voltage
Warm Air Speed Output
Air Output Temperature
Dryer Shall Deliver
Motor Type
Motor Thermal Protection
Heater Element
Heater Thermal Protection
Drying Time
Stand-by Power
Circuit Operation
Sensor Range
Timing Protection
Drip proof
Isolation
Net Weight
Shipping Weight
Unit Size
PERFORMANCE DATA
TECHNICAL SPECIFICATIONS
110-120Vac, 50/60 Hz, 1.34-1.6 kW
168-224 mi/hr (75-100 m/s), adjustable
113 F ()
51-68 CFM (87-116 m³/h)
15 16HP, 350-700W, 12000-18000 R.R.M., Adjustable;
Brush Type, Dual Ball Bearings
Auto Resetting Thermostat turns unit off,
120V at 275°F (135°C), 240V at 221°F (95°C) - US-Spec
240V at 221°F (105°C) - EURO Spec
450-900W, adjustable
Auto Resetting Thermostat turns unit off at, 149°F (65°C)
Less than 15 seconds
Less than 0.5W
Infrared Automatic, self adjusting
Auto adjust; standard 6" [15 cm±2 cm]
60 seconds auto shut off
IPX1
CLASS 1
220-240Vac, 50/60 Hz, 1.34-1.6 kW
° 45°C – Ambient Temp. 68 20°C)
12.8 lbs (5.8 kg)
14.6 lbs (6.6 kg)
8-5/64" W x 11-19/64" H x 7-6/64" D [205 mm x 287 mm x 180 mm]
°F (
/
Circuit Board Module
SENSOR
Transistor
Power Switch
MO2 HE2 N MO1
LED1
HE1 L
Transistor
Power Switch
LED2
VR2
G
N
L
Thermostat
G/Y
Blue
Brown
Motor With Thermal Switch 2A
Heater With Thermo-fuse
1234
ACTIVE STANDBY
FOR MOTOR
SW.FOR HEATER
ON
1
Red (110-120~Vac) (208-240~ 277~Vac)/ Blue
Black
Black
White (110-120~Vac)
(208-240~ 277~Vac)
/
Brown
Operating Instructions and Parts Manual
Hand Dryer Semi-Recessed High-Speed hand dryer
BC 2006 User Manual www.dolphindispensers.co.uk
Diagnostics and Remedies
If the dryer will not run
The dryer cycles by itself
or runs constantly
The dryer runs but air
stream is low pressure
and/or low velocity
Ensure that there is no obstruction on or in front of the IR sensor. Clean
any dirt or debris off the sensor lens. If problem persists, replace sensor.
First ensure that the breaker supplying the dryer is operational. If it is,
disconnect the power and remove the dryer cover. Taki n g suitable
precautions to avoid shock hazard, re connect the power and check for
Voltage at the terminal block. Verify that connections are made correctly.
Adjust the VR to make sure it is not set too low.
Ensure that the supply Voltage is correct. Dryer will run weakly if the
input Voltage is too low. Verify Voltage requirement on unit rating label
and correct supply as required.
The dryer makes a loud
nois e and does not run
for a complete cycle
Ensure that the supply Voltage is correct. Dryer will make a loud humming
noise if the input Voltage is too high. Verify Voltage requirement on unit
rating label and correct supply as required. If CBM has been damaged,
replace CBM, IR sensor module and VR component and cable.
Symptom Corrective Actions for Initial Installation Failures
Symptom Corrective Actions for In-Service Failures
If the dryer will not run
The IR sensor only “sees”
close range objects
The dryer only blows cold
air during a full cycle
Ensure that there is no obstruction on or in front of the IR sensor. Clean
any dirt or debris off the sensor lens. If problem persists, replace sensor.
First ensure that the breaker supplying the dryer is op erational. If it is,
disconnect the power and remove the dryer cover. Replace the CBM
and IR sensor module. Te s t the VR for open circuit (see Technical
Specifications for value). Replace VR if Ω = ∞. Ta ki ng suitable precautions
to avoid shock hazard, reconnect the power and check for Voltage at
the terminal block.
Disconnect the power. Remove the dryer cover and disassemble the blower-
motor/fan housing. Te st the thermostat for open circuit. Check the heater
element for signs of burning or breakage. Damaged element must be replaced.
The heater gets hot but
no air stream is produced
Disconnect the power. Remove the dryer cover and disassemble the blower-
motor/fan housing. Replace the fan motor.
The air stream is low
pressure and velocity
Check the output nozzle for obstructions. If none are present, disconnect
the power. Remove the dryer cover. Remove any dust/lint buildup
from intake vent slots. Disassemble the blower-motor/fan housing.
Check the motor brushes for worn condition (≤ 25/64" [10 mm] graphite
remains) and replace them, if necessary.
Operating Instructions and Parts Manual
Hand Dryer Semi-Recessed High-Speed hand dryer
BC 2006 User Manual www.dolphindispensers.co.uk
Operating Instructions and Parts Manual
Hand Dryer Semi-Recessed High-Speed hand dryer
Brushes replacement
Using the screwdriver to take off the bracket from
the base plate.
Using the screwdriver to take off the blower housing
top from the blower housing bottom.
Take off the motor.
Disconnect wires from the brush.
Using the screwdriver to take off the fixed screws
from the brush motor for the two sides.
Replace with new brush and fasten the fixed screw,
then connect the wire on the motor.
THIS UNIT MUST BE FITTED AND SERVICED BY SUITABLY QUALIFIED PERSONNEL
Remove the front cover from
the recessed box.
Attach the main unit back
to the recessed box.
12
34
56
BC 2006 User Manual www.dolphindispensers.co.uk
Warm aır speed adjustment
Remove the front cover from
the recessed box.
1 2
[CW] to increase power to maximum
[CCW] to reduce power as required
Air speed adjustment
Heater Switch
1.Cut off the power, loosen the screw of the cover
and remove the cover.
2.Adjust the heater switch on the PCB with a
flathead screwdriver.
2.1 Turn the switch to "ON": heater on
2.2. Turn the switch to "1": heater off
Heater Element Switch ON/ OFF
DOLPHIN
BC 2006 User Manual www.dolphindispensers.co.uk
Bell-Chem Products Company, Haywood Way, Hastings, TN35 4PL
Tel: 01424 202224 Fax: 01424 205200

Other Dolphin Dryer manuals

Dolphin BC 2012 User manual

Dolphin

Dolphin BC 2012 User manual

Dolphin 02.4011 User manual

Dolphin

Dolphin 02.4011 User manual

Dolphin BC 2003BM User manual

Dolphin

Dolphin BC 2003BM User manual

Dolphin BC 2003BM User manual

Dolphin

Dolphin BC 2003BM User manual

Dolphin bc2002w User manual

Dolphin

Dolphin bc2002w User manual

Dolphin ECO BC 2002 User manual

Dolphin

Dolphin ECO BC 2002 User manual

Dolphin ECO BC 2002 User manual

Dolphin

Dolphin ECO BC 2002 User manual

Dolphin BC 2003BM User manual

Dolphin

Dolphin BC 2003BM User manual

Dolphin BC2009 Service manual

Dolphin

Dolphin BC2009 Service manual

Dolphin BC2201SS User manual

Dolphin

Dolphin BC2201SS User manual

Dolphin 02.4031 User manual

Dolphin

Dolphin 02.4031 User manual

Dolphin BC  2201 User manual

Dolphin

Dolphin BC  2201 User manual

Dolphin BC2005 User manual

Dolphin

Dolphin BC2005 User manual

Dolphin Velocity Eco User manual

Dolphin

Dolphin Velocity Eco User manual

Dolphin BC 2006 User manual

Dolphin

Dolphin BC 2006 User manual

Dolphin VELOCITY BC 2003BM User manual

Dolphin

Dolphin VELOCITY BC 2003BM User manual

Dolphin BC2001 User manual

Dolphin

Dolphin BC2001 User manual

Dolphin BC22011SS User manual

Dolphin

Dolphin BC22011SS User manual

Dolphin BC 2200SA User manual

Dolphin

Dolphin BC 2200SA User manual

Dolphin BC2001 User manual

Dolphin

Dolphin BC2001 User manual

Dolphin BC 2003BM User manual

Dolphin

Dolphin BC 2003BM User manual

Dolphin Velocity BC 2011 User manual

Dolphin

Dolphin Velocity BC 2011 User manual

Dolphin BC 2400 User manual

Dolphin

Dolphin BC 2400 User manual

Dolphin BC 2002 User manual

Dolphin

Dolphin BC 2002 User manual

Popular Dryer manuals by other brands

Hanil HyperCOOL HC3055 Operation manual

Hanil

Hanil HyperCOOL HC3055 Operation manual

ADC ES76 Service manual

ADC

ADC ES76 Service manual

Siemens WT47W448DN Installation and operating instructions

Siemens

Siemens WT47W448DN Installation and operating instructions

Klasse KUD-WG33S Service manual

Klasse

Klasse KUD-WG33S Service manual

Maytag MLG32PDB installation manual

Maytag

Maytag MLG32PDB installation manual

Whirlpool EL4030V Use and care

Whirlpool

Whirlpool EL4030V Use and care

GE Profile DPSB513 owner's manual

GE

GE Profile DPSB513 owner's manual

Asko T721 quick start guide

Asko

Asko T721 quick start guide

Bosch Nexxt Series Operating, care and installation instructions

Bosch

Bosch Nexxt Series Operating, care and installation instructions

Indesit IDCA H G55 B instruction manual

Indesit

Indesit IDCA H G55 B instruction manual

AEG LAVATHERM 630 operating instructions

AEG

AEG LAVATHERM 630 operating instructions

LG SteamDryer DLGX3251R Service manual

LG

LG SteamDryer DLGX3251R Service manual

Zanussi TD4100 Instruction booklet

Zanussi

Zanussi TD4100 Instruction booklet

LG DLE5001W owner's manual

LG

LG DLE5001W owner's manual

LG DLE7150 Series owner's manual

LG

LG DLE7150 Series owner's manual

Bosch Dryer Installation and instruction manual

Bosch

Bosch Dryer Installation and instruction manual

World Dryer SMARTdri K48 Series instructions

World Dryer

World Dryer SMARTdri K48 Series instructions

Frigidaire GLER341CC0 installation instructions

Frigidaire

Frigidaire GLER341CC0 installation instructions

manuals.online logo
manuals.online logoBrands
  • About & Mission
  • Contact us
  • Privacy Policy
  • Terms and Conditions

Copyright 2025 Manuals.Online. All Rights Reserved.