domat UC120 User manual

domat UC120 03/2017 Subject to technical changes. 1
UC120
Communicative heating
controller, 0..10 V output
Summary
UC120 is a communicative room heating controller with one binary input and one
0...10 V DC output for control of a radiator or electrical heater. It can work
autonomously, or in connection to a primary controller (MiniPLC or SoftPLC), or
building management system (RcWare Vision or any SCADA).
Application
▪Systems with radiators, electric heaters, or floor heating –control and
measuring of room temperature
▪monitoring and communication of room temperatures
Function
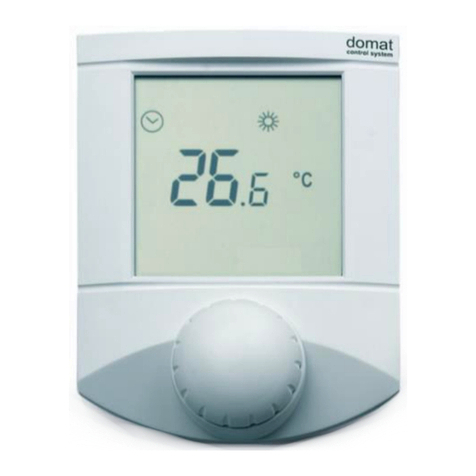
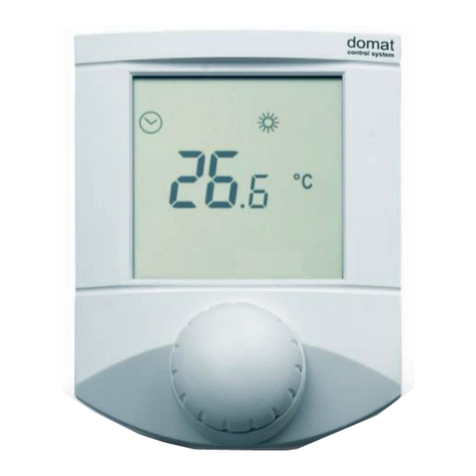
The controller reads actual room temperature, setpoint shift by a knob, and set
operation status which is set by short push of the knob. The room temperature is
measured in the range of -20 to +50 °C. Measured and set values are processed in a PI
algorithm, brought to one 0..10 V DC output. All values are displayed on a large LCD
display.
The functionality and control parameters, i.e. P and I constants, and hysteresis, can be
set with ModComTool, the configuration software, which is free to download at
http://domat-int.com/en/downloads/software.
The controller contains real time clock with a weekly scheduler (6 events per day). It
changes between three operation modes: Day, Night, and Off. A short push in the Night
mode switches to Party mode –Comfort extension by 2 hours.
The Change-over function (communicated over the bus) switches to the cooling mode
while cooling setpoints come into effect. This mode is used when heat pumps with
change-over mode are installed. The change-over signal is read from the heat pump
interface or a thermostat at the supply water piping, and is transmitted to the
controllers over MiniPLC, UCWEB, or any Modbus master. See Room units and
controllers, Communication protocol description handbook for register addressing and
communication examples.

2 03/2017 Subject to technical changes.. domat UC120
The communication bus is Modbus RTU over RS485, therefore the controllers are easily
to integrate into any SCADA or BMS system. Protocol description is available in a
separate document.
Technical data
Power
16...35 V DC (typical 24 V DC)
Consumption
1400 mVA
Measuring range
-20 ÷ 70 °C
Protection
IP20
Sensor accuracy
+/- 1,5 K (with software correction)
Input
Input current
Input voltage
for dry contact
2.4 mA
24 V DC, derived from the power voltage
Output
Maximum output current
Short-circuit current
Resolution
1x 0...10 V DC
10 mA (corresponding to 1 kOhm load)
50 mA, tolerant to permanent short-circuit
10 bit D/A converter
Setpoint correction
according to configuration, +/- 10 to +/- 1 K
Communication
RS485 separation
Baud rate
2 wire RS485 - Modbus RTU slave
optically separated up to 1000 V
selectable, 1200...9600...115200 bps
Display
LCD 60 x 60 mm
Terminals
screw terminals for 0,14 –1,5 mm2wires
Cover
ABS, RAL9010, other colours
Weight
0,13 kg
Dimensions
see below
Terminals
1
2
3
4
5
6
7
8
9
1: DI1 presence input (active when connected to
G0)
2: NC not connected
3: AO1 0...10 V heating output
4: G0 power -, output –reference point
5: NC not connected
6: G0 power -, output –reference point
7: G power +
8: K- communication RS485 -
9: K+ communication RS485 +

domat UC120 03/2017 Subject to technical changes. 3
DIP switches
Back of the PCB
BUS END: if ON, the bus is terminated (if last
device on the line)
USR: not used, reserved for future
applications
INIT: sets the controller into default state
and sets bus address to 1, baud rate to 9600.
To init, proceed as follows:
- connect the device over RS485 to a PC with
ModComTool config tool
- set INIT to ON
- apply power (use only the connector
without bottom)
- find the controller in the tool (Scan)
Installation
Units are intended for operating in a normal and chemically non-aggressive
environment. They do not need any servicing or maintenance. Install them in a vertical
position at places where they can be operated easily and measure correct values of
temperature, i.e. in the height of about 150 cm, with no direct sunlight or other heat /
cool source (AHU outlets, refridgerator, electrical appliances). The device consists of
two parts: bottom with screw terminal block and cover containing PCB, display, and the
knob. The bottom part is fixed by 2 or 4 screws to any flat surface or a flush-mounting
box Ø 50 mm. At the back of the bottom there is an aperture for cabling. The bottom
should be installed and cabling connected first, and the upper part inserted after the
construction works have been finished to prevent damage to the unit.
Seal the conduits to avoid influencing the sensor by draught. Use insulating pad when
installing the sensor on cold walls. Avoid sensor exposition to sunlight or other heat
sources.
Opening the
cover
When removing the display part, proceed as follows:
-press gently the side parts of the unit and pull the right of the display part by
several milimeters
-pull the left of the display part
-pull the display part and remove it from the bottom.
Do not bend the display part too much, the connector pins could be damaged. The locks
are only at the sides of the display part, not at the top nor bottom.

4 03/2017 Subject to technical changes.. domat UC120
Operation
Temperature correction:
Turn the knob clockwise to increase setpoint, turn it counterclockwise to decrease
setpoint. The maximum correction range can be modified over the bus e.g. with the
ModComTool configuration tool.
Operation mode change:
Push the knob shortly (<1 s). Each push changes the operation mode to Party –Day –
Night –Off –Auto.
In the Auto mode, the Day / Night / Off modes change according to time schedule).
The Party mode overrides to Comfort for 120 minutes, then follows the actual time
schedule.
The weekly time schedule switches between Day, Night, and Off modes according to
the event list. There may be up to 6 events per day.
Time schedule settings:
Switch to the time schedule settings mode with a long push (>1 s). The controller
switches to settings mode (clock icon).
Turn the knob to select the weekday (1 to 7). Then short push to confirm the selection.
Turn the knob to select the event (large number 1 to 6). Each event displays the mode
activated by this event.
Short push to confirm the event selection. Turn the knob to select the operation mode
(Day, Night, Off, Event inactive) invoked by this event. If the event is not active, the
operation mode is not changed at the set time.
Short push to confirm the operation mode setting. The event time displays. Turn the
knob to set the time of the event and confirm by a short push. Then turn the knob to
select another event or long push and turn the knob to select another weekday.
After all desired events have been edited, long push to leave the time schedule settings.
The controller goes to the basic display mode also after 30 secs of user inactivity.
Change of setpoints and controller time:
Switch to the settings mode with a superlong push (>2.5 s). The controller switches to
settings mode (flashing thermometer icon).
Turning the knob selects between following settings:
-Controller time and day of week (Clock icon, Day of week)
-Setpoint temp. Heating Day mode (Temperature, Heating, Day are flashing)
-Setpoint temp. Heating Night mode (Temperature, Heating, Night are flashing)
-Setpoint temp. Heating Off mode (Temperature, Heating, Empty house are
flashing)
-Setpoint temp. Cooling Day mode (Temperature, Cooling, Day are flashing)
-Setpoint temp. Cooling Night mode (Temperature, Cooling, Night are flashing)
domat UC120 03/2017 Subject to technical changes. 5
-Setpoint temp. Cooling Off mode (Temperature, Cooling, Empty house are
flashing)
Select the requested value by a short push. Turn knob to change value. Confirm by a
short push again.
If there is no user activity for 30 s, the controller goes to the basic display mode.
Default values:
The default values as well as all other settings (PI parameters, address, baudrate...) can
be set by the configuration program, ModComTool.
Dimensions
All dimensions in mm.

6 03/2017 Subject to technical changes.. domat UC120
Connection
Connection of power, communication, and valve. Suitable cable types are LAM
DATAPAR 2x0.8 (cross-section in mm2), JYTY 2x1 (diameter in mm) etc. If
communication and power are in the same cable, use 4-core LAM DATAPAR 2x2x0.8,
JYTY 4x1. Up to 100-120 meters, parallel lines of 24 V and data bus are no problem.
Regarding to EMC it is better if the pairs are twisted, such as with the LAM DATAPAR or
Belden 8205 cable.
A terminal is designed for maximum 3 wires of 0.8 mm2.
Temperature
compensation
After switching the unit on, allow about 90 mins to dissipate the heat inside of the
housing. Then the sensor is measuring correctly. Do not change the sensor correction
variable immediately after powering the device on!
RoHS notice
The device contains a non-rechargeable battery which backups the real-time clock and
part of the memory. After the device is not operable, please return it to the
manufacturer or dispose of it in compliance with local regulations.
1
2
3
4
5
6
78
9
1
2
3
4
5
6
78
9
24 V =
UC120UC120
RS 485
+
-
+
-
G0
G0
G
DI1
G0
G0
G
DI1
AO1 AO1

domat UC120 03/2017 Subject to technical changes. 7
Changes in
versions
08/2016 —Changed reference to the configuration software.
Added picture and description of the installation and link on the datasheet with other
colours.
03/2017 —Added picture and description of the installation and link on the datasheet
with other colours.
Table of contents
Other domat Thermostat manuals

domat
domat THERMASREG FS-20 Repair manual

domat
domat UC220 User manual

domat
domat UI0 Series User manual

domat
domat UI0 Series User manual

domat
domat UC300 User manual

domat
domat THERMASGARD RTM Repair manual

domat
domat UI090 User manual

domat
domat UC100 User manual

domat
domat UI300 User manual

domat
domat UI0 BL Series User manual
Popular Thermostat manuals by other brands

Carrier
Carrier debonair 33cssn2-wc owner's manual

Honeywell
Honeywell FocusPRO Wi-Fi TH6000 Series operating manual

resideo
resideo TB7100A1000 MultiPRO manual

Agilent Technologies
Agilent Technologies 1260 Infinity II user manual

Pro 1 IAQ
Pro 1 IAQ true comfort III installation manual

PW maintenance
PW maintenance DT operating instructions