manuals.online logo
Brands
  1. Home
  2. •
  3. Brands
  4. •
  5. Dometic
  6. •
  7. Air Conditioner Accessories
  8. •
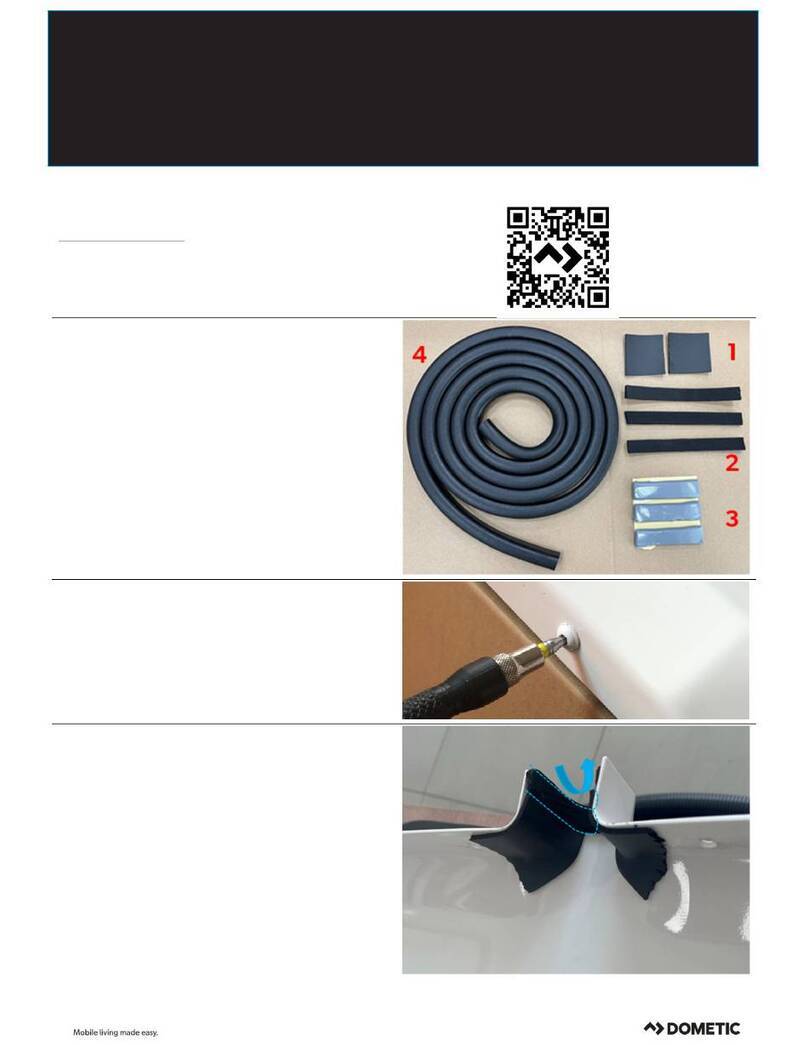
  9. Dometic Duo-Therm QUICK START KIT User manual

Dometic Duo-Therm QUICK START KIT User manual

1
QUICK START KIT
Part No. 3102903.006
The Quick Start Kit can be installed on all Duo-Therm roof mounted air conditioners and heat pumps. The Quick Start Kit will
allow the compressor to start properly when operated on the Onan 2.8 Micro-Lite Generator as the 120 volt power source.
High ambient temperatures can affect the ability of the roof mounted air conditioner/heat pump to start on generator power.
The following parts are included in this Kit:
1 ea. 3100235.245 Start Relay 2 ea. 312219.002 Screw
1 ea. 3100236.219 Start Capacitor 1 ea. 3102904.020 Instructions
1 ea. 304750.227 Black Wire 2 ea. 307879.003 Screw
3 ea. 303937.670 Yellow Wire 1 ea. 312096.002 Screw
1 ea. 20009.002 Wire Nut 1 ea. 317188.000 Capacitor Strap
2 ea. 312219.002 Screw
GENERAL INSTRUCTIONS
All field wiring modification should be made in compliance with the 1990 ANSI/NFPA70 N.E.C. and
1987 ANSI A119.2 for Recreational Vehicles.
This unit must be serviced by a Dometic Service Center or a
qualified service technician. Modification of this product can
be extremely hazardous and could result in personal injury or
property damage.
Read and understand these instructions BEFORE attempt-
ing to install the Quick Start Kit. Keep these instructions with
the air conditioner manuals.
1.Turn all AC and DC power off at the circuit breaker.
2.Remove shroud from unit and cover from electrical box.
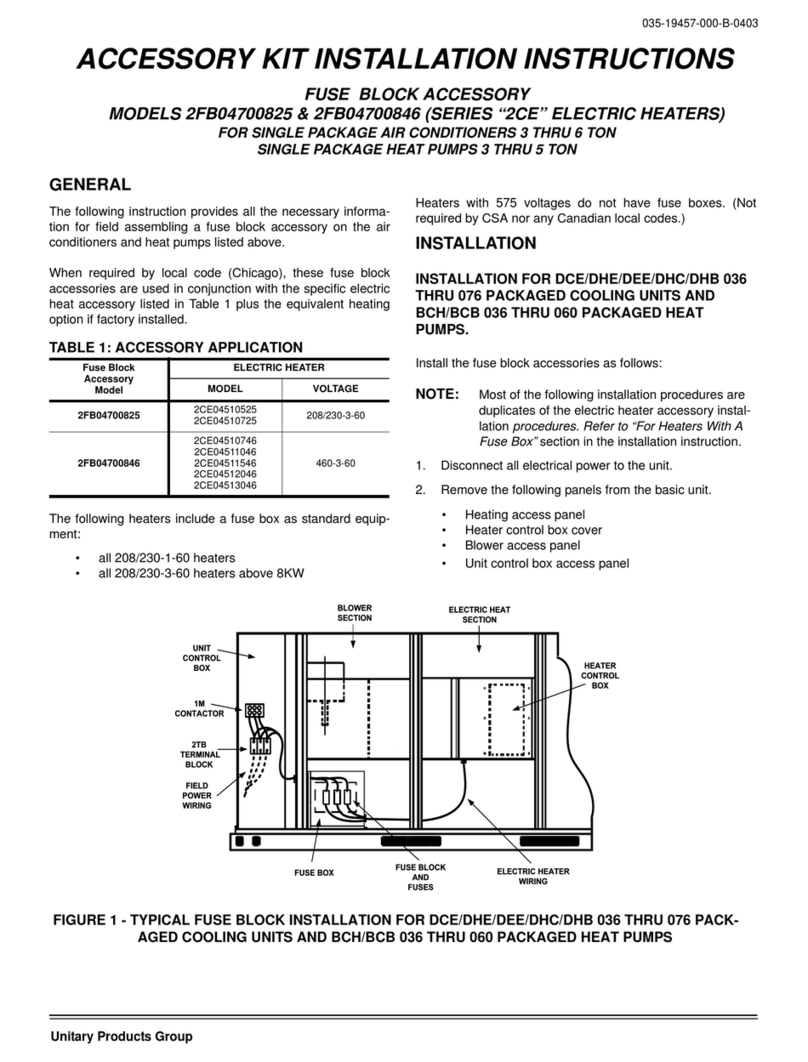
3.Locate and completely remove the PTCR device, start
capacitor, and their wires. Some models have the PTCR
and start capacitor combined into one part, or only have
a PTCR device. See FIG. 1Aand FIG. 1B.
4.Mount the new start capacitor in the electrical box using
the capacitor strap supplied in the kit.
REVISION
Form No. 3102904.020 1/99
(Replaces 3102904.012)(French 3109075.006)
©1999 The Dometic Corporation
LaGrange, IN 46761
FIG. 1A
PTCR Device
FIG. 1B
2
5. Determine a suitable location in the units electrical box
and the new start relay.
6. Locate the wire that supplies the AC power to the over-
load (Common or C terminal) of the compressor.
Note: Some models have a cold control switch installed in
this lead.
7. Cut the compressor AC power wire in half inside the elec-
trical box.
8. Cut the piggy back terminal off the end of the Black wire
supplied with kit. Strip insulation back 1/2" on all three
wires and connect together with the wire nut. Using elec-
trical tape, secure with wire nut.
9. Connect the remaining end of the Black wire to the #5
terminal on the new start relay.
10. Connect the first yellow wire from the kit and connect
the insulated flag terminal to terminal #2 on the new start
relay. Connect the other end to the fan run capacitor
terminal marked HERM.
11. Connect the insulated flag of the second yellow wire to
the #1 terminal on the new start relay. Connect the other
end of the second yellow wire to one terminal of the new
start capacitor.
12. Connect the third yellow wire (non-insulated terminal) to
the C (common) terminal of the fan/run capacitor. Place
the other end of the third yellow wire on the remaining
terminal on the new start capacitor.
FIG. 2
13. Recheck the wiring for loose or shortened terminals and
correctness.
14. Replace the electrical box cover and shroud. Turn the
AC and DC power supplies back on and test the opera
tion of the unit per the Owner/Operators Manual.
15. Keep these instructions with the Owner/Operator
Manuals for future reference.
WIRING DIAGRAM FOR ROOF MOUNTED HEAT PUMP WITH OPTIONAL COMFORT CONTROL CENTER
HERM Term.
on Fan/Run
Capacitor
Term. #2
Start Relay
Start Relay
Term. #1
Start Relay
3
MODULARIZED ROOF TOP HEAT PUMP OPTIONAL WIRING DIAGRAM
MODULARIZED ROOF MOUNTED AIR CONDITIONER OPTIONAL WIRING DIAGRAM
4
ROOF MOUNTED HEAT PUMP OPTIONAL WIRING DIAGRAM
5
ROOF MOUNTED AIR CONDITIONER WITH MECHANICAL CONTROLS
OPTIONAL WIRING DIAGRAM
ROOF MOUNTED AIR CONDITIONER WITH ELECTRONIC CONTROLS
OPTIONAL WIRING DIAGRAM

This manual suits for next models

1

Other Dometic Air Conditioner Accessories manuals

Dometic 4442500717 User manual

Dometic

Dometic 4442500717 User manual

Dometic Waeco AirConServiceCenter ASC2500G User manual

Dometic

Dometic Waeco AirConServiceCenter ASC2500G User manual

Dometic SPX1200T-T-RE User manual

Dometic

Dometic SPX1200T-T-RE User manual

Popular Air Conditioner Accessories manuals by other brands

Carrier 52S Wall Thermostat Interface Retrofit Kit installation instructions

Carrier

Carrier 52S Wall Thermostat Interface Retrofit Kit installation instructions

Frigidaire Smart Choice 5304492448 manual

Frigidaire

Frigidaire Smart Choice 5304492448 manual

GoodHome Takoma 3663602499862 manual

GoodHome

GoodHome Takoma 3663602499862 manual

ActronAir MRE-035AS installation manual

ActronAir

ActronAir MRE-035AS installation manual

Mitsubishi Electric SPTB1 installation manual

Mitsubishi Electric

Mitsubishi Electric SPTB1 installation manual

GE RAK44 installation instructions

GE

GE RAK44 installation instructions

Galletti ZA Series quick start guide

Galletti

Galletti ZA Series quick start guide

TCL TCL-WiredCasCtrl user manual

TCL

TCL TCL-WiredCasCtrl user manual

Fujitsu Airstage UTY-DTGYZ1 operating manual

Fujitsu

Fujitsu Airstage UTY-DTGYZ1 operating manual

Siccom MAXI ECO FLOWATCH DE40LCC300 manual

Siccom

Siccom MAXI ECO FLOWATCH DE40LCC300 manual

Danfoss DSH Series instructions

Danfoss

Danfoss DSH Series instructions

GE RAKUVC1 installation instructions

GE

GE RAKUVC1 installation instructions

Trane BAYECON104AA Installer's guide

Trane

Trane BAYECON104AA Installer's guide

Carrier 324423-751 installation instructions

Carrier

Carrier 324423-751 installation instructions

manuals.online logo
manuals.online logoBrands
  • About & Mission
  • Contact us
  • Privacy Policy
  • Terms and Conditions

Copyright 2025 Manuals.Online. All Rights Reserved.