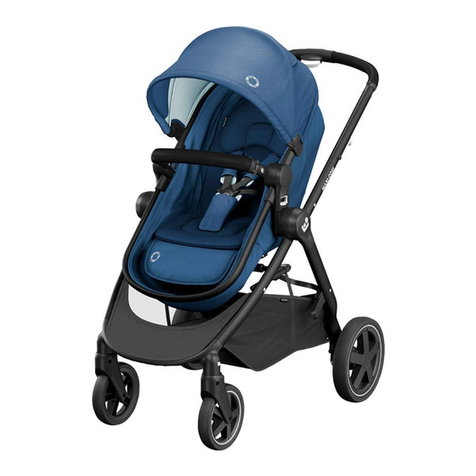
Dorel Maxi-Cosi Mura User manual

7
DEAR PARENTS
Congratulations on your purchase of the Maxi-Cosi Mura.
Safety, user-friendliness, comfort and design played an impor-
tant role in developing this pushchair. Your Maxi-Cosi Mura
therefore complies with the strictest standards and will provide
you with a high level of user-friendliness and comfort.
Read this instruction manual carefully. You will then be able to
make full use of your pushchair. Moreover, the safety and
comfort of you and your child can only be guaranteed if the
product is used correctly.
We hope that you will find your Maxi-Cosi Mura easy to use
and that it will give you years of pleasure!
Dorel
CONTENTS
1 IMPORTANT: READ FIRST!
2 SAFETY INSTRUCTIONS
3 PRODUCT DESCRIPTION
4 PREPARING THE MAXI-COSI MURA FOR USE / UNFOL-
DING AND FOLDING / DISASSEMBLING
4.1 Preparing the pushchair for use
4.2 Folding and disassembling
5 PLACING YOUR CHILD IN THE MAXI-COSI MURA
5.1 General
5.2 Adjusting the length of the belt
5.3 Adjusting the height of the shoulder belt
6 CLEANING AND MAINTENANCE
6.1 General
6.2 Maintenance of the Maxi-Cosi Mura
6.3 Maintenance of the Maxi-Cosi Mura tyres
7 SEPARATING WASTE
8 WARRANTY
9 QUESTIONS
Disclaimer:
The utmost care was exercised in designing and compiling this
instruction manual. We cannot, however, offer any guarantees
with regard to the completeness and correctness of the informa-
tion contained herein.
1 IMPORTANT: READ FIRST!
WARNING
- Please read this instruction manual carefully
and keep it for future reference.The safety of
the child may be seriously endangered if the
instructions are not followed.
- You are personally responsible for the safety
of your child.
- It can be dangerous to leave your child
unsupervised.
- Always set the parking brake on the push-
chair when you are standing still.
- Always secure your child with the safety
harness as soon as your child can sit up
unassisted.
- Always secure your child with the safety
harness - and as tight as possible!
- Do not hang anything from the handlebar.
This will make the pushchair less stable and
will increase the risk of tipping over.
- Keep all small parts like the tyre valve caps
away from children. Your child may swallow
them and they pose a choking hazard. Also
keep the hand pump out of the reach of
children.
- Prevent the danger of suffocation and keep
plastic bags out of the reach of children.
- This product is not suitable for jogging or
skating behind.
- Check to make sure that all locks are secured
before each use in order to avoid getting
anything jammed between parts.
- Before each use check that the prambody,
adapters and/or seats are installed correctly
and securely locked.
- The black tyres may leave marks on some
smooth floors (particularly synthetic lami-
nates, parquet and linoleum).
English
73854_Maxi_C_Mura_3_wheel.qxp 15-05-2007 10:00 Page 7

8
2 SAFETY INSTRUCTIONS
- Use the Maxi-Cosi Mura for only one child at a time.
- The Maxi-Cosi Mura is suitable for children from birth to
age 4 (maximum of 20 kg).
- We recommend that the seat of the Maxi-Cosi Mura is
only used after your child has reached the age of 6 months
and is able to sit unassisted. When being used from birth,
we recommend that the Maxi-Cosi Mura is used together
with a carrycot, prambody or Maxi-Cosi baby or child car
seat.
-The Maxi-Cosi Mura seat is not suitable for use in a
car. Use a Maxi-Cosi baby or child car seat for this.
- Keep your child and your fingers/hands away from
moving/folding parts when folding or unfolding or
adjusting the Maxi-Cosi Mura.
- Never lift the Maxi-Cosi Mura or use escalators or stairs
when your child is sitting or lying in the pushchair.
- Check and clean your Maxi-Cosi Mura regularly.
- Do not remove the logos from the fabric cover. This will
avoid damage to the fabric cover.
- Prevent the danger of suffocation and keep plastic bags
out of the reach of children.
- Only use original accessories and parts that have been
approved by the manufacturer. Do not make any modifica-
tions to the product. Contact your supplier or importer if
you have any complaints or problems.
Maxi-Cosi Mura has been approved in accordance with
EN 1888:2003 (amendments 1, 2 & 3).
Type of Body weight Age
pushchair of child
Pushchair with max. 9 kg From birth
carrycot to approx.
5 months
Pushchair with max. 9 kg From birth
prambody to approx.
6 months
Pushchair with a max. 13 kg From birth
Maxi-Cosi to approx.
baby car seat 12 months
3 PRODUCT DESCRIPTION
Accessories:
Maxi-Cosi baby car seat
Prambody
Carrycot
Foot muff
Shopping bag
Parasol and parasol clamp
Rain cover
12
7
10
12
15
14
13
16
26 27
19
17 18 11
8
9
3
4
5
6
21
20
22
23
25
24
1. Handlebar adjustment
button
2. Handlebar
3. Seat
4. Comfort cushion
5. Safety harness
6. Belt pad
7. T-bar aperture protective
cap
8. T-bar
9. T-bar release button
10. Frame
11. Leg rest adjustment
button
12. Leg rest
13. Swivel wheel lock
14. Front fork release button
15. Front wheel
16. Basket
17. Rear wheel
18. Transport hook
19. Pump
20. Fold release buttons
21. Fold safety lock
22. Sun canopy
23. Back rest positioning
handle
24. Seat release button
25. Sub-frame release button
26. Brake
27. Adapters
English
73854_Maxi_C_Mura_3_wheel.qxp 15-05-2007 10:00 Page 8

9
4 PREPARING THE MAXI-COSI
MURA FOR USE / UNFOLDING
AND FOLDING / DISASSEMBLING
Please note: the left and right sides are as seen from the hand-
lebar/back
4.1 Preparing the pushchair for use
Fitting the wheels
1. Press on the centre of the hubcap and insert the axle of the
rear wheels into the frame until you hear it ‘click’ (Fig. 1).
2.
Insert the front wheel into the front fork until you hear them
‘click’ (Fig. 2).
3. Check that the wheels are correctly secured.
Unfolding the frame
1. Place the frame upright.
2. Push the transport hook near the right rear leg aside (Fig. 3).
3. Pull the handlebar toward you and then upward (Fig. 3).
The frame will unfold and the handlebar will click into the
locking device (Fig. 4).
Adjusting the handlebar height
- Press the adjustment button and slide the handlebar to the
desired height. With a ‘click’ the handlebar is fixed in
position (Fig. 5).
Parking brake
- Note: always use the parking brake, even when standing
still for only a few moments!
1. Press the red surface of the pedal down to set the parking
brake on your Maxi-Cosi Mura (Fig. 6).
2. Put your foot under the pedal and press it up to release the
parking brake on the Maxi-Cosi Mura.
Adapters
The adapters are marked on the inside with an A (right) and
B (left).
1. Slide the adapters onto the frame until you hear a ‘click’
(Fig. 7).
2. Check that both adaptors are secure.
3. When using the prambody: fold the hinging parts of the
adapters down (Fig. 8). For further use see the instructions
for the prambody.
4. When using a Maxi-Cosi baby car seat: fold the hinging
parts of the adapters up (Fig. 9). For further instructions
see the Maxi-Cosi baby car seat instruction manual.
5. Remove the adapters by pushing the lip inward (toward
the middle of the pushchair). Then slide the adaptors off
the frame (Fig. 10).
Seat
- Note: The Maxi-Cosi Mura is suitable for children from
birth to age 4 (maximum of 20 kg). We recommend that
the seat of the Maxi-Cosi Mura is only used after your child
has reached the age of 6 months and is able to sit
unassisted. Always secure your child with the safety
harness. The Maxi-Cosi Mura seat is not suitable for
use in a car.
Preparing the seat for use
1. Fold up the leg rest and attach the fabric cover (Fig. 11).
2. Press the buttons on both sides to fold down the leg rest.
The seat can be used in two positions.
- Note: never allow your child to stand or sit on the footrest.
3. Put the back rest in the upright position using the positio-
ning handle (Fig 12).
- Note: never hang bags or other products behind or on the
positioning handle and never clamp objects between the
back rest and the handle.
4. Remove the protective cap from the crotch strap by pulling
the click tab forward and then pushing it upward (Fig 13).
Push the T-bar into the seat until you hear it click.
5. Attach the elastic to the bottom (Fig. 14).
To remove: loosen the elastic on the bottom. Push in the
button on the front and pull the T-bar upward. Replace the
protective cap.
Fitting the seat and adjusting the sitting angle
- Note: the seat can only be fitted when the adapters have
been removed.
1. Place the seat on the frame with a ‘click'. (Fig. 15).
2. Check to make sure everything is secure.
3. Pull the back rest positioning handle up and tilt the back
rest into the required position (Fig. 16).
The seat can be adjusted to 3 positions: a sitting position,
a semi-reclining position and a reclining position.
Turning the seat around
1. Pull the release handle on the Maxi-Cosi Mura seat back-
wards and remove the seat (Fig. 17).
- Note: do not lift the Maxi-Cosi Mura up with the T-bar.
2. Turn the seat around and place it in the frame until it
'clicks' (Fig 18).
3. Check to make sure everything is secure.
There are D-rings for attaching an additional safety
harness. The standard for this type of harness is BS 6684.
English
73854_Maxi_C_Mura_3_wheel.qxp 15-05-2007 10:00 Page 9

10
Locking the swivel wheels
1. Press the swivel lock on the wheel down and turn the front
wheel to the rear position until you hear a 'click' (Fig. 19).
2. To release the lock lift up the swivel lock.
Sun canopy
When using the Maxi-Cosi Mura with the seat in the forward-
facing position:
1. Attaching: slide the sun canopy onto the frame until it can
go no further (Fig. 20).When using the Maxi-Cosi Mura in
the semi-reclining and reclining positions you can use an
extra flap on the sun canopy. Remove the flap from its
storage compartment (Fig. 21), close the canopy using the
zips and pull the flap tight using the stopper (Fig. 22).
2. When using the Maxi-Cosi Mura seat in the semi-reclining
and reclining positions secure the sun canopy using the
buttonhole. In addition, secure the sun canopy using the
press studs on the side of the seat (Fig. 23).
3. Removing: loosen the sun canopy using the buttonhole
and press studs (Fig. 24). Slide the sun canopy to the top
of the frame (Fig. 25).
- Note: when turning the seat around you have to turn the
sun canopy around also.
When using the Maxi-Cosi Mura with the seat in the backward-
facing position, the sun canopy should be secured using only
the press studs and not using the buttonhole (Fig. 26).
Basket
1. The basket can be used for shopping up to a maximum of
8 kg (Fig. 27).
2. You can attach and remove the basket using the press
studs, hooks and elastics (on the bottom of the Maxi-Cosi
Mura).
- Note: do not exceed the maximum permitted weight of
8 kg!
4.2 Folding and disassembling
Folding
1. If you want to fold the Maxi-Cosi Mura with the seat still
attached, this is only possible when the seat is attached in
the forward-facing position and the back rest is in the
extreme forward position (Fig. 28).
-We recommend that the seat is always removed before
starting to fold the pushchair.
2. Fold back the sun canopy parallel to the handlebar
(Fig. 29).
3. Turn the fold safety lock on the right side downwards and
then simultaneously pull the folding-up release buttons on
both sides upwards (Fig. 30).
4. Tilt the handlebar forwards and then down until it ‘clicks'
into the transport lock (Fig. 31).
If you want to fold the frame even smaller
5. Remove the seat before starting folding.
6. Turn the front wheel forward.
7. Press the release button (Fig. 32).
8. The frame folds even smaller.
9. Remove the wheels if necessary.
Removing the wheels
1. Rear wheels: press on the centre of the hubcap and at the
same time pull the rear wheels out of the frame (Fig. 33).
2. Front wheel: press in the release button and pull the front
fork out of the frame (Fig. 34).
English
73854_Maxi_C_Mura_3_wheel.qxp 15-05-2007 10:00 Page 10

11
5 PLACING YOUR CHILD IN THE
MAXI-COSI MURA
5.1 General
- Note: always set the brake on the Maxi-Cosi Mura before
placing your child in the seat. Ensure that the safety
harness is open.
1. Slide the buckle sections together and click them into the
buckle. The lap belt and the shoulder belts are fastened to
the crotch strap (Fig. 35).
5.2 Adjusting the length of the belt
1. Unfasten the Velcro on the Comfort cushion from the back
rest. Unfasten the shoulder belt hook and remove the belt
pad (Fig. 36).
2. Adjust the belt length to the size of your child by lengthe-
ning or shortening the clasp (Fig. 37).
3. Place the belt pads over the shoulder belts again. Attach
the hooks to the loop. Slide the belt pad up over the
shoulder belt and attach it using the press-stud (Fig. 38).
4. Push both buttons to open the belt buckle (Fig. 39).
5.3 Adjusting the height of the shoulder belt
1. Unfasten the shoulder belt hook and remove the belt pad
(Fig. 40).
2. Pull the shoulder belt out of the loop and thread it through
the other loop (Fig. 41).
3. Adjust the belt length to the size of your child by lengthe-
ning or shortening the clasp (Fig. 42).
4. Place the belt pads over the shoulder belts again. Attach
the hooks to the loop. Slide the belt pad up over the
shoulder belt and attach it using the press-stud (Fig. 43).
6 CLEANING AND MAINTENANCE
Warning
- Check regularly to make sure that the Maxi-Cosi Mura
functions properly. This is essential for your child’s safety.
- For reasons of safety, always use original parts.
- In the event of damage have your retailer check and/or
repair your Maxi-Cosi Mura before using it again.
- When cleaning never use silicon lubricants. These attract
dirt and grime.
- Clean the frame, the fabric cover and the basket regularly
using a damp cloth. Do not use abrasive cleaners.
6.1 General
- During rain always use the rain cover to protect the fabric
cover. After use, dry the pushchair with a soft, absorbent
cloth.
- Remove the detachable wheels once a month, clean the
axles and lubricate them with a dry Teflon spray.
- Never use the Maxi-Cosi Mura in seawater. After use on
the beach, clean the frame and wheels thoroughly with
water to prevent rusting.
6.2 Cleaning the Maxi-Cosi Mura Comfort cushion
1. Remove the Maxi-Cosi Mura seat from the frame.
2. Remove the T-bar.
3. Unfasten the shoulder belt hook and remove the belt pads.
4. Loosen the fabric cover on the footrest (Fig. 44).
5. Slide the tabs on the bottom of the cushion outwards
(Fig. 45).The Comfort cushion will now be free of the seat.
6. Remove the belt pad from the crotch strap by loosening
the snap.
7. Loosen all loops on the bottom of the seat (Fig. 46).
8. Remove the fabric cover from the Comfort cushion. Start
on one side and continue on the other side (Fig. 47).
- Note! Remove the fabric cover around the T-bar aperture
last (Fig. 48)!
9. Finally, pull the safety harness fully out of the Comfort
cushion.
English
73854_Maxi_C_Mura_3_wheel.qxp 15-05-2007 10:00 Page 11

12
7 SEPARATING WASTE
For environmental reasons, we request that you separate the
packaging waste from the Maxi-Cosi Mura. In addition, waste
at the end of the service life of the Maxi-Cosi Mura (product
parts) should be separated.
Warning
Keep plastic wrapping material out of reach of your child in
order to avoid the risk of suffocation.
Packaging
Cardboard box Paper waste
Plastic bag Residual waste
Product parts
Fabric cover Residual waste
Plastic parts In the appropriate container
Metal parts Container for metal
Pneumatic tyres Residual waste
Tether Container for polyester
The fabric cover can be attached in the reverse order.
- Note! The tabs on the bottom should be clicked back in
again. Check that the Comfort cushion is securely attached
to the seat.
6.3 Maintenance of the Maxi-Cosi Mura tyres
- Make sure that the pressure in all the tyres is correct and
the same. The correct tyre pressure is stated on the tyre.
Properly pumped up tyres will ensure a lighter and more
smoother ride from the Maxi-Cosi Mura and will prevent
damage to rotating and hinging parts.
- The tyres are fitted with a car tyre valve. They can be
inflated using the hand pump supplied (to be found in the
front compartment of the basket) or at a garage or petrol
station. The tyres can be inflated more easily once the
wheels have been removed from the frame.
- A punctured inner tube can be repaired in the same way
as a bicycle tyre. You can buy separate inner tubes from
your supplier.
- Always deflate the tyres before taking the Maxi-Cosi Mura
onto an aircraft, as the air pressure difference could cause
the tyres to burst.
English
73854_Maxi_C_Mura_3_wheel.qxp 15-05-2007 10:00 Page 12

13
8 WARRANTY
Dorel guarantees that this product complies with the safety
requirements as specified in current European safety standards,
and that this product is free from defects in workmanship and
material at the time of purchase.You should contact your retai-
ler if this product shows material and/or manufacturing faults
(with normal use as described in the user instructions) after
purchase and during the warranty period. The warranty period
is 24 months for plastic and metal parts and 12 months for
other parts susceptible to wear and tear, such as the fabric
cover. This does not, of course, include the normal wear that
may be expected with the daily use of a product.
The guarantee is not valid in the following cases
- If the product is not submitted for repair through a recog-
nized Dorel supplier.
- If the product is not supplied to the manufacturer with the
original purchase receipt (via the retailer and/or importer).
- If repairs were carried out by third parties.
- If the barcode sticker is damaged or has been removed.
- If the defect is the result of improper or careless use or
maintenance, negligence or impact damage to the fabric
cover and frame.
- If the defect is the result of an accident or airplane travel.
- If the defect is the result of overloading (exceeding the
maximum weight allowed for your child and/or packages).
- If the defect is the result of carrying two children and the
use of a standing board or seats.
- If the parts show normal wear and tear that may be
expected from daily use.
- If there is normal wear and tear to the wheels, tyres and/or
fabric cover (such as a flat tyre and/or loose press studs).
- If there is discolouration on the fabric cover or water
marks due to washing, rainwater, or excessive exposure to
sunlight (UV).
- If damage to the fabric cover was caused by, amongst
others, clothing, zippers or press studs.
- If the product has been involved in a collision with a
pavement kerb or heavy shop door, for example.This could
cause the wheels and/or axles to be thrown out of align-
ment or bend as a result of which the pushchair will no
longer track correctly.
- If there is damage to surfaces, such as synthetic laminate
floors, due to tyre marks.
- If the stated warranty terms and conditions have not been
satisfied.
Effective date
The warranty becomes effective on the date the product is
purchased.
Warranty period
The warranty on the plastic parts and metal parts is valid for a
period of 24 consecutive months. For other parts that are
subject to wear and tear, the warranty period is valid for 12
consecutive months. The warranty only applies to the first
owner and is not transferable.
What to do in case of defects
In the event of problems or defects, contact your retailer. If the
fault cannot be rectified, the retailer will send the product,
together with a description of the complaint and the original
receipt, back to the manufacturer. Exchanging or taking back
the product cannot be requested. Repairs do not give entitle-
ment to extension of the warranty. Products that are returned
directly to the manufacturer are NOT eligible for warranty.
General
Fabric components and other parts subject to wear and tear:
- The fabric should be cleaned on a regular basis (follow the
maintenance instructions).
- It is normal for the fabric cover to show a certain degree
of wear and tear or discolouration due to sunlight after
some time.
This Warranty Clause conforms to European Directive 99/44/EC
of 25 May 1999.
9 QUESTIONS
If you have any questions, please ring your supplier or importer
(see the back of the instruction manual). Make sure that you
have the following information to hand:
- Serial number from the sticker on the bottom of the frame.
- Age, height and weight of your child.
English
73854_Maxi_C_Mura_3_wheel.qxp 15-05-2007 10:00 Page 13

14
Français
NOTES / NOTIZEN / NOTITIES / NOTAS / NOTÍCIAS
73854_Maxi_C_Mura_3_wheel.qxp 15-05-2007 10:00 Page 14

15
CHERS PARENTS
Toutes nos félicitations pour l'achat de la poussette à trois
roues Mura de Maxi-Cosi.
Sécurité, facilité d'utilisation, confort et esthétique ont eu la
priorité lors de la conception de cette poussette. Répondant
aux normes les plus strictes, votre poussette Mura de Maxi-
Cosi vous garantit confort et liberté d'utilisation.
Lisez d'abord ce mode d'emploi attentivement et intégralement.
Vous serez alors en mesure de profiter au maximum de toutes
les possibilités offertes par votre poussette. Par ailleurs, seule
une utilisation correcte permet de garantir la sécurité et le
confort de votre enfant… ainsi que le vôtre.
Nous vous souhaitons beaucoup de plaisir avec votre poussette
Mura de Maxi-Cosi !
Dorel
SOMMAIRE
1 IMPORTANT : À LIRE IMPÉRATIVEMENT !
2 CONSIGNES DE SÉCURITÉ
3 DESCRIPTION DU PRODUIT
4 MONTER / DÉPLIER ET PLIER / DÉMONTER LA POUS-
SETTE MURA DE MAXI-COSI
4.1 Montage de la poussette
4.2 Plier et démonter la poussette
5 INSTALLER VOTRE ENFANT DANS LA POUSSETTE
MURA DE MAXI-COSI
5.1 Généralités
5.2 Réglage de la longueur du harnais
5.3 Réglage de la hauteur des bretelles de harnais
6 NETTOYAGE ET ENTRETIEN
6.1 Généralités
6.2 Nettoyage de la housse de hamac Mura de
Maxi-Cosi
6.3 Entretien des pneus de la poussette Mura de
Maxi-Cosi
7 TRI DES DÉCHETS
8 GARANTIE
9 QUESTIONS
Avis de non-responsabilité :
Ce mode d'emploi a été conçu et rédigé avec le plus grand soin.
Nous ne pouvons néanmoins donner aucune garantie eu égard à
la complétude et à la justesse des informations y figurant.
1 IMPORTANT : À LIRE IMPÉRATIVE-
MENT !
AVERTISSEMENT
- Lisez ce mode d'emploi attentivement et
conservez-le comme ouvrage de référence.
Ne pas se conformer au mode d'emploi peut
mettre gravement en danger la sécurité de
votre enfant.
- Vous êtes vous-même responsable de la
sécurité de votre enfant.
- Il peut être dangereux de laisser votre
enfant sans surveillance.
- Mettez toujours le frein lorsque la poussette
est immobile.
- Une fois que votre enfant peut s'asseoir
seul, attachez-le toujours avec le harnais de
sécurité.
- Attachez toujours votre enfant avec le
harnais de sécurité ! Serrez ce harnais le
plus possible.
- Ne suspendez rien à la barre de conduite.
Ceci rend la poussette moins stable et
augmente le risque de basculement.
- Veillez à ce que votre enfant ne joue pas
avec les petites pièces comme les bouchons
de valve des roues. Il pourrait les avaler
(risques d'étouffement). La pompe à main
doit aussi être tenue hors de la portée des
enfants.
- Evitez tout risque d'étouffement et gardez
les sachets en plastique hors de la portée
des enfants.
- Ce produit ne doit pas être utilisé en faisant
du jogging ou du patin à roulettes.
- Contrôlez avant chaque emploi que tous les
verrouillages sont bien fermés pour éviter
tout risque de pincement.
- Contrôlez avant chaque emploi que la
nacelle, les adaptateurs et/ou les sièges
sont correctement installés et fixés.
- Les pneus noirs peuvent laisser des marques
sur certains sols lisses (surtout les laminés
synthétiques en vinyle, les parquets et le
linoléum).
Français
73854_Maxi_C_Mura_3_wheel.qxp 15-05-2007 10:00 Page 15

16
Français
2 CONSIGNES DE SÉCURITÉ
- La poussette Mura de Maxi-Cosi ne peut être utilisée que
pour un seul enfant à la fois.
- La poussette Mura de Maxi-Cosi convient pour un enfant
naissant jusqu'à 4 ans (poids maximal 20 kg).
- Nous vous conseillons d'utiliser le hamac de la poussette
Mura de Maxi-Cosi seulement à partir de 6 mois ou plus,
lorsque votre enfant se tient assis tout seul. Lors d'une uti-
lisation dès la naissance, nous vous recommandons d'utili-
ser la poussette Mura de Maxi-Cosi avec un couffin, une
nacelle ou un siège-auto Maxi-Cosi pour bébé/enfant.
-Le hamac Mura de Maxi-Cosi ne peut pas être utilisé
en voiture. Pour cela, vous devez utiliser un siège-auto
Maxi-Cosi pour bébé/enfant.
- Lorsque vous pliez, dépliez ou réglez la poussette Mura de
Maxi-Cosi, faites attention à ce que votre enfant ne se
prenne pas dans les éléments mobiles. Faites également
attention à ne pas vous coincer les doigts/mains.
- Ne soulevez jamais la poussette Mura de Maxi-Cosi si
votre enfant y est assis et ne montez pas d'escaliers rou-
lants si votre enfant est assis ou couché dans la poussette.
- Contrôlez et nettoyez votre poussette Mura de Maxi-Cosi
régulièrement.
- N'enlevez pas les logos de la confection. Vous évitez ainsi
de l'endommager.
- Evitez tout risque d'étouffement en gardant les sachets en
plastique hors de la portée des enfants.
- N'utilisez que des accessoires et des pièces d'origine
agréés par le fabricant. Ne modifiez pas le produit. En cas
de réclamation ou de problème, prenez contact avec votre
fournisseur ou votre importateur.
La poussette Mura de Maxi-Cosi est agréée selon la
norme EN 1888:2003 (amendement 1, 2 & 3), BS 7409:1996.
Modèle de Poids de Age
poussette l'enfant
Poussette avec max. 9 kg A partir de la
un couffin naissance jusqu'à
environ 5 mois
Poussette avec max. 9 kg A partir de la
une nacelle naissance jusqu'à
environ 6 mois
Poussette avec max. 13 kg A partir de la
un siège-auto naissance jusqu'à
Maxi-Cosi environ 12 mois
3 DESCRIPTION DU PRODUIT
Accessoires:
Siège-auto pour bébé Maxi-Cosi
Couffin
Nacelle
Chancelière
Panier
Ombrelle et kit de fixation d'ombrelle
Habillage pluie
12
7
10
12
15
14
13
16
26 27
19
17 18 11
8
9
3
4
5
6
21
20
22
23
25
24
1. Barre de conduite
réglable
2. Barre de conduite
3. Siège
4. Coussin confort
5. Harnais de sécurité
6. Protège-harnais
7. Bouchon du trou de la
bride en T
8. Bride en T
9. Bouton de déverrouillage
de la bride en T
10. Socle
11. Bouton de réglage du
repose-jambes
12. Repose-jambes
13. Blocage de la roue pivo-
tante
14. Bouton de déverrouillage
de la fourche avant
15. Roue avant
16. Panier à commissions
17. Roue arrière
18. Crochet de transport
19. Pompe
20. Boutons de déverrouillage
pour le dépliement
21. Sécurité anti-repliement
22. Capote
23. Manette de réglage du
dossier
24. Manette de déverrouil-
lage du siège
25. Bouton de déverrouillage
du châssis inférieur
26. Frein
27. Adaptateurs
73854_Maxi_C_Mura_3_wheel.qxp 15-05-2007 10:00 Page 16

4 MONTER / DÉPLIER ET PLIER /
DEMONTER LA POUSSETTE MURA
DE MAXI-COSI
Remarque : les côtés gauche et droit s'entendent en position de
conduite (vue derrière le guidon)e.
4.1 Montage de la poussette
Montage des roues
1. Appuyez sur le bouton central de la roue, insérez l'axe des
roues arrière dans le châssis jusqu'au « clic » (ill. 1).
2. Appuyez au centre du chapeau de roue et introduisez la
fourche avant dans le châssis jusqu'au « clic » (ill. 2).
3. Contrôlez si les roues sont bien fixées.
Déplier le châssis
1. Mettez le châssis bien droit.
2. Appuyez sur le bouton de maintien de châssis plié situé sur
la droite (ill. 3).
3. Tirez le guidon vers vous puis vers le haut (ill. 3).
Le châssis se déplie et le guidon se verrouille « clic ».
(ill. 4).
Réglage en hauteur du guidon
- Appuyez sur le bouton de réglage et faites glisser le guidon
jusqu'à la hauteur souhaitée. Le guidon se verrouille par un
clic (ill. 5).
Frein de stationnement
Frein parking
- Attention : utilisez toujours le frein lorsque la poussette
est immobile, même si vous ne vous arrêtez qu'un instant !
1. Appuyez sur la partie rouge de la pédale pour enclencher
le frein de la poussette Mura de Maxi-Cosi (ill. 6).
2. Placez votre pied sous la pédale et poussez-la vers le haut
pour débloquer le frein de la poussette Mura de Maxi-Cosi.
Adaptateurs
Les adaptateurs portent les lettres A (droite) et B (gauche).
1. Glissez les adaptateurs sur le châssis jusqu'au « clic ».
(ill. 7).
2. Vérifiez que les deux adaptateurs sont bien fixés.
3. Si vous utilisez une nacelle : rabattez les adaptateurs vers
le bas (ill. 8). Pour la suite des opérations, consultez le
mode d'emploi de la nacelle.
4. Si vous utilisez un siège-auto pour bébé Maxi-Cosi :
Relever les adaptateurs (ill. 9). Pour la suite des opérations,
consultez le mode d'emploi du siège-auto pour bébé Maxi-
Cosi.
5. Enlevez les adaptateurs en pressant la languette vers l'in-
térieur (orientée vers le hamac). Retirez ensuite les adap-
tateurs en les glissant le long du châssis (ill. 10).
Hamac
- Attention : La poussette Mura de Maxi-Cosi peut être uti-
lisée à partir de la naissance jusqu'à 4 ans (poids maximal
20 kg). Nous vous conseillons d'utiliser le hamac de la
poussette Mura de Maxi-Cosi seulement à partir de 6 mois
ou plus, lorsque votre enfant tient assis tout seul. Attachez
toujours votre enfant avec le harnais de sécurité ! Le
hamac de la poussette Mura de Maxi-Cosi ne peut
pas être utilisé en voiture.
Installation du hamac
1. Relevez le repose-jambes et fixez la confection du hamac
(ill. 11).
2. Appuyez sur les boutons situés de chaque côté du repose-
mollets pour le rabattre.
Deux positions sont possibles.
- Attention : Ne laissez jamais votre enfant se mettre
debout ou s'asseoir sur le repose-mollets.
3. 3. Relever le dossier avec la poignée d'inclinaison (ill. 12).
- Attention : Ne suspendez jamais de sacs ou autres pro-
duits à la poignée d'inclinaison du dossier et ne coincez
jamais des objets entre le dossier et la poignée.
4. Retirez le cache de la bande d'entrejambes en le tirant vers
l'avant puis vers le haut (ill. 13). Introduisez l'arceau de
maintien en T jusqu'au « clic ».
5. Fixez l'élastique situé sous le hamac (ill. 14).
Pour l'enlever : détachez l'élastique situé sous le hamac.
Appuyez sur le petit bouton à l'avant et tirez l'arceau de main-
tien en T vers le haut. Remettez le cache en place.
Pour placer le hamac et régler l'inclinaison
- Attention : vous pouvez installer le hamac, uniquement si
les adaptateurs ont été enlevés.
1. Placez le hamac dans le châssis jusqu'au « clic » (ill. 15).
2. Contrôlez que tout est bien fixé.
3. Tirez la poignée d'inclinaison de dossier vers le haut et bas-
culez-le dans la position souhaitée (ill. 16).
Le hamac offre 3 possibilités de réglage : position assise,
position semi-allongée et position allongée.
Retourner le hamac
1. Tirez la commande de déverrouillage du hamac Mura de
Maxi-Cosi vers l'arrière et retirez le hamac (ill. 17).
- Attention : ne soulevez jamais le hamac Mura de Maxi-
Cosi par l'arceau de maintien en T.
2. Tournez le hamac et placez-le dans le châssis jusqu'au
« clic » (ill. 18).
17
Français
73854_Maxi_C_Mura_3_wheel.qxp 15-05-2007 10:00 Page 17

3. Contrôlez que tout est bien fixé.
Vous pouvez fixer un harnais de sécurité supplémentaire
en utilisant les anneaux D. Ce harnais doit répondre à la
norme BS 6684.
Pour bloquer la roue pivotante
1. Pressez sur le bouton de verrouillage de la roue pivotante
vers le bas et tournez-les jusqu'au « clic » (ill. 19).
2. Pour désactiver le blocage, poussez-les vers le haut.
Capote
Si vous utilisez le hamac Mura de Maxi-Cosi dans le sens de la
marche :
1. Pour fixer la capote : glissez au maximum la capote le long
du châssis (ill. 20). Lors de l'utilisation du hamac Mura de
Maxi-Cosi en position semi-allongée et allongée, vous pou-
vez utiliser un quartier de capote supplémentaire. Retirez le
quartier de sa poche de rangement (ill. 21), fermez la capo-
te avec les fermetures éclair et serrez le quartier avec la
tirette (ill. 22).
2. Si vous utilisez le hamac Mura de Maxi-Cosi en position
semi-allongée ou allongée, attachez les boutons. Fixez les
bouton-pressions de la capote à ceux situés de chaque
côté du hamac (ill. 23).
3. Pour enlever la capote : détachez les boutons de la capote
et ouvrez les bouton-pressions (ill. 25). Retirez la capote en
la glissant vers le haut du châssis.
- Attention : si vous tournez le hamac, vous devez aussi
tourner la capote.
Si vous utilisez le hamac Mura de Maxi-Cosi dans le sens
inverse à la marche, fixez uniquement les boutons-pressions de
la capote (sans utiliser la boutonnière) (ill. 26).
Panier
1. Le panier peut supporter jusqu'à 8 kg au maximum (ill. 27).
2. Vous pouvez installer et retirer le panier à l'aide des bou-
ton-pressions, crochets et élastiques au bas de la pousset-
te.
- Attention : ne dépassez pas le poids maximum autorisé
de 8 kg !
4.2 Plier et démonter la poussette
Pour plier la poussette
1. Il est uniquement possible de plier la poussette Mura de
Maxi-Cosi avec le hamac positionné dans le sens de la
marche, le dossier relevé au maximum (ill. 28).
Pour plier votre poussette Mura de Maxi-Cosi, nous vous
recommandons de toujours retirer le hamac
.
2. Pour plier la capote : la rabattre vers l'arrière (ill. 29).
3. Faites pivoter le verrou vers le bas et remonter les gâchettes
de déverrouillage situées de chaque côté du châssis (ill. 30).
4. Penchez le guidon vers l'avant puis vers le bas jusqu'au
« clic » de verrouillage de votre châssis (ill. 31).
Pour un pliage beaucoup plus compact :
5. Enlevez le hamac avant de plier la poussette.
6. Tournez la roue avant vers l'avant.
7. Pressez le bouton de déverrouillage (ill. 32).
8. Le châssis se plie davantage.
9. Retirez éventuellement les roues.
Démontage des roues
1. Roues arrière : appuyez sur le bouton de déverrouillage des
roues arrière (ill. 33).
2. Roues avant : appuyez sur le bouton de déverrouillage et
retirez la fourche avant du socle (ill. 34).
18
Français
73854_Maxi_C_Mura_3_wheel.qxp 15-05-2007 10:00 Page 18

5 INSTALLER VOTRE ENFANT DANS LA
POUSSETTE MURA DE MAXI-COSI
5.1 Généralités
- Attention : enclenchez toujours le frein de la poussette
Mura de Maxi-Cosi lorsque vous installez votre enfant
dans le hamac. Veillez à ce que le harnais de sécurité soit
détaché.
1. Emboitez les bouches supérieures du harnais et enclen-
chez-les dans la boucle inférieure jusqu'au « clic ». La cein-
ture ventrale et le harnais sont ainsi fixés à la bande d'en-
trejambes (ill. 35).
5.2 Réglage de la longueur du harnais
1. Détachez le velcro de la housse du hamac. Détachez ensui-
te le crochet de la sangle et enlevez le protège-harnais
(ill. 36).
2. Ajustez la longueur du harnais à la taille de votre enfant en
la raccourcissant ou en l'allongeant à l'aide de la boucle
(ill. 37).
3. Remettez les protège-harnais en place et attachez les cro-
chets aux sangles. Remontez les protège-harnais le long
des bretelles et fixez-les aux boutons-pressions situés sur
les sangles (ill. 38).
4. Appuyez sur les deux boutons pour ouvrir la boucle du
harnais (ill. 39).
5.3 Réglage de la hauteur du harnais
1. Détachez le crochet de la sangle et enlevez le protège-har-
nais (ill. 40).
2. Interchangez les brides (ill. 41).
3. Ajustez la longueur du harnais à la taille de votre enfant en
la raccourcissant ou en l'allongeant à l'aide de la boucle
(ill. 42).
4. Remettez les protège-harnais en place et attachez les cro-
chets aux sangles. Remontez les protège-harnais le long
des bretelles de harnais et fixez-les aux boutons-pressions
situés sur les sangles (ill. 43).
6 NETTOYAGE ET ENTRETIEN
Avertissement :
- Pour la sécurité de votre enfant, il est impératif de contrô-
ler régulièrement le bon fonctionnement de la poussette
Mura de Maxi-Cosi.
- Pour des raisons de sécurité, utilisez toujours des pièces
d'origine.
- Si votre poussette Mura de Maxi-Cosi a subi des domma-
ges, faites-le d'abord contrôler et/ou réparer par votre ven-
deur avant de la réutiliser.
- Lors du nettoyage, n'utilisez pas de lubrifiants à base de
silicone. Ceux-ci attirent la poussière et la saleté.
- Nettoyez régulièrement le châssis, les confections et le
panier avec un chiffon humide. N'utilisez pas de nettoyants
agressifs.
6.1 Généralités
- En cas de pluie, utilisez toujours un habillage pluie pour
protéger les confections. Après utilisation sous la pluie,
essuyez la poussette avec un chiffon doux absorbant.
- Enlevez les roues une fois par mois, nettoyez les axes et
lubrifiez-les avec un aérosol au téflon sec.
- Ne mettez pas la poussette en contact avec de l'eau de
mer. Après une promenade sur la plage, nettoyez
soigneusement les roues et le châssis avec de l'eau pour
éviter qu'ils ne rouillent.
6.2 Nettoyage de la housse de hamac Mura de
Maxi-Cosi
1. Retirez le hamac Mura de Maxi-Cosi du châssis.
2. Enlevez l'arceau de maintien en T.
3. Détachez ensuite le crochet du harnais et enlevez les
protège-harnais.
4. Détachez la housse de hamac au niveau du repose-mollets
(ill. 44).
5. Sous le hamac, poussez les languettes vers l'extérieur
(ill. 45). La housse se détache du hamac.
6. Enlevez le protège-harnais de la bande entrejambes en
détachant le bouton-pression.
7. Détachez toutes les brides sous le hamac (ill. 46).
8. Enlevez la housse du hamac. Commencez d'abord par un
côté, puis l'autre (ill. 47).
-
Attention ! Terminez le retrait de la housse par la boucle
entrejambes du harnais (ill. 48).
9. Enlevez ensuite complètement le harnais de sécurité de la
housse de hamac.
19
Français
73854_Maxi_C_Mura_3_wheel.qxp 15-05-2007 10:00 Page 19

Pour remettre la housse, effectuez les opérations dans l'ordre
inverse.
- Attention ! Les languettes situées sous le hamac doivent
être à nouveau fixées vers l'intérieur. Contrôlez que la
housse est bien fixée au hamac.
6.3 Entretien des pneus de la poussette Mura de
Maxi-Cosi
- Assurez-vous que tous les pneus sont régulièrement et suf-
fisamment gonflés. La pression de pneu appropriée est
indiquée sur le pneu. Avec des pneus bien gonflés, la con-
duite de poussette Mura de Maxi-Cosi est plus légère et
plus souple et vous évitez tout dommage au niveau des
pièces rotatives et charnières.
- Les pneus sont équipés d'une valve de chambre à air. Vous
pouvez les gonfler à l'aide de la pompe à main fournie
avec la poussette (rangée dans le compartiment avant du
panier) ou dans un garage pour autos ou une station-
service. Il est plus facile de gonfler les pneus si vous
enlevez les roues du châssis.
- Si une chambre à air est crevée, vous pouvez la réparer
comme celle d'une bicyclette. Vous pouvez acheter les
chambres à air séparément chez votre fournisseur.
- Videz toujours l'air des pneus de la poussette lors d'un
voyage en avion. La différence de pression peut en effet les
endommager.
7 TRI DES DÉCHETS
Dans le but de préserver l'environnement, nous vous prions de
séparer les déchets d'emballage de la poussette Mura de Maxi-
Cosi. Faites-le aussi à la fin de la durée de vie de votre
poussette (parties du produit).
Avertissement :
Gardez le matériel d'emballage en plastique hors de la portée
des enfants pour éviter les risques d'étouffement.
Emballage
Boîte en carton Déchets en papier
Sac en plastique Déchets restants
Eléments du produit
Housse et confection Déchets restants
Composants en Dans le conteneur prévu à cet effet
plastique
Composants en Conteneur pour métal
métal
Pneus Déchets restants
Harnais Conteneur pour polyester
20
Français
73854_Maxi_C_Mura_3_wheel.qxp 15-05-2007 10:00 Page 20

8 GARANTIE
Dorel Pays-Bas garantit que ce produit répond aux exigences de
sécurité définies dans les normes européennes actuelles et qu'il
est exempt de tout défaut de composition et de fabrication au
moment de l'achat.Au cas où des défauts de matériau et/ou de
fabrication apparaîtraient après l'achat et pendant la période
de garantie de ce produit (sous condition d'un usage normal tel
que décrit dans le mode d'emploi), veuillez vous adresser à
votre fournisseur. La garantie est de 24 mois sur les composants
en plastique et en métal, et de 12 mois sur les autres compo-
sants sensibles à l'usure, telle que la housse. L'usure normale
que l'on peut attendre de l'utilisation quotidienne d'un produit
est naturellement exclue.
La garantie est exclue dans les cas suivants :
- Quand le produit n'est pas proposé en réparation par le
biais d'un fournisseur reconnu par Dorel Pays-Bas.
- Quand le produit n'est pas renvoyé avec le ticket de caisse
d'origine (par l'intermédiaire du commerçant et/ou impor-
tateur) au fabricant.
- Quand ses réparations ont été effectuées par des tiers.
- Quand l'autocollant avec le code-barres a été endommagé
ou retiré.
- Quand le défaut a été causé par une utilisation ou un
entretien incorrect ou insuffisant, une négligence ou des
chocs au niveau du textile et du socle.
- Quand le défaut est survenu à la suite d'un accident ou
d'un transport par avion.
- Quand le défaut est dû à une surcharge (par rapport au
poids maximum autorisé pour l'enfant et/ou les commis-
sions).
- Quand le défaut a été provoqué par l'utilisation de la pous-
sette avec deux enfants et en se servant d'une planche ou
d'un siège.
- Quand il est question d'une usure normale des pièces, telle
que l'on peut attendre d'une utilisation journalière.
- Quand il y a lieu de parler d'un phénomène d'usure normal
au niveau des roues, des pneus et/ou de la housse (par
exemple un pneu crevé et/ou des boutons-pression qui se
détachent).
- Quand les décolorations ou marques sur le textile ont été
causées par des lavages, la pluie ou l'exposition au soleil
(UV).
- Quand les dommages au niveau du textile ont été causés
entre autres par des vêtements, fermetures éclair, velcro ou
boutons-pression.
- Quand le produit a heurté un objet avec force, par exemple
un bord de trottoir ou une lourde porte de magasin. Le
choc a démis ou tordu les roues et/ou axes et la poussette
ne roule plus.
- Quand des dommages (traces de pneus) ont été causés sur
des surfaces, comme les laminés synthétiques.
- Quand les conditions de garantie susmentionnées n'ont
pas été respectées de quelque manière que ce soit.
Date d'entrée en vigueur :
La période de garantie débute à la date d'achat du produit.
Durée de garantie :
Les composants en plastique et en métal sont garantis pendant
une période de 24 mois consécutifs. Pour les autres composants
soumis à l'usure, s'applique une période de 12 mois consécu-
tifs. La garantie est uniquement valable pour le premier propri-
étaire et n'est pas transmissible.
Que devez-vous faire :
En cas de problèmes ou défauts, veuillez vous adresser à la
personne qui vous a vendu le produit. S'il n'est pas en mesure
d'y remédier, votre vendeur renverra le produit au fabricant,
accompagné d'une description de la réclamation et du ticket de
caisse d'origine. Aucun échange ni reprise ne peut être exigé.
Les réparations ne donnent pas lieu à une prolongation de
garantie. Les produits qui sont retournés directement au fabri-
cant ne sont PAS couverts par la garantie.
Généralités :
Concernant la housse et les autres éléments sensibles à l'usure :
- La housse doit être entretenue régulièrement (veuillez
suivre à cet effet les instructions d'entretien contenues
dans le mode d'emploi).
- Même dans les conditions habituelles d'utilisation, il est
normal après un certain temps que la housse présente des
marques d'usure ou une décoloration due au soleil.
Cette condition de garantie est conforme à la directive
européenne 99/44/EG du 25 mai 1999.
9 QUESTIONS
En cas de questions, n'hésitez pas à contacter votre fournisseur
ou importateur (voir au dos du mode d'emploi). Veillez à avoir
les informations suivantes sous la main :
- Le numéro de série figurant sur l'autocollant au bas du châs-
sis.
- L'âge, la taille et le poids de votre enfant.
21
Français
73854_Maxi_C_Mura_3_wheel.qxp 15-05-2007 10:00 Page 21

22
Nederlands
NOTES / NOTIZEN / NOTITIES / NOTAS / NOTÍCIAS
73854_Maxi_C_Mura_3_wheel.qxp 15-05-2007 10:00 Page 22

23
GEACHTE OUDERS
Gefeliciteerd met de aankoop van uw Maxi-Cosi Mura.
Bij de ontwikkeling van deze kinderwagen hebben veiligheid,
gebruiksgemak, comfort en design steeds voorop gestaan. Uw
Maxi-Cosi Mura voldoet dan ook aan de strengste normen en
belooft u volop gebruiksvrijheid en comfort.
Lees deze gebruiksaanwijzing zorgvuldig door. U kunt uw
kinderwagen dan ten volle benutten. Bovendien is alleen bij
correct gebruik de veiligheid en het comfort van uw kind én u
optimaal gewaarborgd.
Wij wensen u veel gemak en plezier met uw Maxi-Cosi Mura!
Dorel
INHOUDSOPGAVE
1 BELANGRIJK: EERST LEZEN!
2 VEILIGHEIDSVOORSCHRIFTEN
3 PRODUCTBESCHRIJVING
4 GEBRUIKSKLAAR MAKEN / UITKLAPPEN EN INVOUWEN /
DEMONTEREN
4.1 Gebruiksklaar maken
4.2 Invouwen en demonteren
5 UW KIND IN DE MAXI-COSI MURA ZETTEN
5.1 Algemeen
5.2 Instellen van de gordellengte
5.3 Instellen van de schoudergordelhoogte
6 REINIGING EN ONDERHOUD
6.1 Algemeen
6.2 Onderhoud van de Maxi-Cosi Mura
6.3 Onderhoud van de Maxi-Cosi Mura banden
7 AFVAL SCHEIDEN
8 GARANTIE
9 VRAGEN
Disclaimer:
Bij het ontwerpen en samenstellen van deze gebruiksaanwijzing
is de grootst mogelijke zorgvuldigheid betracht. We kunnen
echter geen garantie geven met betrekking tot de volledigheid
en juistheid van de vermelde informatie.
1 BELANGRIJK: EERST LEZEN!
WAARSCHUWING
- Lees deze gebruiksaanwijzing zorgvuldig
door en bewaar deze als naslagwerk. Het
niet opvolgen van de gebruiksaanwijzing
kan de veiligheid van het kind ernstig
schaden.
- U bent zelf verantwoordelijk voor de veilig-
heid van uw kind.
- Het kan gevaarlijk zijn uw kind zonder
toezicht achter te laten.
- Zet de wandelwagen wanneer u stilstaat
altijd op de rem.
- Zet uw kind, zodra het zelfstandig kan zitten,
altijd vast met het veiligheidsharnas.
- Zet uw kind altijd vast met het veiligheids-
harnas! En dit zo strak mogelijk.
- Hang niets aan de duwstang. Dit maakt de
wandelwagen minder stabiel en vergroot
het kantelgevaar.
- Let op met kleine onderdelen, zoals de
ventieldopjes van de wielen. Uw kind kan
deze inslikken waardoor er verstikkings-
gevaar bestaat. Ook de handpomp moet
buiten bereik van kinderen gehouden
worden.
- Voorkom verstikkingsgevaar en houd plastic
zakken buiten het bereik van kinderen.
- Dit product is niet geschikt om achter te
joggen of te skaten.
- Controleer voor elk gebruik of alle vergren-
delingen zijn gesloten om ieder klemrisico
te vermijden.
- Controleer voor ieder gebruik of de kinder-
wagenbak, adapters en/of zitjes correct
bevestigd en vergrendeld zijn.
- De zwarte banden kunnen op sommige
gladde vloeren (vooral vinyl kunststoflami-
naat, parket en linoleum) kleursporen
achterlaten.
Nederlands
73854_Maxi_C_Mura_3_wheel.qxp 15-05-2007 10:00 Page 23

2 VEILIGHEIDSVOORSCHRIFTEN
- Gebruik de Maxi-Cosi Mura voor slechts één kind tegelijk.
- De Maxi-Cosi Mura is geschikt voor kinderen vanaf de
geboorte tot 4 jaar (maximaal 20 kg).
- Wij raden aan het zitje van uw Maxi-Cosi Mura pas te
gebruiken wanneer uw kind 6 maanden of ouder is en zelf-
standig kan zitten. Bij gebruik vanaf de geboorte adviseren
wij u de Maxi-Cosi Mura te combineren met een reiswieg,
kinderwagenbak of Maxi-Cosi baby-/kinder-autozitje.
-Het Maxi-Cosi Mura zitgedeelte is niet geschikt voor
gebruik in de auto. Hiervoor gebruikt u een Maxi-Cosi
baby-/kinderautozitje.
- Houd uw kind en uw vingers/handen buiten bereik van
bewegende/scharende delen wanneer u de Maxi-Cosi
Mura in- of uitvouwt of verstelt.
- Til uw Maxi-Cosi Mura nooit op wanneer uw kind erin zit
en maak geen gebruik van (rol)trappen wanneer uw kind
in de wandelwagen zit of ligt.
- Controleer en reinig uw Maxi-Cosi Mura regelmatig.
- Verwijder de logo’s op de bekleding niet. Zo voorkomt u
beschadigingen aan de bekleding.
- Voorkom verstikkingsgevaar en houd plastic zakken buiten
het bereik van kinderen.
- Gebruik alleen originele accessoires en onderdelen die door
de fabrikant zijn toegestaan. Breng geen veranderingen aan
het product aan. Als u klachten of problemen heeft, neem
dan contact op met uw leverancier of importeur.
Maxi-Cosi Mura is goedgekeurd volgens EN 1888:2003
(amendement 1, 2 & 3), BS 7409:1996
Uitvoering Lichaamsgewicht Leeftijd
wandelwagen kind
Wandelwagen met max. 9 kg Vanaf geboorte
reiswieg tot ca.
5 maanden
Wandelwagen met max. 9 kg Vanaf geboorte
kinderwagenbak tot ca.
6 maanden
Wandelwagen met max. 13 kg Vanaf geboorte
Maxi-Cosi tot ca.
baby-autozitje 12 maanden
3 PRODUCTBESCHRIJVING
Accessoires:
Maxi-Cosi baby-autozitje
Kinderwagenbak
Reiswieg
Voetenzak
Boodschappentas
Parasol en parasolklem
Regenhoes
24
Nederlands
1. Verstelknop duwstang
2. Duwstang
3. Zitje
4. Comfort zitkussen
5. Veiligheidsharnas
6. Gordelbeschermer
7. Afdekdopje T-beugelgat
8. T-beugel
9. Ontgrendelknop T-beugel
10. Onderstel
11. Verstelknop beensteun
12. Beensteun
13. Zwenkwielblokkering
14. Ontgrendelknop voorvork
15. Voorwiel
16. Boodschappenmand
17. Achterwiel
18. Transporthaak
19. Pompje
20. Ontgrendelknoppen
invouwen
21. Inklapbeveiliging
22. Zonnekap
23. Verstelhendel rugleuning
24. Ontgrendelhendel zitje
25. Ontgrendelknop subframe
26. Rem
27. Adapters
12
7
10
12
15
14
13
16
26 27
19
17 18 11
8
9
3
4
5
6
21
20
22
23
25
24
73854_Maxi_C_Mura_3_wheel.qxp 15-05-2007 10:00 Page 24

4 GEBRUIKSKLAAR MAKEN /
UITKLAPPEN EN INVOUWEN /
DEMONTEREN
Opmerking vooraf: links en rechts zijn gezien vanaf de
duwstang/achterzijde.
4.1 Gebruiksklaar maken
Wielen monteren
1. Druk op het midden van de wieldop en steek de achter-
wielen met de as in het onderstel tot u een ‘klik’ hoort (afb. 1).
2.
Steek het voorwiel in de voorvork tot deze “klikt” (afb. 2).
3. Controleer of de wielen goed vastzitten.
Uitklappen onderstel
1. Zet het frame rechtop.
2. Duw de transporthaak opzij bij de rechter achterpoot (afb.3).
3. Trek de duwstang naar u toe en vervolgens omhoog
(afb. 3).
Het onderstel klapt uit en de duwstang klikt in de
vergrendeling (afb. 4).
Duwhoogte instellen
- Druk de verstelknop in en schuif de duwstang op de
gewenste hoogte. Met een ‘klik’ zit de duwstang vast
(afb. 5).
Parkeerrem
- Let op: gebruik altijd de parkeerrem, ook wanneer u maar
even stilstaat!
1. Druk het rode vlak op het pedaal omlaag om uw Maxi-Cosi
Mura op de parkeerrem te zetten (afb. 6).
2. Zet uw voet onder het pedaal en druk deze omhoog om de
Maxi-Cosi Mura van de parkeerrem af te halen.
Adapters
De adapters zijn aan de binnenzijde gemarkeerd met een
A (rechts) en B (links).
1. Schuif de adapters op het frame tot u een ‘klik’ hoort
(afb. 7).
2. Controleer of beide adapters vastzitten.
3. Bij gebruik van de kinderwagenbak: klap de scharnierende
delen van de adapters naar beneden (afb. 8). Zie voor
verder gebruik de gebruiksaanwijzing van de kinder-
wagenbak.
4. Bij gebruik van een Maxi-Cosi baby-autozitje: klap de
scharnierende delen van de adapters naar boven (afb. 9).
Zie voor verdere aanwijzingen de gebruiksaanwijzing van
het Maxi-Cosi baby-autozitje.
5. Verwijder de adapters door de lip naar binnen te duwen
(naar het midden van de wandelwagen).Vervolgens schuift
u de adapters van het frame (afb. 10).
Zitje
- Let op: De Maxi-Cosi Mura is geschikt voor een kind vanaf
de geboorte tot 4 jaar (maximaal 20 kg). Wij raden aan het
zitje van de Maxi-Cosi Mura pas te gebruiken wanneer uw
kind 6 maanden of ouder is en zelfstandig kan zitten. Zet
uw kind altijd vast met het veiligheidsharnas! Het
Maxi-Cosi Mura zitgedeelte is niet geschikt voor
gebruik in de auto.
Zitje gebruiksklaar maken
1. Klap de beensteun op en bevestig de bekleding (afb. 11).
2. Druk aan beide zijden de knoppen in om de beensteun
neer te klappen.
Er zijn twee gebruiksstanden mogelijk.
- Let op: laat uw kind nooit op de voetensteun staan of zitten.
3. Zet de rugleuning rechtop met de verstelhendel (afb. 12).
- Let op: hang nooit tassen of andere producten achter of
aan de verstelhendel en klem nooit voorwerpen tussen
rugleuning en hendel.
4. Verwijder het afdekdopje bij het tussenbeenbandje door de
klikvinger naar voren te trekken en daarna naar boven te
duwen (afb. 13). Steek de T-beugel in de zitting tot u een
‘klik’ hoort.
5. Bevestig het elastiek aan de onderzijde (afb. 14).
Voor verwijderen: maak het elastiek aan de onderzijde los.
Druk het knopje aan de voorzijde in en trek de T-beugel
omhoog. Plaats het afdekdopje terug.
Zitje plaatsen en zithoek verstellen
- Let op: het zitje kan alleen geplaatst worden wanneer de
adapters verwijderd zijn.
1. Plaats het zitje met een ‘klik’ op het frame (afb. 15).
2. Controleer of alles goed vastzit.
3. Trek de verstelhendel van de rugleuning naar boven en
kantel de rugleuning in de gewenste stand (afb. 16).
Het zitje heeft 3 verstelmogelijkheden: zitstand, relaxstand
en ligstand.
Zitje omkeren
1. Trek de ontgrendelhendel van het Maxi-Cosi Mura-zitje
naar achteren en neem het zitje weg (afb. 17).
- Let op: til het Maxi-Cosi Mura-zitje niet op aan de T-beugel.
2. Draai het zitje om en plaats het met een ‘klik’ op het frame
(afb. 18).
3. Controleer of alles goed vastzit.
Voor een eventueel extra veiligheidstuigje zijn D-ringen
aanwezig. De norm voor zo’n tuigje is BS 6684.
25
Nederlands
73854_Maxi_C_Mura_3_wheel.qxp 15-05-2007 10:00 Page 25

Vastzetten zwenkwiel
1. Duw de zwenkblokkering van het voorwiel omlaag en
draai het voorwiel in de achterste stand tot u een ‘klik’
hoort (afb. 19).
2. Om de blokkering op te heffen, beweegt u de zwenk-
blokkering omhoog.
Zonnekap
Bij gebruik van de Maxi-Cosi Mura met zitje in de rijrichting:
1. Bevestigen: schuif de zonnekap op het frame totdat deze
niet verder kan (afb. 20). Bij gebruik van de Maxi-Cosi
Mura in relax- en ligstand kunt u gebruik maken van een
extra flap aan de zonnekap. Haal de flap uit het opberg-
zakje (afb. 21), sluit de kap middels de ritsen en trek de
flap strak met de stopper (afb. 22).
2. Bij gebruik van het Maxi-Cosi Mura-zitje in de relax- en lig-
stand maakt u de zonnekap vast bij het knoopsgat. Zet de
zonnekap ook vast met de drukkers aan de zijkant van het
zitje (afb. 23).
3. Verwijderen: maak de zonnekap los bij knoopsgat en druk-
kers (afb. 24). Schuif de zonnekap naar boven van het
frame (afb. 25).
- Let op: wanneer u het zitje omdraait, moet u de zonnekap
ook draaien.
Bij gebruik van de Maxi-Cosi Mura met het zitje tegen de
rijrichting in, hoeft de zonnekap alleen met de drukkers vast-
gezet te worden en niet met het knoopsgat (afb. 26).
Boodschappenmand
1. De boodschappenmand is geschikt voor boodschappen tot
maximaal 8 kg (afb. 27).
2. U kunt de boodschappenmand plaatsen of verwijderen
met behulp van de drukkers, haakjes en elastieken aan de
onderzijde van de wagen.
- Let op: overschrijd het maximaal toelaatbare gewicht van
8 kg niet!
4.2 Invouwen en demonteren
Invouwen
1. Wilt u uw Maxi-Cosi Mura invouwen met het zitje er nog
op, dan kan dat alleen wanneer het zitje in voorwaartse
rijrichting is geplaatst met de rugleuning in de extra voorste
stand (afb. 28).
-Ons advies: verwijder het zitje altijd voordat u de wagen
invouwt.
2. Vouw de zonnekap naar achteren, evenwijdig aan de
duwbeugel (afb. 29).
3. Draai de inklapbeveiliging aan de rechterzijde naar beneden
en trek daarna gelijktijdig de ontgrendelknoppen voor
invouwen aan beide zijden omhoog (afb. 30).
4. Kantel de duwbeugel naar voren en vervolgens naar
beneden zodat deze in de transportvergrendeling vastklikt
(afb. 31).
Als u het onderstel nog compacter wilt invouwen:
5. Verwijder het zitje voordat u start met invouwen.
6. Draai het voorwiel naar voren.
7. Knijp de ontgrendelknop in (afb. 32).
8. Het onderstel vouwt verder in.
9. Verwijder eventueel de wielen.
Wielen demonteren
1. Achterwielen: druk op het midden van de wieldop en trek
tegelijkertijd de achterwielen uit het onderstel (afb. 33).
2. Voorwiel: druk de ontgrendelknop in en trek de voorvork
uit het onderstel (afb. 34).
26
Nederlands
73854_Maxi_C_Mura_3_wheel.qxp 15-05-2007 10:00 Page 26
Table of contents
Languages:
Other Dorel Stroller manuals

Dorel
Dorel Maxi-Cosi Zelia Luxe User manual

Dorel
Dorel Safety 1st Smooth Ride TR378 User manual

Dorel
Dorel COSCO US119 User manual

Dorel
Dorel Maxi-Cosi Zelia2 User manual

Dorel
Dorel Disney Baby Umbrella Stroller User manual

Dorel
Dorel Disney Baby Umbrella Stroller User manual

Dorel
Dorel Disney Baby Smooth Ride TR396 User manual

Dorel
Dorel covet User manual

Dorel
Dorel Disney Baby Simple Fold TR375 User manual

Dorel
Dorel mother's choice flux User manual