D+H RZN 4402-K User manual

99.821.26 3.8/08/06
Instruction for use
D+H Mechatronic AG • Georg-Sasse-Str. 28-32 • D-22949 Ammersbek • Tel. +4940-60565219 • Fax +4940-60565264
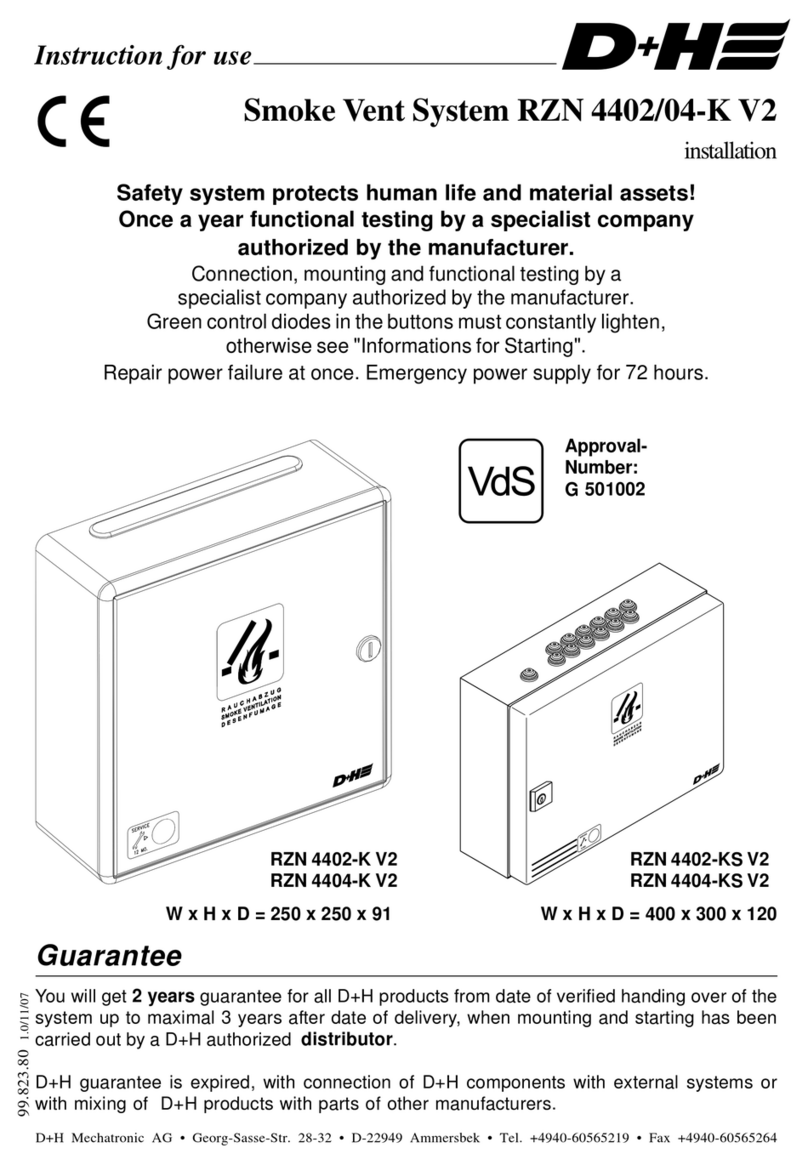
RZN 4402-K
RZN 4404-K RZN 4402-KS
RZN 4404-KS
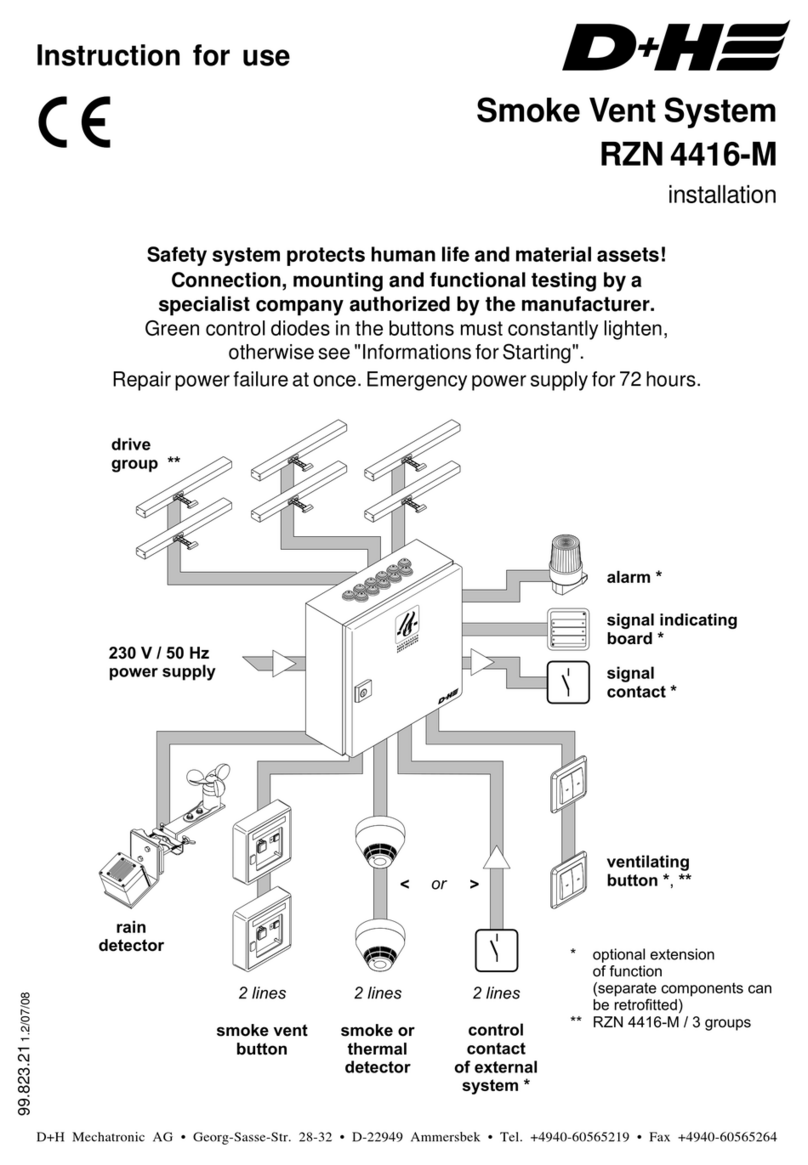
Smoke Vent System RZN 4402/04-K
installation
Safety system protects human life and material assets!
Once a year functional testing by a specialist company
authorized by the manufacturer.
Connection, mounting and functional testing by a
specialist company authorized by the manufacturer.
Greencontroldiodesinthebuttonsmustconstantlylighten,
otherwise see "Informations for Starting".
Repair power failure at once. Emergency power supply for 72 hours.
Approval-
Number:
G 501002
Guarantee
You will get 2 years guarantee for all D+H products from date of verified handing over of the
system up to maximal 3 years after date of delivery, when mounting and starting has been
carried out by a D+H authorized distributor.
D+H guarantee is expired, with connection of D+H components with external systems or
with mixing of D+H products with parts of other manufacturers.
W x H x D = 250 x 250 x 91 W x H x D = 400 x 300 x 120

2/20 RZN4402/04-K Rev.:3.8
TechnicalData
Control panel type : RZN 4402/4404-K / KS
Rated voltage : 230VAC, 50Hz
Rated capacity : 60VA/120VA
Interfering
emission : EN 50081-2
EN 55022
Res. to jamming : EN 50082-1
EN 61000-4-2 to -6
EN 50204
Protective category : II/I
Fire resistance : -5 to +40 °C
Protective system : IP30 / IP54
Class of rating
- Monitoring : Continuous duty
- Emergency state/
ventilation : Short-time duty
Output voltage : 24VDC /
res. ripple <10%
Safe output
- rated current : 2A/4A
VdS approval No : G 501002
Content
Guarantee ................................................. 1
Technical Data, Maintenance ................... 2
Introduction................................................ 3
System overview ....................................... 4
Mounting of housing .............................. 5-6
View motherboard RZN 4402/04-K.......... 7
Drives and smoke vent buttons ............... 8
Wiring plan ................................................ 9
Connection cable .................................... 10
Connection......................................... 11-17
Starting .................................................... 18
Encode of line and group ....................... 19
Examination ............................................ 20
Maintenance
Onceayear by a specialist company,whois
authorized by the appliance manufacturer.
Renew test badge, keep control book.
The respective current D+H maintenance
instruction is decisive.
D+H authorized expert companies have
been specially trained by D+H for carrying
out expertly this maintenance, and they get
automatically the latest maintenance
instructions.
Following tests must be carried out in the
course of maintenance:
- Outside examination / inspection of
system components
- Measuring of insulation resistances
- Checking of all relevant power supply units
- Functional testing of connected system
components
- Record of competent carrying-out of
maintenance, and designation according
to directions
Information
An overdue maintenance of the system will
be indicated by the control panel after about
ca. 14 to 16 months. The yellow diode in the
smoke vent button RT 43-H will start flashing.
A malfunction in the smoke vent system will
be continually indicated by the extinguished
green control diodes in the smoke vent
buttons.
After the maintenance time is expired (ca.
14 to 16 months), the ventilation function
OPEN can be interrupted depending on the
presetting of the service timer. Reset can be
carried out by a specialist company only, who
has been authorized by the appliance
manufacturer.
24 V Emergency Supply
Emergency power supply for 72 hours. Use VdS approved storage batteries only.
RZN 4402-K:
2x 12V / 1,2Ah ±0,2Ah (Type 1)
With connection of alarm devices:
2x 12V / 2,2Ah ±0,3Ah (Type 2)
RZN 4404-K:
2x 12V / 2,2Ah ±0,3Ah (Type 2)
With connection of alarm devices:
2x 12V / 3,4Ah ±0,3Ah (Type 8) *
* Attention! Bigger housing necessary!

3/20
RZN4402/04-K Rev.:3.8
Important Regulations
Observe regulations for danger warning systems VDE 0833, guidelines for electrical systems
VdS 2221, VDE 0100, DIN 18232 for smoke and heat vent systems, regulations of the local
fire-brigade and of EVU for connection to mains supply.
Introduction
Smoke and heat vent systems (RWA´s) are very important
elements of structural preventive fire protection.
Smoke and heat vent systems are appliances of preventive fire protection. They fulfil important
functions in case of fire: protection of human life by providing a smokeless layer, by which
rescue routes are kept free for the fire-brigade. Consequential damages by conflagration
gases are reduced, and therefore, considerable material assets are often protected from
destruction. Precondition for this is, that the systems will function absolutely reliable in a
case of fire. Only electrical specialist companies are authorized to install these systems,
who have electrical specialist staff with relevant experiences in installing danger alarm
systems or smoke and heat vent systems. Only these ones can take on responsibility for
functioning, and can ensure product liability for the whole system (see product liability law
BGBL.I S.2198 and BGB (bodily injury, compensation for damage)).
Therefore, regular maintenance and checking of functional readiness is imperative and has
to be ensured. These standard requirements are demanded according to regulations of the
DIN, of the Association of German Insurer against damage of property (VdS) and the
respective local authorities. Recommended is, that maintenance work should be carried
out by authorized specialist companies, only.
Only regular and professional maintenance warrants
the necessary and permanent functional safety.
Only authorized specialist companies are allowed to install and maintain smoke and heat
vent systems and system components, constructed and distributed by D+H Mechatronic
AG. All D+H Mechatronic AG partners belong to these authorized specialist companies,
who regularly undergo an in-house training to ensure their qualification and experience.
Smoke and heat vent systems must be maintained at annual intervals by authorized special-
ist companies according to DIN 18232 section 2 paragraph 10.2, and VDE 0833 section 1
paragraph 5.3.4 for alarm systems and manufacturer guidelines.
According to DIN VDE 0108 section 1 paragraph 9.1.1 accumulators for emergency supply
(lead accumulators) must be checked every six months by a person, who has been introduced
to this task, and once a year, maintenance must be carried out by specialist companies.
Accumulator types, which are used for D+H Mechatronic AG smoke and heat vent systems
must be VdS approved, and must be released by D+H Mechatronic AG to use in smoke and
heat vent systems. According to DIN 18232 section 2 paragraph 10.2 the tests must be put
down in an operational book, which the operator/ building owner must present to the building
supervision authority on request. This operational book is available at D+H (Ord.-No.:
68.700.15)
Executed maintenance must be proved by a D+H Mechatronic AG maintenance/ and testing
confirmation.

4/20 RZN4402/04-K Rev.:3.8
* optional function extension
(separate components. Retrofitable!)
System Overview
Drive group
signal
indicating
board*
acoustical+
optical alarm
devices*
signal
contact*
230V / 50Hz
Mains supply
wind/rain
transmitter*
smoke vent button
(min. 2 piece) ventilating
button*
smoke or
thermal
detector*
control contact of
external system*

5/20
RZN4402/04-K Rev.:3.8
Recessed dimension for flush mounting
W x H x D : 262 x 262 x 81mm
Mounting of housing 1
joint rod
door
plaster cross for
flush mounting*
cable cover
cable bushing
(only surface mounting)
housing
flush mounted
wall hook*
* optional flush mounted set UPS 44-K
(not for hollow wall mounting)
flush mounted frame
(288x288mm)*
surface mounted
frame

6/20 RZN4402/04-K Rev.:3.8
Mounting of housing 2
Mount control panel sheltered and easily
accessible for maintenance in proximity of
drive
Surface mounting:
1.Remove cable cover
2.Fasten housing trough with 4 screws at
wall
Flush mounting
(not hollow wall mounting):
1.Screw down wall hook and plaster cross
at housing trough
2.Fasten housing trough in niche and
remove plaster cross again after
plastering
Attention: Fire resistance category of fire
walls must not be inadmissibly influenced.
Sound insulation is impaired by flush
mounting.
Final mounting:
3.Mount and connect central pcb
4.Screw down cable cover
5.Unhinge door of the door frame (for this,
press joint rod upwards using pliers).
Fasten door frame on housing trough, and
hangdooron it’shinges again
Piktograph explanation
Smoke and heat vent alarm
Control panel O.K.
Fuse actuator
Mains existing
Vent button function "ON"
Vent button function "OFF"
Charging voltage controller
Battery
Fastening of accumulators
Only RZN 4404-K.
Covering
Place enclosed covering cap over supply
terminalaftermainscablehasbeenconnected.

7/20
RZN4402/04-K Rev.:3.8
accumulator
charging voltage control
Fuses: dimension 5 x 20mm
Class of rating and rated power is indicated
on cover plate in control panel.
View motherboard (RZN 4402/04-K)
fire recognition
element (thermo
maximum signal)
fuse drive
fuse external
detector
Dip switch
mainsconnection
LED-failure,
group
LED-
control
LED-failure
line
fuse mains
RZN 4402/ 04-K = T0,63A
covering
fuse accumulator
LED-failure
accumulator
connection
accumulator
LED-mains

8/20 RZN4402/04-K Rev.:3.8
Smoke Vent Button
Place(s) of mounting:
Maximal 8 smoke vent buttons can be
connected.
Maincontrol mustbemountedon ground-floor
according to VdS 2221.
Secondarycontrol isto beinstalled inall other
floor levels according to VdS 2221.
Install buttons so, that they are accessible
any time and clearly visible.
Mounting height:
1,5m above upper edge of firm flooring.
Fastening:
With plug screws 4,5 x 40mm diagonal, or
direct on 55mm flush box with 2 screws.
Housing colour:
Standard:deeporange (RAL2011),
according to VdS 2592.
However, deviating colours might be locally
required (blue,yellow, red).
Please consult your D+H distributor.
Drives
Smoke and heat vent opening:
Smoke gases are to be carried off as
unhindered as possible through smoke and
heat vent opening in case of fire.
According to relevant rules, openings have
to be placed always in the upper part of a
building.
The smoke and heat vent opening can be
mounted in the wall as well as in the ceiling.
Size, kind and arrangement of the opening
is of decisive significance for an optimal
effect of the smoke and heat vent system.
The important thing here is, that an escape
must not be hindered by the window wing
itself, by structural facts like offsets, or the
like.
Minimum ventilating surface is given by le-
gal regulations and structural facts. The
smoke vent opening must be at least 1m² or
5% of the basis, dependent on the LBO.
The valuated sizes of opening angles of
smoke and heat vent systems must be in
agreement with the responsible fire
protection authority.
Observe! Window wings, opening inward,
must not project in escape/ and rescue
routes and obstruct them.
Mounting of the drives:
Please take mounting informations from the
relevant instruction for use of the respective
drive, because of varied possibilities for
choosing drives.
ATTENTION:
When Dip switch 10 is on ON, the smoke
vent will be triggered with an OPEN-
impulse every 2 minutes for a duration of
30 minutes according to VdS 2581. For this,
the drive must be blockage safe according
to VdS 2580 par. 4.7. .All D+H drives meet
this precondition. Otherwise Dip switch 10
is to be switched on OFF.

9/20
RZN4402/04-K Rev.:3.8
M
230VAC
24VDC
Brandmelder
Zentrale
Antrieb
230V 50Hz
nicht abschaltbar
Kontakt
Fremdansteuerung
Rauchabzugstaster
Rauchabzugstaster
zu weiteren
zu weiteren
M
IY (St) Y
2x2x0,6
IY (St) Y
2x2x0,6
IY (St) Y
2x2x0,6
IY (St) Y
4x2x0,6
IY (St) Y
4x2x0,6
230VAC
24VDC
siehe Kabelverlegetabelle
im obersten bewohnten Geschoss
im EG
Lüftungstaster
Legend
Drive 24 VDC at smoke vent flap
(lines must end in flush
mounted distribution box, see
symbols above).
RZN surface or flush type
(230 VAC / 24 VDC)
in proximity of smoke vent flap.
Smoke vent button
(e.g.RT 43-H/N)surface 24VDC
circa 1,5m above upper edge
firm flooring (by customer 55mm
flush socket)
Vent button 24 VDC (e.g. LT 43)
circa 1,2 above upper edge firm
flooring (at flush type by others
55mm flush socket)
Fire detector 24 VDC
(e.g. FO 1362 or FT 1262)
Wiring Plan (Paragon)
Drive see cable wiring table
to further ones
to further ones
Control
panel
not possible to switch off
Fire detector
Ventilation
button
Contact external control
230 V Supply
Provide for separate electric circuit.
Mark fuses.
Plug covering cap over mains binder on
motherboard of control panel.
Connecting cable: NYM-I3x1.5
Connecting load: RZN 4402-K = 60 VA
RZN 4404-K = 120 VA
Weak Current Lines
Install and feed separately from supply
mains.
Mark cable and terminal box red.
Secondary control
Main control

10/20 RZN4402/04-K Rev.:3.8
Typ / type
Antriebe / 0,5A 12345678
drives 1A 1234
3 x 1,5mm² 240 120 80 60 48 40 34 30 m
3 x 2,5mm² 400 200 130 100 80 65 55 50 m
*5 x 2,5mm² 800 400 260 200 160 130 110 100 m
RZN 4402-KRZN 4404-K
Detector Cables (Line):
The detector cables are monitored for short
circuit and for break.
The opening device is automatically
triggered and opens up in case of fault, when
DIP-switch 7 is on ON.
Smoke vent button cable and cable of
automatic detectors:
- weak current sheathed flexible cable YR
6 x 0.8
or
- house wiring cable IY(ST)Y 4 x 2 x 0.6
Cables through areas not monitored:
An increased time of functioning of the cable
canbe required,when drivelines areinstalled
throughbuildingparts,whicharenotmonitored.
- Safetyline withfunctional conservation
... E90, according to DIN 4102* or standard
guidelinesfor line systemsMLAR.
(see supplementary sheet 1 to DIN VDE
0108)
* Notice: No type designation is given
for these cables, because of a large
variety on the market. Please consult
your D+H distributor about these.
The smoke vent control panel is designed
for opening smoke vent devices, which
operate by thermal ascending force and by
automatic fire recognition devices (thermal
detector, smoke detector), and they release
either self-acting or manual by smoke
detectors at an early stage of a fire, and
remain in opened position without further
power consumption. In these cases,
functioning preservation of the electrical line
system is required only at an early stage of
fire. Protected wiring is required with
protection against mechanical damages
according to DIN 18232 section 2.5.5
paragraph 4.
Control Cable (Group):
Cable from the smoke vent control panel to
connection of drive (drive lines have a
monitoring wire, in which fire recognition
devices (thermal maximal detector e.g. THE)
canbe looped-in):
- Safetyline, withfunctional conservation
... E30, according to DIN 4102* or standard
guidelines for line systems MLAR.
Cable for D+H Smoke and Heat Vent Systems
cross section (mm²) = plain cable length (m) x number of drives
80**
* Connect in parallel 2 wires for each drive line.
** Only valid for drives with 1A actuating current. Use „160“ for drives with 0,5A actuating current
and „230“ for drives with 0,35A actuating current.
Line lengths and Cross sections:
Number of wires and cross-sections indicated, refer to required lines only. In case of
using a line with earthed conductor (green/ yellow), this one will not be counted in and
must not be wired.

11/20
RZN4402/04-K Rev.:3.8
Standard Connection with RT 42
* Terminal resistors for line monitoring:
They are pinched in control panel for transport. Take it off there and connect according to
plan. Terminal resistors must remain at binder RM 1,2, when no fire detector or external
control exists.
**Fire detectors
Only D+H system approved detectors must be used (see page 16).
Lengthoflineand
cross sections, see
page 10

12/20 RZN4402/04-K Rev.:3.8
Parallel Connection of Smoke Vent Buttons - RT 42

13/20
RZN4402/04-K Rev.:3.8
Standard Connection with RT 43-H/-N
* Terminal resistors for line monitoring:
They are pinched in control panel for transport. Take it off there and connect according to
plan. Terminal resistors must remain at binder RM 1,2, when no fire detector or external
control exists.
**Fire detectors
Only D+H system approved detectors must be used (see page 16).
Lengthoflineand
cross sections, see
page 10

14/20 RZN4402/04-K Rev.:3.8
Connection of 2 Smoke Vent Buttons - RT 43-H/-N
12345678
RZN 4402/ 04-K
line
line
–
–
control
alarm
close
RM/RT
smoke vent button
RT 43-H
smoke vent button
RT 43-N
10kW
10kW
alarm
alarm
control
control
-
-
line
line
line
line
malfunction
close
close
22
7
8733116644
alarm
alarm
close
close
red
red
green
green
yellow
* shunt connection by customer
malfunction
*
*

15/20
RZN4402/04-K Rev.:3.8
Parallel Connection of
2 x 2 Smoke Vent Buttons - RT43-H/-N

16/20 RZN4402/04-K Rev.:3.8
Connection of magnetic clamps on RZN 4400-K
Low tension side
in neutral position
in case of power failure!
Magnetic clamps 24V
(max. 500mA
overall power)
-+
-+
N- N+ Z + M D1 D2
Cutout
button
Magnetic
clamp
*The resistor must not be used, when line connections with 2-detector dependency are
employed!
Connection of several fire detectors
Connection of one fire detector
terminal resistor
line
-
10K
single fire detector
180R
1
2
3
4
5
6.
7
*
line
-
10K
first fire detector second to penultimate
fire detector
ultimate
fire detector
180R
1
2
3
4
5
6.
7
*180R
1
2
3
4
5
6.
7
*180R
1
2
3
4
5
6.
7
*
terminal resistor

17/20
RZN4402/04-K Rev.:3.8
M
M
ZentraleAbzweigdose
Abzweigdose
amMotor
weitereAbzweige
gleichartig schalten
Abzweigdose
amMotor
Abzweigdose
br.
br.
bl.
bl.
7
6
5
MMMMM M M M
3x2,5²
25m
M M M M M M M M
4x2,5²3x2,5²
50m50m
MMMMM M M M
3x2,5²
4x2,5²
40m
75m
M M M MM M M M
4x2,5²
5x2,5²
75m75m
200m
controlpanel branchbox
connectinthe
samewayfurther
derivations
branchbox
branchbox
atdrive
branchbox
atdrive
Connection Examples
Connection with line derivation:
supply wires Mot a / Mot b derive off in par-
allel, monitoring will be looped through all
cables up to group end.
Example 1: 1 line
Simple installation, but unfavourable for
voltage drop: All drives on one line.
Example 2: 2 lines
Control panel in centre, one side wired as
derivation, the other as terminal line.
Observe 4 wires for derivation!
Example 3: 2 lines on one side
Derivation and terminal lines in same
direction; number of drives vary according
to length of line.
Observe 4 wires for derivation!
Example 4: 3 lines
3 lines are installed due to extremely long
distances: 2 lines with 3 drives each on 75
m line as derivation, and 1 line with 2 drives
on 200 m line.
Observe 4 wires for derivation!

18/20 RZN4402/04-K Rev.:3.8
123456789
10
ON
yes
no
Factory-set?
(Dip switch)
yes
Adjust Dip switch S1 on
motherboardasfollows:
Informations for Starting
Carry out following sight and performance checks for switching-on the smoke and heat vent
control panel. no
yes
yes
yes
yes
yes
yes
no
no
no
no
no
no
All cable
connected?
Partial or incomplete connection of components can
cause malfunction..
Check following connections: mains 230V, drives,
smoke vent buttons, when necessary fire detectors
and vent buttons. See wiring and connection plans
page 9 and 11-14.
All necessary moving loads connected?
Smoke vent components are line-monitored.
A malfunction is connected as alarm in delivery condition of
control panel. The smoke vent opens self-acting and can be
reset under special conditions only.
Performance check alarm/reset and ventilation
10kΩresistance in
smoke vent button?
10kΩresistance in
fire detector?
Stop module 2x47kΩ
in conduit box?
Connect mains
mains control
lightens?
Connect
accumulator lines control
lightens?
Smoke vent flap
opens and closes?
Cramp stop module on last or only drive in conduit box
on wire 5 yellow, 6 black, 7 black. See connection plan
page 11/ 13.
Check line safety fuse in E distribution and fuse mains
in control panel.
Mains still not available or line switch
on "0" or one of fuses faulty.
Resistance must be cramped in electric last button on
binding posts 3/ 8 (RT 43-H) or binding posts 3/ 7
(RT 42). See connection plan page 11-14.
Resistance must be cramped in last or only fire detector
on binding post 2 and 4 (type FO/FT). Resistance
remains in control panel between binding post RM 1
and 2, when no fire detector available.
See connection plan page 11-14.
Possibly change poles in drive.

19/20
RZN4402/04-K Rev.:3.8
123456789
10
ON
Dip switch 1 on ON = OPEN-running time limitation. Using a potentiometer
sec
20
260
40
, running time
in Open direction can be limited. If the vent button is actuated in Open
direction, the drive will run open as long as the running time is set.
Dip switch 2 on ON = Ventilation time limitation. Using a potentiometer
min
15
245
30
, ventilation time
can be set. Drives will automatically close again, after the adjusted time has
expired.
Dip switch 3 on ON = OPEN-retriggering. If Dip switch 1 is switched on ON, the OPEN-running
time limitation can be retriggered again.
Dip switch 4 on ON = Power failure-CLOSED. If the power supply breaks down, the drive will
close. Only if Dip switch 5 = ON
Dip switch 5 on ON = Ventilation flap close up to final position by single pressing on vent button.
When dip switch 5 is switched on OFF, flaps are closing only so long as the vent button
or the button in the smoke vent button is pressed.
OPEN-display on vent button is no longer possible then! If Dip switch 5 is on OFF, the
function power failure-CLOSED will be ineffective (see Dip switch 4).
Dip switch 6 on ON = Ventilation flap opens up to final position by single pressing on vent
button.
If Dip switch 6 is connected on OFF, the flaps will only open as long as the vent button is
pressed.
Dip switch 7 on ON = The control panel will be switched on alarm, that means the smoke
vent opens at a line fault (e.g. at an interrupted detector line or short
circuit).
Dip switch 8 on ON = The control panel will be switched on alarm, that means, the smoke vent
opens in case of group fault (e.g. in case of an interrupted control line).
Dip switch 8 must be on ON in conjunction with a ground in thermal maximal
detector (e.g. THE 4).
Dip switch 9 on ON = Smoke detector alarm can not be reset by single pressing on button in
smoke vent button.
Dip switch 9 must be switched on OFF, when remote reset is desired of smoke detectors
by the smoke vent button.
Dip switch 10 on ON = The smoke vent is triggered for a duration of 30 minutes in intervals of
2 minutes according to VdS 2581.
Encode of Line and Group
Following functionings can be set with Dip switch (S1) on motherboard.
Set position of
Dip-switch at delivery:

20/20 RZN4402/04-K Rev.:3.8 All sizes in millimetre • Rights to technical modifications reserved. • Reprintingandphototechnical
reproduction also in extracts has to be expressively authorized by D+H Mechatronic AG.
Preparation:
Notifyuser,that thesystem isoutof operation
before starting with inspection.
Notify user about false alarms.
Interrupt or switch off monitored alarm
indication and remote controls.
Information
An overdue maintenance of the system will
be indicated by the control panel after about
16 months. The yellow control diode in the
smoke vent button RT43-H will start flashing.
A malfunction in the smoke vent system will
be continually indicated by the extinguished
green control diodes in the smoke vent
buttons.
After the maintenance time is expired (ca.
14 to 16 months), the ventilation function
OPEN can be interrupted depending on the
presetting of the service timer. Reset can be
carried out by a specialist company only, who
has been authorized by the appliance
manufacturer.
Inspection:
Check all appliances and cable connections
for outer damage and dirt accumulation.
Fire detectors, smoke vent buttons, smoke
vents and so on must not be impaired in
their function by goods in storage or
structural changings.
Smoke vent button:
Open smoke vent button.
Press red button , red display diode
lightensin buttonand controlpanel.
Smoke vent must open.
Press masked button (1 sec.), red display
diode extinguishes in button and control
panel.
Smoke vent must close.
Automatic fire detectors:
Release smoke detector individual by D+H-
smoke detector tester, as an alternative by
cigarette smoke (response delay circa 20
sec.).
Red display diode must lighten.
Smoke vent must open.
For closing wait until there is no more smoke
indetector.
Reset line in control panel (switch off/ switch
on press button), red display diode
extinguishes in button and control panel.
Press masked button in smoke vent
button. Smoke vent must close.
The line can also be directly reset via smoke
ventbutton,if Dip switch9 isswitchedonOFF.
For this, press masked button in smoke
vent button (for 1second).
Red display diode extinguishes in button
andin controlpanel.
At severe dirt accumulation visible from
outside, send detector in for maintenance
and install another one.
External control (optional):
Release external control.
Smoke vent must open.
Open contact in external system for closing,
for example by resetting of fire detector
system.
Pressmasked button insmokevent button
(1second).Reddisplay diode extinguishes
inbutton andcontrol panel.
Smoke vent must close.
Emergency supply:
Detach fuse MAINS on motherboard of
control panel.
Greenmainsindicationdiode on control
panel must not lighten.
Repeat functioning testing.
Green control diode in smoke vent
buttons must not lighten.
If Dip switch 4 and 5 on ON, the group will
be automatically closing.
Examination
Every six months and after repair by a specialist or staff, who has been introduced to the task.
Eliminatefailingsatonce.Keepcontrolbook.
This manual suits for next models
3
Table of contents
Other D+H Fan manuals
Popular Fan manuals by other brands

Inspire
Inspire Ana JB36301 Assembly, Use, Maintenance Manual
Panasonic
Panasonic FV-0810RS1 Service manual
Optimus
Optimus F-4184 instruction manual

NuAire
NuAire MRXBOXAB-ECO4-1Z installation manual

Greenheck
Greenheck ASSURE-120S-S1 Installation, operation and maintenance manual
DYNABREEZE
DYNABREEZE FA-26243 Instructions & user's manual

Stingray
Stingray ALVA Air ACS205 manual
Helios
Helios ultra Silence MiniVent M1/150 N / C Installation and operating instructions
ECG
ECG FT 15a instruction manual
Craftmade
Craftmade Pavilion PV52 instruction manual

Faro Barcelona
Faro Barcelona Poros 33524 installation guide

Casablanca
Casablanca Crestmont 55063 owner's manual

