Optimus F-4184 User manual

Instruction Manual
and Owner’s Guide
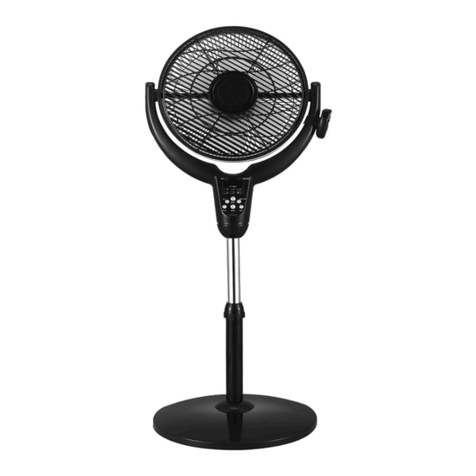
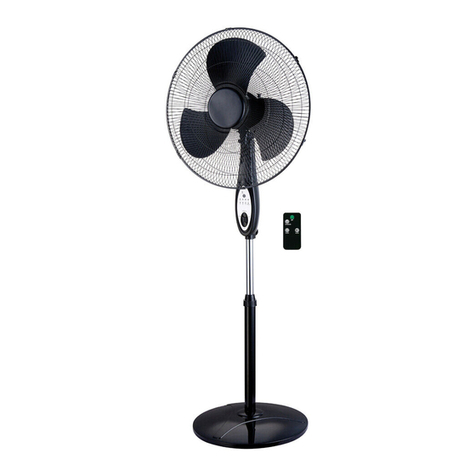
18 Inch Power Stand Fan
Model: F-4184
INFORMATION HOTLINE:If, after reading this owner’s guide,
You have any questions or comments, please feel free to write us or call us at
1-888-672-5832. Our customer service representative will be happy to help you.
PLEASE READ AND SAVE THESE INSTRUCTIONS
IMPORTANT INSTRUCTIONS:
Thank you for choosing an Optimus fan. To ensure the best performance from your
Fan, please read and save the following instructions.
WHEN USING ELECTRICALAPPLIANCES, BASIC PRECAUTIONS
SHOULDALWAYS BE FOLLOWED TO REDUCE THE RISK OF FIRE,
ELECTRIC SHOCK AND INJURY TO PERSONS, INCLUDING THE
FOLLOWING:
•Read all instructions before using this product.
•Use this fan only as described in this manual.Any other use not recommended by the
manufacturer may cause fire, electrical shock or injury, and may void the warranty.
•Always unplug the unit before assembling, disassembling or cleaning.
•Always unplug the unit when not in use or when moving from one location to another.
•To disconnect, grip the plug and pull it from the wall outlet. Never yank the cord.
•The use of attachments not recommended or sold by the appliance manufacturer may
cause hazards.
•Avoid contact with moving parts.
•DO NOT operate this fan with a damaged cord or plug, after a malfunction, or is
dropped or damaged in any manner. Return the unit to Optimus Enterprise, Inc. for
examination, electrical or mechanical adjustment, or repair.
•DO NOT operate this fan in the presence of explosive and/or flammable fumes.
•DO NOT place the fan or any parts near an open flame, cooking or other heating
appliance.
•Extreme caution is necessary when fan is used by or near children or invalids and
whenever the fan is left operating and unattended.
•This product is intended for industrial and commercial use only.
•Always use on a dry level surface.
•DO NOT operate if the fan housing is removed or damaged.
•A loose fit between theAC outlet and plug may cause over heating of the plug. Have a
qualified electrician replace the outlet.
•DO NOT run cord under carpeting. Do not cover cord with throw rugs, runners or like.
Arrange cord away from traffic area and where it could be tripped over.
•This fan has a three prong grounded plug that must be inserted into a matching outlet
to reduce the risk of electrical shock. Do not defeat this safety feature.
•This product employs an overload protection (fuse). A blown fuse indicates an
overload or short-circuit. If the fuse blows, unplug the product from the outlet. Replace
the fuse as per the Maintenance Instructions (follow product marking for proper fuse
rating). If the replacement fuse blows, a short-circuit may be present and the product
should be discarded or returned to Optimus Enterprise, Inc. for examination and/or
repair.
•NEVER connect the fan to any power sources other than a 120 volt alternating current
polarized outlet.
•WARNING: To reduce the risk of electric shock. DO NOT use this fan with any
solid-state speed control and DO NOT insert finger or any object into grill.

OPERATING INSTRUCTIONS:
SETTING UP
•Carefully remove your fan from the box (please save the carton for off-season
storage).
•Make sure the unit is in the OFF position before plugging the unit into the outlet.
OPERATING
1) Place fan on a firm level surface.
2) Plug the power cord into any standard 120VAC, 60HZ outlet. Please make sure
the Selector (Speed Control) is in the OFF position. A loose fit between the AC
outlet and plug may cause over heating of the plug. Have a qualified
electrician to replace the old outlet if the power cord feels extremely hot.
3) Tilt and adjust the fan head to the desired angle or airflow.
4) 3 Speed Press-button Switches:The switch is located on back of the unit. Select
the desired fan speed setting by pressing the switch button. To stop the fan, press
the button 0.
CLEANING
During Season Care:
•Before cleaning, be sure to turn off and unplug the unit.
•Keep the fan clean. Carefully wipe the unit with a soft, damp cloth. Please be very
cautious near the motor.
•DO NOT immerse the fan in water and never allow water to drip into the Motor
Housing.
•Never use gasoline, benzene or thinner. This will damage the surface of the unit.
•After cleaning, be sure to completely dry the unit with a cloth or towel.
After Season Care:
•Your fan can be stored in the off-season.
•Before putting the fan in storage, clean it thoroughly, cover it with a vinyl bag, and
store it in a cool and dry place. We recommend using the original (or appropriately
sized) box.
ASSEMBLY INSTRUCTIONS
(refer to the picture)
a) Dismantle the 4 screws from the inner ring of the round base.
b) Line the pole with the screws holes in round base from where the screws were
dismantled. Fix the pole tightly with screws.
c) Dismantle the screws from the top of pole.
d) Dismantle the screws from the support tube which is under the U shaped tube of
the head.
e) Through the support tube, insert the head into the inner pole.
f) Firmly fix the head and the pole together with the screws.
g) Assembly is now completed.
FAN DIRECTION ADJUSTMENT
1) Do not attempt to make any adjustments to the direction of the grille and fan
assembly until the fan has been turned off and unplugged from the socket.
2) To adjust the direction of the fan, hold the grille and gently tilt the fan until the
desired position is reached.
3) Plug the fan back into the socket and turn the fan on.
MAINTENANCE INSTRUCTIONS:
A loose fit between theAC outlet and plug may cause over heating of the plug. If the
plug over heats, it might cut off the fuse inside the power cord plug.
If your fuse access cover is located on the side of the plug:
•Grasp plug and remove from the receptacle or other outlet device. Do not yank the
cord to unplug.
•Select a suitable tool such as a small flat screwdriver or travel scissors.
•To open the fuse cover. Slide open fuse access cover on top of attachment plug toward
blades. (see fig.1)
•Carefully remove the fuse by prying it out. (see fig.2)
•Risk of fire can result by using wrong fuse rating. Replace fuse only with 5.0Amp,
125 Volt rating.
•To close the fuse access cover. Slide to close access cover on top of attachment plug.
(see fig.3)
Fig.1 Fig.2 Fig.3

If your fuse access cover is located on the face of the plug:
•Grasp plug and remove from the receptacle or other outlet device. Do not yank the
cord to unplug.
•Select a suitable tool such as a small flat screwdriver or travel scissors.
•To open the fuse cover. Press the tool down, and then pry the protection door off of the
face of the plug.
•Continue to remove protection door until you can access the fuse below.
•Carefully remove the fuse by prying it out.
•Risk of fire can result by using wrong fuse rating. Replace fuse only with 5.0Amp,
125 Volt rating.
•To close the Close fuse cover. Push the protection door back onto the face of the plug
and press it securely in place.
SERVICE AND REPAIR:
•Do not attempt to repair or adjust any electrical or mechanical functions on this unit.
Doing so will void the warranty.
•If you have any questions regarding this unit’s operation or believe any repair is
necessary, please call 1-888-672-5832 to speak with a Customer Service
Representative. Or e-mail us at Service.Optimus@gmail.com. E-mail will be easier to
get answer.
•If you need to exchange the unit, please return it, in its original carton with a sales
receipt enclosed, to the store where you purchased the unit.
•If you are returning the unit more than 30 days after the date of purchase, please see
the enclosed warranty for return procedure.
•If you have any other question or comments, feel free to write us:
Optimus Enterprise, Inc.
Customer Service Department
2201 E. Winston Road, Unit #J. Anaheim, CA 92806
Tel: (714) 956-1300 FAX: (714) 956-1311
E-mail: Service.Optimus@gmail.com
WARRANTY
For your own records, staple or attach your sales receipt to this manual. Please also write
the store name /location and date purchased below.
STORE NAME/LOCATION:
DATE PURCHASED:
ONE (1) YEAR LIMITED WARRANTY
(SAVE THIS WARRANTY INFORMATION)
Optimus Enterprise. Inc, warrants to its customers and /or consumer of this electric fan and
the parts thereof will be free from defect in material and workmanship, under normal use,
for a period of one (1) years from the date of initial purchase. The warranty does not apply
to repairs necessitated by damage, misuse, abuse or alteration and to any repairs of
merchandise not used within the United States unless otherwise prescribed by law. Optimus
Enterprise, Inc, shall not be liable for any personal injury, property damage or any
incidental or consequential damages of any kind (including water damage) resulting from
malfunctions, defects, misuse, improper installation or alternation of this product. This
warranty is the only warranty extended by Optimus Enterprise, Inc, to its original
customers and /or consumers purchasing fan, Optimus Enterprise, Inc, disclaims all other
warranties, expressed or implied, that arise by the operation of law, specifically including
the implied warranties of merchantability and fitness for a particular purpose. Optimus
Enterprise, Inc, shall not be liable for any incidental or consequential damage, which may
have resulted from any alleged breach of warranty. Some states do not allow limitations on
how long implied warranty lasts or the exclusion or limitation of consequential damage, so
the above limitations or exclusion may not apply to you. This warranty gives you specific
legal rights you may also have other rights which vary from state to state.
Should the fan fail during the warranty period, the owner should:
● Within the first 30 days from date of purchase, the store from which you purchased your
Optimus product should replace this product if it is defective in material or
workmanship (provided the store has in-stock replacement).
● Within the first 1 years from date of purchase, Optimus Enterprise, Inc, will repair or
replace the product if it is defective in material or workmanship providing it is
returned to Optimus Enterprise, Inc. with freight prepaid, with evidence of purchase
date (cash register receipt) together with US$49.00 CHECK OR MONEY ORDER for
handling and return packaging/shipping charges.
IMPORTANT: ANY REPAIRS SHOULD BE PERFORMED BYAN AUTHORIZED
SERVICE REPRESENTATIVE. DO NOTATTEMPT TO REPAIR THIS FAN
YOURSELF. DOING SO MAY VOID YOUR WARRANTY.
PLEASE RETAIN THIS WARRANTYAND SALES RECEIPT TO INSURE YOUR
PRODUCT WARRANTY.
IMPORTANT: RETURN INSTRUCTIONS:
Your warranty depends on your following these instructions if you are returning the unit more
than 30 days after the date of purchase:
● Carefully pack the fan in the original container or a suitable container to avoid damage in
shipping.
●
Seal the carton. Address an envelope as follows
: Optimus Enterprise, Inc.
2201 E. Winston Road, Unit #J
Anaheim, CA 92806
● Inside the envelope, enclose your name, full address with zip code, daytime phone number,
evidence of purchase date (cash register receipt) AND A CHECK OR MONEY ORDER
for handling and return packaging/shipping charges. Please also include a brief explanation
of the problem you are having with the unit.
● Optimus Enterprise, Inc. recommends you insure the package as damage in shipments is not
covered by your warranty.
● All shipping/ handling charges must be prepaid by you (as noted as above).

Manual de Instrucciones
Guia para el Usario
Ventilador de Stand en Alimentación
de 18 Pulgadas
Model: F-4184
LINEADIRECTA de INFORMACION: Si, después que leer esta guía de dueño,
usted tiene cualquier pregunta o los comentarios, se sienten por favor libre escribirnos
o nos llama en 1-888-672-5832 o nos manda correo electrónico en
service.optimus@gmail.com Nuestro representante del servicio de atención al cliente
será feliz de ayudarle.
Lea por favor estas instrucciones con cuidado y mantenga para la
referencia futura.
INSTRUCCIONES IMPORTANTES:
Gracias por elegir un ventilador Optimus. Para garantizar el máximo rendimiento de su
Ventilador, favor de leer y guardar las siguientes instrucciones.
CUANDO SE UTILIZAN APARATOS ELÉCTRICOS, CIERTAS PRECAUCIONES
BÁSICAS SIEMPRE SE DEBEN DE SEGUIR PARA REDUCIR EL RIESGO DE
INCENDIOS, DESCARGAS ELÉCTRICAS Y DAÑOS A PERSONAS, ENTRE ELLAS
LAS SIGUIENTES:
•Lea todas las instrucciones antes de usar este producto.
•Utilice este ventilador sólo como se describe en este manual. Cualquier otro uso no
recomendado por el fabricante puede provocar incendios, descargas eléctricas o lesiones y
podría anular la garantía.
•Siempre desconecte la unidad antes de ensamblarla, desensamblarla o limpiarla.
•Siempre desconecte la unidad cuando no esté en uso o cuando lo mueva desde una
ubicación a otra.
•Para desconectar, agarre el enchufe y tire de él desde el enchufe de la pared. Nunca jale el
cable.
•El uso de partes no recomiendas o vendidas por el fabricante del dispositivo puede causar
riesgos.
•Evitar el contacto con las partes que se mueven.
•NO opere este ventilador con un cable o el enchufe dañado, después de un mal
funcionamiento, o si se calló o dañó de cualquier manera. Devuelva la unidad a Optimus
Enterprise, Inc. para examinar, hacer ajustes eléctricos o mecánicos, o reparaciones.
•NO opere este ventilador en presencia de vapores inflamables o explosivos.
•NO coloque el ventilador o cualquier parte cerca de una flama abierta, la cocina u otro
aparato de calefacción.
•Extrema precaución es necesaria cuando el ventilador es utilizado por o cerca de los niños
o inválidos y siempre que el ventilador se deje operando y desatendido.
•Este producto está diseñado para uso exclusivo en el industrial y comercial.
•Utilizar siempre sobre una superficie nivelada y seca.
•NO opere este ventilador si la cubierta del ventilador es removida o dañada.
•Un ajuste inadecuado entre el tomacorriente y enchufe puede causar la sobre calefacción
del enchufe. Pida a un electricista calificado que reemplace el tomacorriente.
•NO coloque el cable bajo la alfombra. No cubra el cable con tapetes, corredores o similares.
Coloque el cable fuera del área de tráfico y de donde puedan tropezarse con el.
•Este ventilador requiere una fuente de alimentación conectada a tierra (de 3 entradas). No
conecte el ventilador a cualquier fuente de alimentación distinta a la salida de corriente de
voltaje alterno polarizada.
•Este producto emplea una protección de sobrecarga (fusibles). Un fusible fundido indica
una sobrecarga o cortocircuito. Si el fusible se funde, desenchufe el producto del toma
corriente. Cambie el fusible según las instrucciones de mantenimiento (siga las
indicaciones del producto para el fusible adecuado). Si se funde el fusible de reemplazo, un
cortocircuito puede estar presente y el producto debe ser desechado o regresado a Optimus
Enterprise, Inc. para ser examinado o reparado.
•NUNCA conecte el ventilador a cualquier fuente de alimentación distinta de una toma de
corriente alterna polarizada de 120 voltios.
ADVERTENCIA: para reducir el riesgo de descarga eléctrica. NO utilice este ventilador con
cualquier control de velocidad estático y NO inserte los dedos o cualquier objeto en la parrilla.

INSTRUCCIONES DE OPERACIÓN:
INSTALACIÓN
•Saque cuidadosamente sacar el ventilador de la caja (por favor, guarde la caja de cartón
para almacenar la unidad fuera de temporada).
•Asegúrese de que la unidad está en la posición deAPAGADO antes de conectar la
unidad en el toma corriente.
OPERACIÓN
1) Conecte el cable de alimentación en cualquier tomacorriente estándar de 120 vAC, 60
HZ. Por favor, asegúrese de que el selector (control de velocidad) está en la posición
de APAGADO. Un ajuste inapropiado entre el tomacorriente y el enchufe puede
causar el sobrecalentamiento del enchufe. Pida a un electricista calificado que
reemplace el tomacorriente obsoleto si el cable de alimentación se siente
extremadamente caliente.
2) Incline y ajuste la cabeza de ventilador en el ángulo o flujo de aire deseado.
3) Botón de Control de 3 Velocidades: Presione el botón para seleccionar la velocidad de
ventilador deseado. Presione el botón marcada 0 para deterner el ventilador.
LIMPIEZA
Cuidado durante temporada de uso:
•Antes de limpiar, asegúrese de apagar y desconectar el enchufe de la unidad.
•Mantener el ventilador limpio. Limpie cuidadosamente la unidad con un paño suave y
húmedo. Por favor, sea muy cauteloso cerca del motor.
•NO sumergir el ventilador en agua y nunca permitir que gotee agua en la cubierta del
motor.
•NUNCAuse gasolina, benceno o thinner. Esto producirá daños en la superficie de la
unidad
•Tras la limpieza, asegúrese de secar completamente la unidad con un paño o una toalla.
Cuidado después de la temporada de uso:
•El ventilador puede almacenarse durante la pretemporada.
•Antes de guardar el ventilador en un almacén, limpiar minuciosamente, cubrirla con
una bolsa de vinilo y guárdelo en un lugar fresco y seco. Se recomienda utilizar la caja
original (o un caja de tamaño adecuado).
INSTRUCCIONES DE MONTAJE
a) Remueva los 4 tornillos del anillo interior de la base redonda.
b) Haga que el agujero en la parte inferior del pilar coincida con los agujeros de los
tornillos de la base redonda de donde acaba de remover los tornillos. A
continuación, asegúrelos apropiadamente con los tornillos.
c) Remueva los tornillos de la parte superior del pilar.
d) Remueva los tornillos del tubo de soporte que está bajo tubo en forma de U de la
cabeza.
e) Através del tubo de soporte, inserte la cabeza en el pilar interior.
f) Fijar firmemente la cabeza y el pilar con tornillos.
g) En ensamblaje esta termine.
AJUSTE DE DIRECCIÓN DE VENTILADOR
1) No intente hacer ningún ajuste a la dirección del conjunto de la parrita y ventilador hasta
que el ventilador haya sido este apagado y desconectado del tomacorriente.
2) Para ajustar la dirección del ventilador, sostenga la parrilla e Incline levemente el
ventilador hasta llegar a la posición deseada.
3) Conecte el ventilador en el toma corriente y encienda el ventilador.
INSTRUCCIONES DE MANTENIMIENTO:
Un ajuste inadecuado entre el tomacorriente y enchufe puede causar la sobre
calefacción del enchufe. Si el enchufe sobre se sobre calienta, podría fundir el fusible
dentro el enchufe del cable de alimentación. Si la tapa de acceso de su fusible se
encuentra en el lado del enchufe:
•Agarre el enchufe y desconéctelo del toma corriente u otro dispositivo de salida. No
jale el cordón para desconectarlo.
•Seleccione una herramienta apropiada, como un pequeño destornillador plano o tijeras
de viaje.
•Para abrir la cubierta de fusibles. Deslice la tapa de acceso del fusible sobre el enchufe
hacia en dirección de las clavijas. (Ver. fig.1)
•Retire cuidadosamente el fusible haciendo palanca hacia afuera. (Ver. fig.2)
•Riesgo de incendio puede resultar si de utiliza un fusible de calibre equivocado.
Remplace el fusible sólo con 5.0Amp, de calibre de Volt 125.
•Para cerrar la tapa de acceso de fusibles. Para cerrar deslice la tapa de acceso sobre el
enchufe (Ver. fig.3)

Fig.1 Fig.2 Fig.3
Si su tapa de acceso de fusibles se encuentra sobre la cara del enchufe:
•Agarre el enchufe y desconéctelo del toma corriente u otro dispositivo de salida. No
jale el cordón para desconectarlo.
•Seleccione una herramienta apropiada, como un pequeño destornillador plano o tijeras
de viaje.
•Para abrir la cubierta de fusibles. Presione la herramienta hacia abajo y, a continuación,
haga palanca en la cubierta de protección sobre la cara del enchufe.
•Continúe para quitar la puerta de protección hasta que pueda acceder el fusible que
aparece abajo.
•Retire cuidadosamente el fusible haciendo palanca hacia afuera.
•Riesgo de incendio puede resultar si de utiliza un fusible de calibre equivocado.
Reemplace el fusible sólo con 5.0Amp, de calibre de Volt 125.
•Para cerrar la tapa de acceso de fusibles. Empuje la puerta de protección sobre la cara
del enchufe y presiónelo hasta que se asegure en su lugar.
Atienda a y Repare:
•No procure reparar ni ajustar ninguna función eléctrica ni mecánica en esta unidad.
Hacer así hace vacío la garantía.
•Si usted tiene cualquiera pregunta con respecto a esta operación de la unidad o cree
que cualquier reparación es necesaria, llama por favor 1-888-672-5832 en hablar con
un Representante de servicio de atención al cliente.
•Si usted necesita cambiar la unidad, por favor lo vuelve, en su cartón original con un
recibo de ventas encerrado, a la tienda que usted compró de. Si usted vuelve la unidad
más de 30 días después de la fecha de la compra, ven por favor la garantía encerrada.
•Si usted tiene cualquier otra pregunta o los comentarios, siéntase libre escribirnos:
Optimus Enterprise, Inc.
2201 E. Winston Rd., Unit J
Anaheim, CA 92806
E-mail: Service.Optimus@gmail.com
Garantía
Para sus propios registros, cosa con una grapa o conecta su recibo de ventas a este manual.
Por favor escriba también la nombre/ubicación de la tienda y la fecha compraron abajo.
ALMACENE la NOMBRE/UBICACION:______________________________________
La FECHA COMPRO:____________________________________________________
UN AÑO LIMITO la GARANTIA:
(SALVE ESTA INFORMACION de la GARANTIA)
Optimus Enterprise, Inc., las autorizaciones S.a. a sus clientes y/o consumidores de este
ventilador eléctrico y las partes del mismo serán libres del defecto en la materia y la
habilidad, bajo el uso normal, por un período de uno (1) año de la fecha de la compra
inicial. La garantía no aplica a reparaciones necesitadas por el daño, el maltrato, el abuso
ni la alternancia y a ninguna reparación de mercancías no utilizó dentro de los Estados
Unidos ni Canadá.A menos que de otro modo proscrito por la ley, Optimus Enterprise, S.a.
no será responsable de ninguna herida personal, el daño de la propiedad ni ningún daño
casual ni consecuente de cualquier tipo (incluye el daño de agua) resultando de
funcionamientos defectuosos, los defectos, el maltrato, la instalación o la alternancia
impropias de este producto. Esta garantía es la única garantía prolongada por la Optimus
Enterprise, S.a. a sus clientes y/o el consumidor originales compró de este ventilador. La
Optimus Enterprise, renuncias S.a. todas las otras garantías, expresan o implicado, eso
surge por la operación de la ley, específicamente inclusive las garantías implicadas de
merchantability y salud para un propósito particular. La Optimus Enterprise, S.a. no será
responsable de ningún daño casual ni consecuente, que puede haber resultado de ninguna
infracción pretendida de la garantía. Algunos indican no permite las limitaciones en la
garantía implicada cuán larga duran o la exclusión o la limitación del daño casual o
consecuente, así que el encima de limitaciones o exclusión no pueda aplicar a usted. Esta
garantía le da derechos legales específicos usted puede tener también otros derechos que
varían del estado para indicar. Esta garantía le da derechos legales específicos usted puede
tener también otros derechos que varían del estado para indicar.
Deba el ventilador falla durante el período de la garantía, el dueño debe:
•Dentro de los primeros 30 días de la fecha de la compra, la tienda de que usted compró
su producto de Optimus debe reemplazar este producto si es defectuoso en la materia o
la habilidad (proporcionó la tienda tiene el reemplazo de en-acciones).
•Dentro de los primeros 12 meses de la fecha de la compra, la Optimus Enterprise, S.a.
reparará o reemplazará el producto si es defectuoso en la materia o la habilidad que
proporcionan lo es vuelto a la Optimus Enterprise, S.a. con flete prepagad9, con la
evidencia de la fecha de la compra (recibo de caja registradora) junto con cheque
US$49.00 o giro postal para manejar y regreso que embalan/enviando las cargas.
IMPORTANTE: CUALQUIERAREPARA DEBE SER REALIZADO POR UN
REPRESENTANTE AUTORIZADO del SERVICIO. No PROCURE REPARAR ESTE
VENTILADOR USTED MISMO. HACERASI VACIO de mayo SU GARANTIA.
RETENGA POR FAVOR ESTE RECIBO de la GARANTIAY VENTAS para
ASEGURAR SU GARANTIA del PRODUCTO.
IMPORTANTE: VUELVE las INSTRUCCIONES:
Su garantía depende de su siguiente estas instrucciones si usted vuelve la unidad más de 30
días después de la fecha de la compra:
•Empaca Con cuidado el ventilador en el contenedor original o un contenedor
conveniente para evitar el daño en el envoi.
•Selle el cartón. Diriga un sobre de la siguiente manera:
Optimus Enterprise, Inc.
2201 E. Winston Rd., Unit J
Anaheim, CA 92806
•Dentro del sobre, encierra su nombre, la dirección repleta con código postal, el número
de teléfono del día, la evidencia de la fecha de la compra (recibo de caja registradora)
Y UN CHEQUE O el GIRO POSTAL para manejar y regreso que embalan/enviando
las cargas. Por favor incluya también una explicación breve del problema que usted
tiene con la unidad.
•La Optimus Enterprise, S.a. recomienda que usted asegure el paquete (como daño en
embarques no es cubierto por su garantía).
•Todas cargas del envío deben ser prepagadas por usted (notó como como arriba).
Table of contents
Languages:
Other Optimus Fan manuals

Optimus
Optimus F-4182 User manual

Optimus
Optimus F-1672BK-F User manual

Optimus
Optimus F-8449-F User manual

Optimus
Optimus F-1030 User manual

Optimus
Optimus F-7348WH-F User manual

Optimus
Optimus F-5280S User manual

Optimus
Optimus F-7585WH User manual

Optimus
Optimus F-7200 User manual

Optimus
Optimus F-1630 User manual

Optimus
Optimus F-6218 User manual

Optimus
Optimus F-7345WH User manual

Optimus
Optimus F-7508 User manual

Optimus
Optimus F-0600C User manual

Optimus
Optimus F-6212A User manual

Optimus
Optimus F-6121 User manual

Optimus
Optimus F-4205 User manual

Optimus
Optimus F-1888 Configuration guide

Optimus
Optimus F-4202 User manual

Optimus
Optimus F-0610C User manual

Optimus
Optimus F-4122 User manual