Dr.Frei A-20 User manual

ANEROID BLOOD PRESSURE KIT
CLASSIC
MODEL A-20
USER’S MANUAL
dr-frei.com


ANEROID BLOOD PRESSURE KIT CLASSIC
Model A-20
User’s manual (4-12)
A-20
(13-21)
A-20
(22-30)
CLASSIC
Modelis A-20
Vartotojo instrukcija (31-39)
KLASISKS
Modelis A-20
(40-48)
ARTERIAALNE VERERÕHUAPARAAT
CLASSIC
Mudel A-20
Kasutusjuhend (49-56)
Model A-20
Manual de utilizare (57-65)
(66-74)
RU
LT
UA
LV
ee
RO
MD
KZ
en
BG

4
ANEROID BLOOD PRESSURE KIT CLASSIC model A-20
CAUTION:
Please read all instructions before using this instrument to take your
blood pressure. Follow all CAUTIONS to avoid damaging the instrument
or hurting yourself. Talk to your doctor for information about your blood
pressure.

EN 5
TABLE OF CONTENTS
Unit Assembly...................................................................................5
What Is Blood Pressure....................................................................6
How to Take a Reading ....................................................................7
Quick Reference Guide ....................................................................9
Care and Maintenance ...................................................................10
Warranty .........................................................................................10
T ................................................................. 11
Lay out the parts as pictured. The cuff should already be folded through
Place the metal D-ring on your left. Pull the end of the cuff through the
metal bar. If you fold the cuff correctly, the hook and pile material faces the
outside of the cuff loop.
Look at the drawing to help you put the unit together.
1. Attach the gauge to the tubing
on the left.
2.
tubing on the right.
3. Attach the single end of the
Y-tubing to the stethoscope
chestpiece.
4. Attach the double end of the
Y-tubing to the binaural.
NOTE:
For easy assembly follow diagram.
Connect each component securely to avoid injury and instrument damage.
13
2

6
WHAT IS BLOOD PRESSURE?
Blood pressure is the force exerted on the walls of your blood vessels as
The heart is like a pump. When it contracts. or beats, it sends a surge of
blood through the blood vessels and pressure increases. This is called
systolic pressure. When your heart relaxes between beats, your blood
pressure decreases. This is diastolic pressure.
When a doctor takes your blood pressure, he or she measures both
your systolic and diastolic pressures and records them as numbers. For
example, if your blood pressure reading is 126/76(126 over 76), your
systolic is 126 and your diastolic is 76. The numbers are calculated in
millimeters of mercury and recorded as 126/76 mmHg.
pressure include physical activity, medications, and your emotional and
physical condition. A single measurement does not provide a true picture
of your blood pressure. You need to measure your blood pressure over
a period of time.
CONSULT YOUR DOCTOR TO DETERMINE YOUR
NORMAL BLOOD PRESSURE. ONLY A DOCTOR IS QUALIFIED TO
DIAGNOSE AND TREAT HIGH BLOOD PRESSURE. PRACTICE THE
MEASUREMENT PROCEDURES FOR THIS INSTRUMENT CARE-
FULLY. CHECK YOUR PROCEDURE WITH YOUR DOCTOR.
Heart Contracts
(Pressure Increases)
Heart Relaxes
(Pressure Decreases)

EN 7
HOW TO TAKE A READING
supported. Rest your arm at heart level.
CAUTION: MAKE SURE ALL COMPONENTS ARE ASSEMBLED
CORRECTLY AND SECURELY. FAILURE TO DO SO MAY RESULT IN
INJURY OR AN INCORRECT READING.
the elbow on the inside of the arm.
3. Put your left arm through the cuff loop. Place the bottom edge of the
cuff approximately 1-2 cm above the elbow. Place the cuff so that the
air-pipes were over the brachial artery.
the cuff by folding the end of the cuff over the D-ring and press the hook
correctly.
Elbow
Tendon
Pile material
Sewn hook
material

8
5. Insert stethoscope ear-pieces into ears.
6. Put the chestpiece over the brachial artery under or 1-2 cm below the cuff.
7. Rest your arm on a table. Relax your arm, and turn your palm upward.
Ensure the cuff is same level as heart.
8. Place the gauge in front of you. Hold
-
tion bulb by turning it clockwise.
9. T
the gauge reaches approximately 30
mmHg ABOVE normal SYSTOLIC read-
ing. If you are unsure or do not know your
normal SYSTOLIC reading consult your
CAUTION: DO NOT INFLATE THE
CUFF ABOVE 280 mmHg. YOU MAY
Bottom Edge
Stethoscope
1/2 cm Elbow
Bladder Tu besY-tubing

EN 9
INJURE YOURSELF OR DAMAGE THE
INSTRUMENT.
10. Slowly open the air release valve by
turning it counter-clock- wise. Release
the air at a rate of 5-6 mmHg per second.
11. Listen carefully for the appearance of sounds, watching the gauge
-
TOLIC blood pressure reading.
12. Continue to release the air at a rate of 5-6 mmHg per second. When
you no longer hear any sounds, that is your DIASTOLIC blood pressure
reading.
13. Turn the air release valve counter-clockwise to release the remain-
ing air. Record your measurement in the record chart. You should record
reading early, (not to forget values). Remove the stethoscope from your
ears. Remove the cuff.
QUICK REFERENCE GUIDE
Before
1. MEASURE your blood pressure at the SAME TIME each day.
2. RELAX for at least 5 minutes before taking a measurement.
3.
4. DO NOT eat, smoke or exercise for at least 30 minutes before taking
a measurement.
NOTE:
to twice. Wait at least 5 minutes before measuring again, to avoid
inaccurate readings due to the engorged blood vessels.

10
During
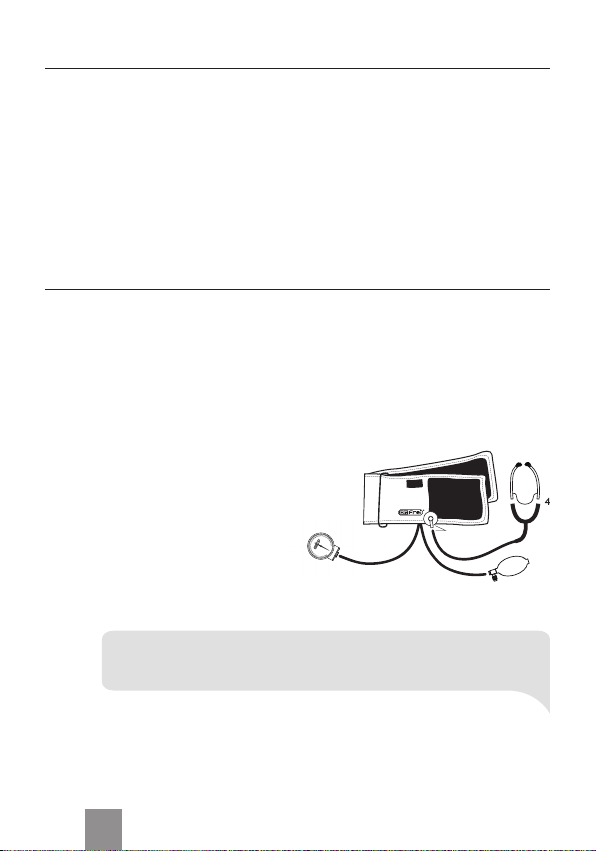
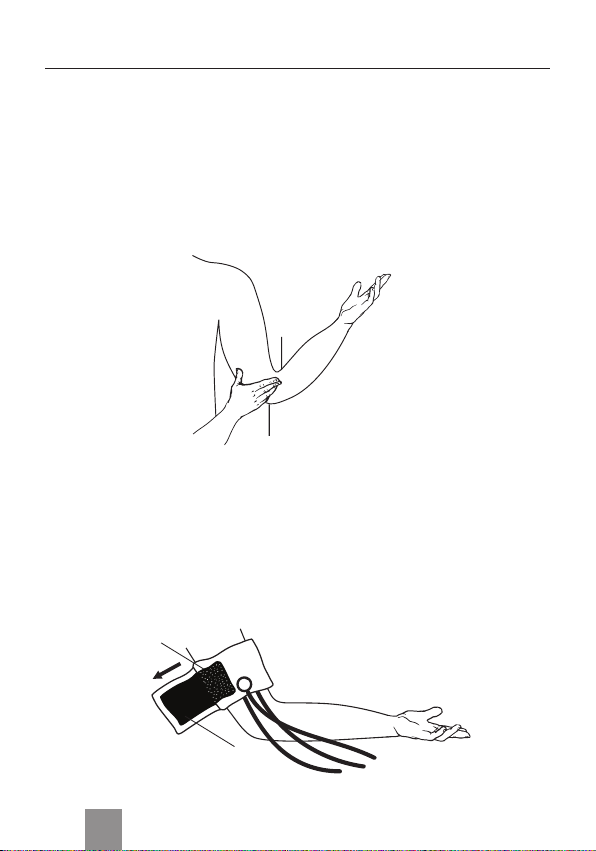
1. PLACE CUFF at the heart level.
2. STETHOSCOPE CHESTPIECE covers the BRACHIAL ARTERY.
3. INFLATE unit to proper level (30-40 mmHg above estimated systolic
pressure).
4. DO NOT talk or move during a measurement.
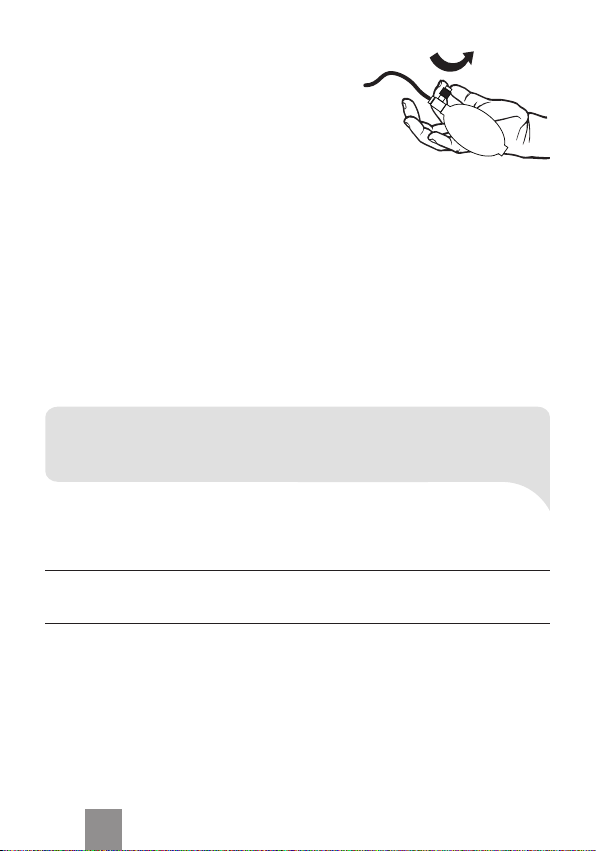
5. DEFLATE unit at 5-6 mmHg per second.
After
1. WAIT 5 minutes before taking another measurement.
To protect your unit from damage, please AVOID washing or moistening
the cuff, dropping the gauge, or hitting the surface of the stethoscope.
Your new blood pressure unit has been carefully checked to assure reli-
ability and accuracy prior to shipment and use. However, as with any
sensitive instrument subjected to repeated use, we recommend that
your blood pressure gauge be checked periodically. When the cuff is
zone. If the needle points outside of the accuracy indicator zone, the
gauge will give inaccurate readings. In this case you have to bring the
device to the nearest service centre for calibration (address mentioned
in warranty card).
The blood-pressure monitor is guaranteed for 2 years from the date of
purchase. Warranty for the cuff and bulb is 1 year from the date of pur-
chase. The warranty is only valid upon presentation of the warranty card
center representative) with the date of the purchase (repair), the check,
instruction manual and safe packaging of the device.
The warranty does not apply to wear out of cuff, rubber tubes and
packaging box.
The warranty does not apply to damage caused by improper handling,

EN 11
accidents, not following the operating instructions or self-maintained
alterations made to the device.
The device cannot be returned if it is without original packaging, with mechan-
ical damages (scratches, stains and so on) or without any component.
The device which was used and needs repair cannot be replaced with
a new one. In case there was violation of operating rules during war-
ranty period, repair will be done at the expense of the consumer.
Weight: 300 g
Size: 200 x 120 x 75 mm
Storage temperature: -20 °°
Humidity: 10% - 90% relative humidity
Operation temperature: 5 °°
Measuring range: 20 to 300 mmHg
Measuring resolution: 2 mmHg
Accuracy: ± 3 mmHg
Air leakage: < 3 ± 2 mmHg/sec.

12
Accessories:
1. Sphygmomanometer.
2. Cuff (22-36 cm) with inlaid latex bladder.
3. Bulb and valve.
4. Stethoscope.
5. Soft bag.
6. Packaging.
Technical alterations reserved!
Whole service life without cuff - 10 years.
Whole service life of cuff - 2 years.
Checking
The device is calibrated at manufacturing checking. During usage and
after repair it is recommended to check the device at least once a year
in specialised labs.

RU 13

14
................................................................................14
..................................................15
....................................................................16
.........................................................................18
....................................................................................................19
............................................................................................20
............................................................20
-
-
1.
2.
3. -
4.
13
2
: -

RU 15
-
-
-
-
-
Сердце сокращается
(давление увеличивается)
Сердце расслабляется
(давление падает)

16
-
-
-
-
-
-
-
.
Липучка
Липучка
Локоть
Локтевой сгиб

RU 17
-
-
-
-
-
-
Нижний край
Стетоскоп
Локоть
Воздушные трубки Y-трубка
½ cм

18
-
-
-
-
-
-
-
1.

RU 19
2. -
3.
4. -
1.
2.
3.
4.
5.
1.
-
-
-
-
-
-

20
-
-
-
-
-
-
-
10% - 90%
Table of contents
Languages:
Other Dr.Frei Blood Pressure Monitor manuals

Dr.Frei
Dr.Frei M-100A User manual

Dr.Frei
Dr.Frei M-150S User manual

Dr.Frei
Dr.Frei A-40 User manual

Dr.Frei
Dr.Frei M-500A User manual

Dr.Frei
Dr.Frei A-10 User manual

Dr.Frei
Dr.Frei A-30 User manual

Dr.Frei
Dr.Frei A-10 User manual

Dr.Frei
Dr.Frei M-200A User manual

Dr.Frei
Dr.Frei M-300A User manual

Dr.Frei
Dr.Frei M-100A User manual